Vote

Best Bathroom

This category is sponsored by 

Aimee, Blakey

Photo 1
Photo 2
Photo 3
Photo 4
Photo 5
Photo 6
Photo 7
Please provide any other information that is relevant for your entry
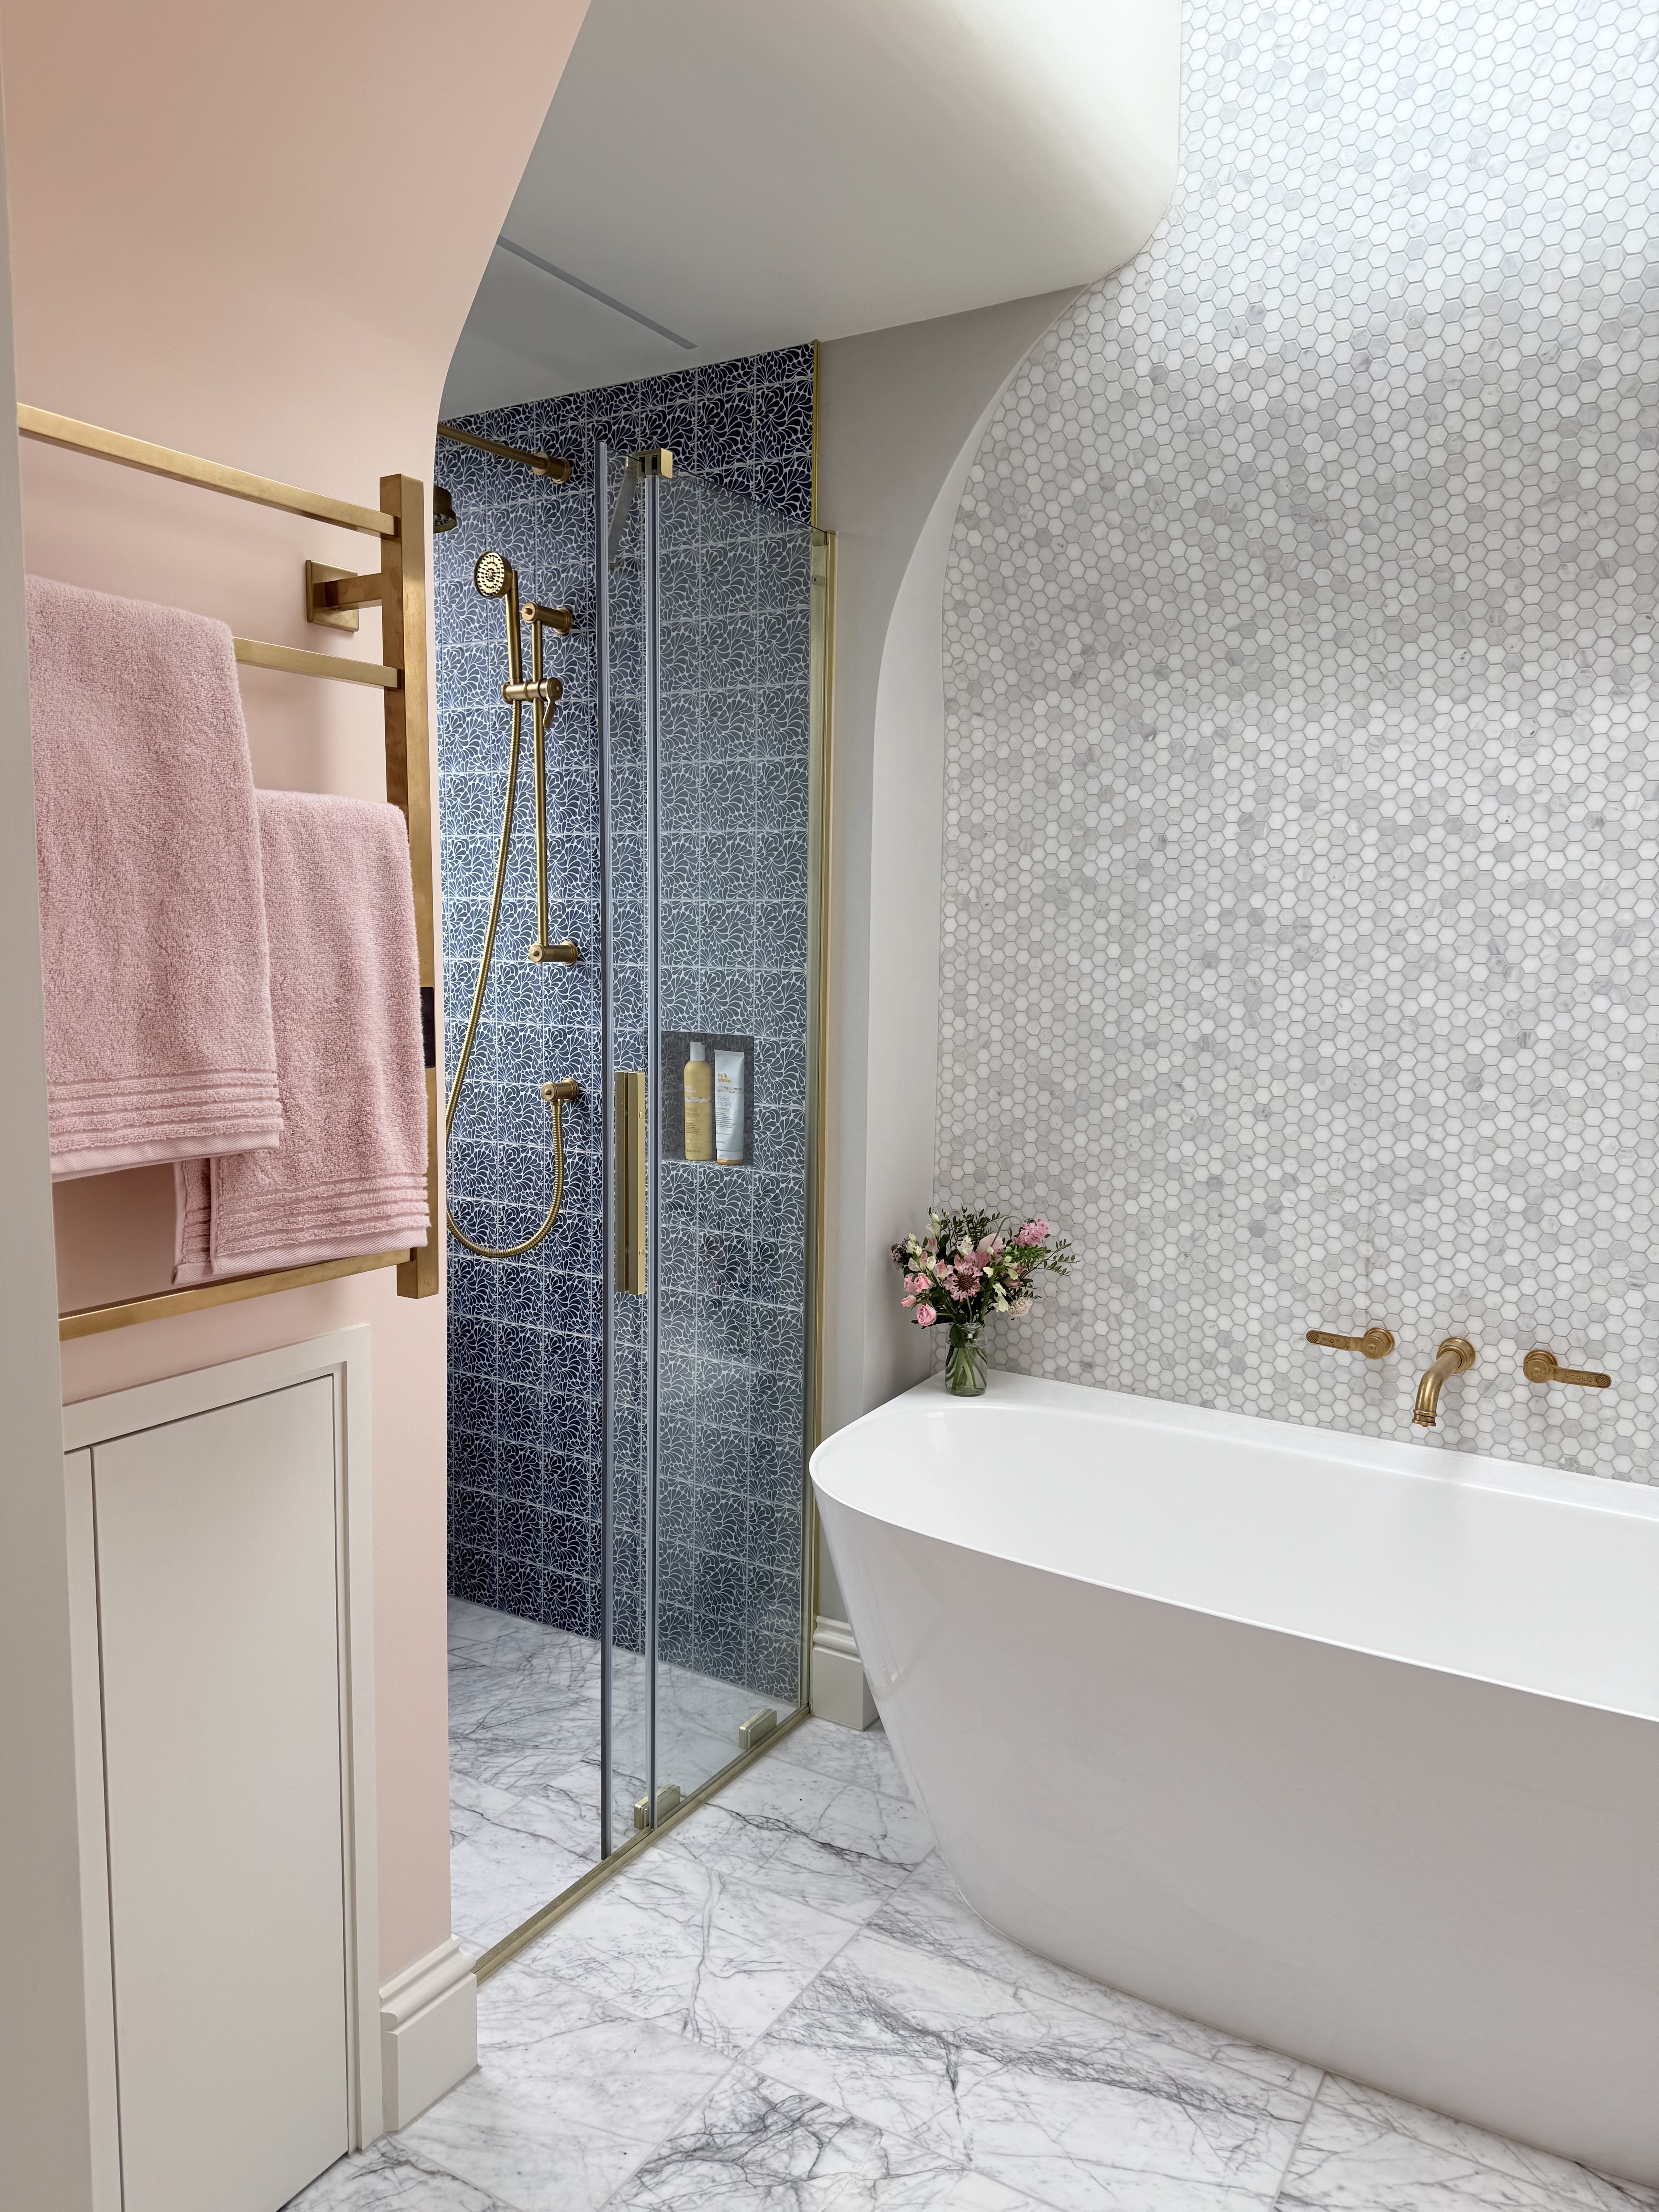
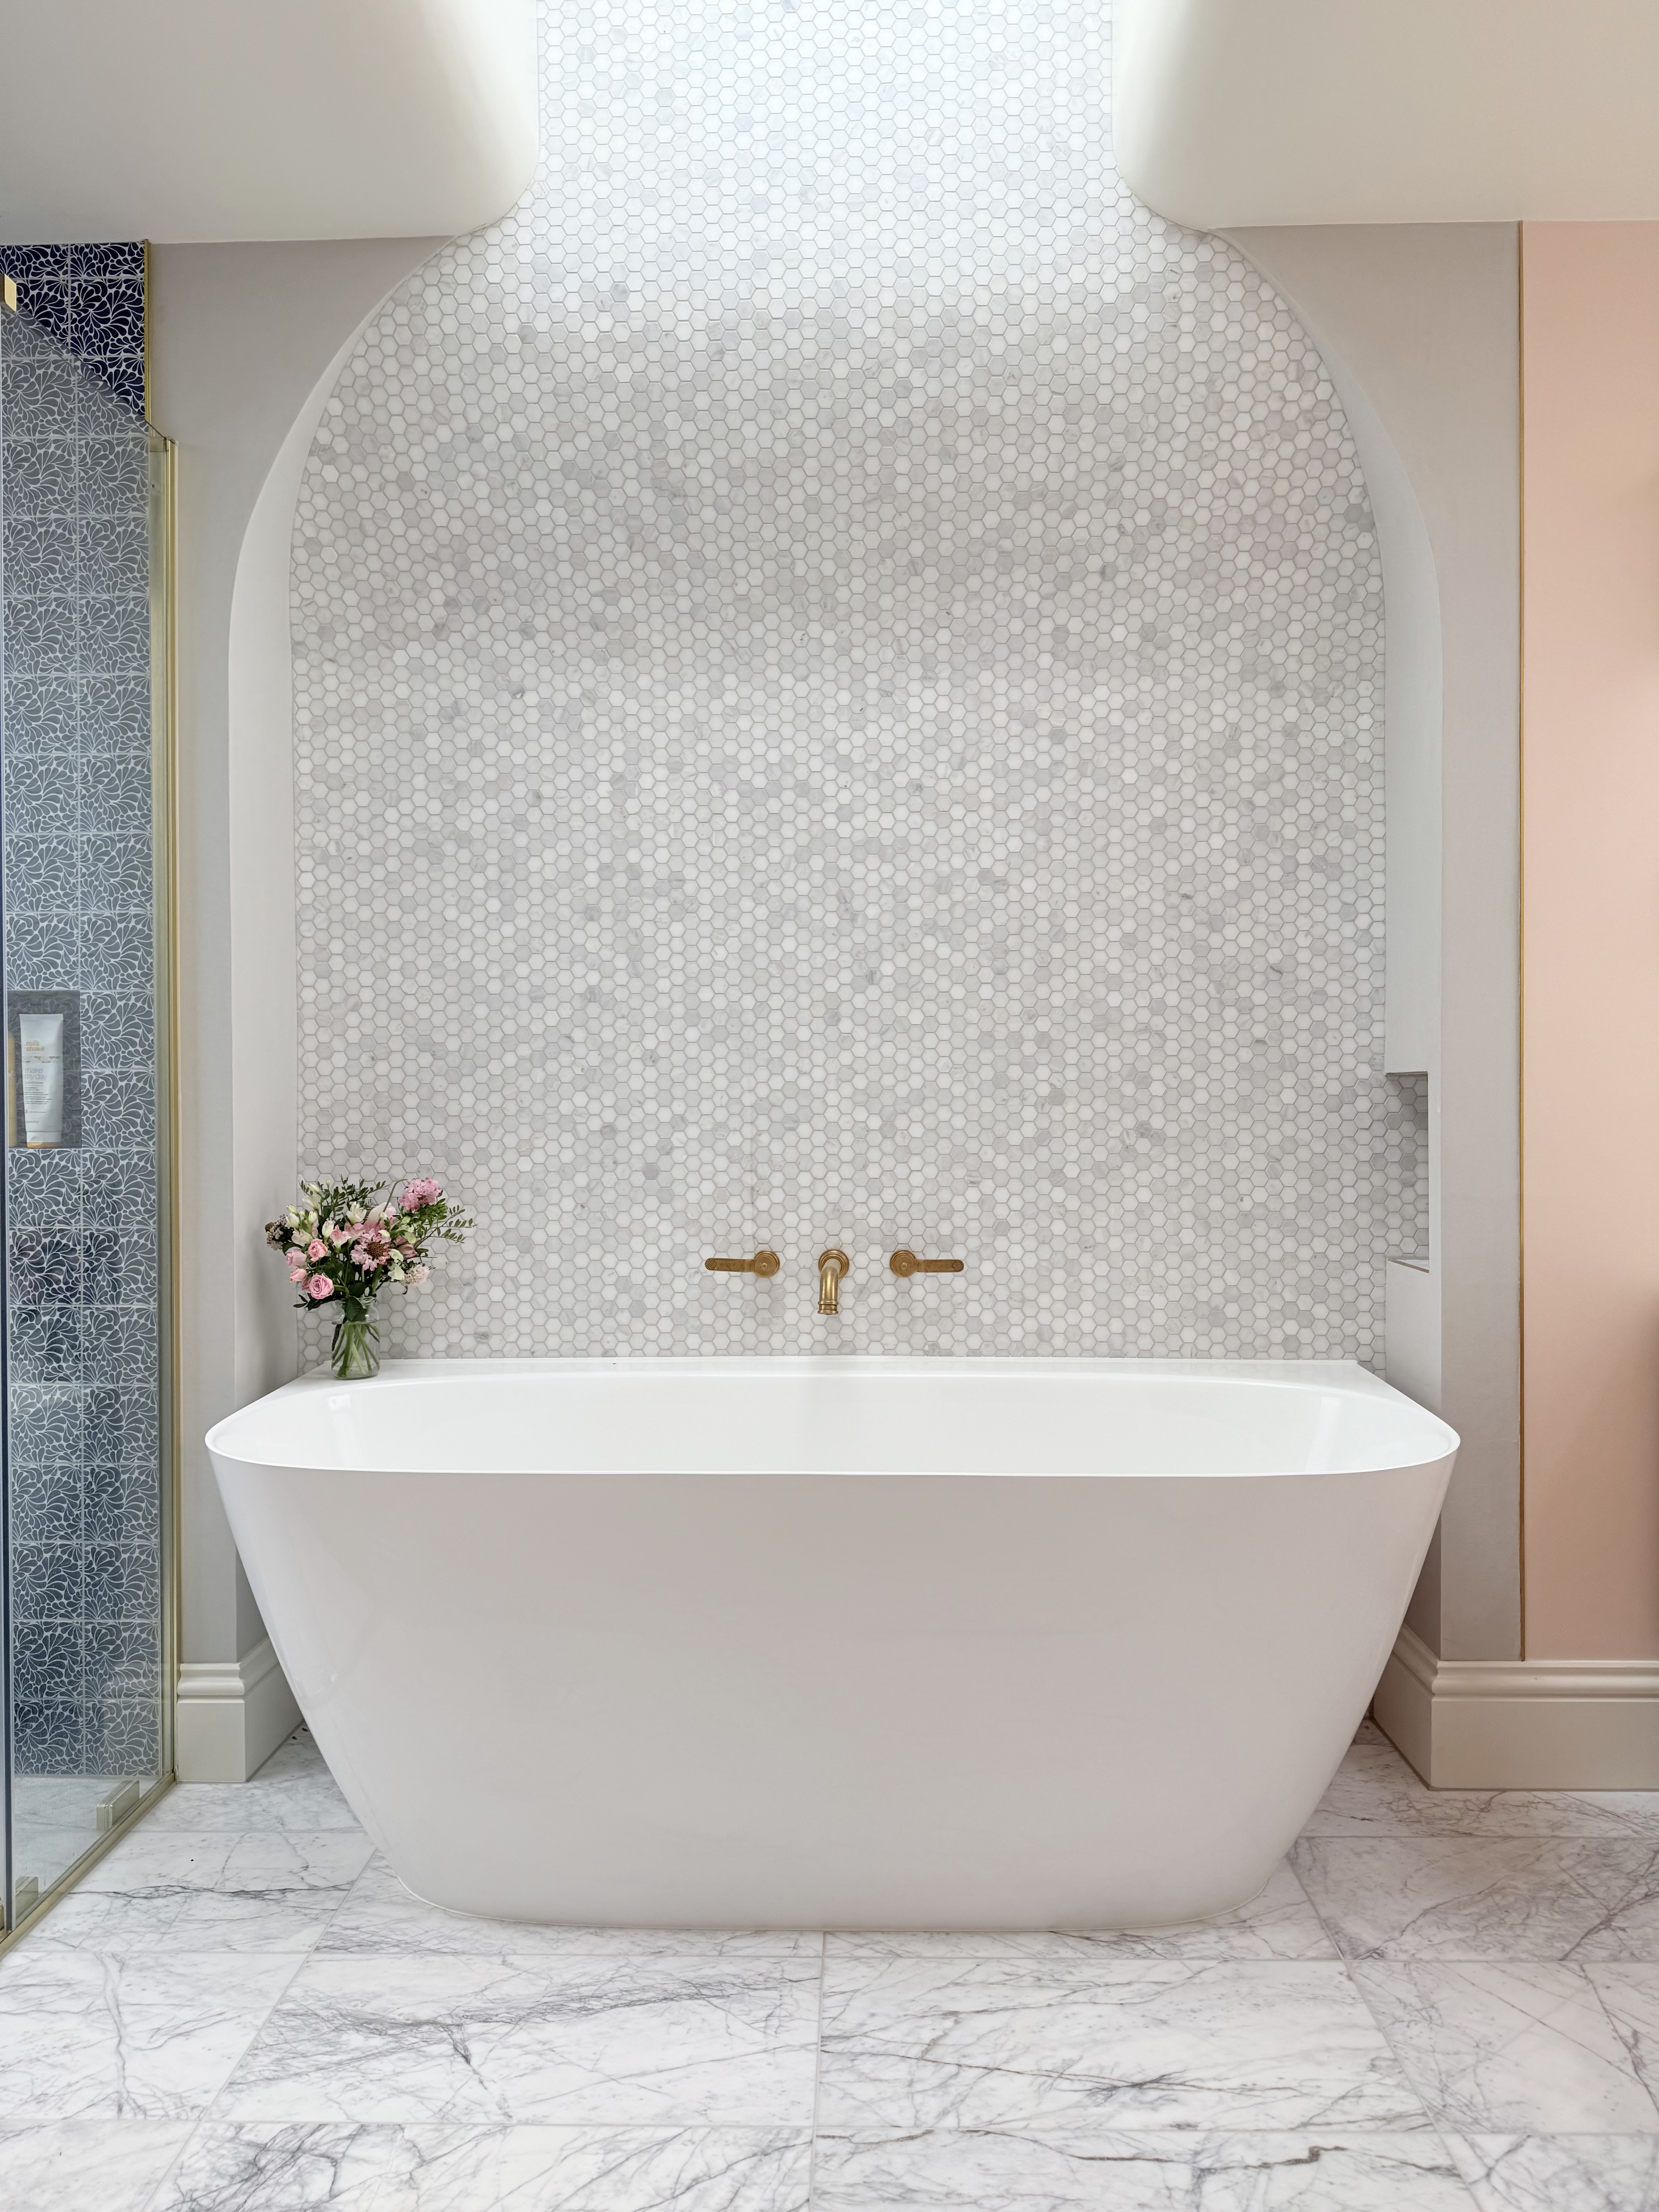
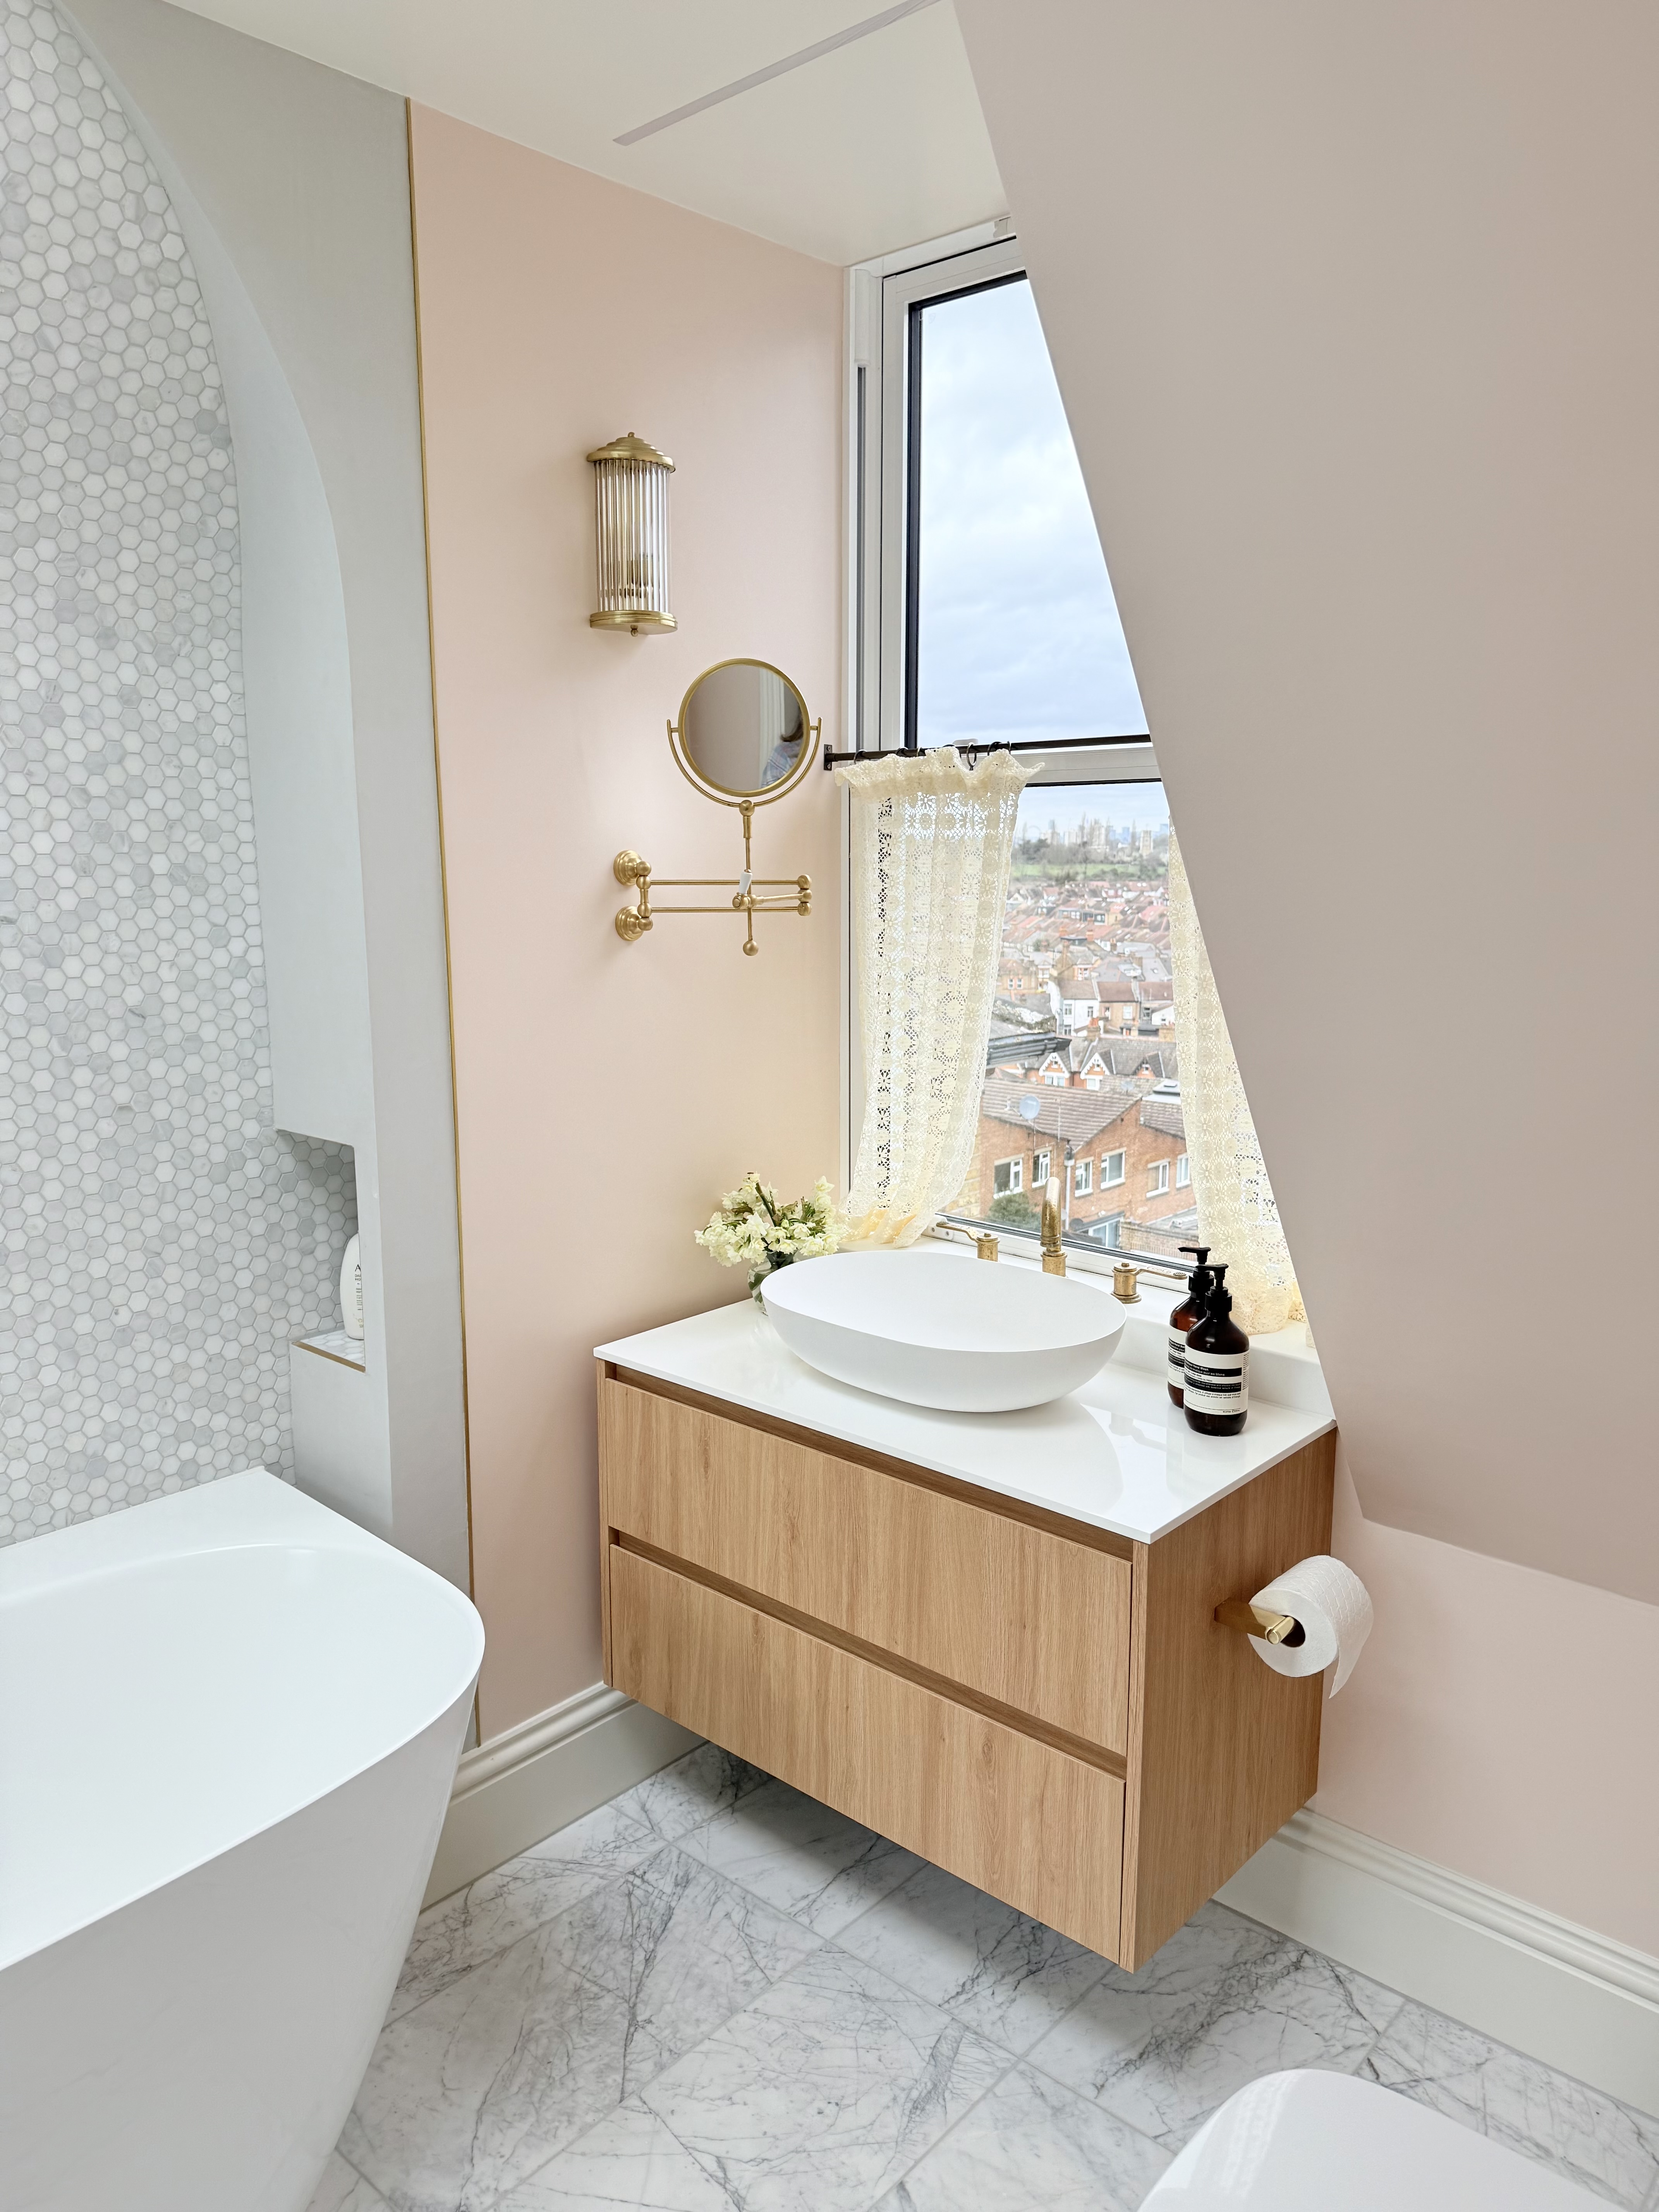
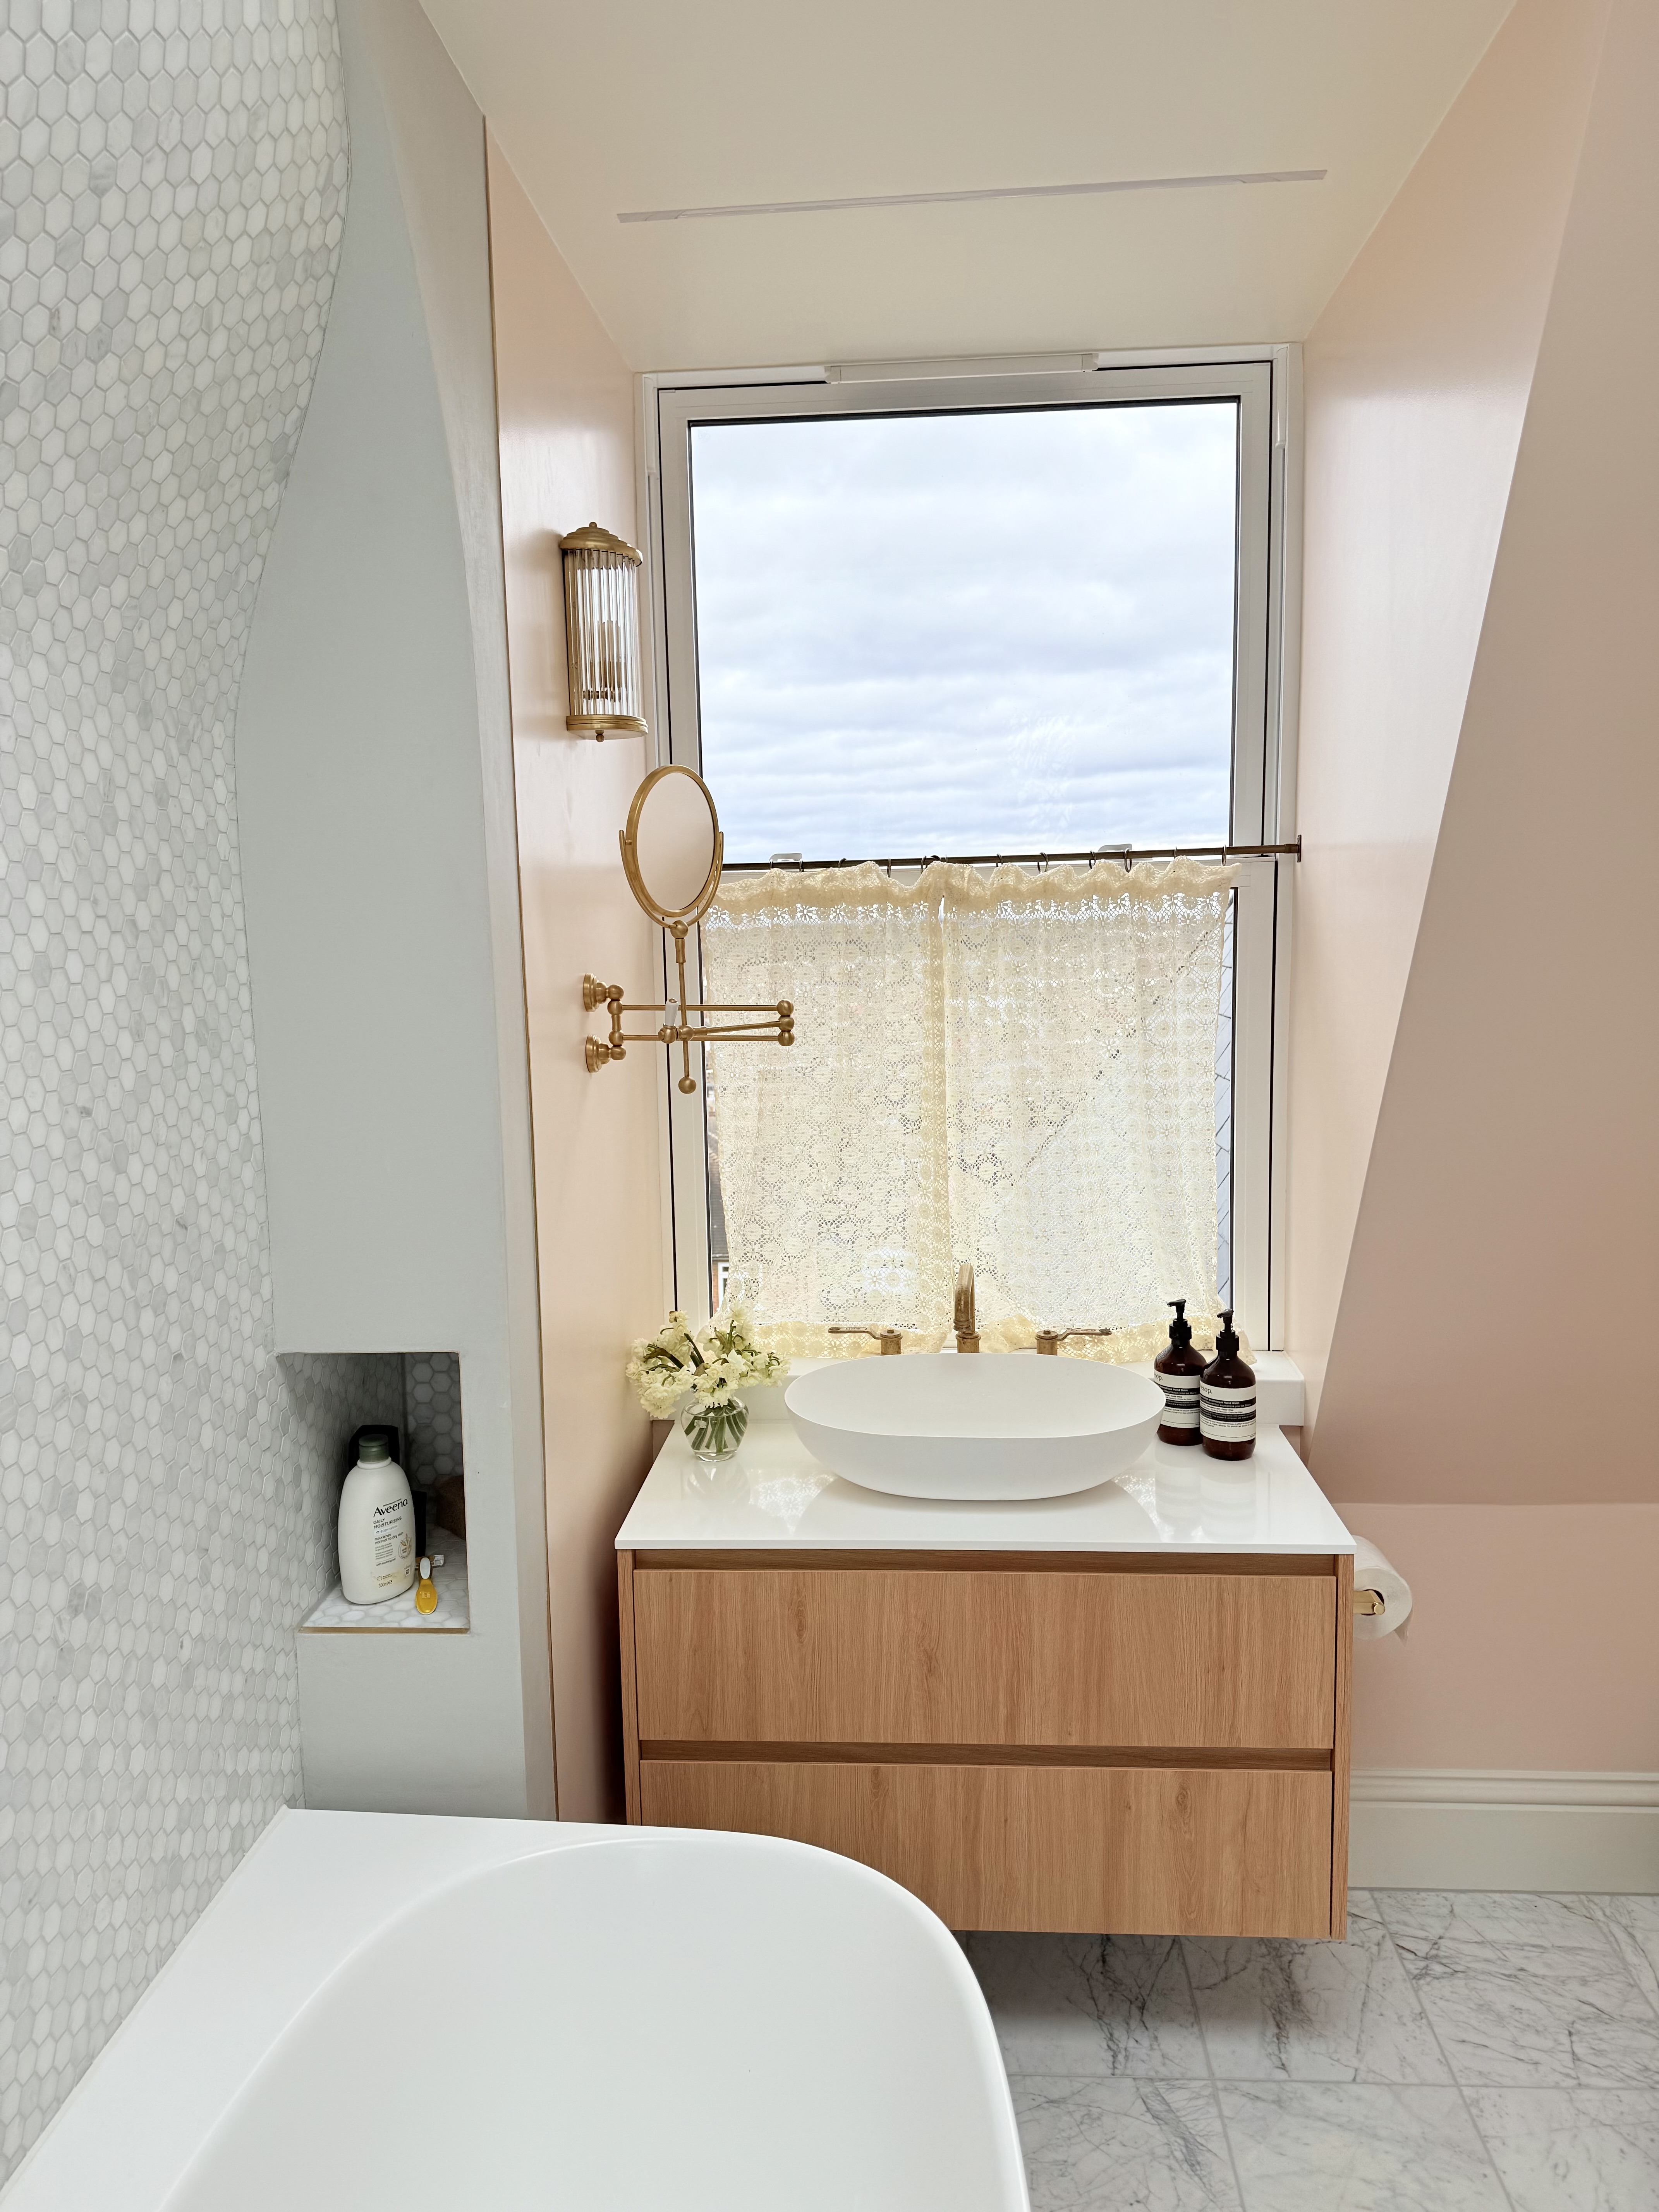
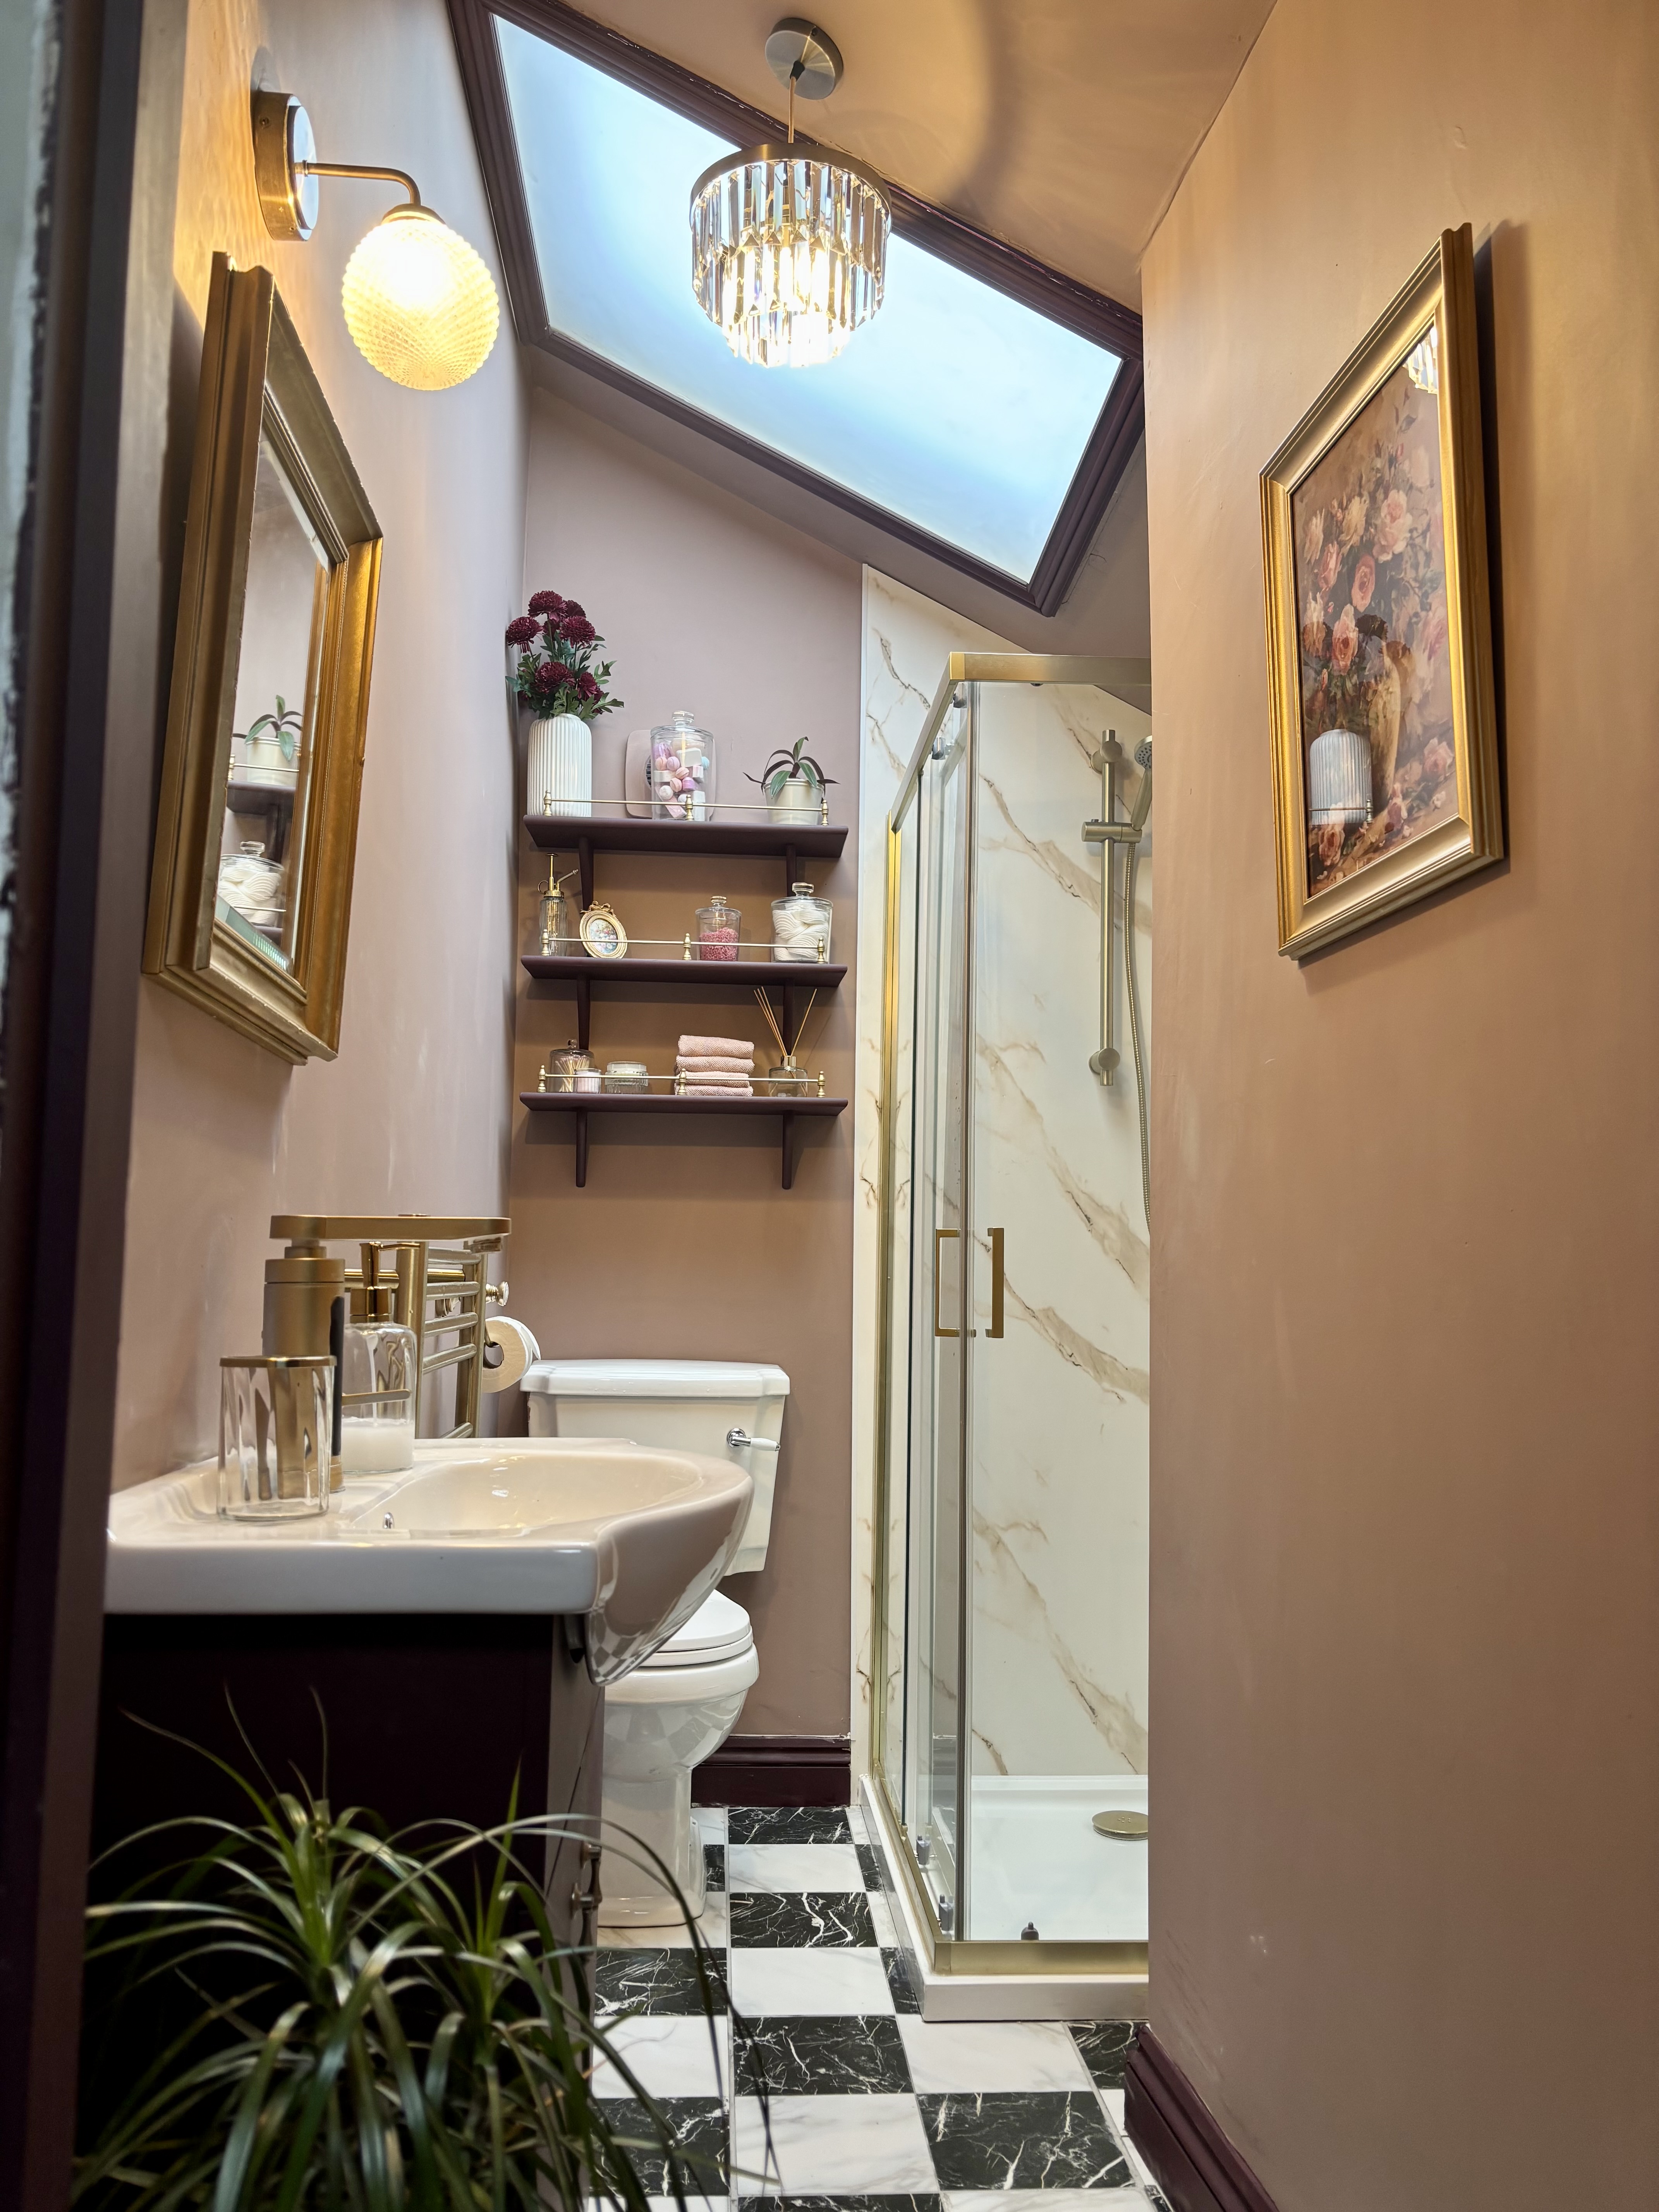
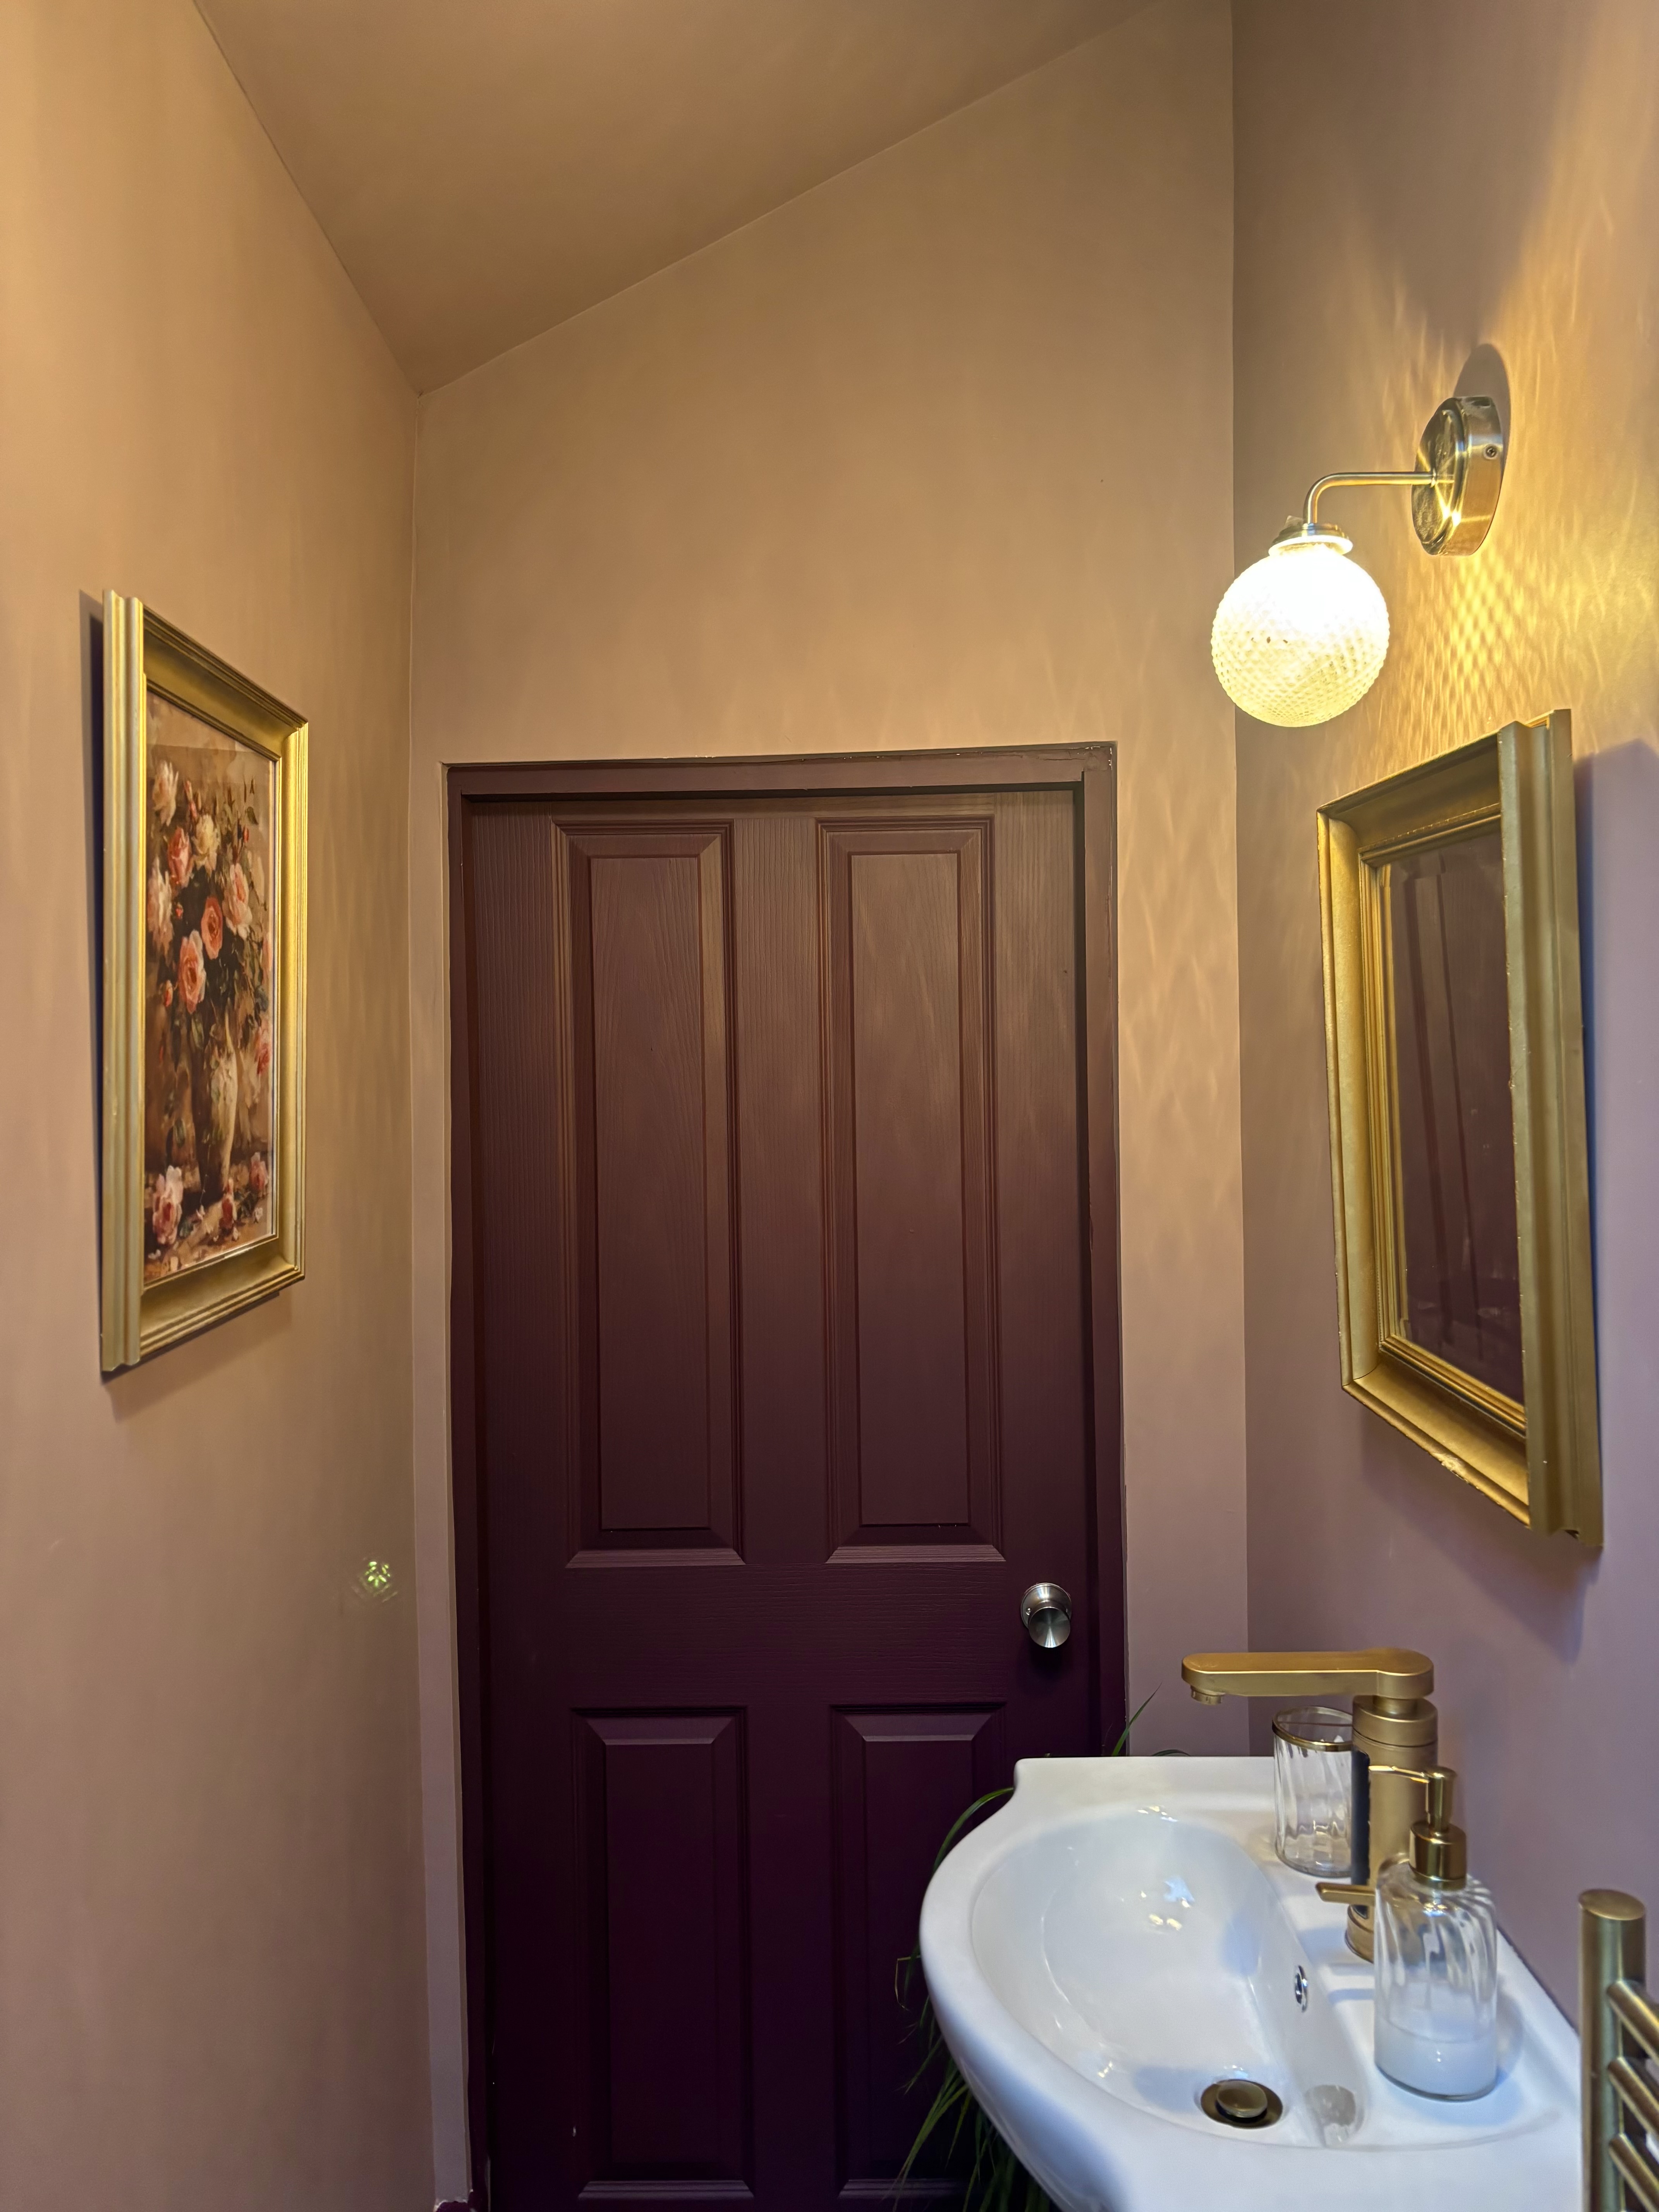
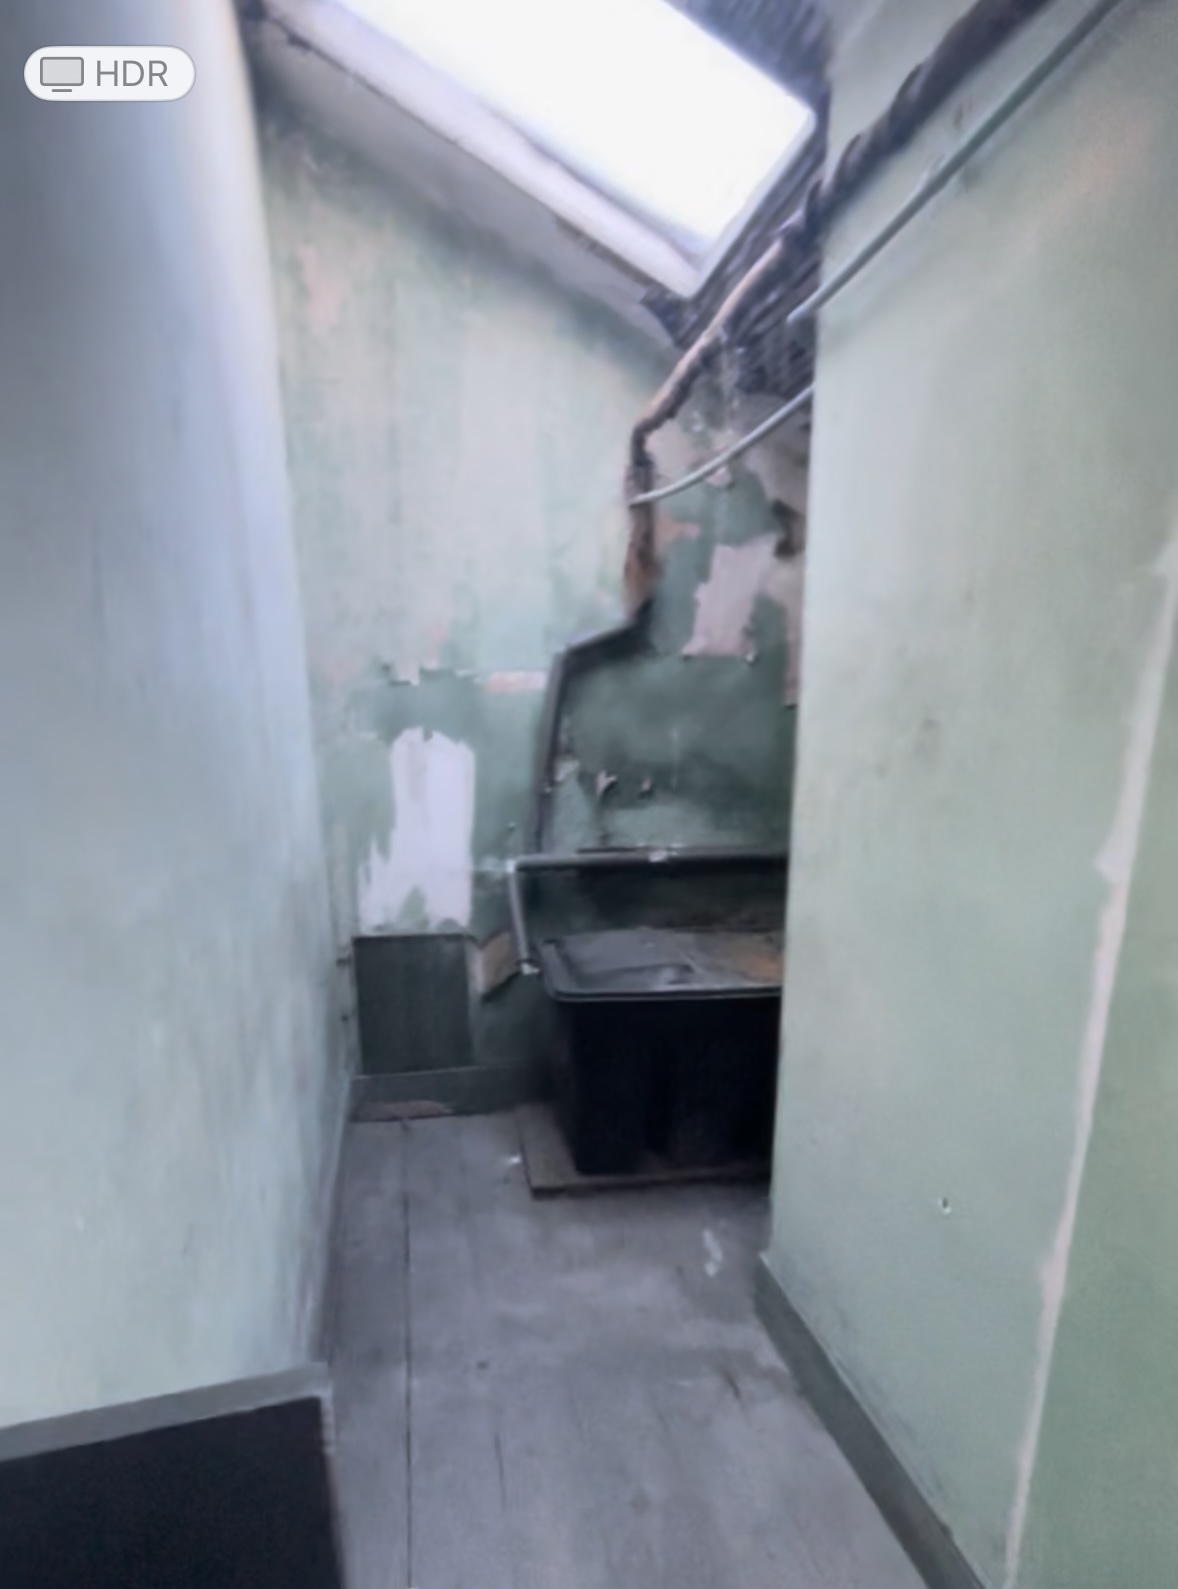
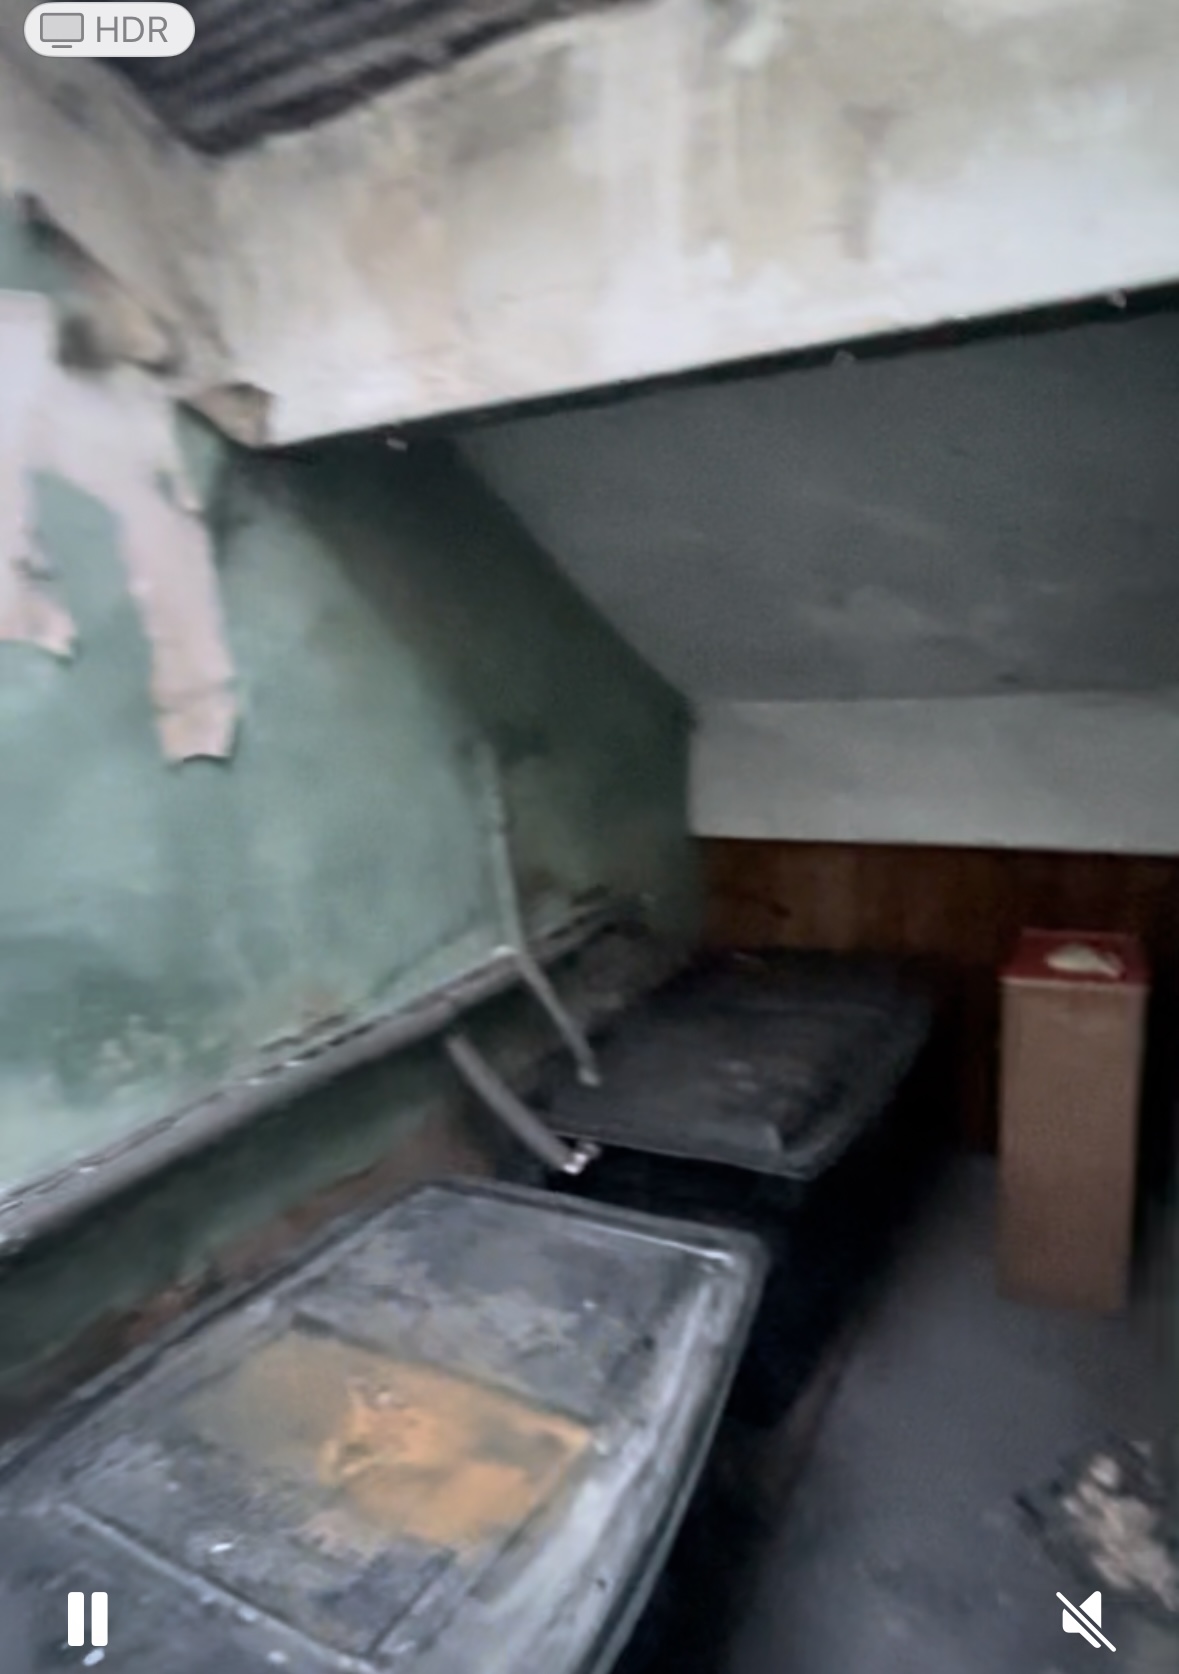
We had a tiny space to work with - just 1.7m square and needed to keep the shower, sink and toilet. We went for a neutral theme as I really love changing things up for the seasons, and that way I could go for deep red accessories for winter and lighter colours for spring / summer. I’ve also included a before photo!
Voting is not enabled or out of date!

Alana, Miller

Photo 1
Photo 2
Photo 3
Photo 4
Please provide any other information that is relevant for your entry
This bathroom was a real challenge! It has a compact footprint with an awkward layout but the goal from the start was to create something dramatic rather than settle for a safe aesthetic that wouldn't match the rest of my home. Black microcement covers the walls for a more seamless look with a feature herringbone tile in bottle green from Mandarin Stone to add some colour and anchor the space. Together, these contemporary materials are used in a more traditional way for a gentle nod to the Edwardian character of my home. The Burlington Bathrooms roll-top bath takes centre stage, with gold-plated fixtures from the same collection to add a touch of opulence. The WC pan and vanity are from Laufen's New Classic range, bringing a touch of clean Swiss design that sits beautifully alongside the more period detailing. Both pieces are wall-hung, a practical choice that keeps the floor clear and makes the room feel considerably more spacious than it is! Lots of house plants soften the drama of the dark walls and gives the space a spa-like quality, while a converted French crystal chandelier adds a touch of vintage glamour overhead. A tiny space but packed with personality!
Voting is not enabled or out of date!

Alexandra, Wood-Tonks

Photo 1
Photo 2
Photo 3
Photo 4
Photo 5
Photo 6
Photo 7
Photo 8
Please provide any other information that is relevant for your entry
This is our ensuite bathroom, which was an advocate green 1970s bathroom which would have certainly been the hight of fashion back in the day! Our home had been a renovation project from day 1, and me and my partner wanted to make the most use out of the upstairs space and that was when we decided to re-configure the floor plan which turned the singular bathroom into two and gave us an ensuite for our new master bedroom. This is the ensuite that you can see in the pictures, and I have also included a before and some during photos for you so you can truly appreciate the difference that this is made. By reconfiguring the floor plan we added an ensuite which made so much use of the upstairs space and even though we’ve gone from three bedroom one bathroom to 3 bedroom one bathroom and an ensuite the house somehow feels even bigger than it did before! And of course we had to stick with the green!
Voting is not enabled or out of date!

Alice, May

Photo 1
Photo 2
Photo 3
Photo 4
Photo 5
Voting is not enabled or out of date!

Alicia, Coates

Photo 1
Photo 2
Photo 3
Photo 4
Photo 5
Photo 6
Photo 7
Photo 8
Please provide any other information that is relevant for your entry
Stars and Stripes are the theme for our bathroom! Bringing joy to the family bathroom routine. You can see how bland it was before compared to what it looks like now. The stripes were painted using colours from the Paint & Paper library paint range and the sink unit was painted off black to match the star floor tiles. We changed the layout of the room to include a separate shower cubicle and free standing bath, making the bathroom work much better for us. This meant space was tight along the wall with the toilet and so we had to choose all our sanitary ware from separate companies on-line (because it was during lockdown) and we brought the scheme together using brushed gold hardware and touches of rich yellow and toffee accessories.
Voting is not enabled or out of date!

Andrea, Grace

Photo 1
Photo 2
Photo 3
Photo 4
Please provide any other information that is relevant for your entry
The bathroom was transformed using a pot of tile paint for £26 and stick on green tiles on the bath and sink area for £29.99. The best budget transformation hack. The bathroom is now a botanical great haven.
Voting is not enabled or out of date!

Angela, McGill

Photo 1
Photo 2
Photo 3
Photo 4
Photo 5
Please provide any other information that is relevant for your entry
My favourite room in our home ✨? also once an empty loft space
Voting is not enabled or out of date!

Anna, King

Photo 1
Photo 2
Photo 3
Photo 4
Photo 5
Photo 6
Photo 7
Photo 8
Please provide any other information that is relevant for your entry
This master ensuite has been transformed from a once distasteful space into a calm & inviting retreat. Designed & renovated by myself, it embraces a country style feel with rustic touches like reclaimed shelving & a vanity unit made from scrap wood. A French grey-green palette sits beautifully against fresh white, creating a light yet soothing atmosphere, while panelling adds an extra layer of charm. The result is a relaxed, characterful space that feels both homely & quietly refined
Voting is not enabled or out of date!

Beccy, Horwood

Photo 1
Photo 2
Photo 3
Photo 4
Photo 5
Photo 6
Please provide any other information that is relevant for your entry
Loft conversion bathroom
Voting is not enabled or out of date!

Beth, Loman

Photo 1
Photo 2
Photo 3
Photo 4
Photo 5
Please provide any other information that is relevant for your entry
Our cloakroom transformation shows how even the smallest spaces can deliver big design impact. What was once a dated and under‑whelming cloakroom has been re‑imagined as a stylish, cohesive bathroom retreat. I embraced the compact scale by introducing rich, deep panelling paired with a bold, playful wallpaper that extends across the ceiling to create depth and personality. Carefully chosen brass fittings, a sleek floating pink basin and tailored finishes bring sophistication and function together. This project proves that thoughtful attention to detail and creative use of colour can make a tiny bathroom feel inviting and completely renewed.
Voting is not enabled or out of date!

Beth, Marsden

Photo 1
Photo 2
Photo 3
Photo 4
Photo 5
Photo 6
Photo 7
Please provide any other information that is relevant for your entry
This ensuite was designed as a calm, restorative retreat within the home, where natural textures and soft tones work together to create a sense of quiet luxury. The palette is deliberately warm and layered, combining fluted timber, veined stone and brushed brass to add depth without overwhelming the space. Every detail was considered to balance function with indulgence, from the bespoke vanity and sculptural basins to the softly curved mirrors that echo the organic feel of the room. Natural light filters through the shutters, enhancing the tonal finishes and creating a space that shifts beautifully throughout the day. The result is a ensuite bathroom that feels both elevated and effortless, a place designed not just for daily routines, but for slowing down and switching off.
Voting is not enabled or out of date!

Bethany, Tyson

Photo 1
Photo 2
Photo 3
Photo 4
Photo 5
Photo 6
Photo 7
Photo 8
Please provide any other information that is relevant for your entry
Picture 8 is our bathroom before. This was one of our biggest DIY projects. My husband is an electrician so we did 90% of this ourselves from the rip out to the tiling (just needed a little hand from a plumber)! It’s my sanctuary and happy place and I wanted to create a spa like escape at home.
Voting is not enabled or out of date!

Brogan, Dix

Photo 1
Photo 2
Photo 3
Photo 4
Photo 5
Voting is not enabled or out of date!

Callieanne, Major

Photo 1
Photo 2
Photo 3
Photo 4
Voting is not enabled or out of date!

Candice, Guy

Photo 1
Photo 2
Photo 3
Photo 4
Photo 5
Photo 6
Photo 7
Photo 8
Please provide any other information that is relevant for your entry
This project began not with a blank slate, but with a typical new‑build bathroom: small and fully functional, but devoid of personality. My goal wasn’t to redesign the room from the ground up, but to prove how much character and mood can be created through thoughtful design interventions. I wanted to take a space that felt simple, and turn it into a dramatic bathroom with presence and warmth, using earthy tones.   The first step was addressing the flatness of the original finishes. I introduced a deep green faux‑limewash across the walls, adding instant texture and atmosphere. I also added fluted wooden panelling to the high‑gloss sink unit, which transformed from a standard white piece of storage into something a bit more bespoke and textural.   To soften the harsh lines of the tiles and the walls, I added the organic-shaped pond mirror as well as a curved wooden shelf. Warmth was also essential, so I incorporated shades of brown as well as other wooden elements: the bath stool, and a bath board that ties in with the light woods in the fluted panelling. One of my favourite elements is the vase - painted by me, creating a focal decorative piece that adds individuality as well as some bold pattern.   Finally, I replaced one of the spotlights with a rattan hat lamp, softening the lighting and introducing a playful, unexpected detail that breaks away from the uniformity of spotlights.
Voting is not enabled or out of date!

Charlotte, Lawrence

Photo 1
Photo 2
Photo 3
Photo 4
Photo 5
Photo 6
Photo 7
Photo 8
Please provide any other information that is relevant for your entry
Living in a reno made me crave a spa like bathroom! It's a family bathroom so it had to function for our family of 4, but I also needed it to scream luxury hotel, to escape the chaos of the rest of our renovating house. We had our family in mind when it came to the details; Under floor heating was a must to keep the tiny toes warm in winter, the straight sided deep bath, the space around the toilet (for the potty), and the matt textured tiles that don't need constant maintenance are examples of the intentional family choices. That said, it also had to double as a space that i could relax after a long day of being a working mum half way through a renovation! By adding LED lights around the ceiling niches and bath the space feels like a difference space when the kids are in bed. It's come a long way from the mouldy mess we started with and I'm so happy with how it turned out.
Voting is not enabled or out of date!

Chloe, Shepherd

Photo 1
Photo 2
Photo 3
Photo 4
Photo 5
Photo 6
Photo 7
Photo 8
Please provide any other information that is relevant for your entry
This bathroom is something we’re incredibly proud of. The shower is the real focal point. We built it ourselves from scratch, from the structure to every tile, finishing it with a soft arched opening that gives it a warm, characterful feel. The window inside the shower is my favourite detail, flooding the space with natural light and making the tiles glow. It completely transforms the feel of the room. Seeing it all come together, knowing we created it ourselves, makes it even more special.
Voting is not enabled or out of date!

Christine, Mullan

Photo 1
Photo 2
Photo 3
Photo 4
Photo 5
Please provide any other information that is relevant for your entry
Our family bathroom- calming blue and marble with black accents. We bought the grey ceiling down to match the blue of the wall and tied it altogether with black tape in line with the trim of the shower and tiles. Its a calm and bright space with the contrast of the concrete and marble
Voting is not enabled or out of date!

Claire, Champion

Photo 1
Photo 2
Photo 3
Photo 4
Photo 5
Photo 6
Photo 7
Photo 8
Please provide any other information that is relevant for your entry
This tiny 1.8m x 1.8m shower room was, quite frankly, a disaster. The toilet had fallen off the wall, the shower door was hanging on by sheer willpower, and an optimistic attempt to paint the very sad grey tiles didn’t exactly save the day. So, a full rethink was in order: turn a small, slightly tragic space into something that felt genuinely luxurious. By reworking the layout, I squeezed in a generous walk-in shower, instantly improving both space and flow. From there, it was all about the details—brushed bronze fittings, fluted glass, and rich dark cherry tones layered with green and natural tiles to create something warm, inviting, and a little bit special. Mirror frames were upcycled with paint and varnish to mimic a lacquered finish, proof you don’t need a big budget to get that high-end look. A bold wallpaper and a DIY café curtain add the finishing touches and a bit of personality. The design came together using the Easy Bathrooms visualiser tool, with all fittings and tiles sourced through them. Small in size, big on personality—and now, everything is exactly where it should be (including the toilet).
Voting is not enabled or out of date!

Coral, Foster

Photo 1
Photo 2
Photo 3
Photo 4
Photo 5
Photo 6
Please provide any other information that is relevant for your entry
We transformed the bathroom into a tranquil, spa-like space by making the most of every inch. We took this carpeted, old, dated bathroom and created a much more usable and functioning space. An unused cupboard was cleverly converted into a walk-in shower, while double his-and-hers sinks were added for both convenience and style. The addition of fluted finishes brings texture and elegance, elevating the entire room into a beautifully balanced retreat.
Voting is not enabled or out of date!

Dan, Coyles

Photo 1
Photo 2
Photo 3
Photo 4
Voting is not enabled or out of date!

Daniel, Bland

Photo 1
Photo 2
Photo 3
Photo 4
Please provide any other information that is relevant for your entry
Imitation gold leaf shower tiles, D.I.Y marble resin floor. Hand painted bamboo design with Smartcret tile paint.
Voting is not enabled or out of date!

Danielle, Pearce

Photo 1
Photo 2
Photo 3
Photo 4
Photo 5
Please provide any other information that is relevant for your entry
This bathroom started with a concept in my mind, I knew I wanted certain colours, I knew I wanted a black toilet, I knew I wanted a vintage cabinet as a vanity so I sketched it out and then I needed to source! I found a dresser on ebay and set about cutting the drawers up and re fixing to accommodate pipes etc, t even has a razor point wired in the side, I sourced a toilet from Germany, found the tiles I had seen in my head and couldn't believe how close to my vision I got, the mural on the ceiling and the battery powered light above the bath was an added bonus and just finished the room for me and it's a joy to bathe in there.
Voting is not enabled or out of date!

Donna

Photo 1
Photo 2
Photo 3
Photo 4
Photo 5
Photo 6
Please provide any other information that is relevant for your entry
We squeezed the tiniest of en-suites into the smallest of spaces but it was so worth it!
Voting is not enabled or out of date!

Drew, Muntz

Photo 1
Photo 2
Photo 4
Photo 5
Photo 6
Photo 7
Photo 8
Please provide any other information that is relevant for your entry
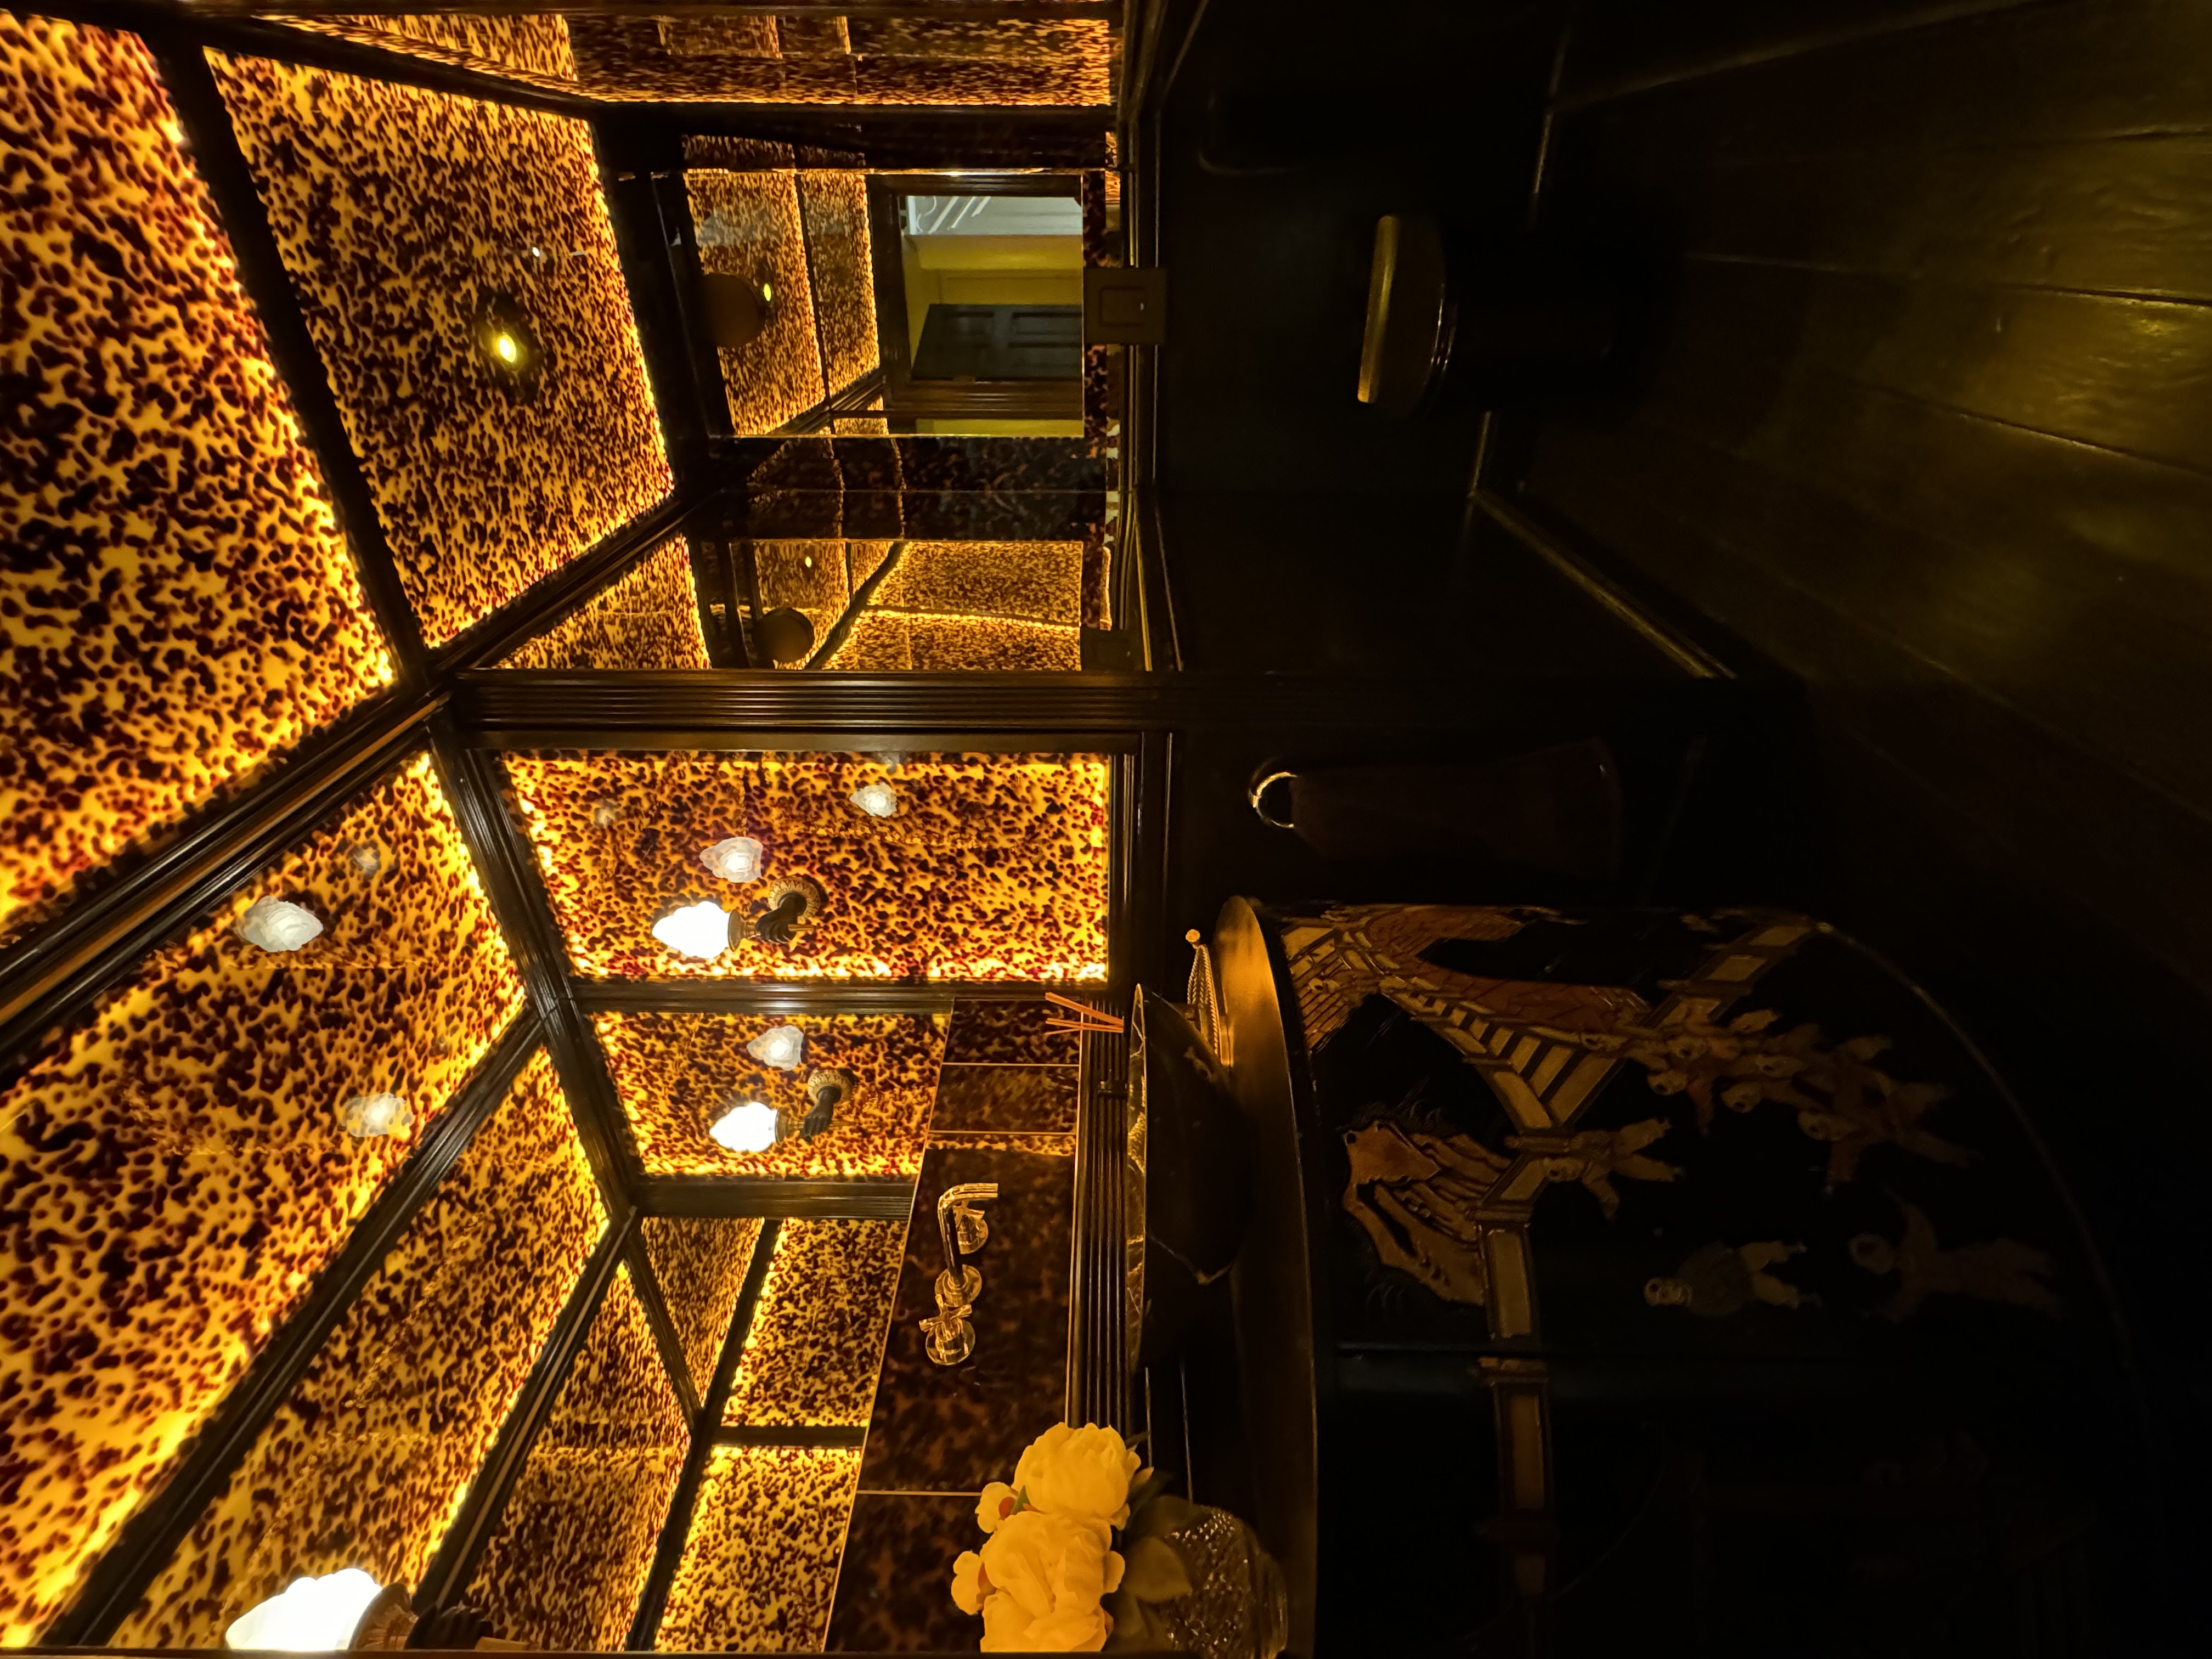
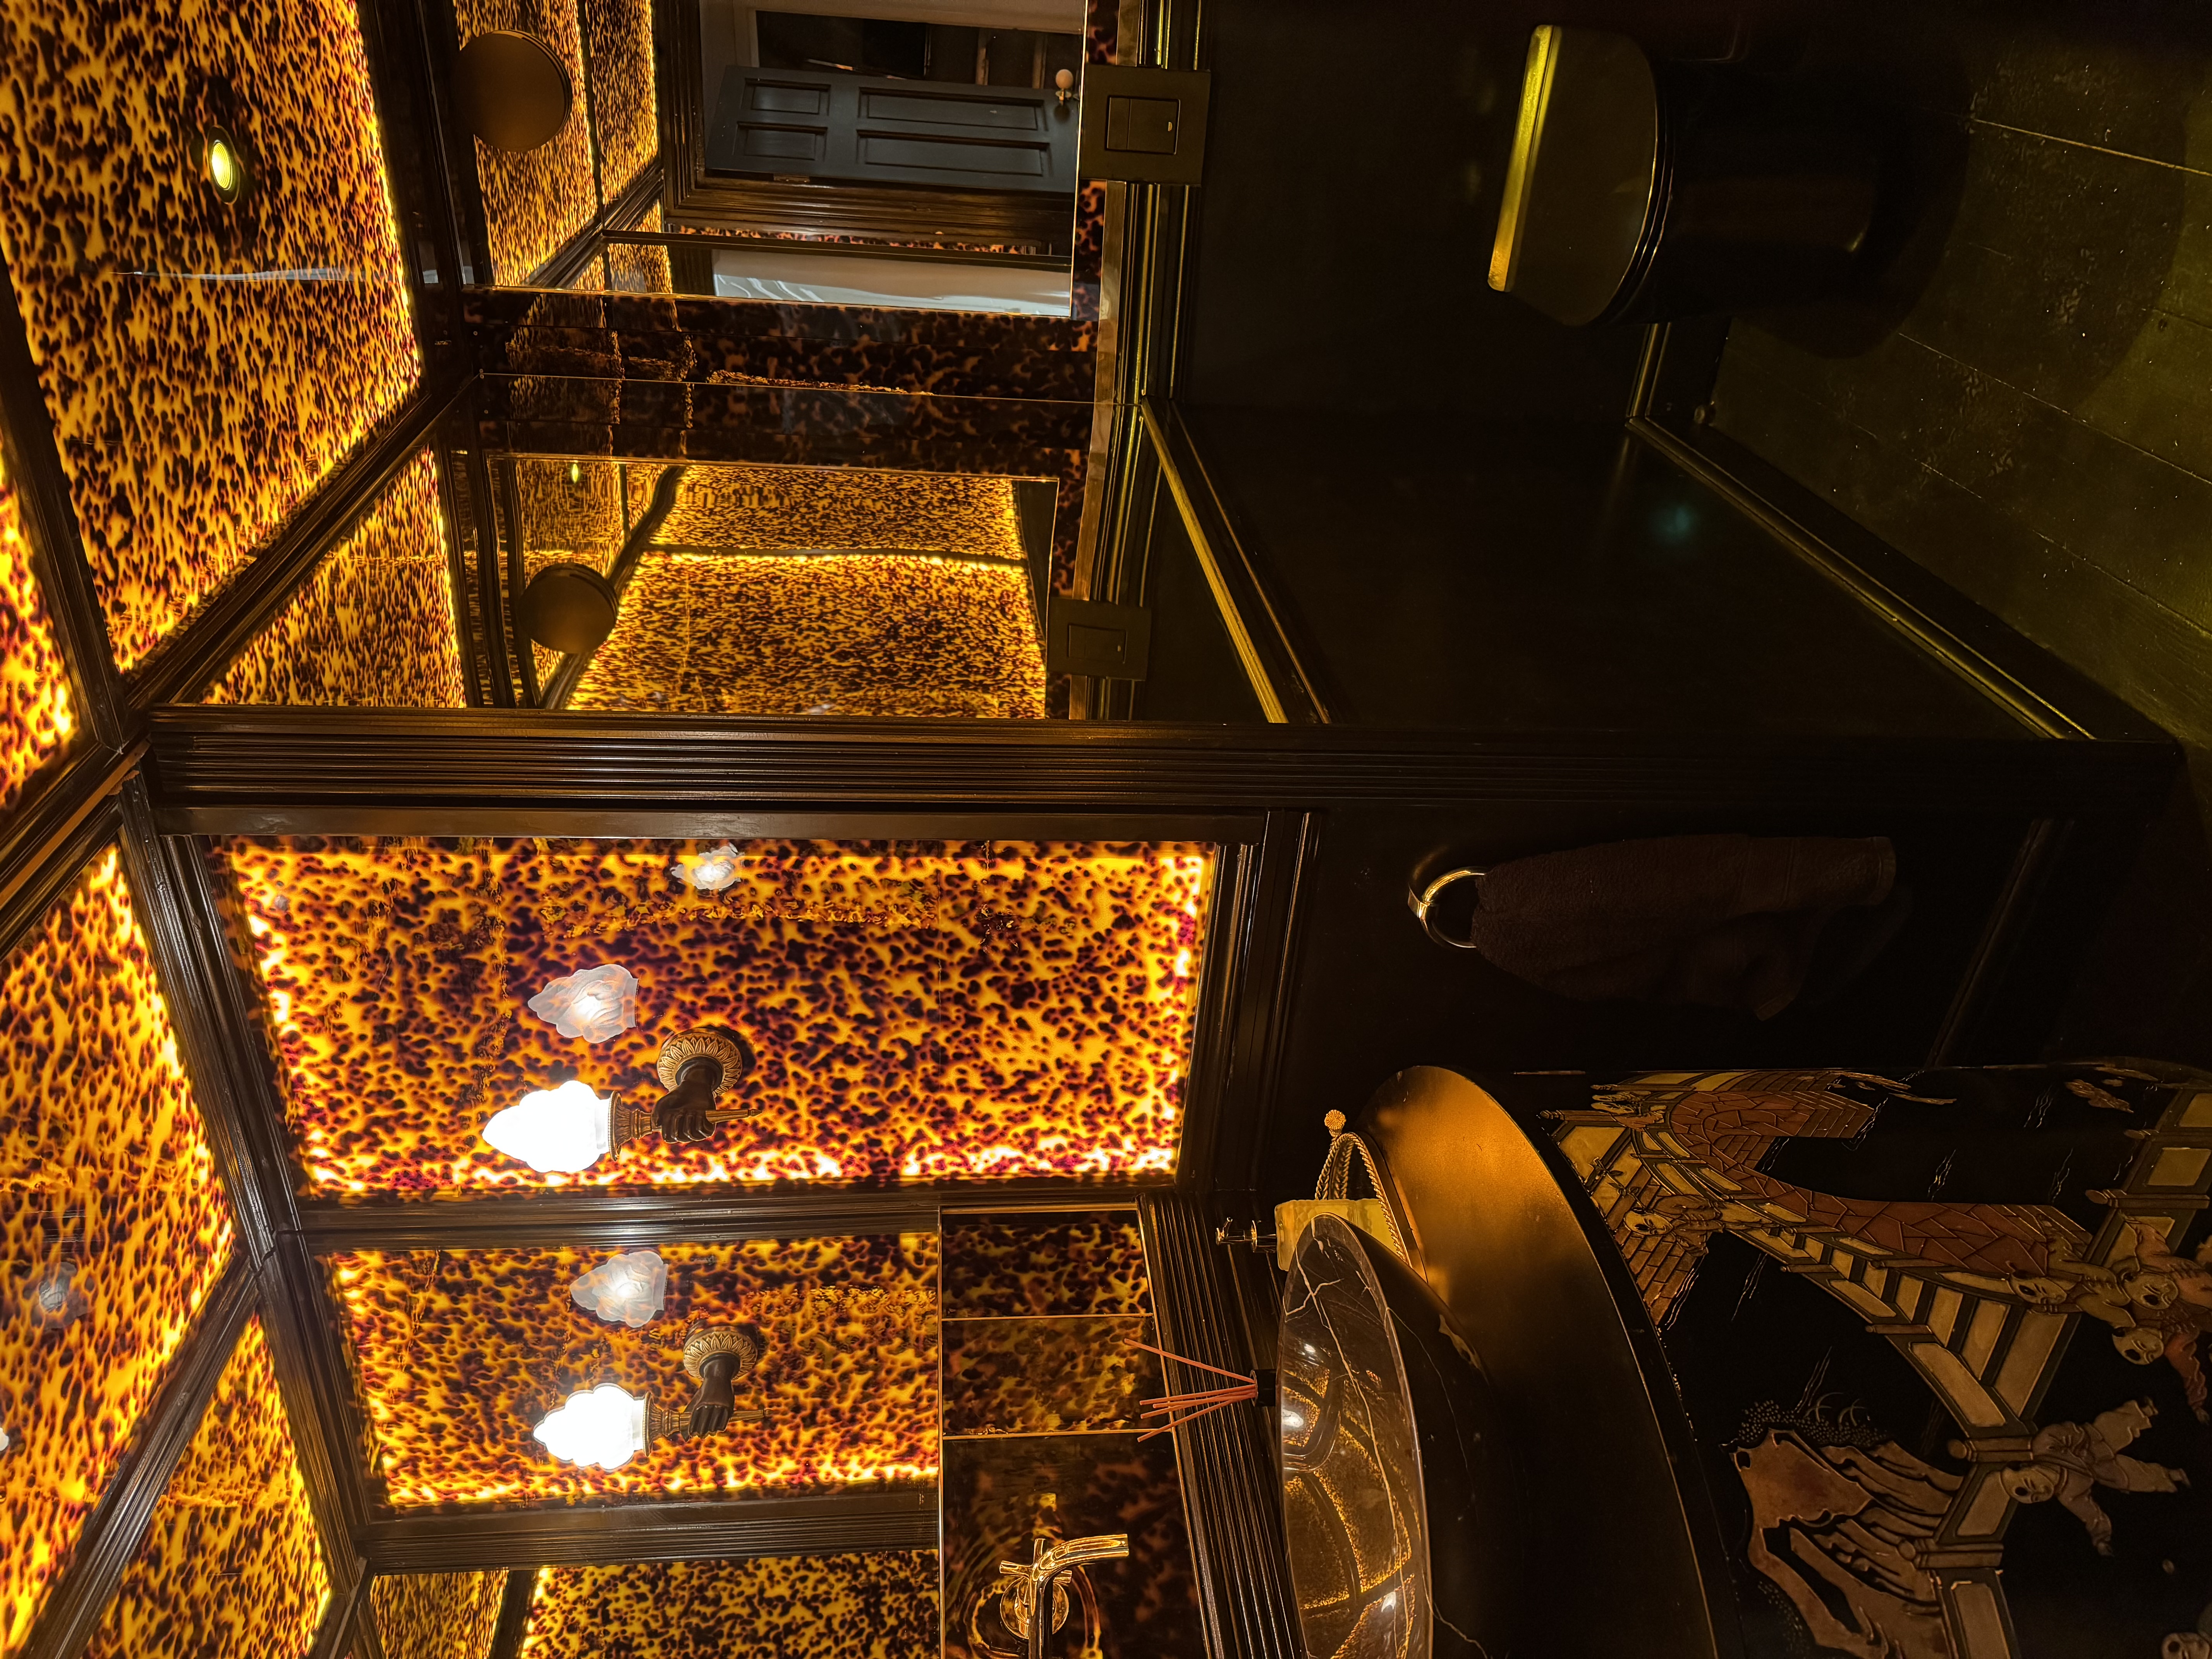
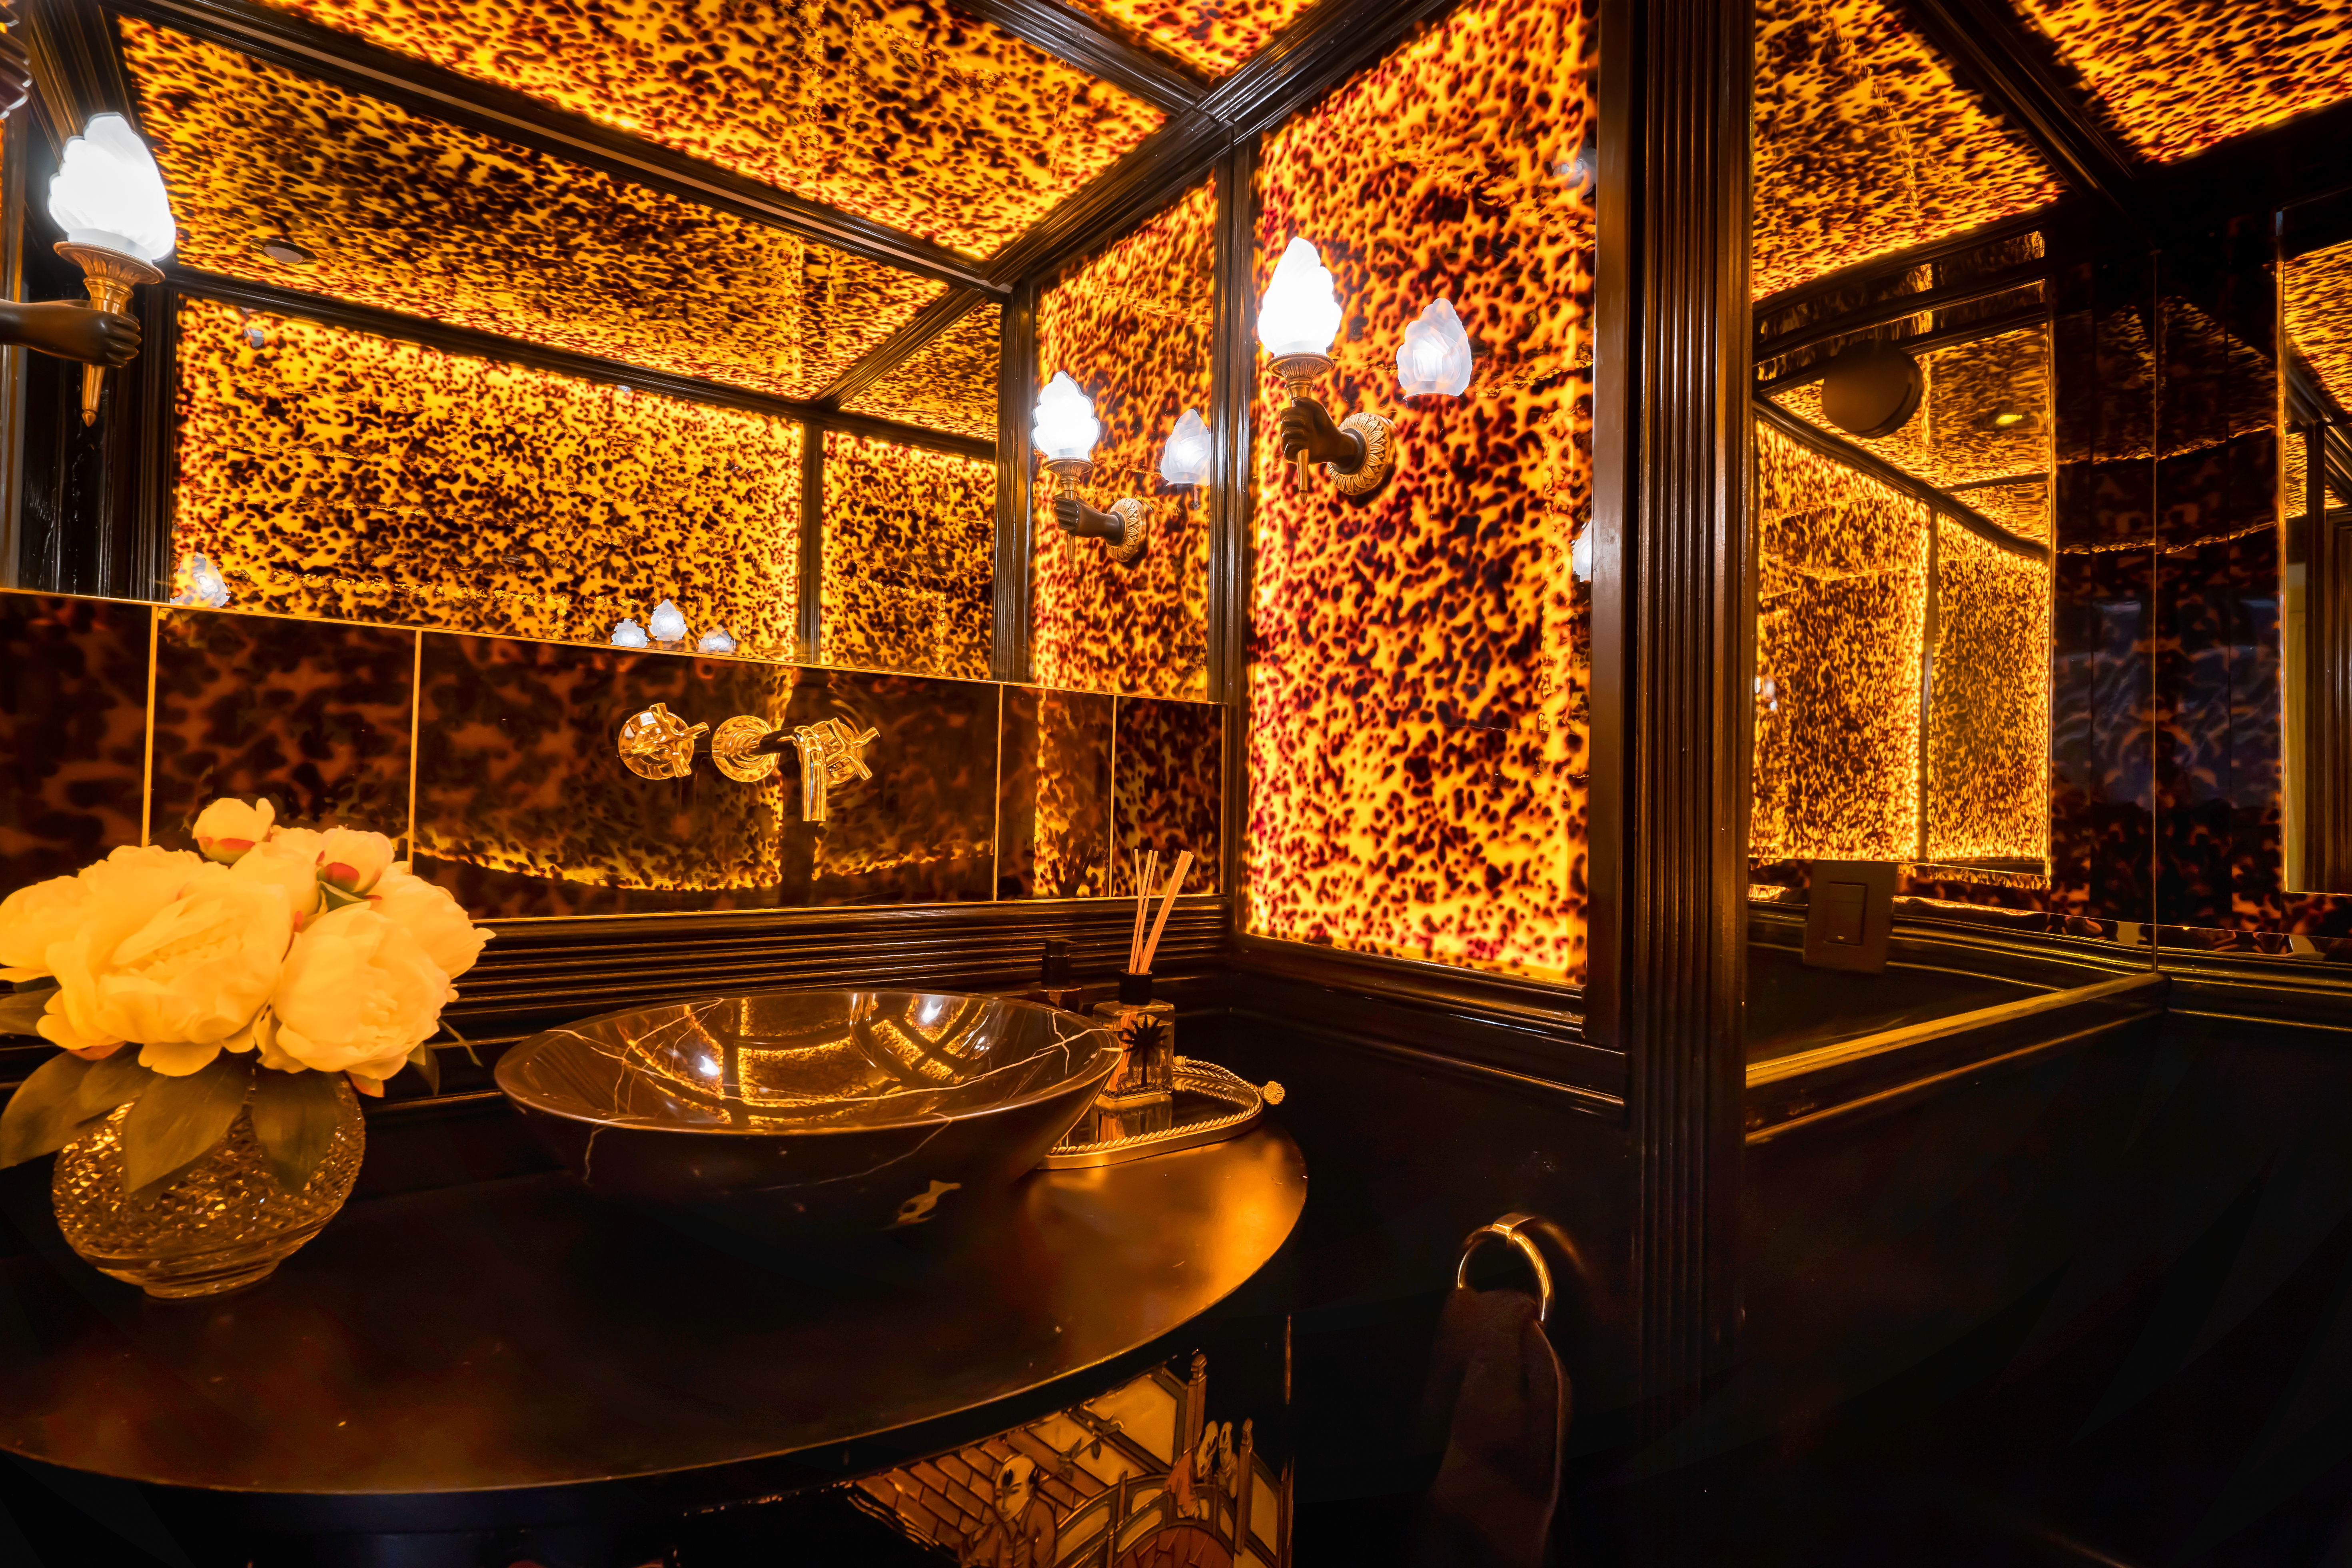
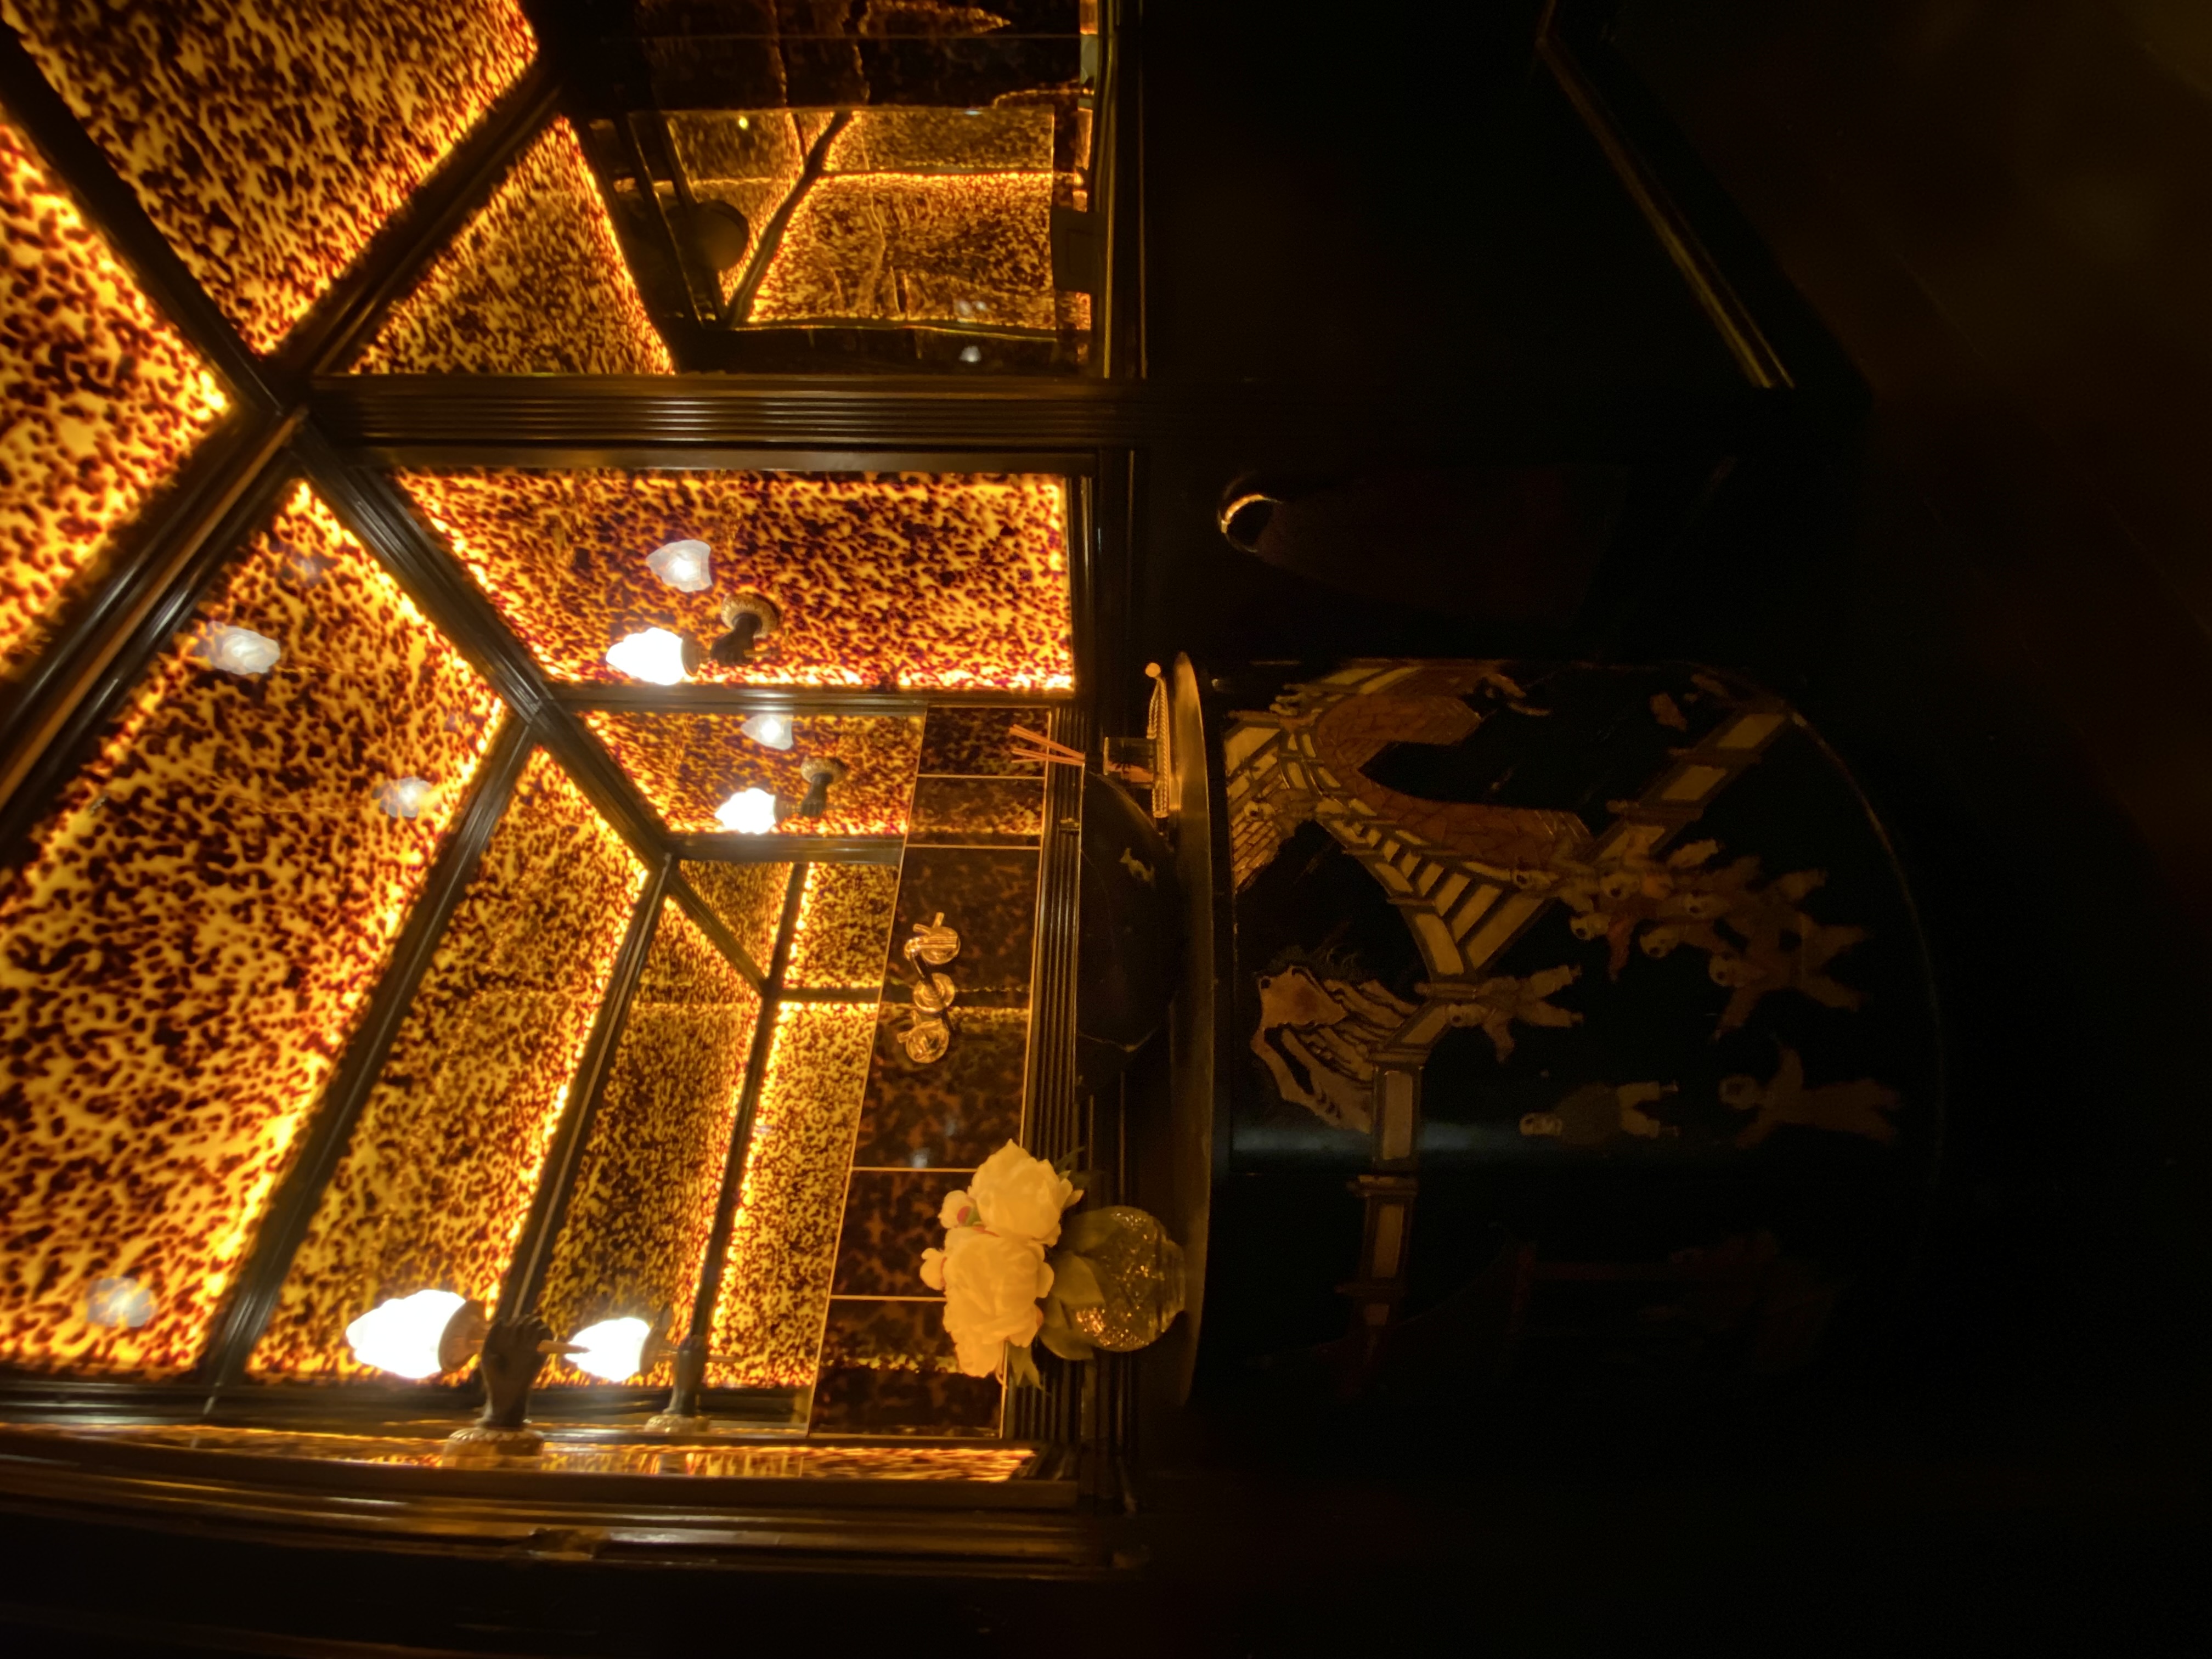
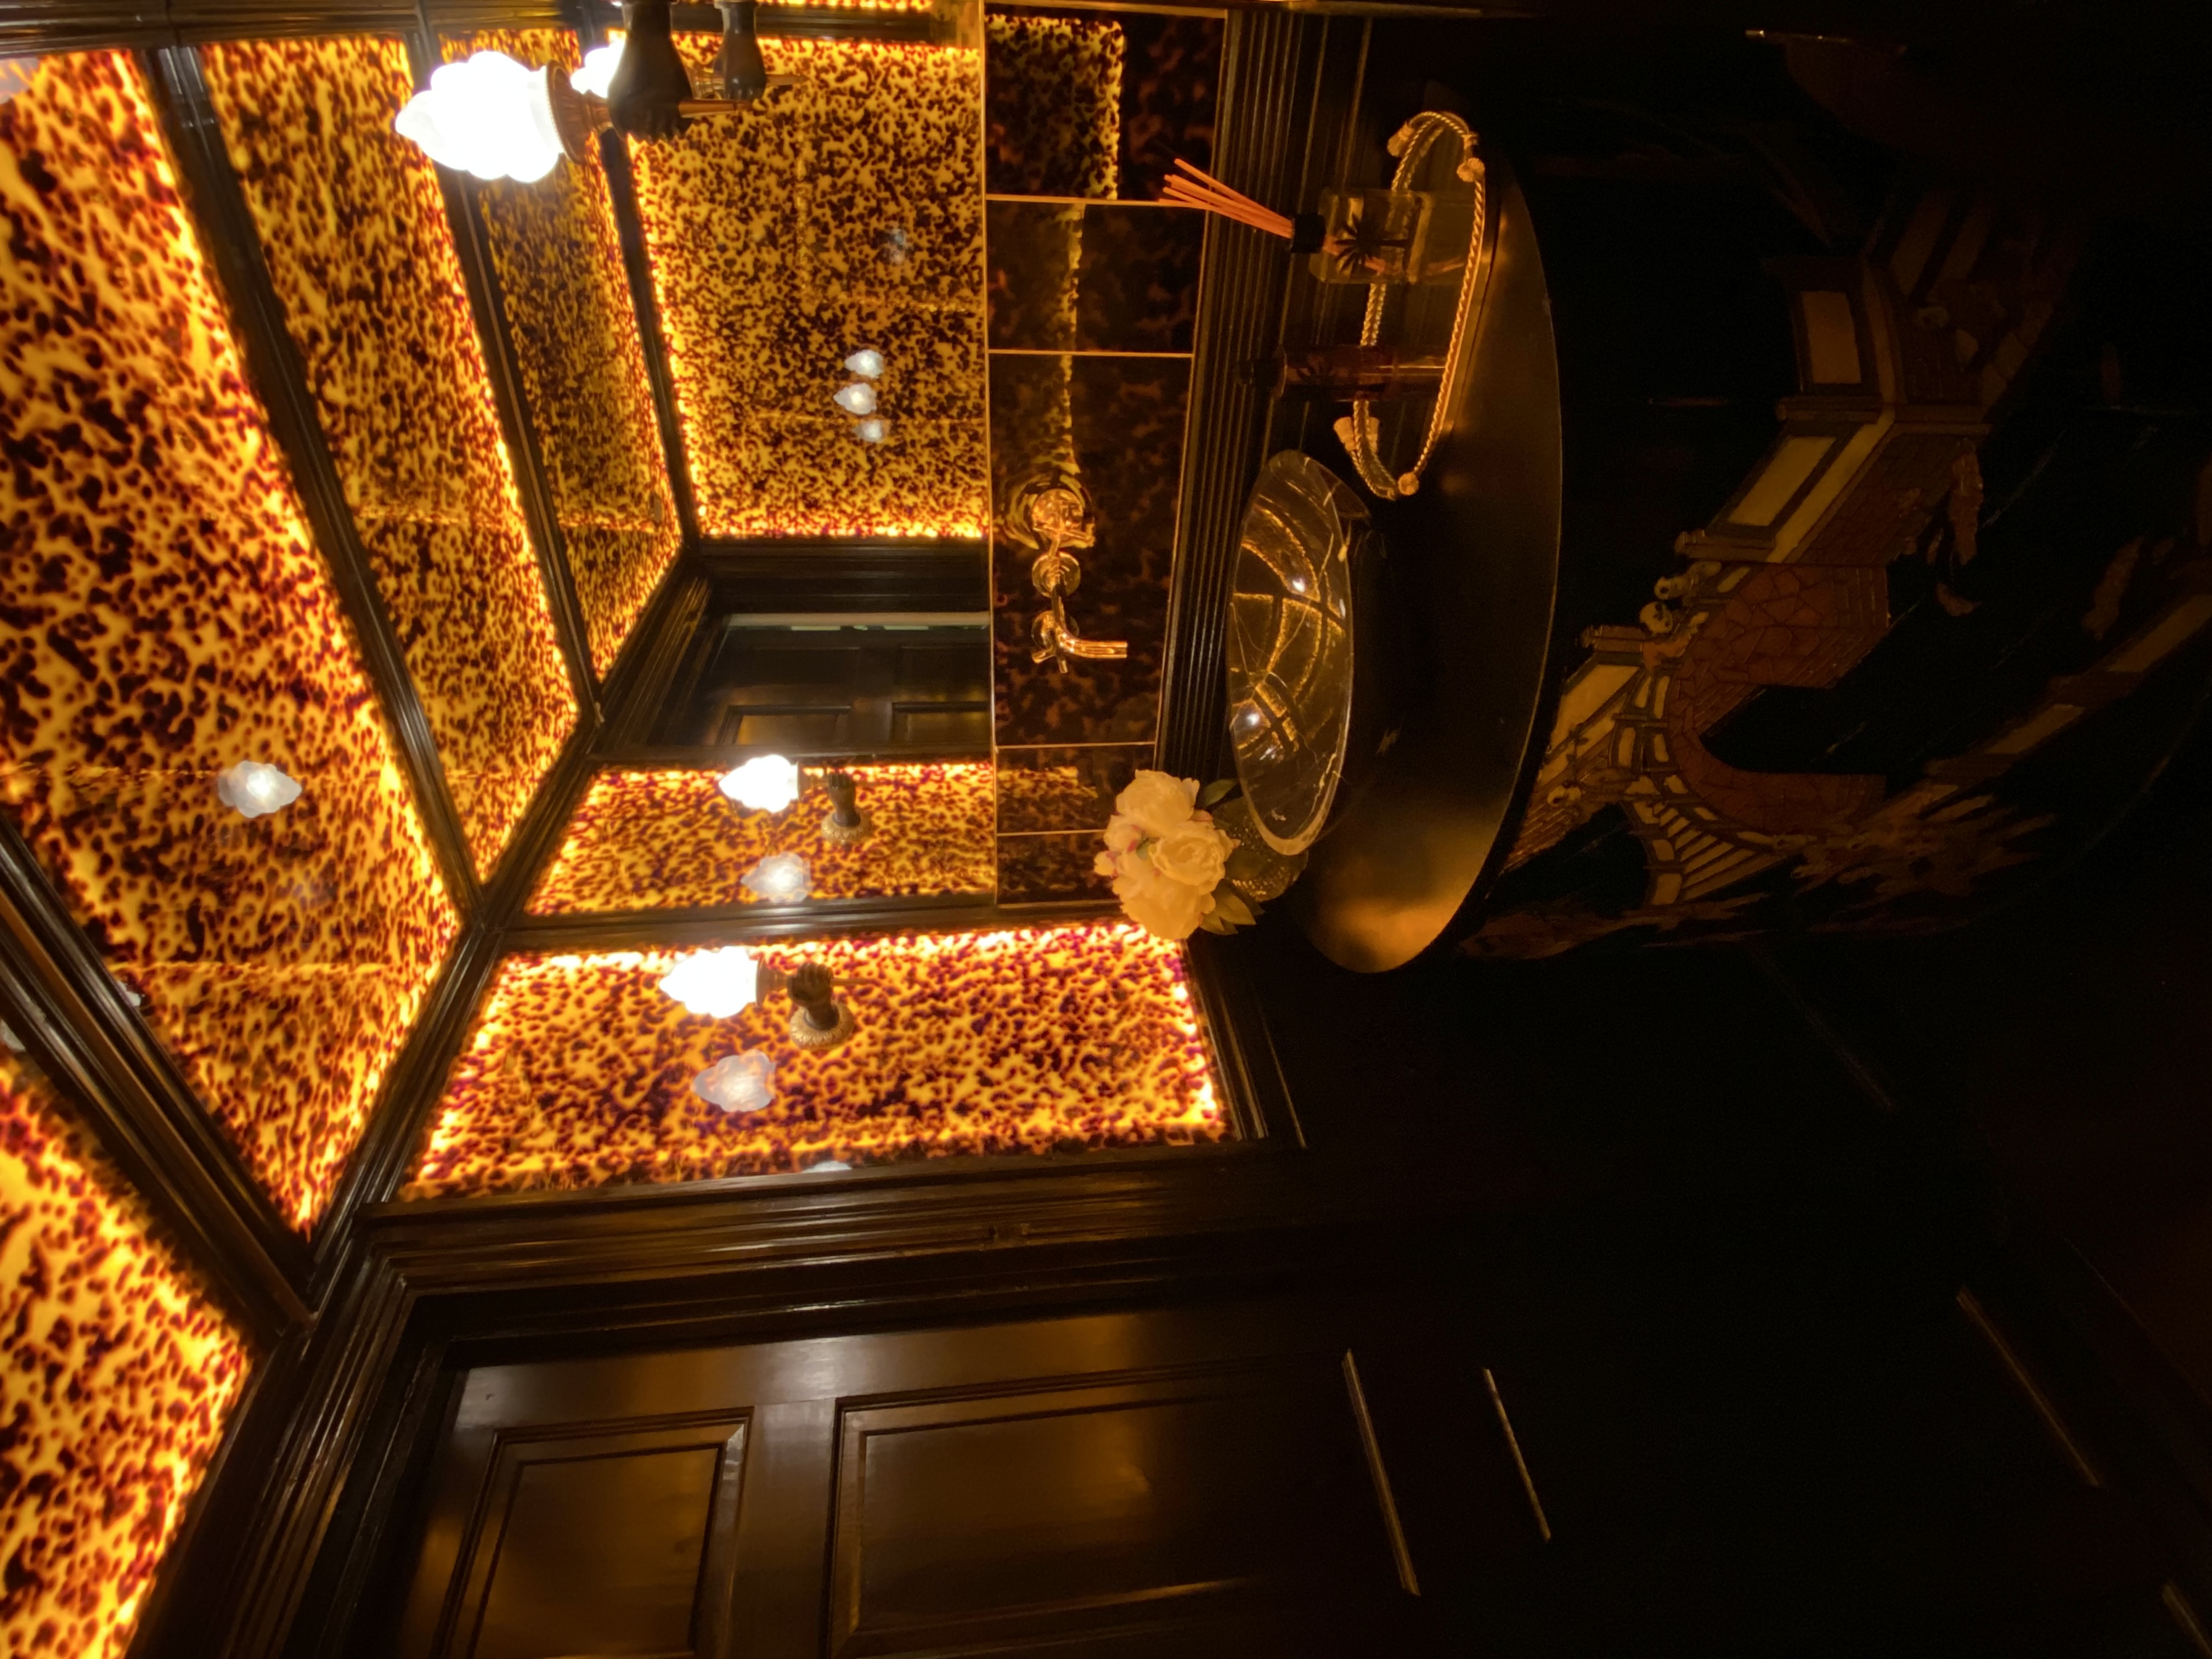
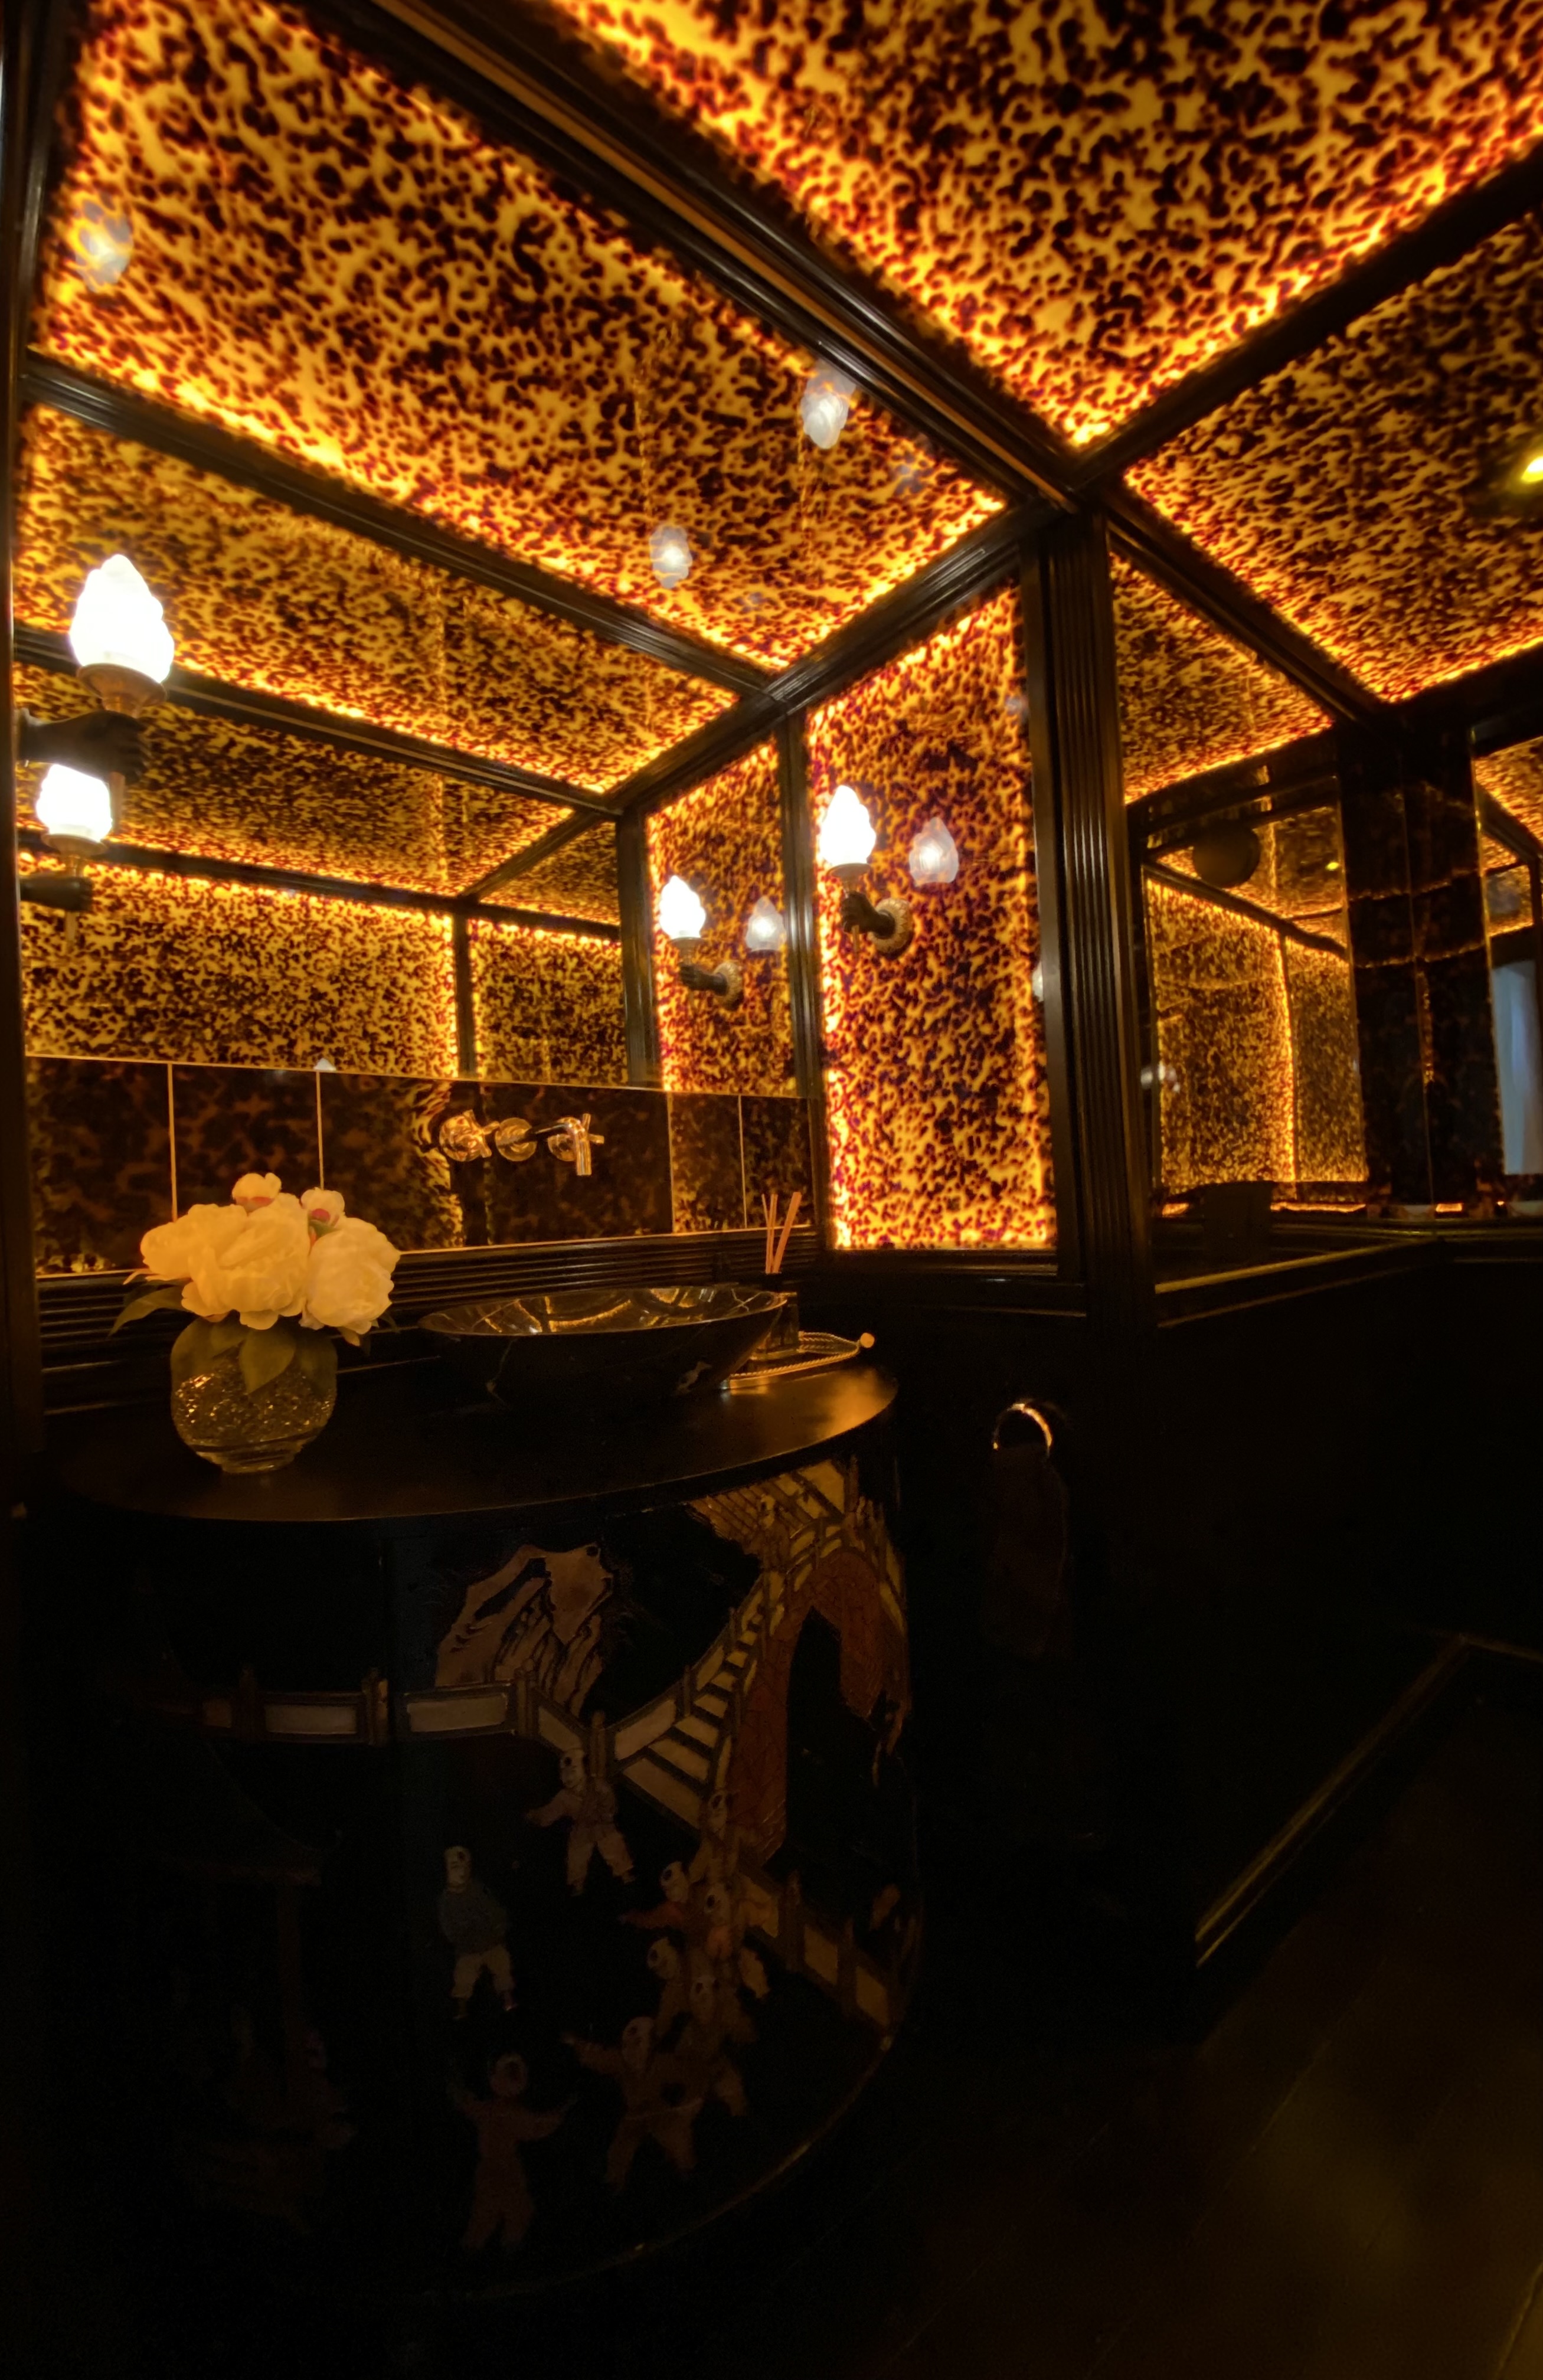
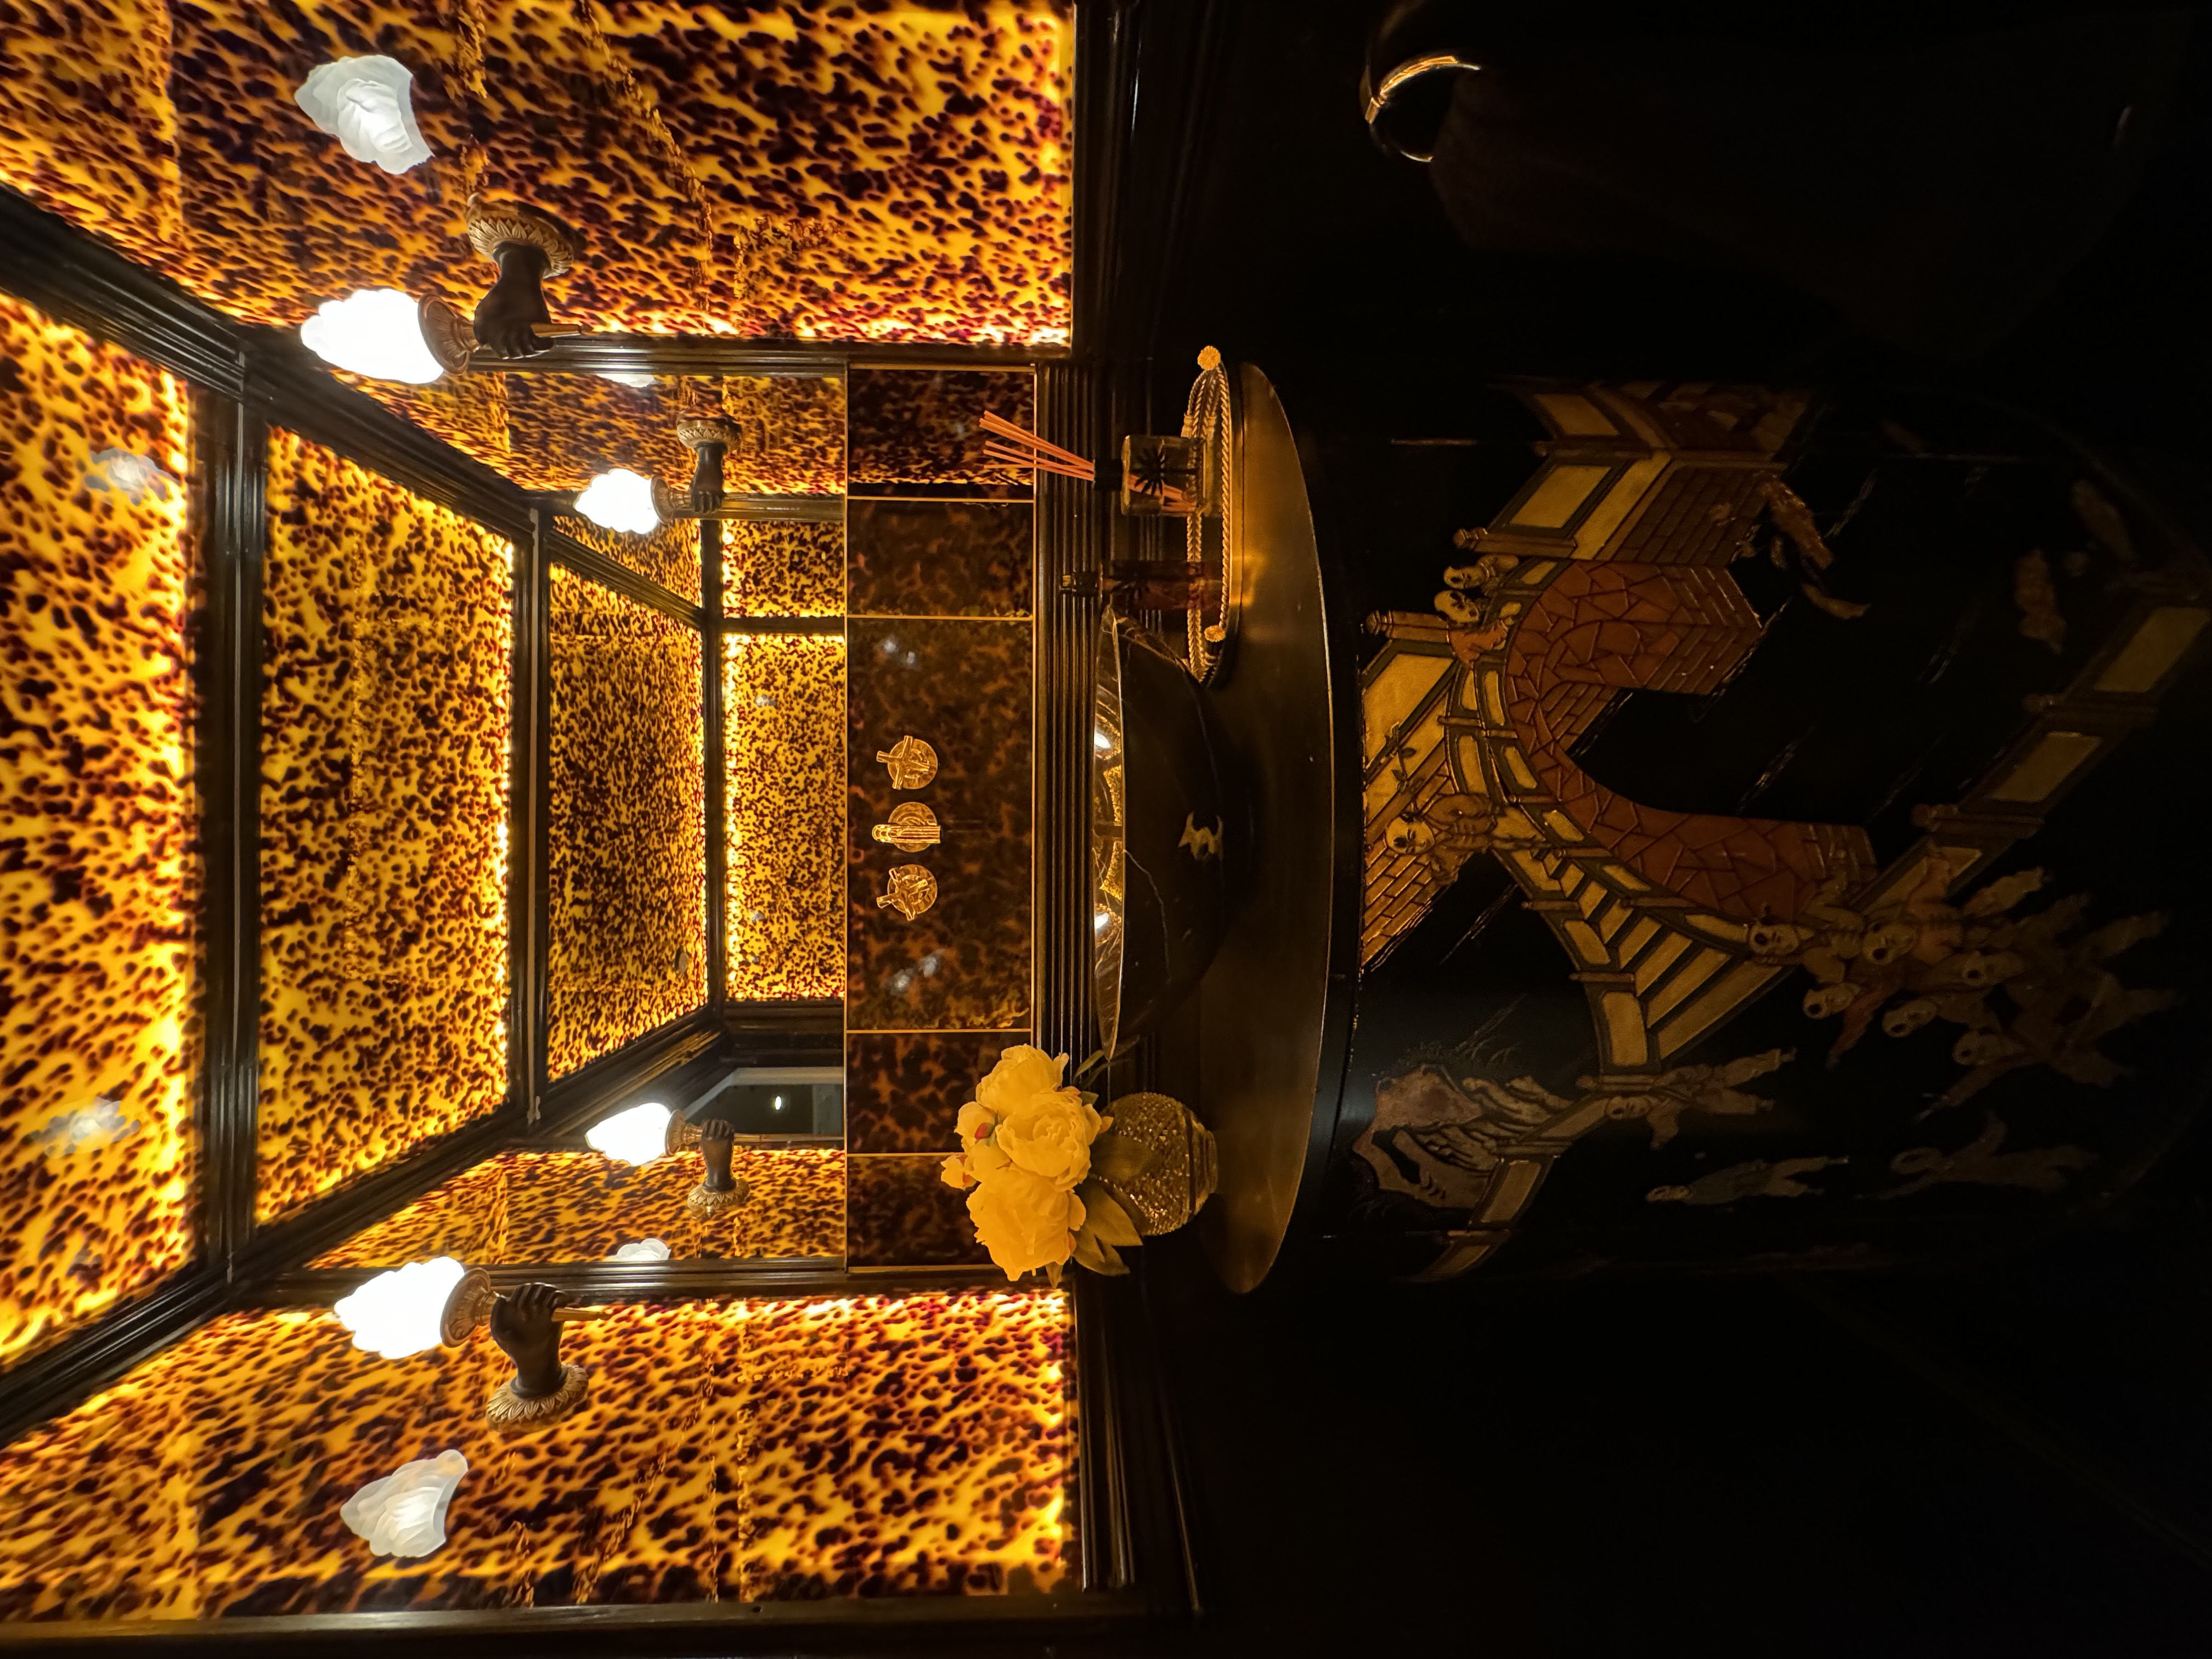
My Home in Cornwall: A small, dark windowless room gave an opportunity to create a little unexpected magic. The House has an eclectic, travelled eye decor, with Art Deco Japanese folding screens and a touch of Grand Tour, so I tracked down a Demi Lune Ebonised Japanese cabinet and mounted a black marble bowl on top. The Maison Jansen wall lights are African hands holding glass torches, whilst the ebonised lower walls sit below back lit Italian tortoise shell sheets of lucite. The ceiling and back lit walls are operated by PIR so dispenses with the need for light switches. I use black toilet tissue on an ebony holder, next to the black ceramic WC keeping the space “on theme”
Voting is not enabled or out of date!

Drew, Muntz

Photo 1
Photo 2
Photo 3
Photo 4
Photo 5
Photo 6
Photo 7
Photo 8
Please provide any other information that is relevant for your entry
Creating a luxury feel in such a small space meant creating a special piece. So, I installed a a bespoke Carara Basin on pedestal to create the first impression, and a Vintage Murano Chandelier . As the window restricts a shower position, building a diving wall allows the shower above the bath to be set behind, whilst also creating a separate vanity area. All fittings are Nickel from Lefroy Brooks
Voting is not enabled or out of date!

Ellie, Watson

Photo 1
Photo 2
Photo 3
Photo 4
Photo 5
Photo 6
Photo 7
Photo 8
Please provide any other information that is relevant for your entry
We wanted a hotel feel bathroom and feel we achieved it. Cosy, big bath and a comforting space to relax.
Voting is not enabled or out of date!

Emily, Barratt

Photo 1
Photo 2
Photo 3
Photo 4
Please provide any other information that is relevant for your entry
This bathroom is super small but I didn’t want it to be boring, I wanted to add colour whilst keeping the feel of our Victorian home
Voting is not enabled or out of date!

Emily, Murray

Photo 1
Photo 2
Photo 3
Photo 4
Photo 5
Photo 6
Photo 7
Photo 8
Please provide any other information that is relevant for your entry
Welcome to my beautiful new bathroom, which turned out exactly as I’d hoped and dreamed (even if it was rather more pink than the husband was expecting). What was a dirty flat roof on our second floor is now a daylight-drenched bathing paradise with unparalleled views from the loo over London’s skyline and our South East London private park. And you can even lie in the bath and watch the clouds float by through the roof window directly above. Bliss! This bathroom was built for my two teenage boys to share but I’ve decided it’s too good for them. So I’m claiming it. They can wee in the garden.
Voting is not enabled or out of date!

Emma, Neely

Photo 1
Photo 2
Photo 3
Photo 4
Photo 5
Photo 6
Photo 7
Photo 8
Please provide any other information that is relevant for your entry
This is my viral bathroom makeover! Where I created a lot of opinions on TikTok and Instagram with over 21million views on my initial post! Check it out here and see the before and afters attached! https://www.instagram.com/reel/Cqhd_DCqq...
Voting is not enabled or out of date!

Fern, Hutchinson

Photo 1
Photo 2
Photo 3
Photo 4
Photo 5
Photo 6
Please provide any other information that is relevant for your entry
Our downstairs bathroom was a basic, white small toilet when we bought our home a year ago and we have transformed it to be a luxurious, moody room. We took off the old tiles, panelled the room with trim, then larger trim to create a dado rail, built a shelf and used peel and stick wallpaper around the top of the room. We simply then styled it with a new mirror, towel rail and plants.
Voting is not enabled or out of date!

Frederique, Pope

Photo 1
Photo 2
Photo 3
Photo 4
Photo 5
Photo 6
Photo 7
Photo 8
Please provide any other information that is relevant for your entry
To say this bathroom has been a labour of love would be an understatement. It took over four years to complete, largely due to funding constraints along the way. I wanted to experiment with mixing patterns and create an opulent, Art Deco-inspired sanctuary. To fully embrace this aesthetic, I introduced as many curves as possible — asking the plasterers to shape the ceiling so it echoes the lines of both the bath and the window. To save on costs, I decided to wallpaper the ceiling myself. I quickly realised that combining a curved surface with a patterned wallpaper was perhaps an ambitious choice — it certainly tested both my patience and my skills! In the end, it all came together. I also the wood works, cupboard and gold leaf the bath myself to achieve the desired finish while staying within budget.
Voting is not enabled or out of date!

Gail, Richardson

Photo 1
Photo 2
Photo 3
Photo 4
Photo 5
Photo 6
Photo 7
Photo 8
Please provide any other information that is relevant for your entry
This was a tiny box room before, with a very tired shower room adjacent. We had the rooms knocked together to create our family bathroom. We chose microcement for a seamless finish, and the waterproof wood effect panelling to make it more homely. We had an arch designed for the shower - any excuse to add an arch! I only wish I got to use my bath more than my kids do!
Voting is not enabled or out of date!

Grace, Austin

Photo 1
Photo 2
Photo 3
Photo 4
Photo 5
Photo 6
Photo 7
Photo 8
Please provide any other information that is relevant for your entry
Our en-suite which is a complete transformation. A fresh, modern ensuite designed with soft tones, warm textures, and subtle lighting to create a relaxed, spa-like feel. My home account Brook Home Project
Voting is not enabled or out of date!

Grace, H

Photo 1
Photo 2
Photo 3
Photo 4
Voting is not enabled or out of date!

Hannah, Bayliss

Photo 1
Photo 2
Photo 3
Photo 4
Photo 5
Photo 6
Photo 7
Photo 8
Please provide any other information that is relevant for your entry
To create this colourful en-suite bathroom, we completely gutted the existing dated and broken bathroom, made smart layout changes to maximise space and went big on colour in a way that still echoed our old cottage. By removing the old bidet, shrinking the cupboard and moving the sink to the other side of the room, we were able to make room for a bigger shower. We panelled the wall to bring a cottage feel, and wallpapered every wall in a bright, floral pattern, complemented with soft blue light shades and dimmer switches to keep a cosy feel. While the plumber did all the technical work, I learnt lots of new skills including panelling, skirting, upcycling the vanity unit, and wallpapering the whole room, window reveals and hidden cupboard above the toilet. I wholly recommend people treat bathroom decor as they would any other room in their home - if you treat and protect your surfaces well, you can be so much more creative in a bathroom than you might think!
Voting is not enabled or out of date!

Hannah, Roe

Photo 1
Photo 2
Photo 3
Photo 4
Photo 5
Please provide any other information that is relevant for your entry
We have underfloor heating, our main mirror is a TV. Small but luxury bathroom.
Voting is not enabled or out of date!

Heather, Nash

Photo 1
Photo 2
Photo 3
Voting is not enabled or out of date!

Hollie, Hedley

Photo 1
Photo 2
Photo 3
Voting is not enabled or out of date!

Holly, Scott

Photo 1
Photo 2
Photo 3
Photo 4
Please provide any other information that is relevant for your entry
We wanted to bring in colour and fun into our very bland new build cloakroom. I always feel a cloakroom should be a destination which creates a talking point and this is what we wanted to create. This fabulous wallpaper brings our whole home colour palette together and reminded me of my childhood somehow. And to take it up and over the ceiling made it event bolder. Mixed with the metallic mirrors to add texture and fun details.
Voting is not enabled or out of date!

Jade, watkins

Photo 1
Photo 2
Photo 3
Please provide any other information that is relevant for your entry
The space was designed and built by us. Our Instagram handle is @no14hectorshouse thank you so much x
Voting is not enabled or out of date!

Janice, Bristow

Photo 1
Photo 2
Photo 3
Photo 4
Photo 5
Photo 6
Please provide any other information that is relevant for your entry
My husband designed and installed this ensuite bathroom entirely himself. We extended it back by about 1 metre, which has made a huge difference to the space and flow. It hadn’t been touched in over 20 years and we love the transformation!
Voting is not enabled or out of date!

Jess, Ryan

Photo 1
Photo 2
Photo 3
Photo 4
Photo 5
Photo 6
Voting is not enabled or out of date!

Jessica, Prince

Photo 1
Photo 2
Photo 3
Please provide any other information that is relevant for your entry
This is my gorgeous boho bathroom with inspiration of a spa/ jungle oasis Perfect vibes and relaxation
Voting is not enabled or out of date!

Jodie, Cutter

Photo 1
Photo 2
Photo 3
Photo 4
Voting is not enabled or out of date!

Jodie, Kemp

Photo 1
Photo 2
Photo 3
Photo 4
Photo 5
Photo 6
Photo 7
Please provide any other information that is relevant for your entry
This bathroom started life exactly how you’d expect. White. Safe. Completely forgettable. Now it’s the opposite. The brief wasn’t just to “add colour.” It was to create a space that feels joyful, confident, and actually works hard. The green bath and pedestal sink set the tone, but the real transformation is in the layering: • warm yellow tiles to bring energy and contrast • a bold geometric floor to ground the space • patterned wallpaper to add personality in a room most people play safe Even the blind is matched to the wallpaper. Nothing is accidental. But this isn’t just about how it looks. The layout was pushed to fit the largest bath possible into the space because function matters just as much as aesthetics. A step was added for easy access, turning a design feature into something genuinely practical. That balance is the point. ? It’s a bathroom that works ? and one you actually want to spend time in It’s now my favourite room in the house. Not because it’s the most sensible… but because it proves that even the most functional spaces can have personality, joy, and a bit of rebellion.
Voting is not enabled or out of date!

Karen, Smith

Photo 1
Photo 2
Photo 3
Photo 4
Photo 5
Photo 6
Photo 7
Photo 8
Please provide any other information that is relevant for your entry
We took the wall down between the original bathroom and the 4th bedroom as it was only a box room , to make a bigger main bathroom. We used some of the original stained glass from the windows in the bathroom cupboard and the door .
Voting is not enabled or out of date!

Kate, Turner

Photo 1
Photo 2
Photo 3
Photo 4
Photo 5
Please provide any other information that is relevant for your entry
Our bathroom was part of our renovation in 2024, we went from a traditional 1930's separate toilet (see picture of before) and bathroom to one family bathroom inspired by home accounts on Instagram.
Voting is not enabled or out of date!

Katelynn, McCarthy

Photo 1
Photo 2
Photo 3
Photo 4
Photo 5
Please provide any other information that is relevant for your entry
Before and after bathroom transformation. From a wasted space to our dream bathroom❤️
Voting is not enabled or out of date!

Katie, Brown

Photo 1
Photo 2
Photo 3
Photo 4
Photo 5
Photo 6
Please provide any other information that is relevant for your entry
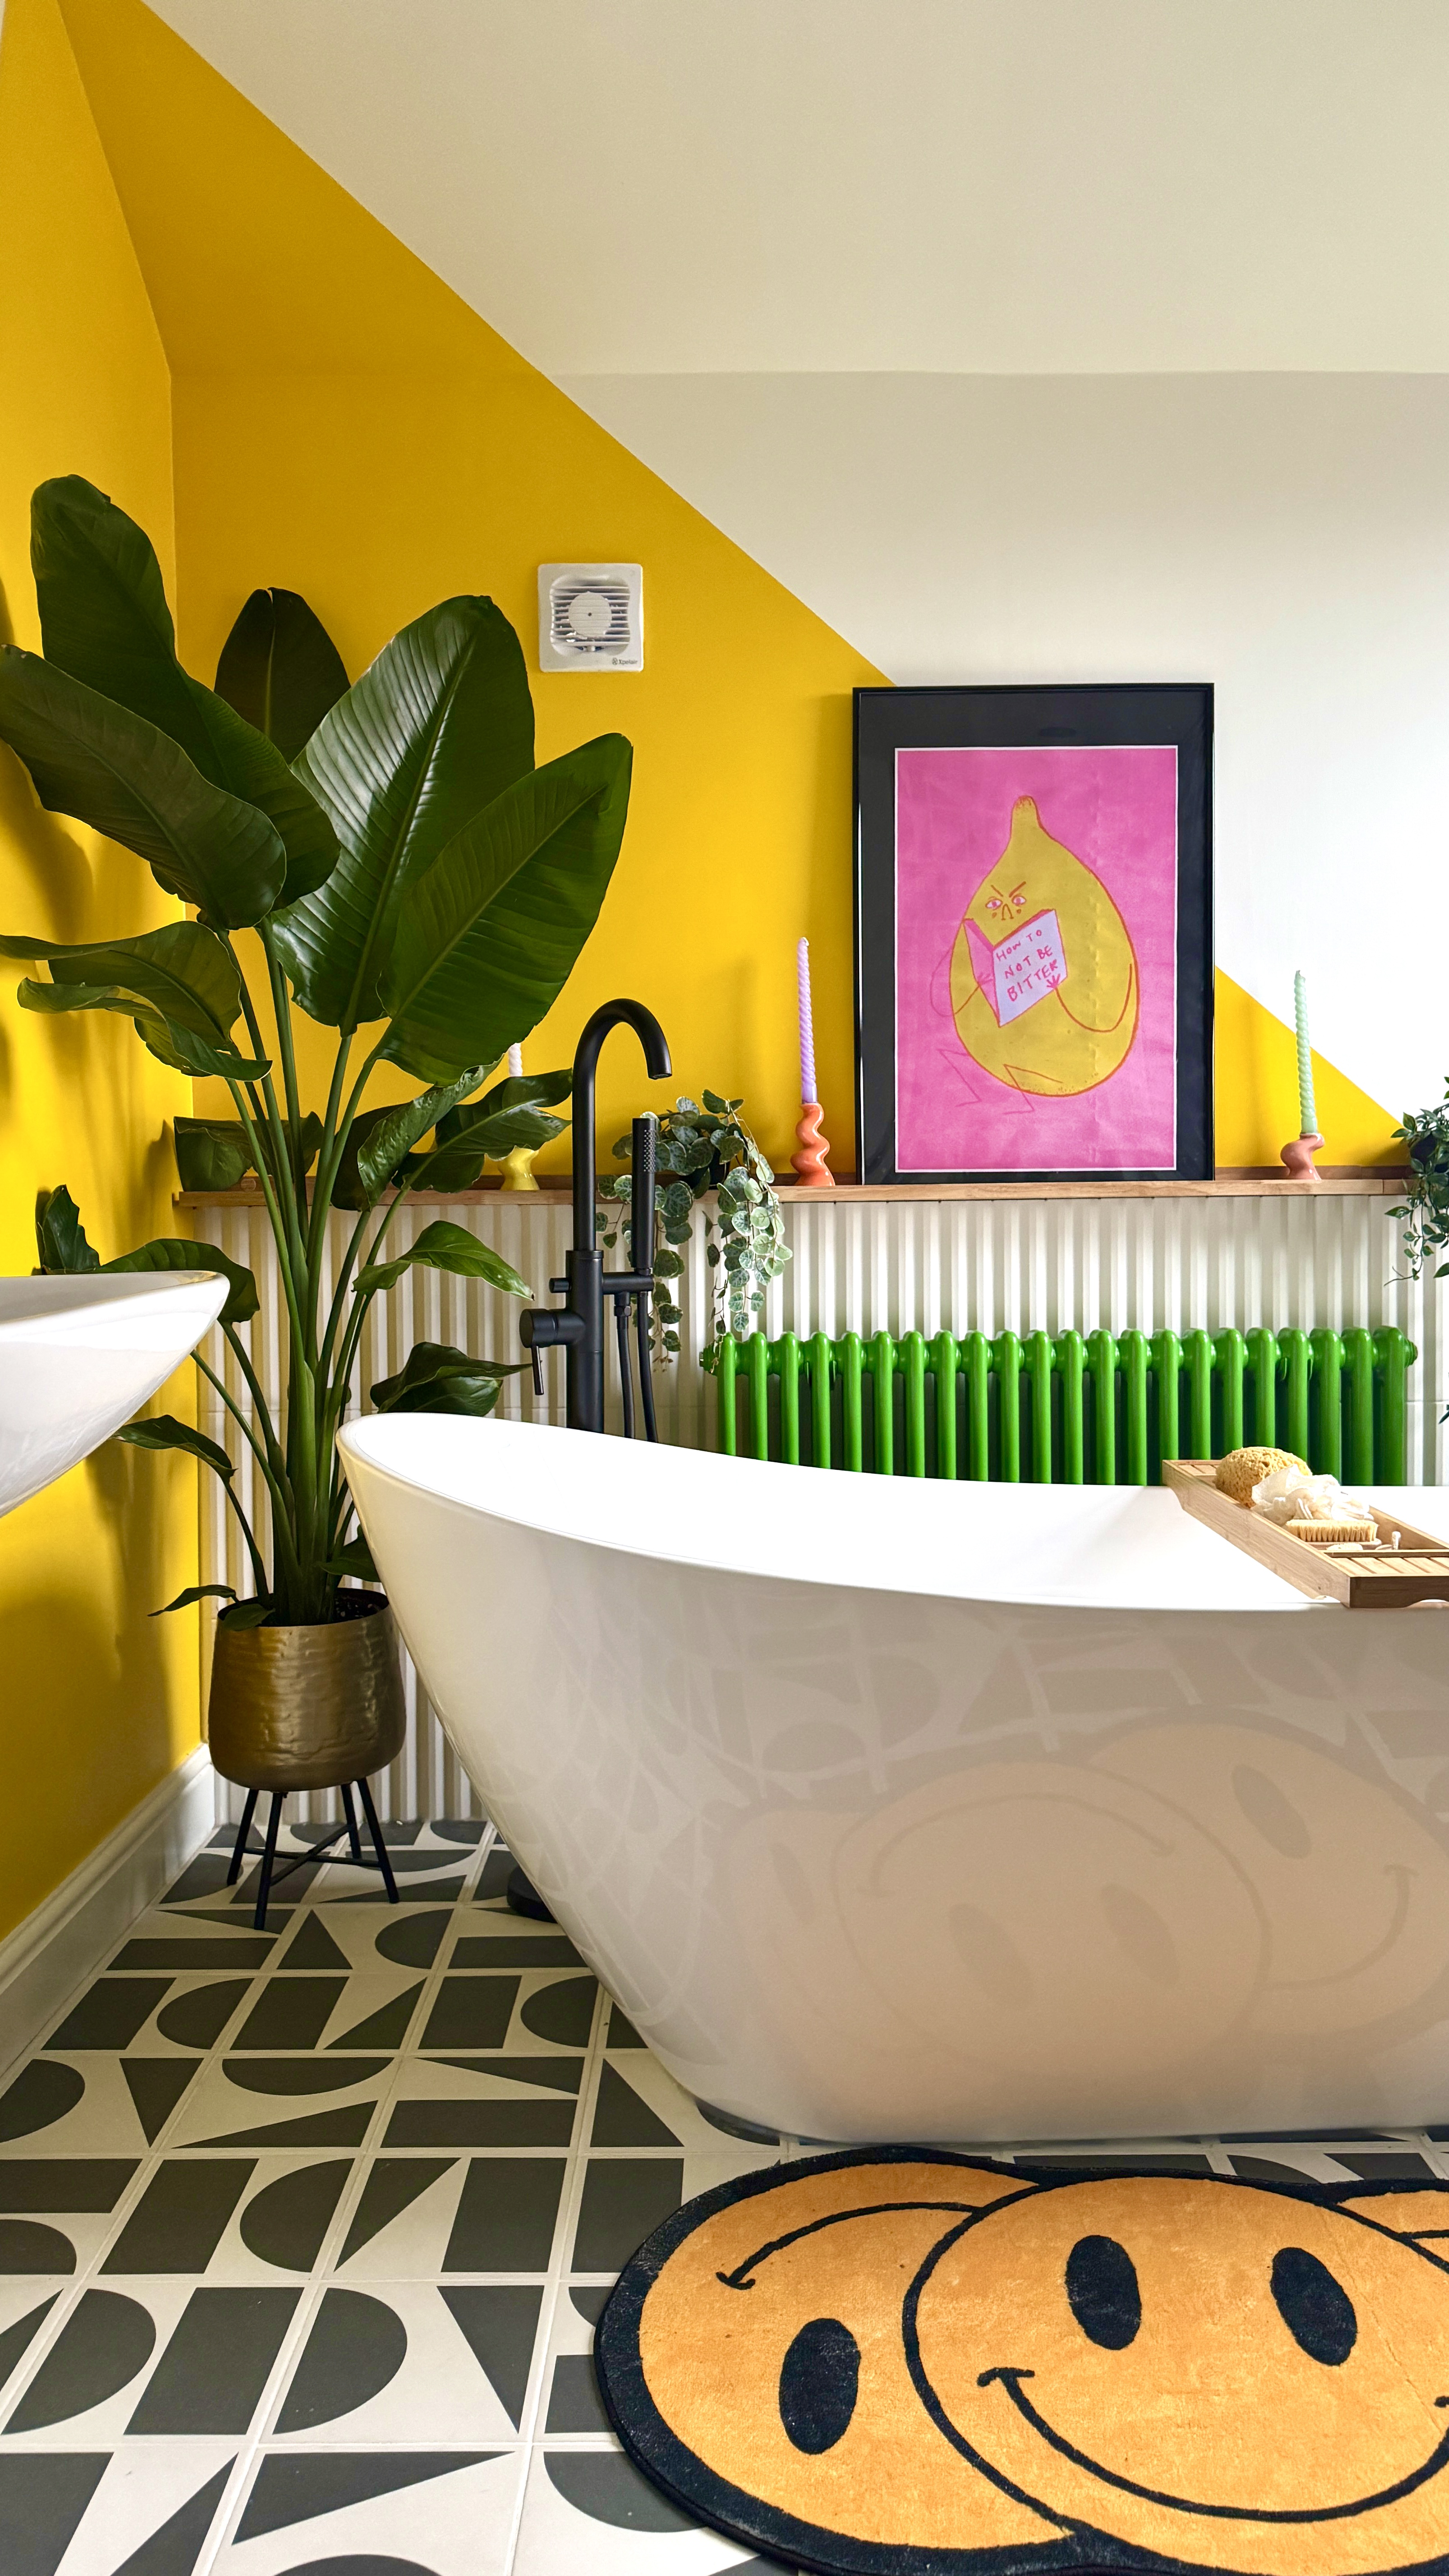
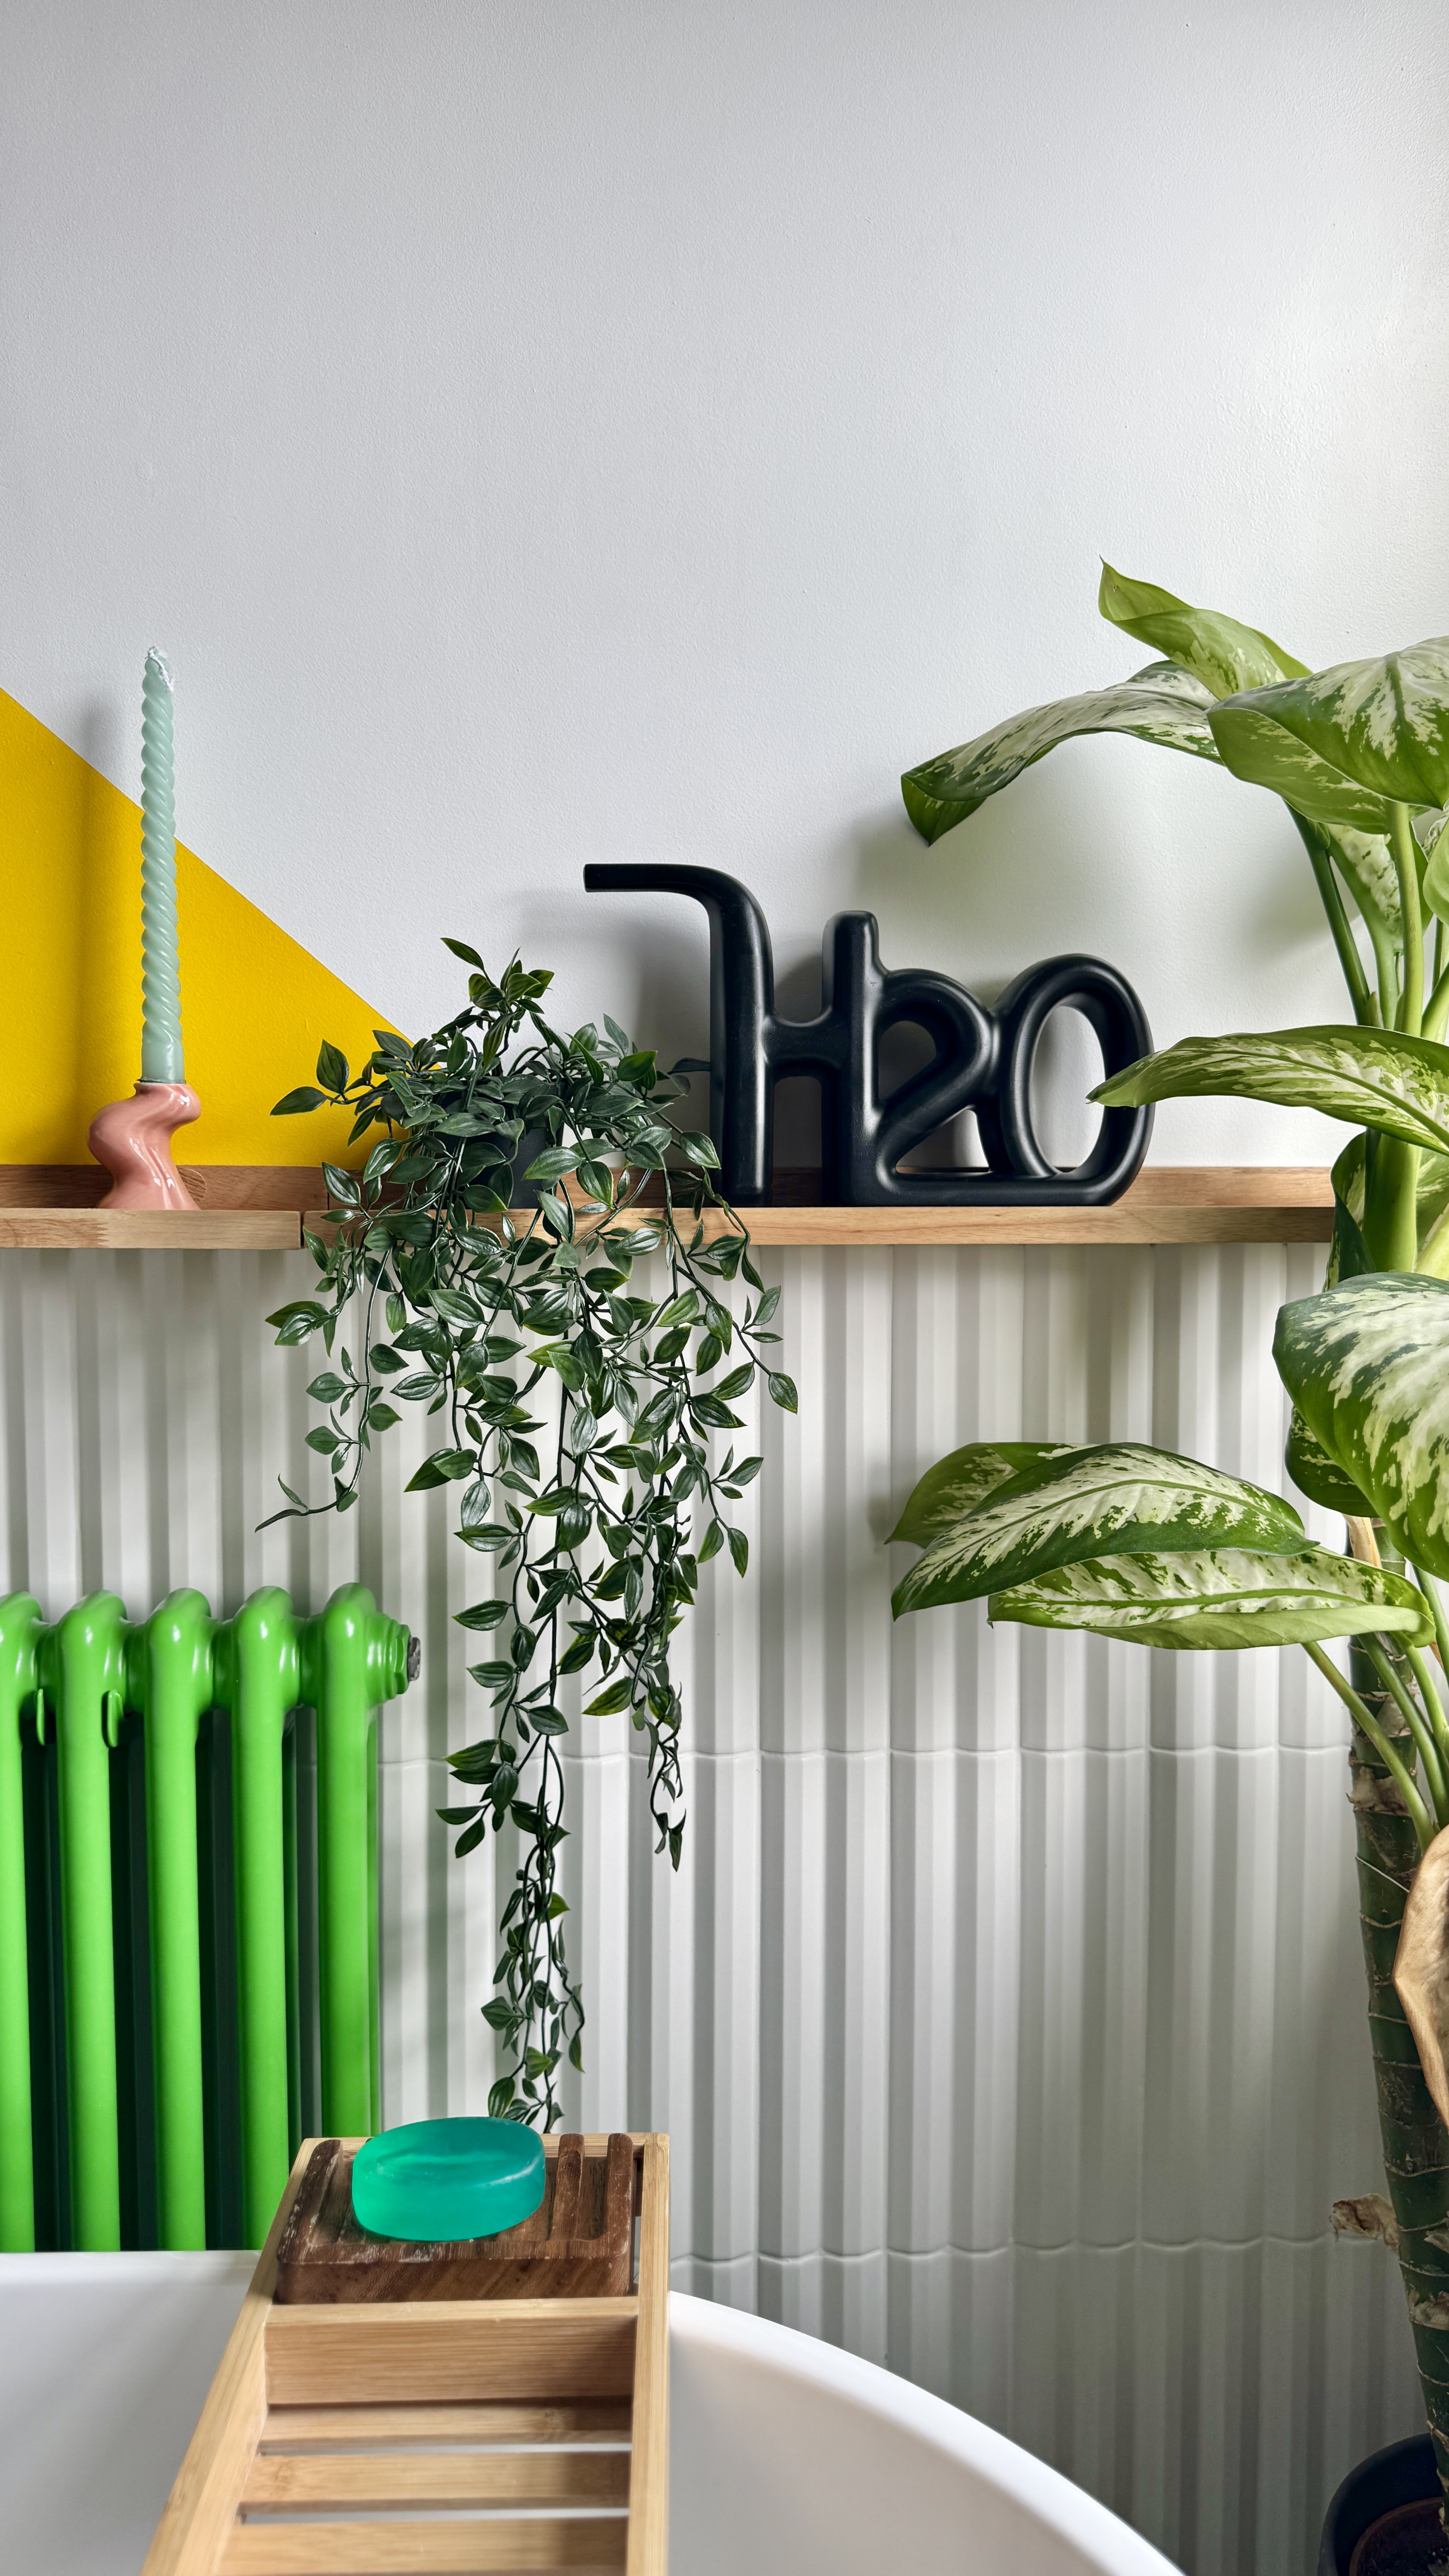
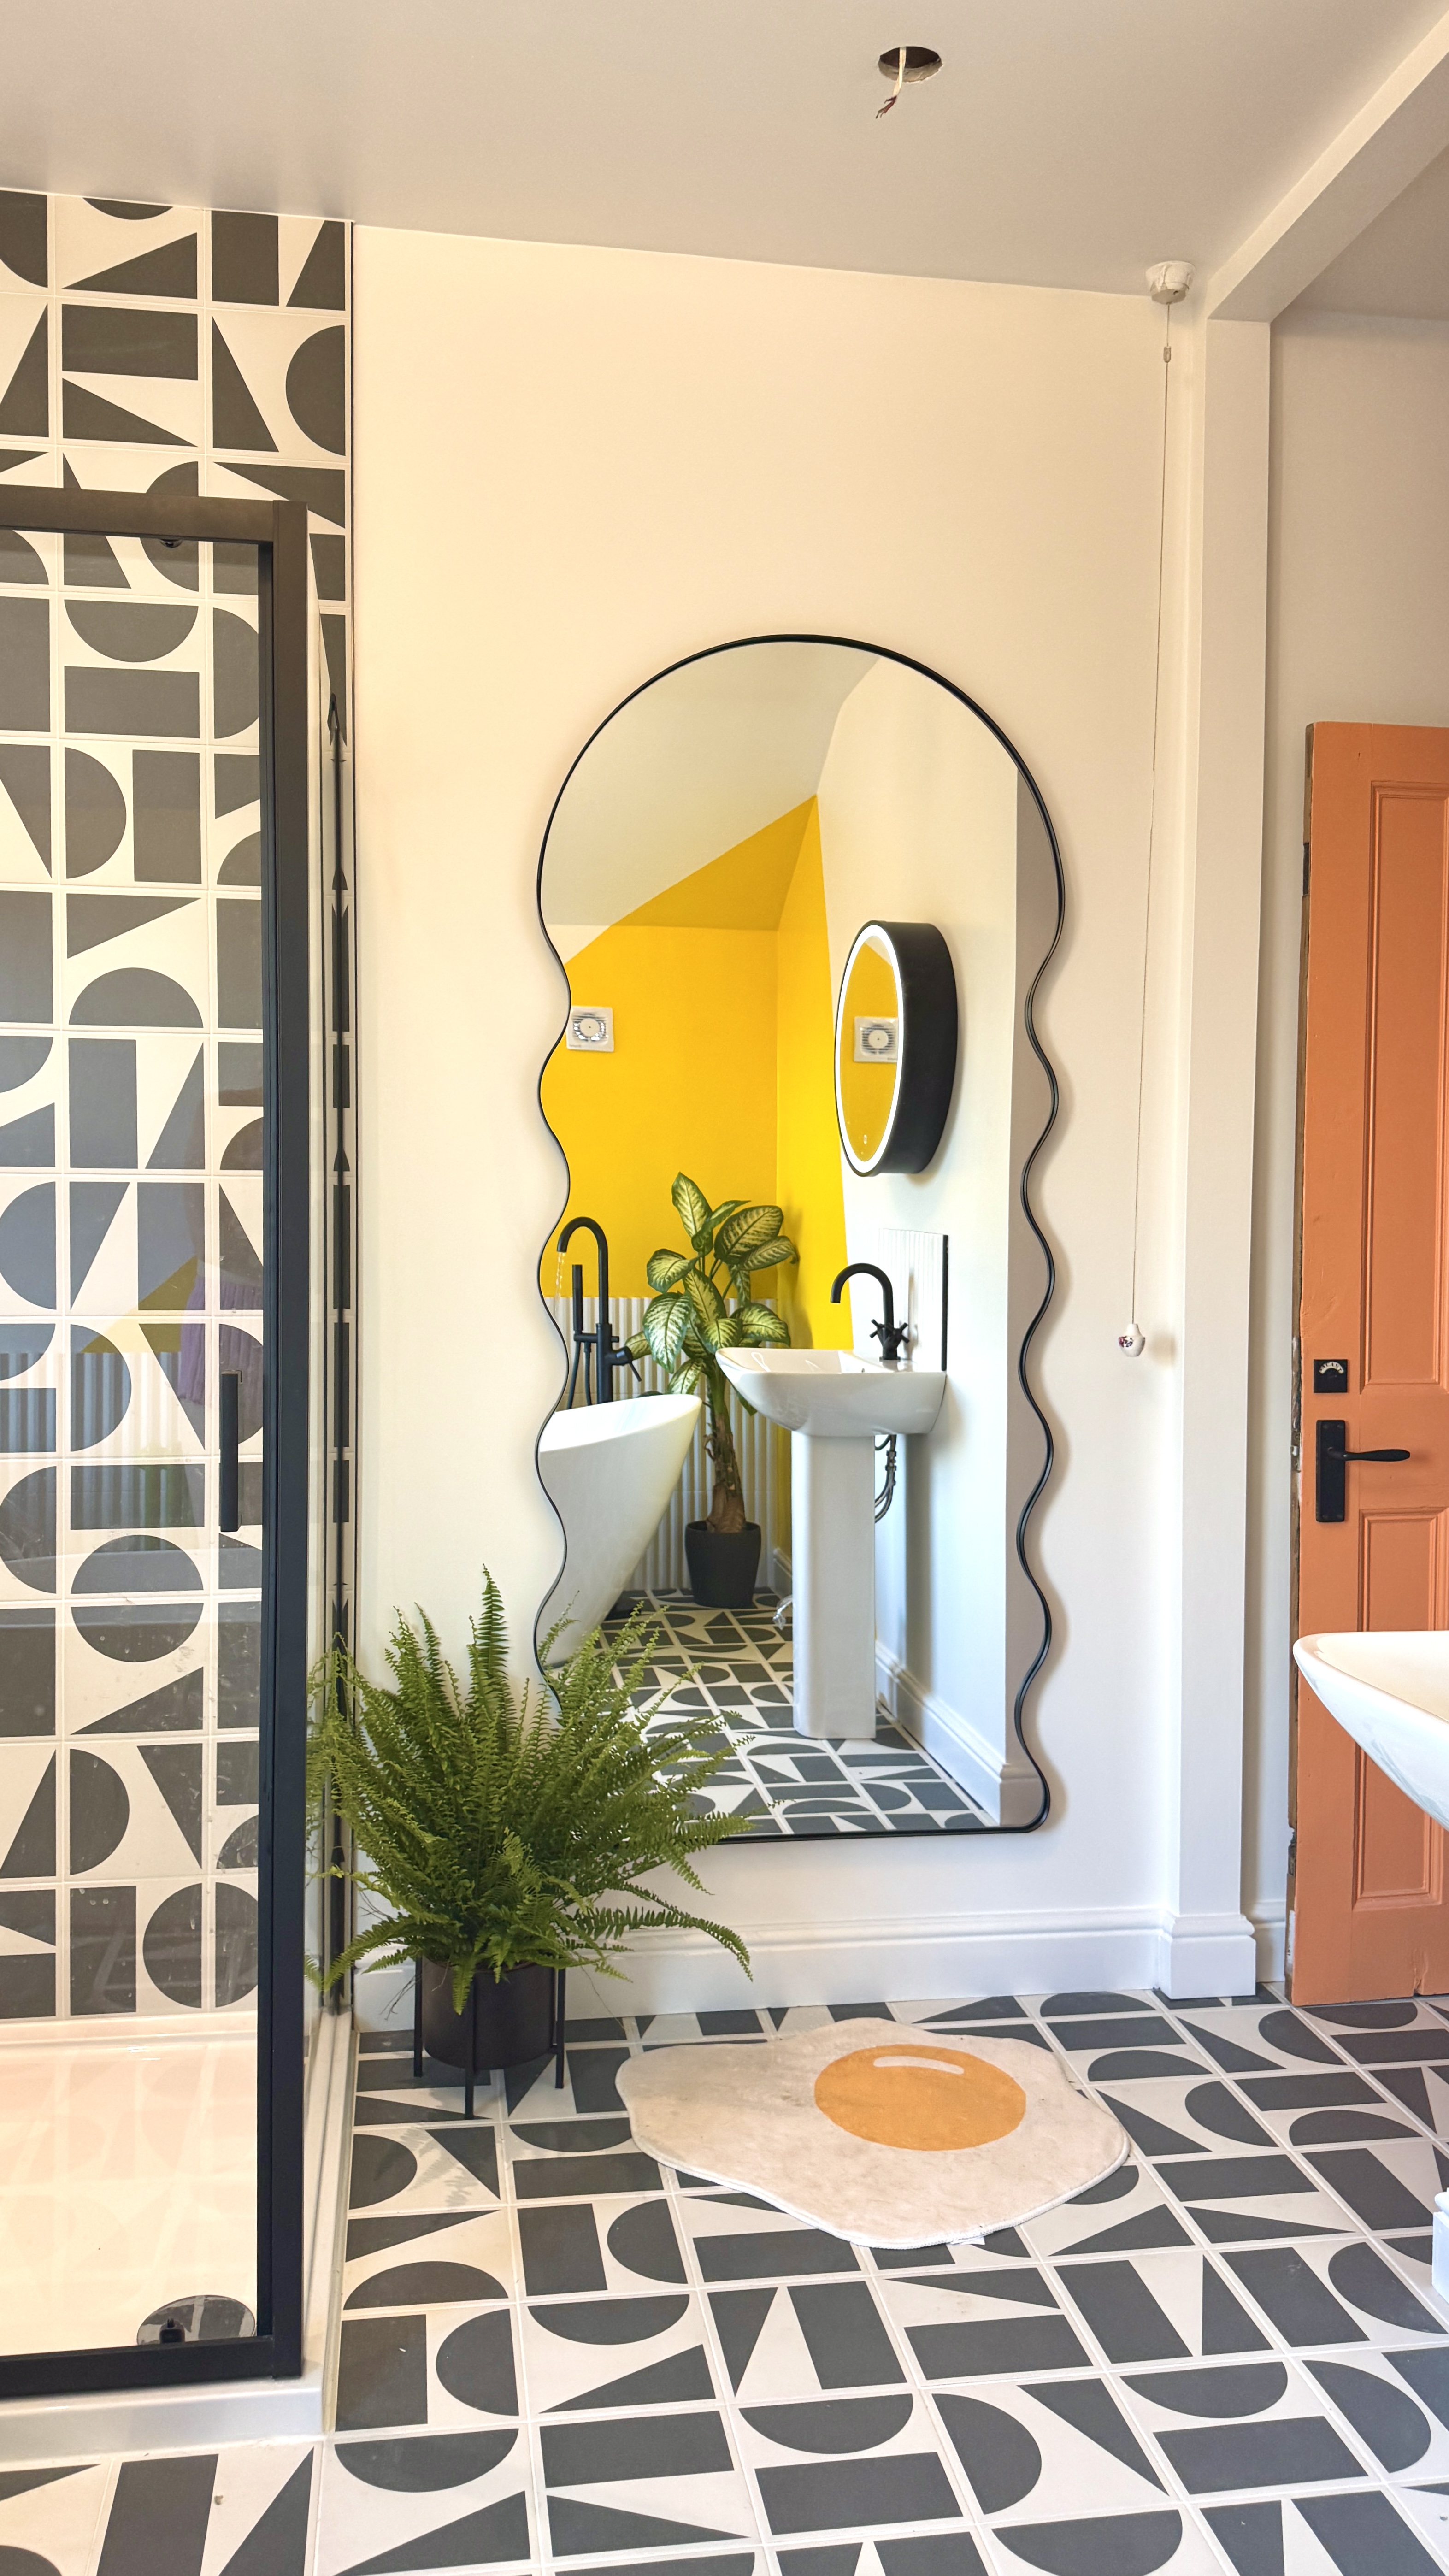
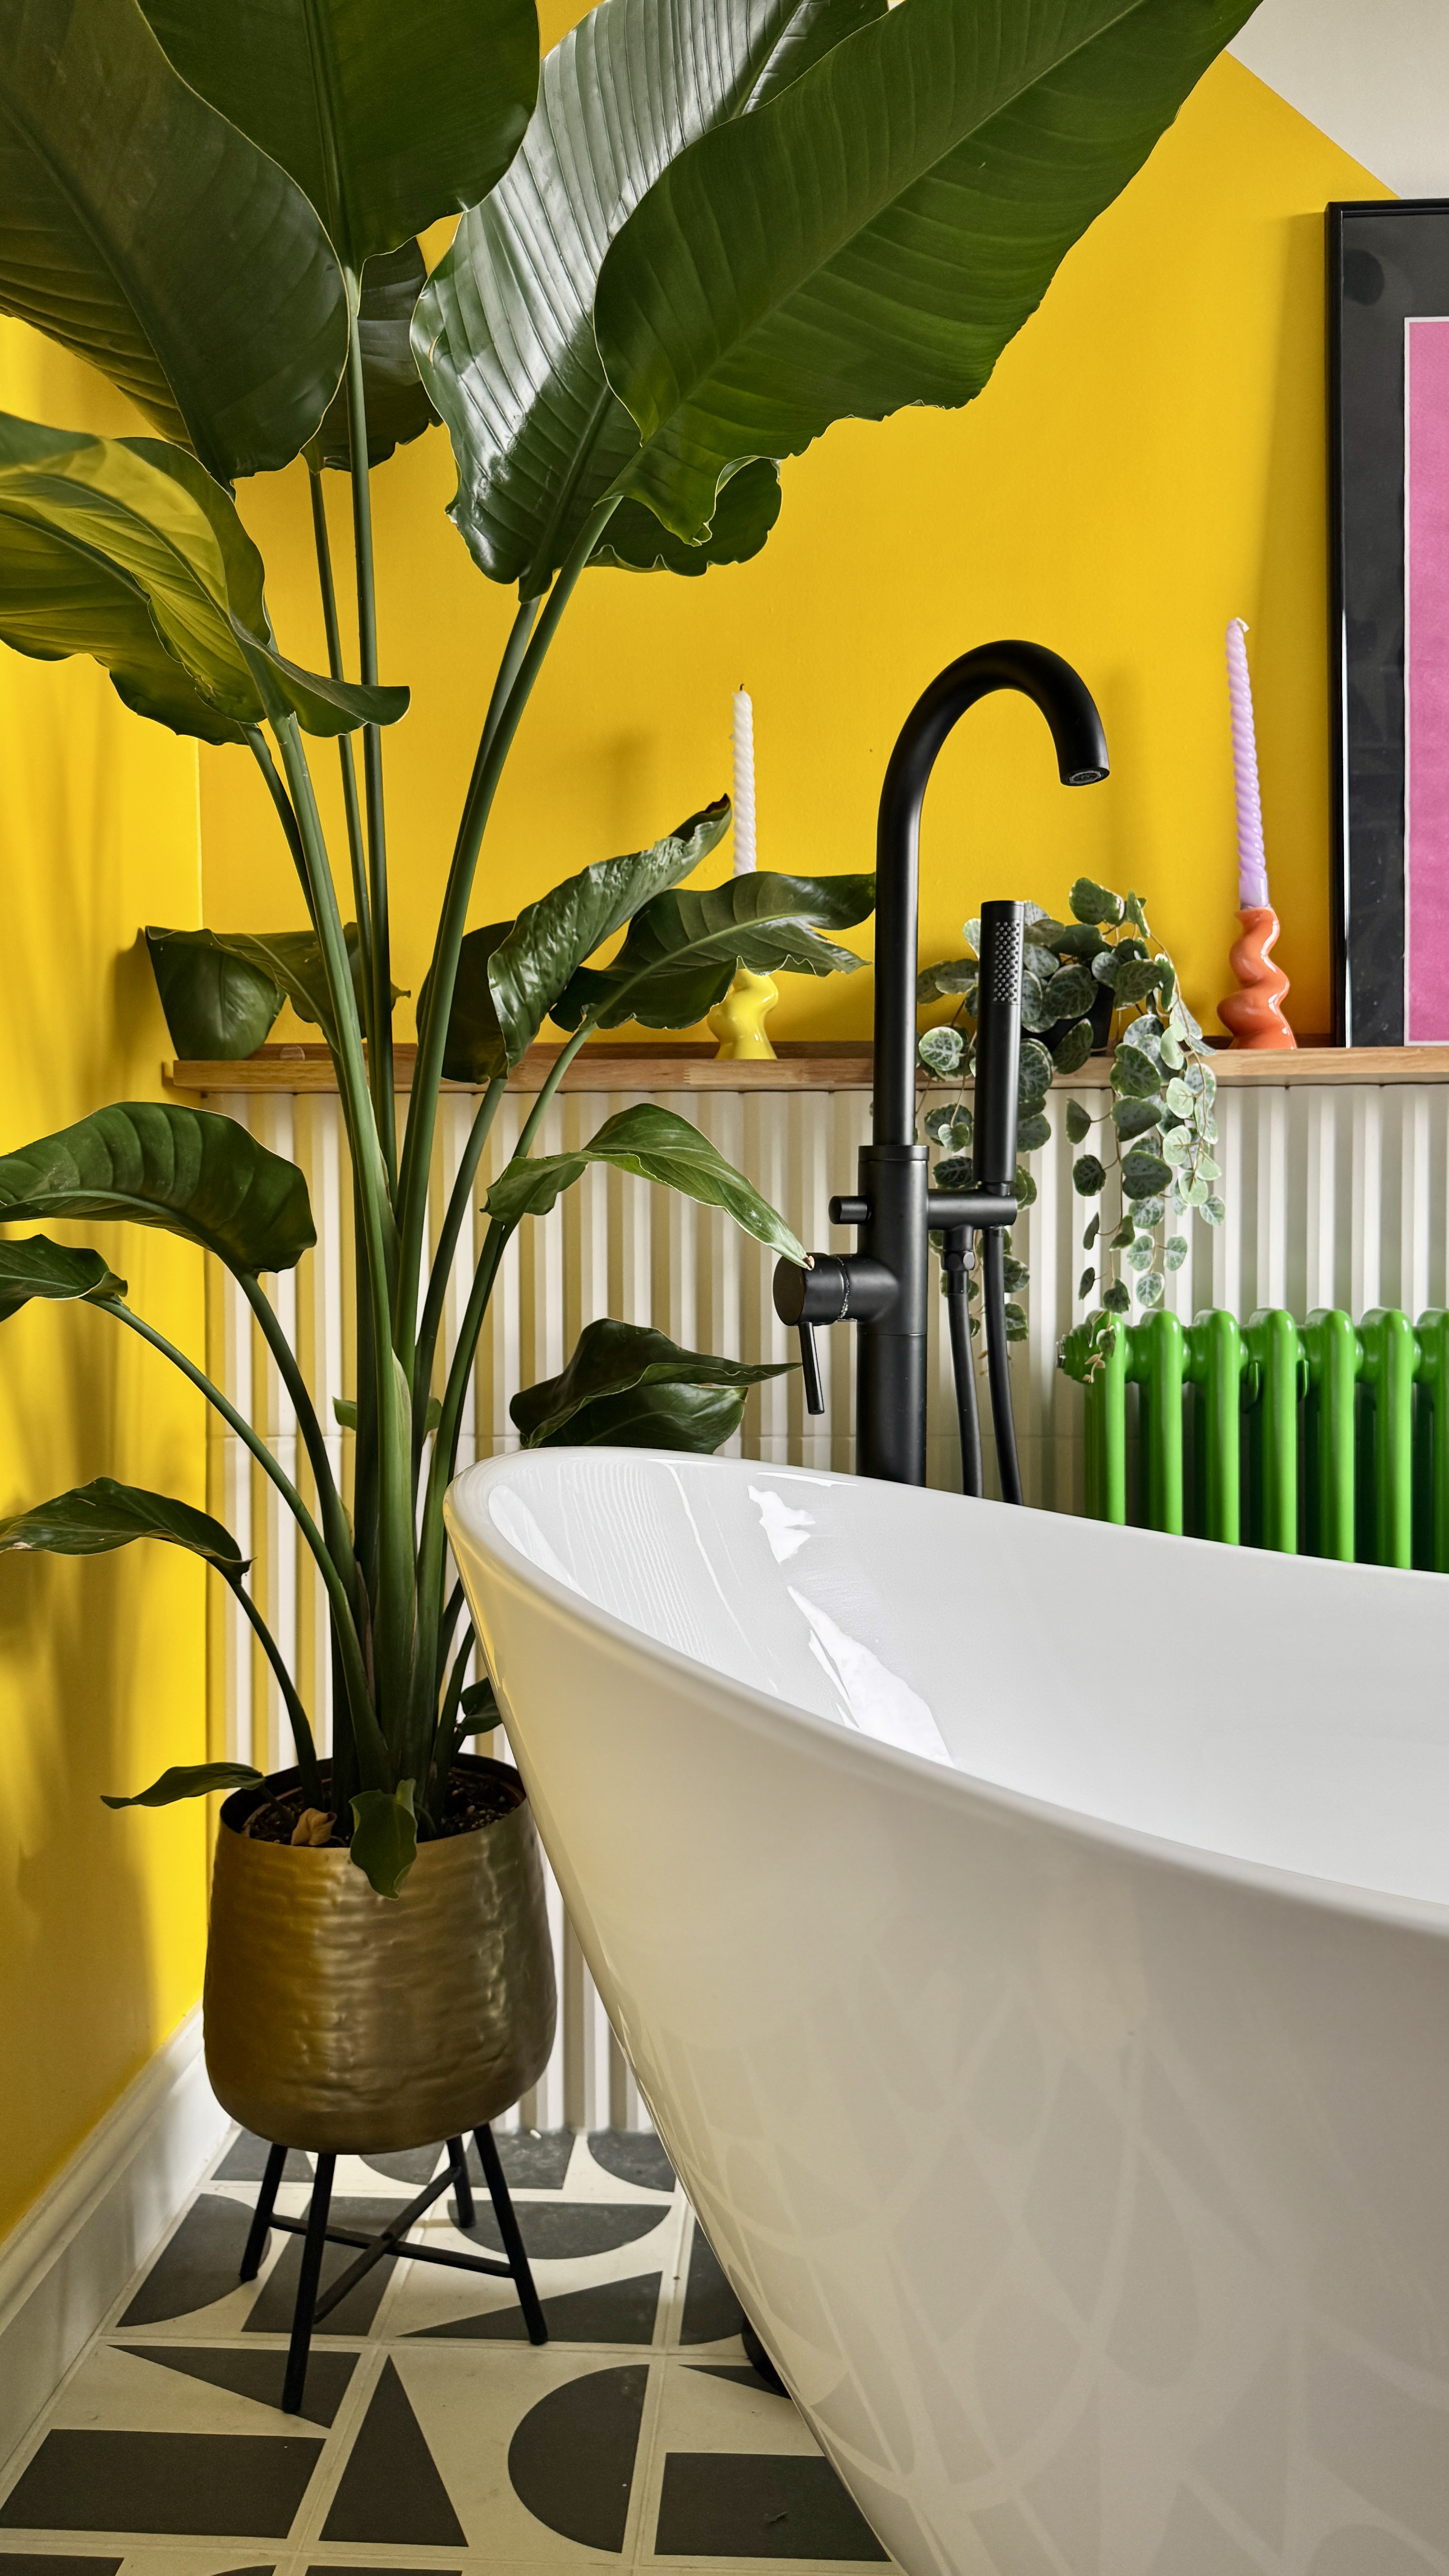
We wanted our bathroom to mirror the bold choices throughout the rest of our home and create a tropical haven. It’s south facing so wanted to maximise the natural light with the use of white and an intense bright yellow. We chose a mixture of geometric tiles and fluted tiles to create pattern and texture and the use of plants to add additional pops of colour and enhance the tropical vibe.
Voting is not enabled or out of date!

Kayleigh, McInulty

Photo 1
Photo 2
Photo 3
Photo 4
Photo 5
Please provide any other information that is relevant for your entry
The bathroom of our dreams! With the bath that used to touch the literal outside floor (eeek) now ripped out, we installed a double space shower, penny tile flooring, microcement walls, floor to ceiling shower tiles and brass accents. The vanity was a DIY job! I thrifted a chest of drawers, made a white concrete top, plumbed in the water works and added a sink and tap!
Voting is not enabled or out of date!

Kim, Lind

Photo 1
Photo 2
Please provide any other information that is relevant for your entry
Lindwhitehome - Instagram
Voting is not enabled or out of date!

Kimberley-Jade, Agate

Photo 1
Photo 2
Photo 3
Please provide any other information that is relevant for your entry
A tiny cloakroom with maximum impact!
Voting is not enabled or out of date!

Lara, Winter

Photo 1
Photo 2
Photo 3
Photo 4
Photo 5
Photo 6
Photo 7
Please provide any other information that is relevant for your entry
After previously painting our family bathroom dark green, I wanted to bring it back to a calmer, more relaxed feel while still keeping some personality. Rather than ripping everything out, I used vinyl stick-on tile panels and added panelling throughout to give it more texture and warmth. I also included some budget-friendly touches like a battery-powered ceiling pendant, homemade wall art, and a shower curtain rod I adapted to hang from the ceiling. It’s now a calm, practical space that works for everyday family life, with a fun pop of colour from the chequered floor.
Voting is not enabled or out of date!

Laura, Crombie

Photo 1
Photo 2
Photo 3
Photo 4
Photo 5
Please provide any other information that is relevant for your entry
Entering two bathrooms - both were exceptionally dated before and have been transformed on a shoestring budget doing everything DIY. We were quoted over £15k for the main bathroom but did everything ourselves for £4k - learning to plumb from YouTube and almost getting divorced over the tiling!
Voting is not enabled or out of date!

Laura, Gibson

Photo 1
Photo 2
Photo 3
Photo 4
Please provide any other information that is relevant for your entry
I was inspired by our beautiful Victorian house when I designed our bathroom. I almost wanted it to feel like it another original feature of the house! I especially love the angled wall where our sink is, and the curved design of our sink unit.
Voting is not enabled or out of date!

Laura, Major

Photo 1
Photo 2
Voting is not enabled or out of date!

Lauren, Brady

Photo 1
Voting is not enabled or out of date!

Lauren, Flower

Photo 1
Photo 2
Photo 3
Photo 4
Photo 5
Photo 6
Photo 7
Please provide any other information that is relevant for your entry
Our newly renovated bathroom and en-suite
Voting is not enabled or out of date!

Leah, Hodson

Photo 1
Photo 2
Photo 3
Photo 4
Photo 5
Photo 6
Photo 7
Photo 8
Please provide any other information that is relevant for your entry
This bathroom renovation began out of necessity. Shortly after moving in, cracks in the existing tiles and grout caused a leak, accelerating our plans to completely reimagine the space. But what started as a practical renovation quickly became an opportunity to correct the room’s awkward proportions and create a bathroom that felt calm, balanced and timeless. Originally built in the 1960s, the bath and toilet were once separate rooms that had later been combined, leaving behind an unusual arrangement of one large window beside a much smaller one. Creating symmetry became the starting point for the design. By reducing the size of the larger window to mirror the smaller one, I was able to establish a more harmonious layout - and frame the sink and mirror as the natural focal point when entering the room. From there, every design decision fell into place. Zellige style wall tiles bring softness, texture and subtle movement, while checkerboard floor tiles add depth, character and a classic sense of pattern. The result is a bathroom that feels thoughtfully layered and beautifully timeless - balancing architectural refinement with warmth and personality.
Voting is not enabled or out of date!

Lisa, Shaver

Photo 1
Photo 2
Photo 3
Photo 4
Voting is not enabled or out of date!

Lorah-Kate, Allen

Photo 1
Photo 2
Photo 3
Voting is not enabled or out of date!

Luiza, Frediani Oxley

Photo 1
Photo 2
Photo 3
Please provide any other information that is relevant for your entry
After years of living with a generic, "investor-grade" bathroom, the space felt completely disconnected from our lifestyle. As a household of "non-bath people," our daily use of a poorly positioned shower caused constant splashing, eventually rotting the window frame. We decided to gut the room entirely to create a space that was both structurally sound and aesthetically intentional. Our goal was a look that felt "beautifully classic, but never boring." We anchored the room with traditional black-and-white penny tile flooring and wrapped the walls in a vibrant mint green subway tile, punctuated by sharp black borders for a graphic, sophisticated edge. By swapping the bulky bathtub for a modern black-framed shower enclosure, we didn't just solve the moisture issues; we reclaimed significant floor real estate. This layout shift was a functional game-changer, finally allowing us to move our cat’s litter tray from the living room into the bathroom. The result is a space that feels architecturally thoughtful, highly functional, and brimming with personality.
Voting is not enabled or out of date!

Maisie, Cookson

Photo 1
Photo 2
Photo 3
Photo 4
Photo 5
Voting is not enabled or out of date!

Megan, Butler

Photo 1
Photo 2
Photo 3
Photo 4
Photo 5
Please provide any other information that is relevant for your entry
In collaboration with Drench and Fired Earth, we created a calming space that uses the small room to it's maximum capacity. We added a light well as we have no windows in the room and it has made a huge difference to the feeling of the space.
Voting is not enabled or out of date!

Michelle, Corr

Photo 1
Photo 2
Photo 3
Photo 4
Photo 5
Photo 6
Photo 7
Please provide any other information that is relevant for your entry
We had an empty room to work with and designed the bathroom. The ceiling is a very light sponge effect. The last photo doesn’t do it justice but it’s beautiful
Voting is not enabled or out of date!

Nick, Toteda

Photo 1
Photo 2
Photo 3
Photo 4
Photo 5
Photo 6
Please provide any other information that is relevant for your entry
We wanted our bathroom to feel like a living room, which is why we went with curtains - a unique but elegant touch. Paired with funky handmade tiles from Mandarine Stone, which are equally beautiful and imperfect - there’s always beauty in imperfection, and you always learn through DIY. We then continued to redefine social norms with a his and his sink, a custom vanity unit, huge ceilings, cornicing, honed gold marble, brass fixtures, and underfloor heating for a hidden touch of warmth. A space you no longer come in to get ready, but a place you can enjoy just like a living room (almost).
Voting is not enabled or out of date!

Nicky, Neeve

Photo 1
Photo 2
Photo 3
Photo 4
Voting is not enabled or out of date!

Paloma, Quinn Mills

Photo 1
Photo 2
Photo 3
Photo 4
Photo 5
Photo 6
Photo 7
Photo 8
Please provide any other information that is relevant for your entry
We have been DIY renovating for 30 months and started with a pretty rotten and sad violet bathroom. Our objective was to build a bathroom that looked hi-quality and that it had always been there. We totally gutted the room rebuilding stud walls that had black mould, adding a new floor and joists. We had the bowing side wall rebuilt as a cavity wall and took the opportunity to change from a square window to a classic looking round window. We decided to make it wetroom standard with a lipless walk in shower under the slightly vaulted ceiling the space would allow. Adding light was important to us so we added a skylight on the angled ceiling so you can see (the rare) blue sky in Wales whilst showering. We went for an octagon and dot marble floor, marble skirting and green and white metro tiles, quite ambitious for our first ever endeavour into tiling. The shower and bathroom suite are all brass Burlington pieces to complete our traditional looking room.
Voting is not enabled or out of date!

Rebecca, Anderson

Photo 1
Photo 2
Photo 3
Photo 4
Photo 5
Photo 6
Photo 7
Photo 8
Please provide any other information that is relevant for your entry
Designed it completely myself and decorated it ourselves. The mural was gifted in a collab. I added fringe from eBay to Next ceiling and wall lights. I needed long fine object d’art for each side of the window and so I made the “scales” inspired from Roman mythology and astrology to tie in with the goddess Venus on the wall. I used two “hand” towel holds from Dunelm, some gold chain, cut circles off mdf and added Oyster shell ornaments onto the “scales”
Voting is not enabled or out of date!

Sal, Riley

Photo 1
Photo 2
Photo 3
Photo 4
Photo 5
Photo 6
Photo 7
Photo 8
Please provide any other information that is relevant for your entry
From Bedroom to Bathroom: A layered, spa Like retreat defined by texture and warmth This space was originally a sixth bedroom, reconfigured into a bathroom to better suit the needs of the family. The transformation focuses on creating a calm, neutral retreat that feels both functional and restorative, achieved through layered textures and considered detailing. Marble within the shower niche adds a subtle focal point and a refined finish, while the herringbone flooring flows into the bespoke vanity unit, grounding the scheme and creating balance against the softer tones used throughout. Warmth is introduced through natural, tactile elements, including a handwoven rug in wool, adding warmth and texture underfoot. A vintage wooden stool and simple decorative pieces, such as a vase, bring an effortless, lived in quality that enhances the spa like feel without the space feeling overly styled. Shiplap panelling introduces quiet texture and architectural interest, reinforcing a sense of craftsmanship and depth. A freestanding bath completes the room, making full use of the generous proportions and anchoring the space as a calm, spa inspired sanctuary.
Voting is not enabled or out of date!

Salma, Chatto

Photo 1
Photo 2
Photo 3
Photo 4
Photo 5
Please provide any other information that is relevant for your entry
Welcome to my bathroom — a little whimsical wonderland ✨ Layered with pattern, colour, and personality, this space came together with clever budget ideas (including my hand-painted “wallpaper” using just one tester pot ?). I’ve filled it with soft pink accents, vintage treasures, and all the little details that make it feel magical, playful, and completely me ?
Voting is not enabled or out of date!

Sandra, Czachur

Photo 1
Photo 2
Photo 3
Photo 4
Photo 5
Photo 6
Please provide any other information that is relevant for your entry
My bathroom is my little sanctuary, a space where calm meets creativity. Thoughtfully styled with timeless details and personal touches, it’s more than just a room; it’s where I pause, reset, and find a moment of quiet beauty in everyday life.
Voting is not enabled or out of date!

Scarlett, Mack

Photo 1
Photo 2
Photo 4
Photo 5
Photo 6
Photo 7
Please provide any other information that is relevant for your entry
Photos 1&6 are photos of the before shots and the rest are photos of after I had redecorated to my own style. Thanks
Voting is not enabled or out of date!

Sophie, Murphy

Photo 1
Photo 2
Photo 4
Photo 5
Photo 6
Photo 7
Please provide any other information that is relevant for your entry
For this bathroom the panelling that you see behind the roll top is original Georgian. We spend four months hand sanding and stripping off years of paint and seven layers of wallpaper. We then fully refurbished it. It was done to a reasonable budget as well. I lightened the beams using the french chip hack and my husband plumbed everything in.
Voting is not enabled or out of date!

Sophie, Stotesbury

Photo 1
Photo 2
Photo 3
Photo 4
Photo 5
Please provide any other information that is relevant for your entry
A compact en suite designed to maximise both function and style. By using large-format marble-effect tiles and a consistent palette, the space feels open and cohesive despite its limited footprint. Brushed brass fittings add warmth and contrast, while carefully considered storage and layout ensure practicality without compromising on design. The result is a small space that works efficiently while delivering a calm, luxurious feel.
Voting is not enabled or out of date!

Stacey, Hawkes

Photo 1
Photo 2
Photo 3
Photo 4
Photo 5
Photo 6
Photo 7
Photo 8
Please provide any other information that is relevant for your entry
Our main family bathroom is a bold but functional space which oozes personality and drama. The copper roll top, claw foot bath tub is the star of the show, and stands proud against the black and white Victorian Mosaic floor tiles, and black painted walls. The wet room style shower enclosure and 'barely there' glass screen draws the eye across the room and gives the illusion of an uninterrupted floor space and the emerald green wall tiles laid in a herringbone pattern compliment the traditional brushed brass shower fixings and freestanding bath mixer tap. An upcycled, mahogany sink unit fits neatly into the space and lush, green foliage is dotted around to bring some interest to the space. The lighting is considered throughout, with floor lighting to bring a sense of serenity when bathing and a wall light to add a softer light when cleansing. Dramatic gold gilt framed quirky artwork above the bath tub finishes the space beautifully.
Voting is not enabled or out of date!

Suzanne, Harwood

Photo 1
Photo 2
Photo 3
Photo 4
Photo 5
Photo 6
Photo 7
Photo 8
Please provide any other information that is relevant for your entry
My bathroom is inspired by the calm of the beach, featuring a walk-in shower with a recessed niche for lotions and gels. Large sand-toned wall tiles beautifully complement the floating oak vanity unit and mirrored cabinet, creating the perfect apartment bathroom—stylish, peaceful, and refreshing.
Voting is not enabled or out of date!

Suzy, Broome

Photo 1
Photo 2
Photo 3
Photo 4
Please provide any other information that is relevant for your entry
This bathroom was built from scratch when we extended our previous home. I knew I wanted something colourful and fun! So I designed a pink and turquoise bathroom complete with anatomical artworks! I’ve always wondered why people just pick white bathroom suites when bathrooms can be a perfect place to inject colour and fun.
Voting is not enabled or out of date!

Victoria, Boyce

Photo 1
Photo 2
Photo 3
Photo 4
Photo 5
Photo 6
Please provide any other information that is relevant for your entry
This bathroom formed part of our new extension and presented a unique design challenge. As someone who doesn’t naturally visualise spaces, I approached it with careful planning and considered detailing, determined to create a calm, restorative environment—without ever physically stepping into the completed room during the design phase. The original architectural plans did not include a window. Recognising the importance of natural light in achieving a serene and functional bathroom, I introduced a Velux roof window within the sloped ceiling. This single intervention transformed the space, flooding it with daylight and enhancing both its practicality and atmosphere. Lighting was layered to complement this natural source. Ceiling lights provide bright, even illumination, creating an airy, open feel. In contrast, the wall lights offer a softer glow—ideal for winding down in the evening—adding warmth and a more intimate ambience. This dual lighting scheme ensures the room adapts seamlessly from energising morning routines to relaxing night-time rituals. Material selection was intentionally understated yet highly considered. Three concrete-grey tiles, each in a different format, were used to subtly define zones without overwhelming the space. Rather than selecting a statement tile, I chose finishes that quietly unify the room’s elements, allowing texture, proportion, and layout to take precedence. A carefully sourced 1960s sideboard introduces character and warmth. The muted tile palette allows this vintage piece to stand out, contributing to a refined, spa-like atmosphere. To ensure practicality, the drawers were expertly reconfigured to accommodate plumbing, preserving valuable storage while maintaining the integrity of the design. Introducing greenery further softens the scheme, enhancing the calming aesthetic and bringing a sense of life and warmth to the space. The simple walk-in shower aligns with our desire for clean, uninterrupted lines. Reeded glass provides privacy while allowing light to flow through the room, reinforcing the cohesive and tranquil feel of the design. The result is a thoughtfully curated bathroom that balances function with atmosphere—transforming a technically challenging extension space into a light-filled, restorative retreat.
Voting is not enabled or out of date!

Joanna, Fletcher

Photo 1
Photo 2
Photo 3
Photo 4
Photo 5
Photo 6
Photo 7
Photo 8
Please provide any other information that is relevant for your entry
Self-building is a journey of trial and error, where mistakes are simply part of the process. When I designed my first bathroom, I certainly made a few big ones. I rushed my tile choices to meet a deadline, only to end up removing them all 2 days later. I also didn’t properly consider the space around the toilet—something that became very apparent a few years down the line with young children in the house! In the end, I had to add extra tiling to that area (a lesson learned thanks to little boys and their questionable aim!) it’s a small but practical bathroom with all the children’s bathroom delights tucked away in the vanity drawer!
Voting is not enabled or out of date!

Lexie, Carducci

Photo 1
Photo 2
Photo 3
Please provide any other information that is relevant for your entry
I call this our night club bathroom, because of the dark colours and the use of LEDs. I wanted to recreate a spa feeling that is often the vibe in hotels where you feel relaxed and zen. This is our en suite to our main bedroom and I love showering in here when I wake up, there are no bright lights or white tiles that are overwhelming with light, instead the mix of dark tiles feels calm. We mixed two dark slate Minoli tiles, the majority are smooth but accented with a textured black on the vanity wall that keeps the natural feel we have used throughout the home. The LED lights were an important feature to us too, they are motioned sensored so will turn on if you use the rest room in the night without triggering the fan or need for the main spotlights so as not to wake anyone up. The open wood shelving are also lit by LEDs and allow us to add our own personal stamp with plants, books and accessories. We also used the gun metal coloured fixtures for the shower instead of matte black to elevate the space with another texture and colour instead of it being too black. My favourite feature is the way the LEDs around the mirror hit the textured tile.
Voting is not enabled or out of date!

Monalisa, Quaidoo

Photo 1
Photo 3
Please provide any other information that is relevant for your entry
This was my first renovation project, converting a room upstairs into a bathroom. It was a huge learning curb but so worth it!
Voting is not enabled or out of date!
Best Bedroom


Aimee, Scott

Photo 1
Photo 2
Photo 3
Photo 4
Photo 5
Voting is not enabled or out of date!

Alana, Miller

Photo 1
Photo 2
Photo 3
Photo 4
Photo 5
Please provide any other information that is relevant for your entry
Painted throughout in Farrow & Ball's Hague Blue, this bedroom renovation leans into the Edwardian heritage of the home with vintage touches and a deliberately lived-in feel. The original floorboards have been left untouched, their dinks and marks telling the story of the house rather than being hidden away. Every piece of furniture was sourced secondhand, keeping the entire room well within a £500 budget. The bed has been upcycled and painted to match the walls, creating a cohesive wraparound effect that's deepened further by the rich blue velvet curtains. I wanted to create a rich and decadent room but with a whole house renovation we had an extremely tight budget! Hopefully this proves you don't always need a huge budget to create the look you love.
Voting is not enabled or out of date!

Alexandra, Wood-Tonks

Photo 1
Photo 2
Photo 3
Photo 4
Photo 5
Photo 6
Photo 7
Photo 8
Please provide any other information that is relevant for your entry
We are first time renovators, and so we completely renovated this bedroom! Originally this was the second bedroom, but we decided that is we reconfigured the upstairs layout then we could make this bedroom bigger to be a main bedroom and add an ensuite! We also make the chimney breast wider so the alcoves were equal size and so the bed can be central to the room. We added a feature panelled wall too to make a feature wall.
Voting is not enabled or out of date!

Amy, Neill

Photo 1
Photo 2
Photo 3
Photo 4
Please provide any other information that is relevant for your entry
A very small bedroom but now warm and cosy. I’ve added a before picture at the end.
Voting is not enabled or out of date!

Aneta, Havirova

Photo 1
Photo 2
Photo 3
Photo 4
Photo 5
Photo 6
Photo 7
Photo 8
Please provide any other information that is relevant for your entry
In a world filled with constant noise, screens, and visual overload, this bedroom was designed as a calm retreat—somewhere to slow down and switch off. The aim was to create a space that feels restful and considered, with a sense of quiet luxury rather than anything overdone. A neutral palette forms the base of the room, allowing texture and shape to take the lead. Warmth comes through in the darker wood tones, seen in the sculptural bedside tables and the tall chest of drawers. These pieces are simple but distinctive, adding height, depth, and a sense of character without overwhelming the space. The bed sits against a soft, abstract mural wallpaper, which adds interest and a gentle, artistic backdrop without disrupting the calm feel of the room. Hanging pendant lights on either side of the bed free up surface space and bring a slightly unexpected, more contemporary touch. Natural light plays a key role in the experience of the space. A traditional window was replaced with French doors, opening the room to the garden beyond. This decision enhances both the sense of openness and the connection to nature, with ever-changing views of the acer tree bringing seasonality and movement into the room. Storage was designed to be practical but unobtrusive. One wall is dedicated to built-in wardrobes, created using IKEA Pax units and adapted to feel more bespoke. Leaving the top open helps the room feel taller and less enclosed, while dimmable lighting above adds a soft glow in the evenings. To enhance the sense of space, we stripped back the ceiling to expose the original beams, adding both texture and height. A statement cast iron radiator was also kept as a nod to the home’s 1930s character, grounding the design with a subtle reference to its history. Soft furnishings, including a textured rug and layered bedding, bring comfort and softness, making the room feel easy to live in. Overall, the space is about balance between practicality and comfort, simplicity and detail. It’s a room designed not just to look good, but to feel calm and lived in, offering a quiet escape from everyday life.
Voting is not enabled or out of date!

Angela, McGill

Photo 1
Photo 2
Photo 3
Photo 4
Please provide any other information that is relevant for your entry
This was just an empty loft space and I’m soooo pleased with how it has turned out ?
Voting is not enabled or out of date!

Anna, King

Photo 1
Photo 2
Photo 3
Photo 4
Photo 5
Photo 6
Photo 7
Photo 8
Please provide any other information that is relevant for your entry
My guest bedroom is a thoughtfully collected space, designed to make guests feel instantly welcome & at home. I added paneling, painted in a heritage neutral tone, to create a calm, timeless backdrop, with a delicate ditsy wallpaper to add a layer of charming visual interest. The picture ledge showcases an evolving display of my thrifted frames, reflecting a love of mixing old with new & giving the room a personal, curated feel. A once-forgotten chest of drawers, rescued & lovingly restored, brings warmth & character to the space. Layers of neutral tones paired with gentle greens enhance the cozy atmosphere, while subtle pops of seasonal colour keep the room feeling fresh & inviting all year round, creating a space guests don't want to leave.
Voting is not enabled or out of date!

Anne, Elder

Photo 1
Photo 2
Photo 3
Photo 4
Photo 5
Photo 6
Photo 7
Photo 8
Please provide any other information that is relevant for your entry
My bedroom is designed as a calm, restorative space, centred around antique furniture and carefully curated fabrics. I’ve chosen timeless textiles from GP & J Baker and Colefax and Fowler, layered to create depth and softness. The curtains have been thoughtfully designed to frame and enhance the view, allowing natural light to become part of the room’s atmosphere.
Voting is not enabled or out of date!

Anouska, Lancaster

Photo 1
Photo 2
Photo 3
Photo 4
Photo 5
Photo 6
Photo 7
Photo 8
Please provide any other information that is relevant for your entry
This bedroom is a celebration of joy. I adore to play with layers of colour, pattern and textures to push boundaries. This room can take it as it has high ceilings and huge sash windows. This guest room at Penally House houses the only original fireplace from 1836. All the other fireplaces were stolen from the house in the 1980's when squatters ransacked the house, stealing all the original features. When I design guest bedrooms or hotel rooms I like to push boundaries to the next level, creating an escape through design. I also like to add sofas if the space allows, to create a hotel suite experience.
Voting is not enabled or out of date!

Becca, Jordan

Photo 1
Photo 2
Photo 3
Photo 4
Photo 5
Photo 6
Photo 7
Photo 8
Please provide any other information that is relevant for your entry
We blocked up the fourth bedroom from the hallway, and knocked through from the main bedroom to create a walk in dressing room. The bedroom is now a calming, sophisticated and yet timeless bedroom suite. We added the panelling ourselves and I designed the bedside tables and my dad made them for us. It was the first room we completed in our home, and I absolutely love it and how calming it feels
Voting is not enabled or out of date!

Becs, Baker

Photo 1
Photo 2
Photo 3
Photo 4
Photo 5
Please provide any other information that is relevant for your entry
Wallpaper, panelling, two shades of blue, a fab rug, plants, patterned bedding and cushions, gorgeous shutters on the bay window… all help to create an opulent but relaxing retreat.
Voting is not enabled or out of date!

Callieanne, Major

Photo 1
Photo 2
Photo 3
Photo 4
Please provide any other information that is relevant for your entry
A romantic, timeless bedroom using a cosy paint colour, a faux mantelpiece with delft tiles and a handmade headboard!
Voting is not enabled or out of date!

Candice, Guy

Photo 1
Photo 2
Photo 3
Photo 4
Photo 5
Photo 6
Photo 7
Photo 8
Please provide any other information that is relevant for your entry
As a new build, this bedroom originally felt flat and completely lacked any personality. To break up the "boxy" feel and introduce some architectural structure to the plain walls, I installed custom wall panelling designed specifically to frame the bed and highlight it as a focal point. To soften these structural lines, I recently added a neutral tree mural within the panels, which brings a delicate, organic feel to the room - without being too overwhelming. The muted tones keep the space feeling calm and by placing the mural inside the panels, it acts like a series of windows looking out into a forest. It adds incredible depth to the wall and also makes the bed pop against the soft, woodland backdrop. To complete the transformation, I focused on tactile layers to pull the different tones together but also to create contrasts. A mix of throws and cushions in a range of fabrics, echo the soft browns of the mural to make it feel like a cohesive design.
Voting is not enabled or out of date!

Charlotte, Lawrence

Photo 1
Photo 2
Photo 3
Photo 4
Photo 5
Photo 6
Photo 7
Photo 8
Please provide any other information that is relevant for your entry
This room was so cold and damp it had to be stripped back to it's bare bones. A new window and lots of insulation solved the problem and gave us the blank canvas to create what I wanted - a fancy 'hotel like' Master bedroom. The ikea hack DIY wardrobes blend to feel like a panelled wall, the layout has been redesigned to focus on the natural asset - the view. I still feel lucky to wake up in this dreamy hotel - like bedroom every day, and very proud that we did it ourselves!
Voting is not enabled or out of date!

Charlotte, Reddington

Photo 1
Photo 2
Photo 3
Photo 4
Photo 5
Photo 6
Please provide any other information that is relevant for your entry
This bedroom has such calm and beautiful vibes, the colour is so warm and inviting. We absolutely love this bedroom in our house
Voting is not enabled or out of date!

Claire, Champion

Photo 1
Photo 2
Photo 3
Photo 4
Photo 5
Photo 6
Photo 7
Photo 8
Please provide any other information that is relevant for your entry
My ambition for our master bedroom was simple: colour without chaos, calm without compromise—all on a high street budget (mostly). I’ve always been drawn to mid-century design, so I wanted to bring in those signature shapes and tones while still keeping the space feeling fresh and modern. Armed with inspiration slightly outside my price range—think Soho Home, Pooky and TB Co—I went on the hunt for the best high street alternatives from Dunelm, Next and Argos, saving just enough in the budget for a couple of splurge pieces I couldn’t resist. I do love an upcycle too, I painted my wardrobe doors in a muted red and added statement handles, and the FBMP dressing table chair got a whole new look in a vibrant pear-coloured paint. The artwork is a mix of pieces I’ve collected and made myself, adding a personal layer, and the felt rug was definitely a treat piece but ties everything together. I hope I’ve proved that a yellow bed, a red wardrobe and a green chair can live together—and still feel calm.
Voting is not enabled or out of date!

Daniel, Bland

Photo 1
Photo 2
Photo 3
Please provide any other information that is relevant for your entry
Paint and paper library- malachite paint. Installed plaster coving myself, hand painted stripes on chimney. Made upholstered window seat from the old boiler cupboard.
Voting is not enabled or out of date!

Drew, Muntz

Photo 1
Photo 2
Photo 3
Photo 4
Photo 5
Photo 6
Photo 7
Photo 8
Please provide any other information that is relevant for your entry
Guest Bedroom at my Home: The huge Clam Shell uplight rescued from Harrods Display dept. from the ‘70’s dictated the soft pearl palette; peach satin drapes, Ralph Lauren wallpaper, Bespoke Velvet wardrobe built to resemble a dressing screen. Vintage Bedside Wall lights by Kalmar, Austria. The river below the window reflects light through the shutters as if underwater.
Voting is not enabled or out of date!

Drew, Muntz

Photo 1
Photo 2
Photo 3
Photo 4
Photo 5
Photo 6
Photo 7
Please provide any other information that is relevant for your entry
Children’s Room at my Home: I find making a small room interesting distracts the eye from its compact nature; Here, this children’s room has a sense of exotic adventure using Moroccan Linen to tent the entire room, and enclose the bed when curtains are drawn. In keeping with the travelled theme, all the furniture, Bed, wardrobe, desk and stool are antique french faux bamboo campaign furniture. The addition of a mythical sea creature side table adds to the children’s sense of wonder.
Voting is not enabled or out of date!

Ellie, Watson

Photo 1
Photo 2
Photo 3
Photo 4
Photo 5
Photo 6
Photo 7
Photo 8
Please provide any other information that is relevant for your entry
Recently decorated our bedroom on a budget and tied in countryside rustic meets modern. The photos I’ve used are all local photos of our local area (the highland cow, our dog and our local woodland) I upcycled our furniture myself and everything else was on a total budget. We love it!
Voting is not enabled or out of date!

Emily, Barratt

Photo 1
Photo 2
Photo 3
Photo 4
Photo 5
Photo 6
Photo 7
Photo 8
Please provide any other information that is relevant for your entry
I tried to create a calming room that still fit the Victorian style of the house.
Voting is not enabled or out of date!

Emily, Kowalewska

Photo 1
Photo 2
Photo 3
Photo 4
Photo 5
Photo 6
Photo 7
Photo 8
Please provide any other information that is relevant for your entry
As a busy mum of two, our bedroom is our sanctuary (although I do find the odd dinosaur and doll stuffed in amongst the pillows occasionally) I love modern vintage and wanted to create a space full of second hand treasure, upcycled furniture textures and prints. I love the hint of pink the neutral walls give off when the sun is shining. Our faux fireplace, my husband and I built really makes this room something special to us. Living in a 1930s semi I was keen to add vintage features with a modern twist. I hope you enjoy seeing the images of our very much loved master bedroom.
Voting is not enabled or out of date!

Emily, Murray

Photo 1
Photo 2
Photo 3
Photo 4
Photo 5
Photo 6
Photo 7
Photo 8
Please provide any other information that is relevant for your entry
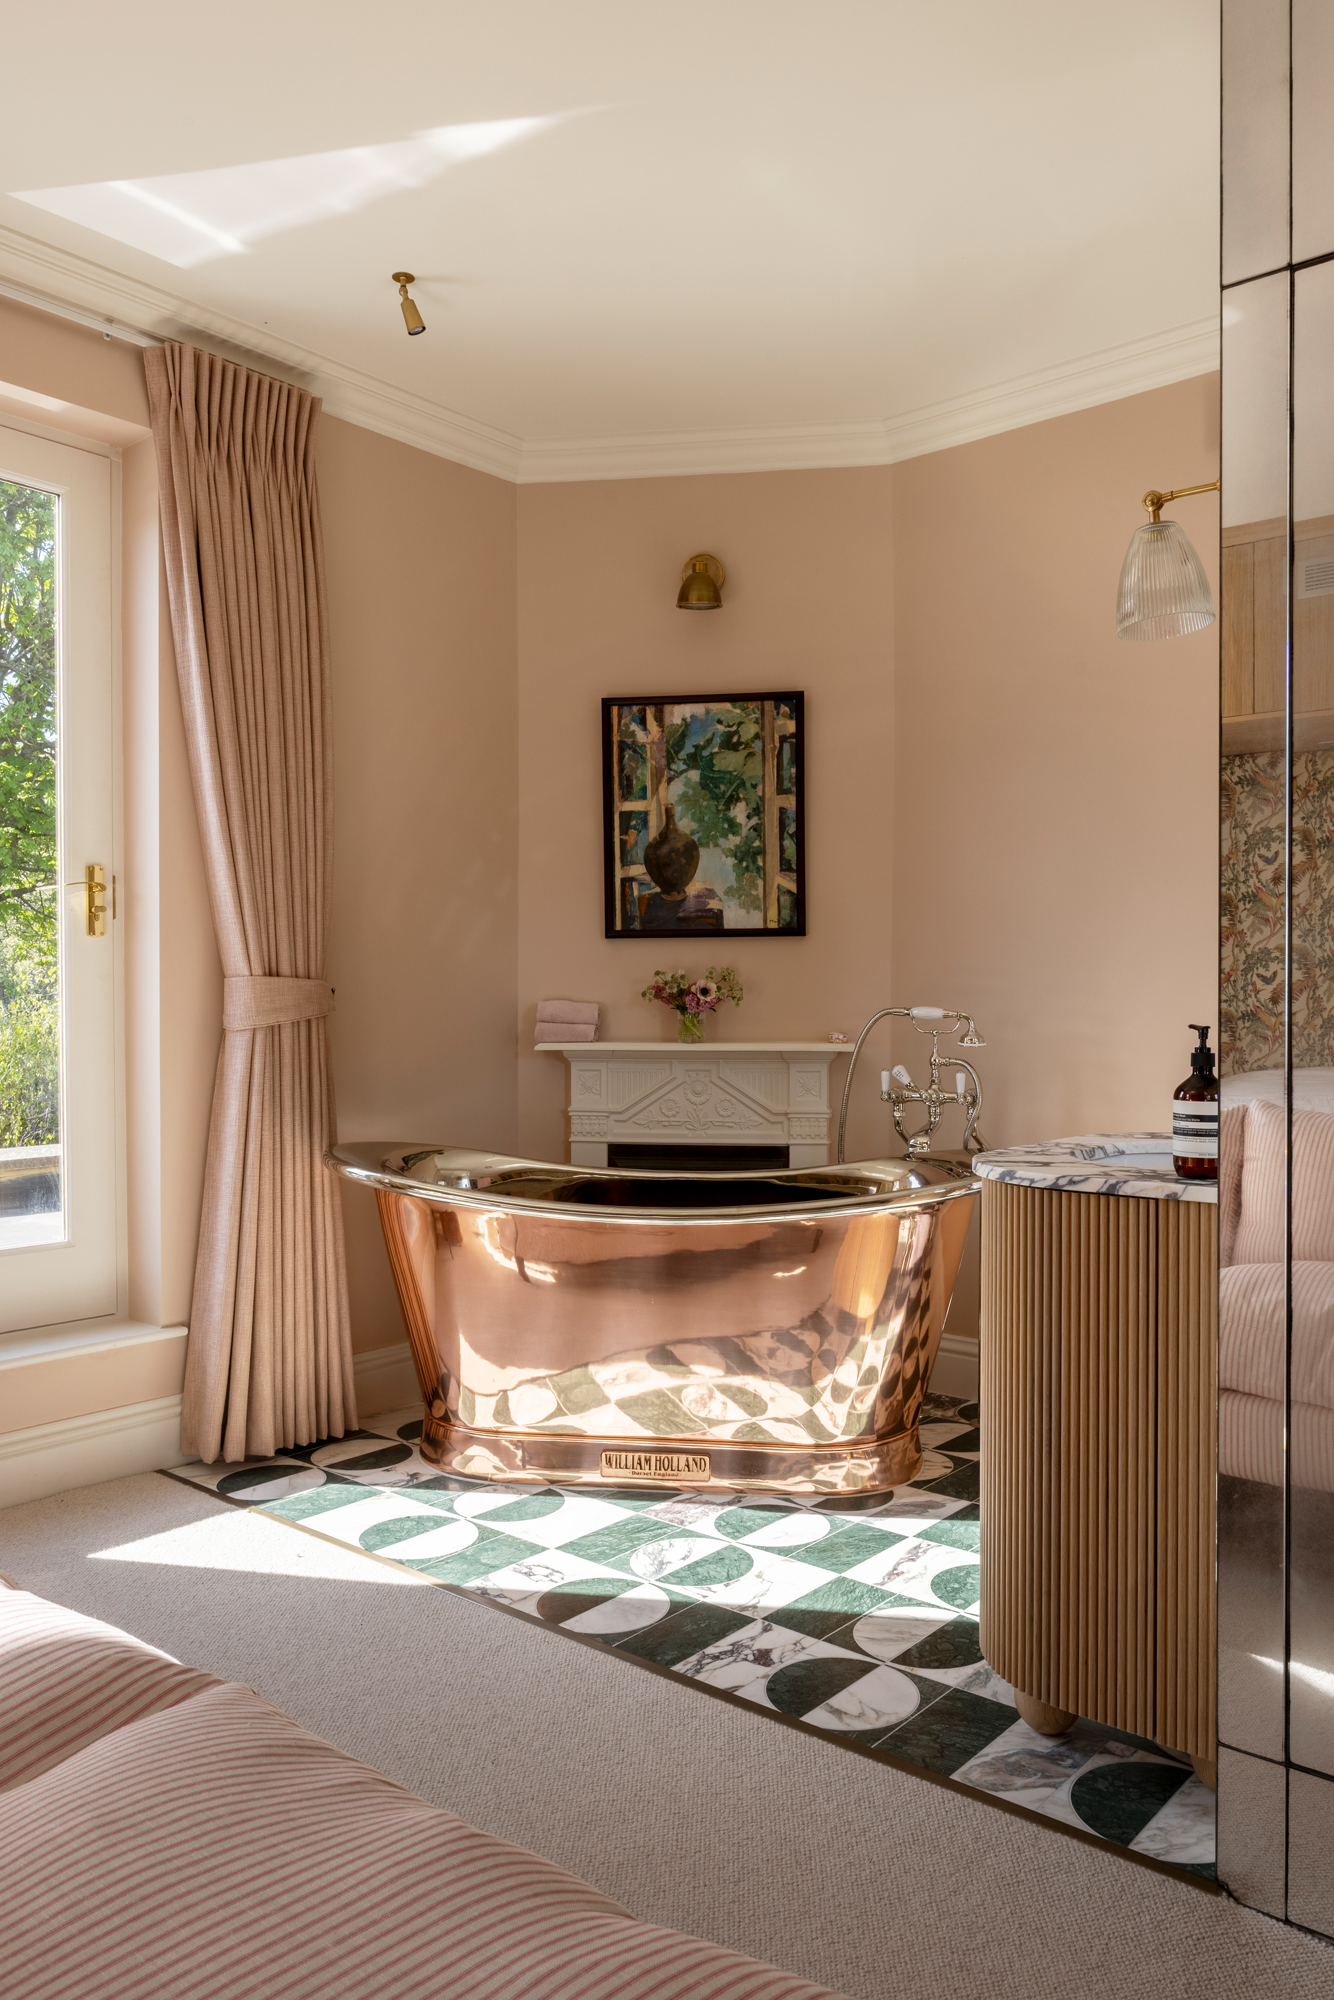
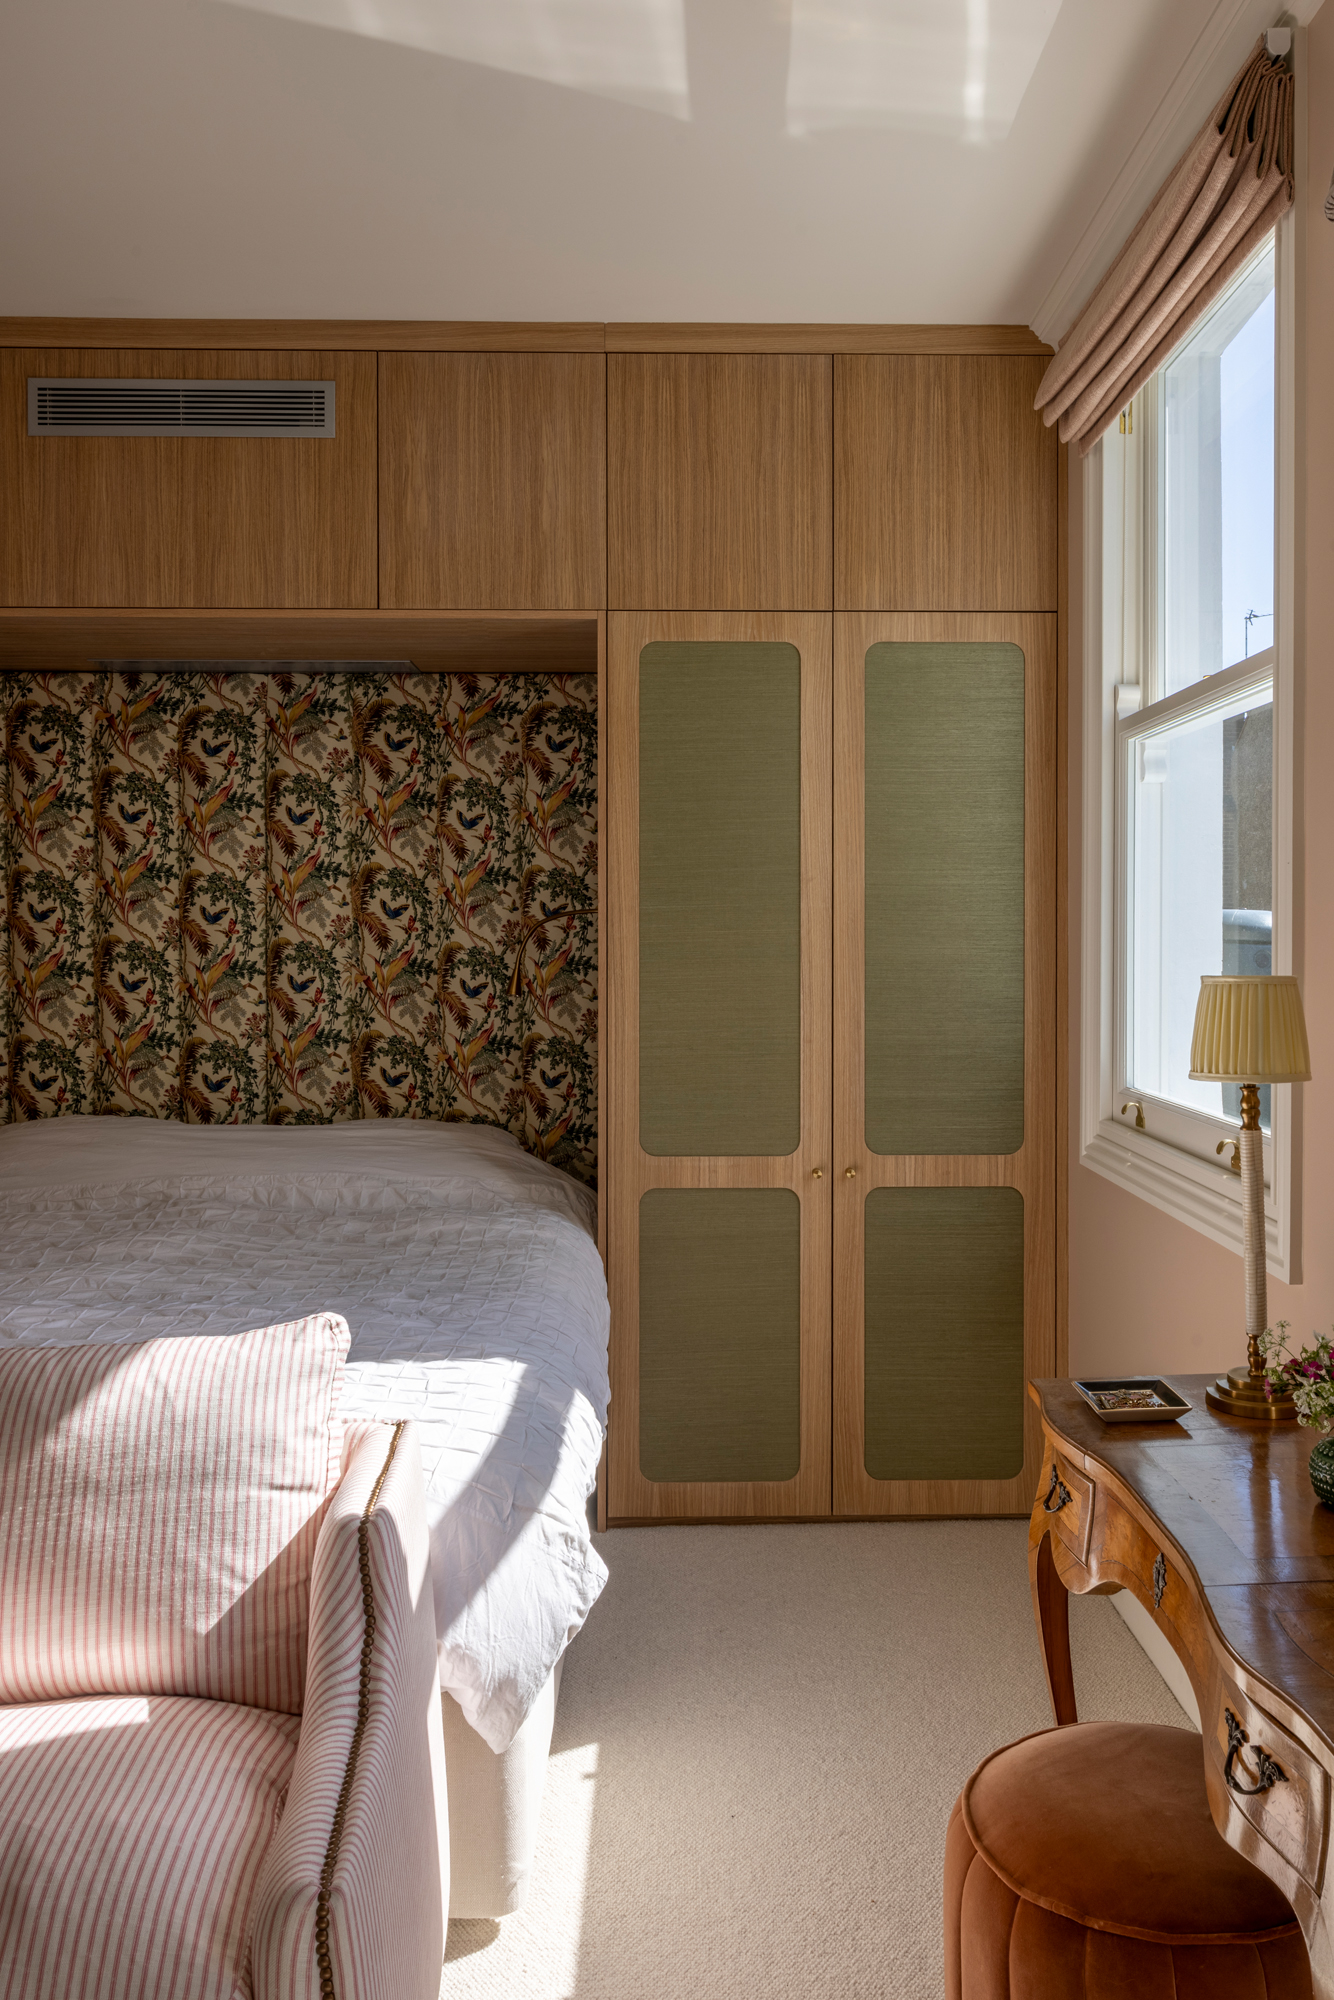
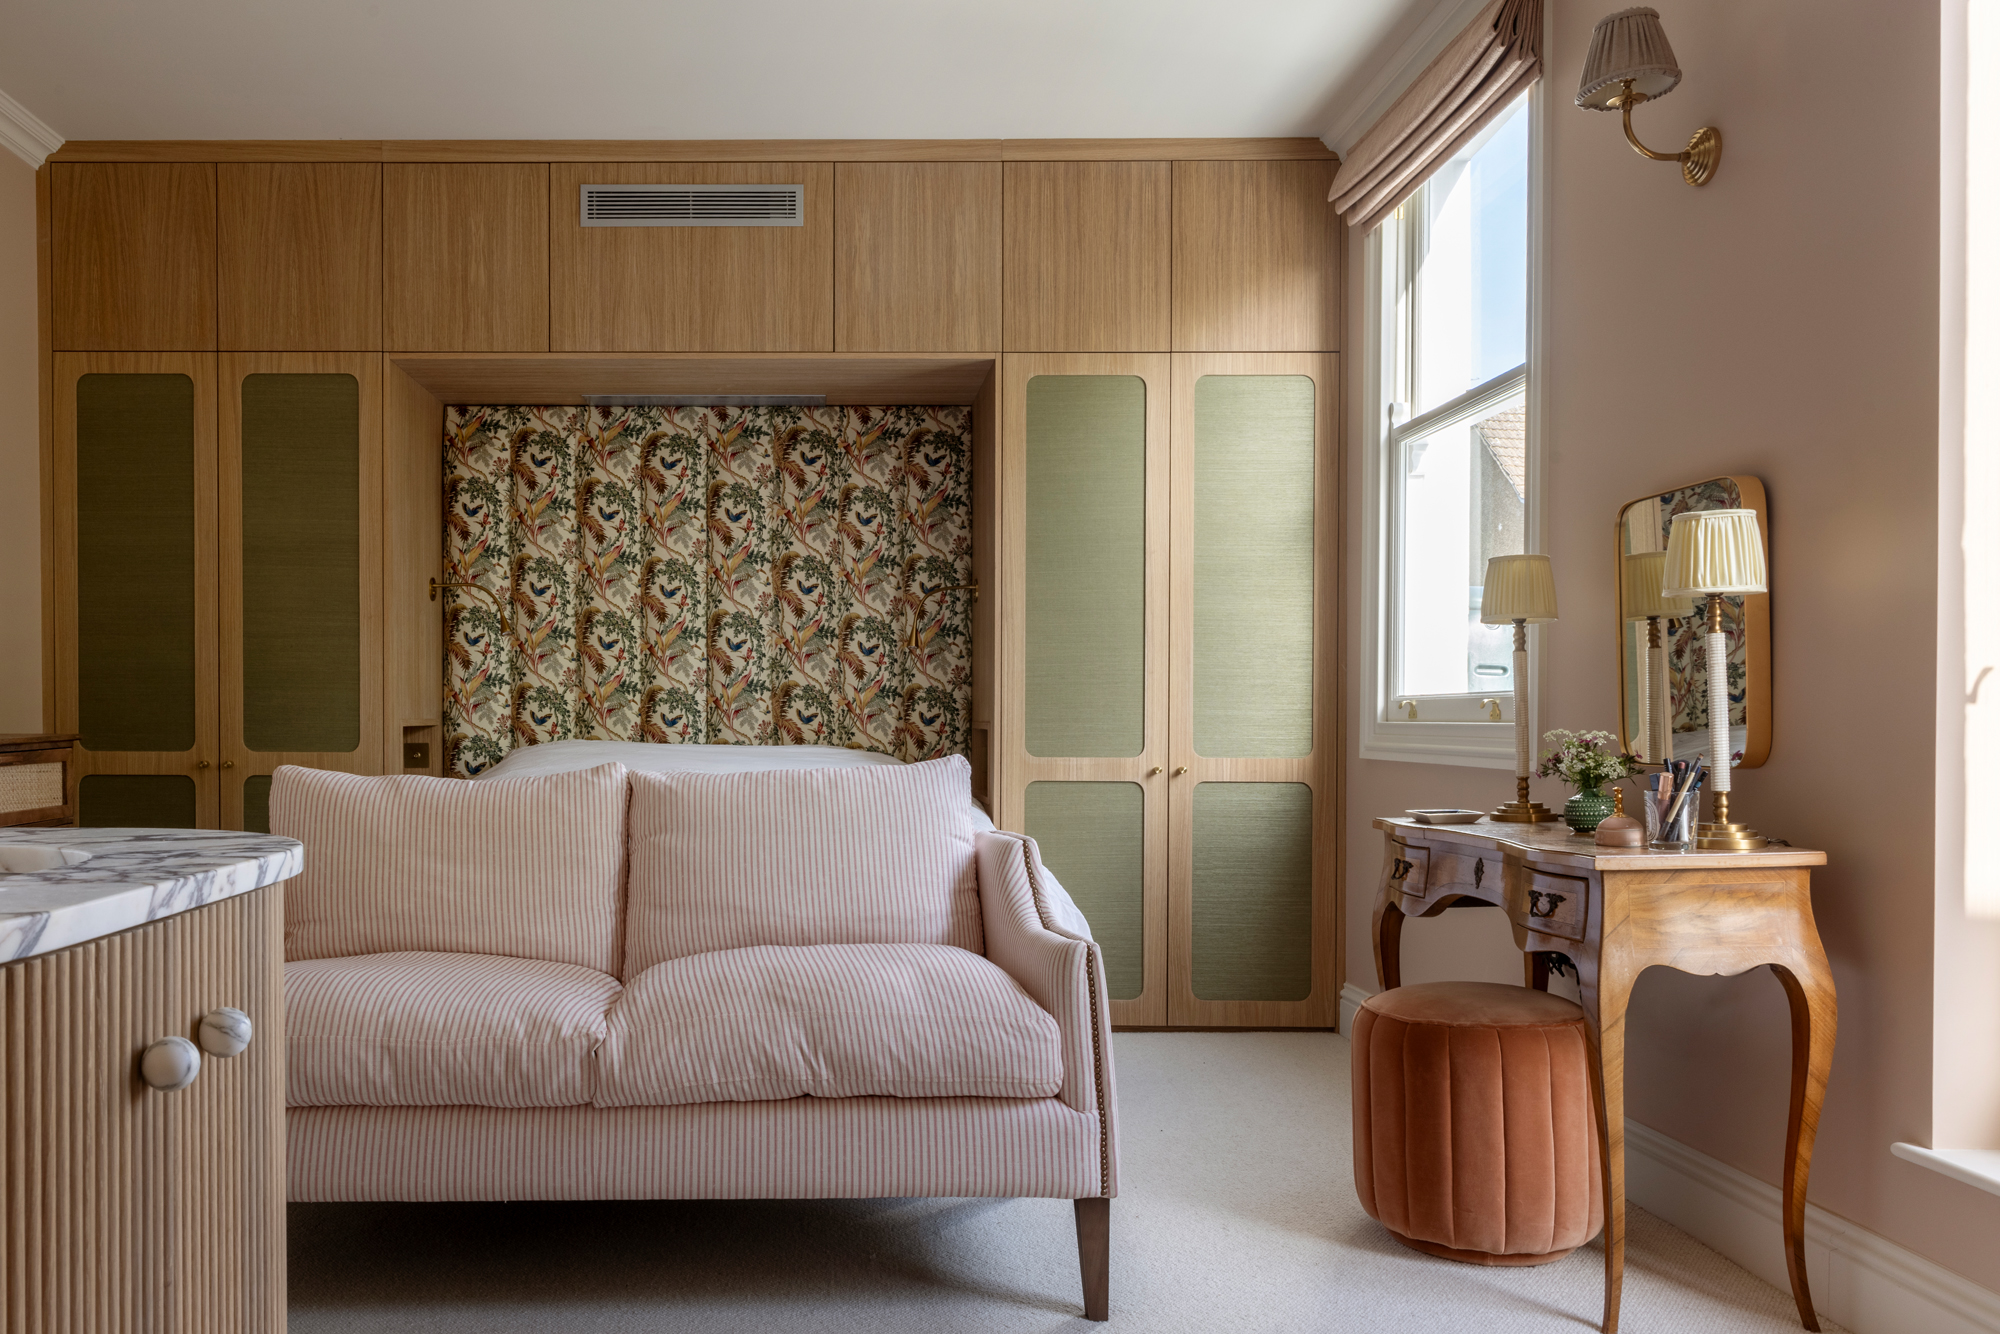
This is my dream bedroom, modelled on a room in my favourite country escape, Babington House in Somerset, even though my house is in the urban jungle of South East London. From the bed, bath and sofa, there are views over our fabulous private woodland. As someone who loves pink, this room is a softer take on the colour, with setting plaster walls and subtle candy shades in the sofa and on the chest of drawers. The bespoke wardrobe has grass green grasscloth panels and a headboard made from a fabric I discovered while in Paris with my family for the 2024 Olympics, one of our favourite ever holidays.
Voting is not enabled or out of date!

Evelyn, Lindley

Photo 1
Photo 2
Photo 3
Photo 4
Photo 5
Photo 6
Photo 7
Please provide any other information that is relevant for your entry
This master bedroom still gets the most attention, of all of my photos, online! It was the first room I decorated when I moved into my old house and it remains my favourite project so far. It was always cosy, inviting and peaceful.
Voting is not enabled or out of date!

Fern, Hutchinson

Photo 1
Photo 2
Photo 3
Photo 4
Photo 5
Photo 6
Photo 7
Photo 8
Please provide any other information that is relevant for your entry
Our master bedroom was another DIY project that we took on quite soon after moving in. We wanted wall lights but didn't want to chase out the wall, so we built out the wall slightly using battens, then panelled the wall and painted in Skimming stone from Farrow and Ball. We have an ottoman bed for optimal storage on top of our chest of drawers and 2 x double built in wardrobes (which were already there). I style the bedroom for the season and have provided a few different images of how I've styled it depending on the time of year. We have beautiful shutters in our bedroom and the light when they're open is stunning.
Voting is not enabled or out of date!

Frederique, Etienney-Pope

Photo 1
Photo 2
Photo 3
Photo 4
Photo 5
Photo 6
Photo 7
Photo 8
Please provide any other information that is relevant for your entry
This guest room was designed with one intention — to make anyone who sleeps here feel like they’ve checked into somewhere special. The walls are colour-drenched in a deep sage green, a shade I had to work to get right — the first green wasn’t quite it, so I repainted until it was. The fireplace surround and wood panelling were added to bring depth and a sense of period elegance. I wanted the room to feel suspended in time - timeless rather than on trend. That's why apart from the lights almost everything in here was sourced second hand, mainly charity shops. The wooden fire surround, the bedside cabinet, the arts — each piece chosen for its character. Buying second hand meant I could find pieces with real quality and history that you can’t always have with new. It gives the room a warm collected, lived-in luxury. My objective was to create something that feels closer to a Soho House than a spare room. Moody, warm, and full of quiet details to discover — a vintage jug, a painted canvas, vintage dresser. Opulence doesn’t have to mean expensive. Sometimes it just means taking the time to get it right.
Voting is not enabled or out of date!

Frederique, Etienney-Pope

Photo 1
Photo 2
Photo 3
Photo 4
Photo 5
Photo 6
Photo 7
Photo 8
Please provide any other information that is relevant for your entry
Nine months pregnant, mid-renovation, with walls open to the elements — I needed this room to be an escape. Not just comfortable, but a boutique hotel experience I never had to leave. Every surface is colour-drenched to create a cocoon feeling. I added wood panelling, a fire surround and wooden floors to bring back the Edwardian character of the house. Then — controversially — a freestanding yellow clawfoot bath, centre stage. Because for me, a bath in your bedroom is just the ultimate luxury. The details mattered as much as the big decisions. Velvet curtains for softness and opulence, I sourced an antique washstand and a vintage floor mirror for something with real character. I saved a lot buying second hand, I even upcycled a bedside table with wallpaper to tie it back to the curtain behind the bath. Light was everything. By day the teal and yellow fill the room with energy. By evening, gold accents catch the warm light, shifting the mood to something cosy and indulgent. The same room, two completely different feelings. Built in chaos but designed with intention — this became my boutique retreat.
Voting is not enabled or out of date!

George, Grantham

Photo 1
Photo 2
Photo 3
Photo 4
Please provide any other information that is relevant for your entry
First time buyer in the North East, bringing colour, prints and texture to what used to be a white shell of a home. Over a quarter of a million views within our first few months of moving. Video / TikTok is more my forte: https://vm.tiktok.com/ZNRQBgrY7/ https://vm.tiktok.com/ZNRQB9DkL/ https://vm.tiktok.com/ZNRQBPM6d/
Voting is not enabled or out of date!

Heather, Nash

Photo 1
Photo 2
Photo 3
Photo 4
Voting is not enabled or out of date!

Holly, Scott

Photo 1
Photo 2
Photo 3
Photo 4
Please provide any other information that is relevant for your entry
This bedroom was originally a blank white new-build space with no architectural detail and very little personality. My aim was to transform it into a calm, restorative retreat while introducing layers of subtle opulence through texture, materiality and considered detailing. Opulence in this scheme is expressed through restraint rather than excess. I introduced a soft, neutral palette built around warm taupes, muted blush tones and gentle metallic accents. The textured wallpaper adds depth and vertical movement, preventing the space from feeling flat while maintaining a serene atmosphere. The upholstered, button-detailed headboard creates a sense of tailored luxury and anchors the room with quiet confidence. Layering was key to achieving both comfort and refinement. Multiple cushions in varied textures, a quilted throw, and softly lined curtains add tactile richness without overwhelming the eye. The brushed brass detailing in the bedside lamps and furniture hardware introduces warmth and a subtle glow, elevating the scheme while remaining understated. Practicality was equally important. The layout maximises natural light from the large window, enhanced by sheer curtains that maintain privacy while softening daylight. Blackout curtains ensure restful sleep. The integrated dressing table provides a functional yet elegant workspace, designed to feel cohesive rather than separate from the bedroom scheme. Storage has been streamlined to reduce visual clutter, reinforcing the sense of calm. Every element was chosen to support how the room feels to live in. This is not a bedroom designed purely for aesthetics. It is designed for restoration. The muted palette lowers visual stimulation. The layered lighting allows for adjustable mood. The upholstered surfaces soften acoustics. The materials feel comforting to the touch. The result is a space that balances sophistication with serenity. A once plain new-build bedroom has become a refined sanctuary where opulence is experienced through texture, warmth and thoughtful detailing rather than overt statement.
Voting is not enabled or out of date!

Imogen, Thomas

Photo 1
Photo 2
Photo 3
Photo 4
Please provide any other information that is relevant for your entry
Our master bedroom is our space of calmness after a chaotic day. Somewhere to unwind. I adore creating cosy and calm spaces, adding textures, colours and patterns that complement one another. Otis our cocker is never too far either.
Voting is not enabled or out of date!

Jade, watkins

Photo 1
Photo 2
Photo 3
Photo 4
Photo 5
Please provide any other information that is relevant for your entry
The space was designed and created by us. Our Instagram handle is @no14hectorhouse where you can see our journey to creating this space in our recently completed extension. Thank you so much x
Voting is not enabled or out of date!

Jess, Prince

Photo 1
Photo 2
Photo 3
Photo 4
Please provide any other information that is relevant for your entry
Welcome to my colourful boho bedroom. I have installed the panelling myself (with my hubby) I have chosen a light blush pink to light up this room enthusing boho vibes into this room
Voting is not enabled or out of date!

Jess, Ryan

Photo 1
Photo 2
Photo 3
Photo 4
Photo 5
Photo 6
Voting is not enabled or out of date!

Karen, Gadd

Photo 1
Photo 2
Photo 3
Photo 4
Photo 5
Photo 6
Photo 7
Photo 8
Please provide any other information that is relevant for your entry
Our bedroom was designed to be a calm, restful retreat — a space to unwind at the end of the day while still reflecting our personal style. We focused on creating a balanced and cohesive look, combining soft, neutral tones with carefully chosen textures and layered details to add warmth and depth. While the overall feel is contemporary and calming, I also love introducing subtle pops of colour to bring personality and interest into the space. Every element has been thoughtfully considered, from the colour palette to the styling, to ensure the room feels both relaxing and visually harmonious. Gentle contrasts and carefully placed accents add character without overwhelming the calm atmosphere. The layout has been kept clean and uncluttered to promote a sense of calm, while still feeling practical for everyday living. It’s a space that allows us to switch off, recharge and enjoy a slower pace at the end of the day. Ultimately, our bedroom is more than just a place to sleep — it’s a sanctuary within our home, designed to feel calm, comfortable and effortlessly stylish, with just the right touch of personality.
Voting is not enabled or out of date!

Katherine, Sanders

Photo 1
Photo 2
Photo 3
Photo 4
Please provide any other information that is relevant for your entry
Having split our bedroom into 2 to accommodate our children. I wanted to create a really calming space in this room.
Voting is not enabled or out of date!

Kelly, Robbins

Photo 1
Photo 2
Photo 3
Photo 4
Photo 5
Photo 6
Photo 7
Photo 8
Please provide any other information that is relevant for your entry
This was the transformation of our 2 younger daughter’s bedroom. The idea was to bring pure nostalgic childhood to their space. Nothing needed to match, everything goes. Anything they loved, any theme, any colour could go into the room and just ‘fit’. Whatever ever made them happy, made the space feel even more special, and continues to as they add trinkets and treasures. This is actually my favourite room in the whole house, sometimes on hard days I go in here and just sit as the sun pours in, it’s truly such a happy space, that makes everyone smile.
Voting is not enabled or out of date!

Kelly, Robbins

Photo 1
Photo 2
Photo 3
Photo 4
Photo 5
Photo 6
Photo 7
Photo 8
Please provide any other information that is relevant for your entry
The master bedroom, with its daring but dramatic classic art mural. This was one of the very first room as we completed. This was also the very first time I’ve ever Wallpapered, all the gear and absolutely no idea, cutting around tricky plastered in pipes. The bath in the corner was a little added luxury, a new coving to bring back the Georgian and feel. I wanted to calm neutral space but not boring and bland, that added luxurious and opulent feel and I think we absolutely nailed that.
Voting is not enabled or out of date!

Kelly, Robbins

Photo 1
Photo 2
Photo 3
Photo 4
Photo 5
Photo 6
Photo 7
Photo 8
Please provide any other information that is relevant for your entry
My 7 year olds Neapolitan cottage core bedroom, exactly what she wanted— division air Vintage ice cream truck visiting your country cottage. With soft pallete, pretty florals and classic stripes. With everything in here that she absolutely loves, a mixture of modern and vintage pieces, made for the most special unique space.
Voting is not enabled or out of date!

Kerry, Davison

Photo 1
Photo 2
Photo 3
Photo 4
Photo 5
Photo 6
Photo 7
Photo 8
Please provide any other information that is relevant for your entry
Our master bedroom is easily my favourite space in the house. Being a new build, it was important to me to introduce depth and character without competing with the view that naturally draws your eye as soon as you walk in. I’ve layered tonal greens throughout the room to echo the landscape you see from the window, creating a seamless connection between inside and out. I’ve used natural textures like linen, wicker and sheepskins, to add warmth and softness, giving the space a calm, grounded feel whilst still feeling considered and cohesive with the rest of our home. I love nothing more than sinking into this bed with a cuppa on an afternoon, with the windows wide open and the birds tweeting outside. My most simple pleasure of all.
Voting is not enabled or out of date!

Kim, Lind

Photo 1
Photo 2
Photo 3
Photo 4
Please provide any other information that is relevant for your entry
Lindwhitehome - Instagram
Voting is not enabled or out of date!

Laura, Gibson

Photo 1
Photo 2
Please provide any other information that is relevant for your entry
This is our front bedroom and is north facing which can sometimes make it feel cold. I decided to add warmth by choosing pink for the ceiling and a warm white for the walls. We also restored the original fireplace ourselves and made all the details look brand new (it’s 130 years old!). Now it feels comfortable and glowy and friends that stay have said they feel like the room gives them a hug!
Voting is not enabled or out of date!

Laura, Timmins

Photo 1
Photo 2
Photo 3
Please provide any other information that is relevant for your entry
It took me a long time to design this room, because it's a loft room, a funny shape with the dormer window, there's no built-in storage (or space for any!) and we have a super-king bed. It's also only got one single window so has limited natural light coming in. I knew I wanted to make a design feature of the dormer window, so I hand-painted the stripes on the adjacent wall and extended them down to the dormer area, to elongate the space and to try and maximise the natural light. I colour-blocked the other walls whilst still left some white for balance, and kept the rest of the ceiling white to maximise the light. Because we didn't want to keep clothes in this room and just keep it for our 'safe space' I used minimal furniture that had functional use (storage ottoman for bed linen, a sideboard for bits and bobs, and two bedside tables), it means the room has a real air of calm.
Voting is not enabled or out of date!

Leekim, Stewart

Photo 1
Photo 2
Photo 3
Photo 4
Photo 5
Photo 6
Photo 7
Please provide any other information that is relevant for your entry
A few pieces in this bedroom tell a DIY story — from a handmade fluted headboard and IKEA window seat hack to upcycled bedside tables with vintage knob details and a star decal which elevated the pieces; and a reimagined mirror, creating the perfect blend of old and new.
Voting is not enabled or out of date!

Leila, Talmadge

Photo 1
Photo 2
Photo 3
Photo 4
Photo 5
Photo 6
Photo 7
Photo 8
Please provide any other information that is relevant for your entry
The first room I tackled in our new build home was our main bedroom and accompanying walk in wardrobe. Colour is my main love, so using the right colours for each space was priority to create a perfect environment for them. The bedroom is North facing, so a warm neutral was the base of the walls, with the focal point coming from the fabrics on the bespoke curtains and chair upholstery, and my hand drawn mural which I painted inspired by a pattern I fell in love with from a Soho Home fabric. I painted the mural on the wall behind the bedhead so the visually busy part of the room is behind your eyes when you are resting in bed. It also was designed to wrap around the end of the room and overhang onto the ceiling to create a cocooning feeling with colour. It is a perfect backdrop for our beloved artwork showcasing a colour wheel of birds painted by Jim Moir. The colours used in the mural were carefully chosen from the colour palette for our whole home so their will be a cohesive colour scheme throughout. The darker blue was used as the base wall colour in the adjoining room which I turned into a walk in wardrobe. This was a perfect colour for the South facing room to take the edge off the strong sun that comes in daily. This room I had fitted wardrobes installed to give maximum storage space, and then used a bold orange fabric for the curtains to link back to the bedroom mural and also complement the artwork in there from Rob Ryan Studio. Dark wood flooring matches the dark wood furniture to add a touch of depth to our new build, along with texture natural carpets which run throughout the home for continuity. Our home is being designed carefully to create spaces that truly reflect our own personalities and also honour the uniqueness of the award winning development we are in. I love to use local suppliers, with paint supplied by Isle of Skye Paint, and soft furnishings created by Little Plum Productions, then of course the mural is hand painted by myself as our home wouldn't be complete without a hand painted mural or two!
Voting is not enabled or out of date!

Lesley, Kay

Photo 1
Photo 2
Photo 3
Photo 4
Photo 5
Photo 6
Photo 7
Photo 8
Please provide any other information that is relevant for your entry
The guest en suite bedroom is small but perfectly formed. It has all the necessary furniture to make the room work hard. There’s a chest of drawers, a big walk in wardrobe which doesn’t dominate the room as it’s in the corridor leading into the room and is built into the eaves. The bed is a super king with room for bedside tables. We chose the metal framed bed as it exudes a bit of glamour into the room and enables light to bounce around as there is only a skylight in here. There’s also storage underneath the bed which we utilise using storage boxes. All the upstairs in the barn is what would be the loft space so we don’t have storage to speak of so make the most of the all the space available. We have painted the room a subtle off white colour with a hint of pink so it isn’t stark and papered the wall behind the bed and the little corridor in the same pink and white WM Morris wallpaper. l have recently used the French chic hack on all the beams and doors to further enhance the light. The white bedroom furniture further helps the room the feel airy and bright. Lighting plays an important part and we have installed spotlights in antique gold to exude a soft warm light. Bedside lamps in a neutral shade complete the room.
Voting is not enabled or out of date!

Lesley, Kay

Photo 1
Photo 2
Photo 3
Photo 4
Photo 5
Photo 6
Photo 7
Photo 8
Please provide any other information that is relevant for your entry
My small but perfectly formed master bedroom but it still has everything we need in here. The passageway forms part of the bedroom and has a walk in wardrobe and chest of drawers. The small window is my grandchildren’s favourite view point looking out over the pond. Our barn used to be the old milking parlour to the farmhouse next door and because of building restrictions the form hasn’t changed hence the sloping ceilings. We have managed to fit in a super king bed in here so nothing is compromised. The only compromise we did make was to make this our master bedroom as opposed to the ensuite bedroom. Thats because this room has the only window as opposed to the other bedroom having a skylight. We now enjoy waking up to the views over the pond and beautiful surrounding countryside
Voting is not enabled or out of date!

Lexie, Carducci

Photo 1
Photo 2
Photo 3
Photo 4
Photo 5
Please provide any other information that is relevant for your entry
I am entering this bedroom for this category to highlight a flexible space. I think since lockdown and as a result a lot of people working from home, spare rooms have become a bit of a multi functional space. With this in mind, we wanted to make the most use out of our guest room as possible. So not only is this space a bedroom, it is also my work from home space with the built in desk and boucle chair which can double up as a dressing table for guests. We took down a wall between the bedroom and the box room next door which was going to be my boyfriend's office, we then put in a telescopic pocket door which allows us to separate the room. This means that when my boyfriend is working in his office he can open the telescopic pocket door and have a whole open office space, the chair from the bedroom can be used if he has a client or a meeting. And when we have guests staying over we can close of the telescopic pocket door so they become two different rooms. The space infront of the window is also a useful space for us, it becomes our 5pm bar because the sun comes in the floor to ceiling window and we'll often sit together and have a drink looking at the water and it becomes a work out space when we take up the rug and lay down a yoga mat. So 4 rooms in 1 :) For the design of this space, we wanted to keep our home calm and neutral throughout with natural tones but we thought for these rooms we could go a little more bold and opted for Farrow and Ball's green blue. We had a fluted wood panel put in as a feature wall for the bed which we also painted in the same colour. The furniture is from Dusk, we have features boucle throughout, it also acts as storage as it is an ottoman bed. And the sheets are a linen mix to again be light, natural and calming.
Voting is not enabled or out of date!

Lisa, Shaver

Photo 1
Photo 2
Photo 3
Photo 4
Photo 5
Photo 6
Voting is not enabled or out of date!

Lucy, Jacobs

Photo 1
Photo 2
Photo 3
Photo 4
Photo 5
Please provide any other information that is relevant for your entry
This bedroom began as a typical new build space with white walls and little character, which I transformed into a cosy, moody retreat where elegance meets comfort. By introducing a richer palette, layered textures and bespoke panelling, I’ve added depth, warmth and architectural interest, while soft furnishings and ambient lighting create a calm, inviting atmosphere. Every detail has been carefully considered to balance timeless style with real-life comfort, resulting in a space that feels intimate, elevated and effortlessly liveable.
Voting is not enabled or out of date!

Marie, Nolan

Photo 1
Photo 2
Photo 3
Photo 4
Photo 5
Please provide any other information that is relevant for your entry
Our bedroom was one of the very first rooms we renovated, and from the beginning I wanted it to feel like a place of complete calm, somewhere restful, peaceful and a little indulgent. The previous owners had put a lot of love into the house and I've included a picture of the bedroom as it was when we first viewed the house. As nice as it was, we really wanted ti to put our stamp on it. The house originally had a beautiful freestanding cast iron bath, but when we renovated the small bathroom and added a shower, there simply wasn’t room to keep it there. We couldn’t bear the thought of losing it, so instead we gave it a new life in our bedroom, creating a little spa-like retreat of our own with the bath sat beneath the window and next to the wood-burning fire. For me, a connection to nature is always important in how a space feels, and that’s what makes this room so special. From the bath, you can look out through the beautiful semicircular window across the canal, watching the changing seasons, the wildlife on the water, and feeling completely connected to the outdoors. There’s something incredibly peaceful and grounding about that moment, it feels restorative, comforting, and like a small act of everyday luxury that quietly supports our wellbeing.
Voting is not enabled or out of date!

Mariné, Lee

Photo 1
Photo 2
Photo 3
Photo 4
Photo 5
Photo 6
Please provide any other information that is relevant for your entry
This bedroom is a small north facing space, so I wanted it to feel warm, cosy and inviting at the end of the day. The wallpaper was the starting point and I designed the room around it, keeping it behind the bed so it becomes a focal point without feeling overwhelming from where you rest. From there, I built a palette using warm tones, including Setting Plaster by Farrow and Ball for its soft yellow undertones, which helps counterbalance the cooler natural light. To add depth and interest, I introduced a burgundy limewash wall and patterned curtains, layering textures and tones to create a space that feels rich but still balanced. The overall feeling I wanted was for the room to feel like a warm hug, somewhere to unwind, slow down and feel completely at ease.
Voting is not enabled or out of date!

Miranda, Horchler

Photo 1
Photo 2
Photo 3
Photo 4
Photo 5
Photo 6
Photo 7
Photo 8
Voting is not enabled or out of date!

Miranda, Horchler

Photo 1
Photo 2
Photo 3
Photo 4
Photo 5
Photo 6
Photo 7
Photo 8
Voting is not enabled or out of date!

Miranda, Horchler

Photo 1
Photo 2
Photo 3
Photo 4
Photo 5
Photo 6
Photo 7
Photo 8
Please provide any other information that is relevant for your entry
An autumnal bedroom designed with a warm palette, layered textures and ambient lighting for a cosy feel.
Voting is not enabled or out of date!

Miranda, Horchler

Photo 1
Photo 2
Photo 3
Photo 4
Photo 5
Photo 6
Photo 7
Photo 8
Voting is not enabled or out of date!

Miranda, Horchler

Photo 1
Photo 2
Photo 3
Photo 4
Photo 5
Photo 6
Photo 7
Photo 8
Voting is not enabled or out of date!

Monalisa, Quaidoo

Photo 1
Photo 2
Photo 3
Photo 4
Please provide any other information that is relevant for your entry
I lime washed the entire room, needing to hire a professional scaffold ladder to reach the 8ft ceiling. When I am in this room it makes me feel like I'm in a real life painting. The best thing was how affordable it was to paint.
Voting is not enabled or out of date!

Natalie, Wong

Photo 1
Photo 2
Photo 3
Photo 4
Photo 5
Photo 6
Photo 7
Photo 8
Please provide any other information that is relevant for your entry
This is my bedroom, bold but tranquil. I used wallpaper to create a wavy headboard which has become a bit of a centrepiece. I hadn’t seen this done anywhere and wanted to give it a go to match my squiggle aesthetic and love the outcome! Each bit of furniture was picked to balance the room, the aim I had was colourful but relaxing. With the added wall lights, this green and pink themed room to me feels like the ultimate cosy space!
Voting is not enabled or out of date!

Nicky, Neeve

Photo 1
Photo 2
Photo 3
Photo 4
Voting is not enabled or out of date!

Nikola, Harvey

Photo 1
Photo 2
Voting is not enabled or out of date!

Rachel, Campbell

Photo 1
Photo 2
Photo 3
Photo 4
Please provide any other information that is relevant for your entry
? Project Overview This project focused on transforming a plain new-build bedroom into a calm, warm and cocooning retreat inspired by the tones and textures of the Scottish Highlands. Starting with a blank, cold-feeling space, the goal was to create a room that felt restful, grounded and layered, while working to a realistic budget and documenting the full DIY journey. ⸻ ? Design Intent The intention was to design a bedroom that supports wellbeing and relaxation, with a focus on: • Soft, clay-toned colour palettes • Natural textures and materials • Layered, cosy styling • Creating a sense of calm and safety within the space The room was designed to feel like a “cosy cocoon”, somewhere to fully switch off and recharge. ⸻ ?️ What I Did The transformation was completed using a series of DIY projects: • Painted the room in a warm plaster-toned shade to soften the space • Installed wall panelling to add depth, texture and character • Applied a feature wall mural to introduce visual softness and interest • Styled the room with layered textiles and natural materials • Added a rug to ground the space and bring everything together Each step was documented and shared as part of an ongoing transformation series. ⸻ ? Key Challenges • Working within a tight budget while achieving a high-end, styled look • Transforming a standard new-build space with minimal architectural character • Balancing aesthetics with practicality and ease of installation • Completing the work independently while managing health limitations ⸻ ? Sustainability / Thoughtful Choices • Focused on updating the existing space rather than replacing furniture • Chose materials and finishes that enhance longevity and versatility • Prioritised simple, impactful changes over full renovation ? Result The finished space feels warm, calm and cohesive, a complete contrast to the original room. The transformation demonstrates how thoughtful design, DIY and small changes can completely reshape a space, both visually and emotionally.
Voting is not enabled or out of date!

Rachel, Edmonds

Photo 1
Photo 2
Photo 3
Photo 4
Photo 5
Voting is not enabled or out of date!

Rachel, P Byrne

Photo 1
Photo 2
Photo 3
Photo 4
Photo 5
Photo 6
Photo 7
Photo 8
Please provide any other information that is relevant for your entry
This bedroom presented a unique challenge with its awkward proportions and an existing layout that felt heavy and restrictive. The side of the bed sits against the line of the staircase, which encroached into the room and contributed to a previously bulky and compressed feel. Instead of forcing a traditional wardrobe into this limited space, we designed a bespoke wall-mounted half chest, allowing for essential storage while maintaining a lighter, more open flow around the bed. Our approach focused on reimagining the room as a calm, luxurious retreat with a subtle hotel-inspired feel. We introduced a deeper, more tonal colour to the walls, carried right up to the architraves, creating a cocooning effect that enhances the sense of intimacy and comfort within the space. The layout was reworked to maximise light and openness, relocating the vanity and makeup area to sit beside the window. This not only enhances the experience of natural daylight but also maintains a sense of airiness. Due to the room’s angled walls, a traditional wardrobe could not be accommodated in this position, allowing this area to be redefined in a more functional and thoughtful way. To further elevate the design, we introduced a dedicated seating area and layered lighting. Carefully chosen accessories, along with a large rug, help ground the bed area and create a clear zoning distinction between the bed, the vanity, and the seating area. Lamps and candles add warmth and atmosphere, encouraging relaxation and quiet moments of retreat. The bed area was designed to feel grounded and luxurious, featuring a bespoke burnt orange velvet headboard with cream piping and panelling. Given the compact nature of the space around the bed, careful consideration was given to the selection of side tables to ensure both functionality and balance without overwhelming the room. Structural constraints, including a chimney breast, meant the layout could not be reversed, so the design worked with the existing architecture to make the most of every inch. Heavier curtains were replaced with tailored fabric blinds, allowing light to filter through while introducing a subtle pop of colour that complements the headboard and enhances the overall palette. The result is a thoughtfully layered bedroom that balances practicality with elegance—transforming a previously constrained space into a serene and considered sanctuary, rich in texture, light, and comfort.
Voting is not enabled or out of date!

Salma, Chatto

Photo 1
Photo 2
Photo 3
Photo 4
Please provide any other information that is relevant for your entry
Welcome to my vintage maximalist bedroom ✨ The crane wallpaper was the very first piece I chose, and everything else grew from there. I love styling my vintage trinkets above the bed — little treasures that make the space feel layered and lived-in. It’s my kind of cosy ? The large artwork was a budget DIY using wood moulding and wallpaper, and I hand-painted the floral border on the headboard to turn something simple into something completely unique ?
Voting is not enabled or out of date!

Sandra, Sundén

Photo 1
Photo 2
Photo 3
Photo 4
Photo 5
Photo 6
Photo 7
Photo 8
Please provide any other information that is relevant for your entry
I started off with a rather plain and uninspiring bedroom. I mixed the paint using left overs from previous projects, and used a faux lime wash method on walls and ceiling. Some texture and interest was needed so I added cane webbing to the wardrobes and changed the handles. I also made the headboard from scratch which I feel grounds the room, but it was also needed to protect our poor heads from the cold of the single skin external wall! The green lampshade is made from a table runner from our wedding a couple of years ago, which gives a nice little touch. My intent for this room was to create a calm cosy space to relax in, but with added depth using texture and a subtle mix of pattern.
Voting is not enabled or out of date!

Sarah, Crangle

Photo 1
Photo 2
Photo 3
Photo 4
Photo 5
Photo 6
Photo 7
Photo 8
Voting is not enabled or out of date!

Scarlett, Rowley

Photo 1
Photo 2
Photo 3
Photo 4
Photo 5
Photo 6
Photo 7
Photo 8
Please provide any other information that is relevant for your entry
Our little neutral haven! Our master bedroom has turned out to be everything I could have dreamed of and more. We took it right back to floorboards and bare brick, then extended the front of the house to create the nook where our reading chair and chest of drawers now sit. It’s become the perfect spot to unwind after a busy day and we absolutely love it!
Voting is not enabled or out of date!

Sophie, Murphy

Photo 1
Photo 2
Photo 3
Photo 4
Photo 5
Photo 6
Please provide any other information that is relevant for your entry
This bedroom was stripped back from woodchip and taken back down to its original georgian panelling. I’ve opted for a french traditional style in here and also white walls with feminine touches. Ive also added in a ceiling rose and chandelier to compliment the original georgian coving.
Voting is not enabled or out of date!

Stephanie, Wilson

Photo 1
Photo 2
Photo 3
Photo 4
Photo 5
Photo 6
Photo 7
Photo 8
Please provide any other information that is relevant for your entry
Mill view cottages master bedroom
Voting is not enabled or out of date!

Tracy, Merry

Photo 1
Photo 2
Photo 3
Photo 4
Photo 5
Photo 6
Photo 7
Photo 8
Please provide any other information that is relevant for your entry
Welcome to the Merry household- creating a country feel in a new build, blending vintage charm with modern comfort
Voting is not enabled or out of date!

Vania, Silva

Photo 1
Photo 2
Photo 3
Photo 4
Photo 5
Photo 6
Photo 7
Photo 8
Please provide any other information that is relevant for your entry
We wanted to create a relaxing and peaceful space. Soft lights,neutral colours and ceilings to floor curtains gave us that hotel vibe we here looking for.
Voting is not enabled or out of date!

Victoria, Kerrigan

Photo 1
Photo 2
Photo 3
Photo 4
Photo 5
Voting is not enabled or out of date!
Best Before and After Transformation

This category is sponsored by 

Abbie, Downey

Photo 1
Photo 2
Photo 3
Photo 4
Photo 5
Photo 6
Photo 7
Photo 8
Please provide any other information that is relevant for your entry
This kitchen transformation took a blank, uninspiring space and turned it into a vibrant, functional maximalist hub. From muted surfaces and a room with no clear purpose to bold patterned tiles, rich textures, and layered colour, the renovation focused on enhancing both style and workflow. Thoughtful layout adjustments and a mix of vintage, reclaimed, and modern elements created a space that is as practical for everyday cooking and family life as it is visually striking. The before (first image) and after images illustrate how careful design choices can completely reimagine a space while reflecting personality and lifestyle.
Voting is not enabled or out of date!

Abbie, Downey

Photo 1
Photo 2
Photo 3
Photo 4
Photo 5
Photo 6
Photo 7
Photo 8
Please provide any other information that is relevant for your entry
This living room transformation took a jarring lime green and white space with no natural flow and turned it into a layered, personality-driven maximalist retreat. By introducing bold colours, rich textures, and eclectic collections, the room evolved into a space that encourages curiosity and creativity while remaining comfortable and practical for everyday living. Original features were incorporated seamlessly, and key design interventions — from gallery walls to comfy furniture and hidden features — illustrate how thoughtful design can elevate both style and functionality. The before (first image) and after images highlight the dramatic change and the creative journey behind the space.
Voting is not enabled or out of date!

Abbie, Downey

Photo 1
Photo 2
Photo 3
Photo 4
Photo 5
Photo 6
Please provide any other information that is relevant for your entry
This washroom transformation took a plain, uninspiring space and turned it into a vibrant, functional maximalist retreat, removing the monotony of everyday laundry tasks. Previously bland and lacking personality, the room now features a statement wallpaper drench, bold patterned tiles, layered textures, and a thoughtfully curated mix of practical and aesthetic elements. Clever design interventions maximise both style and functionality, making the space feel luxurious while remaining fully practical for everyday use. The before (first image) and after images highlight the dramatic transformation and the creative approach behind the redesign.
Voting is not enabled or out of date!

Aimee, Blakey

Photo 1
Photo 2
Photo 3
Photo 4
Photo 5
Photo 6
Photo 7
Photo 8
Please provide any other information that is relevant for your entry
Our boot room / utility used to be a very dated, 80’s style kitchen with a non-working green Stanley boiler and an ugly cooker. After I was made redundant that gave us the budget to convert our old double garage in to a kitchen (before we ran out of money) and then Instagram earnings paid for us to be able to convert the old kitchen in to a really usable room - in fact, the most used room in the house! We wash messy puppies and muddy wellies, clean and dry clothes, hang up wet things to dry, we each have individual coat, hat and shoe cupboards (Bertie our son has extra low hooks so he can reach) and we also have a utility cupboard for the vacuum and brushes, with electricity in there too. The bench is perfect for putting on our wellies and looking after dog leads and the central island is the perfect place to fold and tidy washing and put them in to the individual rattan baskets ready for each of us to put away. Everything has been thought of and everything has a purpose - even the radiator can be controlled independently of the others in the house in case we need to use it as a wet / dry room after winter country walks. I’m so glad we converted it - it was worth every penny!! https://www.instagram.com/reel/DLHJRJHqq... https://www.instagram.com/reel/DPdPFIdDT...
Voting is not enabled or out of date!

Aimee, Scott

Photo 1
Photo 2
Photo 3
Photo 4
Photo 5
Photo 6
Please provide any other information that is relevant for your entry
We’re first time buyers who have purchased our home from the previous owners of 20+ years. With no DIY or renovating experience, we’ve completely transformed the second bedroom into my home office.
Voting is not enabled or out of date!

Alana, Miller

Photo 1
Photo 2
Photo 3
Photo 4
Photo 5
Photo 6
Photo 7
Photo 8
Please provide any other information that is relevant for your entry
This transformation began with taking down four walls to completely rethink the layout, opening up what was once a series of disconnected rooms into one generous family space. The result is a U-shaped solid wood kitchen painted in Farrow & Ball's Studio Green with a waterfall island in the center to zone the space from the newly created dining area featuring bespoke built-in alcove units. All the walls and joinery have recently been painted in Farrow & Balls Reduced Green a lovely muddy, nature inspired colour with a feature wallpaper mural to the ceiling to add the dramatic flair I love so much. Perhaps the most satisfying element is the floor, sourced entirely for free on Facebook Marketplace and laid by hand over six months of patient DIY work. It's a room the whole family now lives in, a proper gathering space for cooking, eating and spending time together. One of the biggest transformations of the house and it has changed the way we use the space completely!
Voting is not enabled or out of date!

Alexandra, Wood-Tonks

Photo 1
Photo 2
Photo 3
Photo 4
Photo 5
Photo 6
Photo 7
Photo 8
Please provide any other information that is relevant for your entry
We are first time renovators, and we have renovated our entire home! These are some of my favourite before and after transformation in our home (there are so many more and I would love to share more photos of the rest of the rooms in our home!). The kitchen was previously a small and we decided to move it into one of two reception rooms. Which allowed us to alter the chimney breast and add a range cooker, and adding an island. The kitchen then became our dining room (we also added a lootility room which you can see a sneak peak of). We also reconfigured the entire upstairs floor plan, which allowed us to split the old avocado green bathroom into an ensuite (pictured) and a house bathroom.
Voting is not enabled or out of date!

Alia, Razzaq

Photo 1
Photo 2
Photo 3
Photo 4
Photo 5
Photo 6
Photo 7
Photo 8
Please provide any other information that is relevant for your entry
We worked hard to create the garden we have today. It was once a garden with very little interest, uneven grounds and no plants. We’ve levelled the garden, laid down turf, built raised planters and laid new slabs. We’ve built an outdoor kitchen ourselves, and customised our pergola to fit our neutral aesthetic. We’ve built a log cabin and painted this in the same theme.
Voting is not enabled or out of date!

Alice, May

Photo 1
Photo 2
Photo 3
Photo 4
Photo 5
Voting is not enabled or out of date!

Alicia, Coates

Photo 1
Photo 2
Photo 3
Photo 4
Photo 5
Photo 6
Please provide any other information that is relevant for your entry
Our downstairs loo, It’s a small but mighty room that packs a punch! Decorated in Emma J Shipley wallpaper with painted sink unit and mirror to match. It’s a much talked about room by visitors to our house! It’s home to a pretty nifty show cupboard behind those white doors.
Voting is not enabled or out of date!

Amy, Neill

Photo 1
Photo 2
Photo 3
Photo 4
Photo 5
Photo 6
Photo 7
Photo 8
Please provide any other information that is relevant for your entry
Grade II listed cottage but transformed the space from sad and clinical to whimsical and full of colour and joy.
Voting is not enabled or out of date!

Amy, Wolfe

Photo 1
Photo 2
Photo 3
Photo 4
Photo 5
Photo 6
Photo 7
Photo 8
Please provide any other information that is relevant for your entry
A Room Reimagined - From Medieval to Magical This transformation began with a bedroom that had remained untouched since we moved into our 400-year-old thatched cottage — a dark, medieval red space that felt heavy and disconnected from the gentle charm we envisioned for our little one’s bedroom. Completed as a step-by-step DIY project, the aim was to completely reimagine the room, transforming it into a whimsical space, inspired by the English countryside and the nostalgic charm of childhood tales. The focus was not simply to redecorate, but to create a bedroom that nurtures imagination, comfort and practical everyday living. Working within the quirks of a historic cottage meant embracing wonky walls, sloped ceilings and uneven surfaces. Rather than correcting these imperfections, they were celebrated. At the heart of the transformation is woodland-inspired wallpaper, setting the narrative tone for the entire space. This storytelling element is complemented by carefully layered textures and timeless prints, creating depth and visual interest while maintaining a calm and enduring aesthetic. A key feature of the redesign was building an extensive play and creative desk area using flat-pack furniture as the foundation. Thoughtfully adapted and elevated, these pieces were transformed into a highly functional workstation with integrated toy storage — demonstrating how accessible materials can be used to achieve a bespoke feel, while keeping achievable design at the centre of the project. Sustainability played an important role in shaping the space too. The room was intentionally designed to grow alongside our son, with adaptable furniture and storage solutions that evolve as his needs change. A DIY bespoke wardrobe was created with longevity in mind, supporting a more sustainable approach by reducing the need for future replacements. Practicality was woven throughout, with carefully organised storage supporting daily routines and encouraging independence. A dedicated reading nook introduces a quiet space for storytelling and rest, helping to create meaningful bedtime moments. Layering textures and natural materials softened the once heavy medieval palette, transforming the room into a light-filled woodland retreat that honours the heritage of the cottage while supporting modern family life. Ultimately, this project demonstrates how thoughtful design and careful planning can transform a dark, dated room into a whimsical bedroom designed to grow with our young son, while remaining rooted in the perfectly imperfect character of a historic home.
Voting is not enabled or out of date!

Anais, Stiles

Photo 1
Photo 2
Photo 3
Photo 4
Photo 5
Photo 6
Photo 7
Photo 8
Please provide any other information that is relevant for your entry
This project completely reimagines a small, closed-off kitchen as a bright, welcoming heart of our home. We designed both the extension and the kitchen ourselves, turning a dark, cramped space into an open, airy room filled with natural light. Inspired by French country homes (a nod to my roots), we focused on creating something that feels warm, timeless, and lived-in. The vaulted ceiling with exposed faux wooden beams and the large arched window bring in light and give the room a sense of calm and space, while connecting it beautifully to the garden. We chose natural materials throughout—marble, solid wood with dovetails joinery, and soft, neutral tones—to keep the look organic and relaxed. The island, which I designed, was made to feel like a standalone antique piece of furniture rather than typical fitted cabinetry, giving the space character and a focal point to gather around. We also decided to tile it instead of going for a traditional worktop, which allowed us the save money and go for real marble. Although it leans traditional in style, the kitchen works hard behind the scenes. A modern induction hob with built-in extraction keeps things streamlined, and a concealed pantry provides plenty of practical storage without adding visual clutter. It’s a space designed for everyday living—cooking, gathering, and slowing down—balancing charm and functionality in a way that feels both personal and effortless.
Voting is not enabled or out of date!

Andrea, Foye

Photo 1
Photo 2
Photo 3
Photo 4
Photo 5
Photo 6
Photo 7
Photo 8
Please provide any other information that is relevant for your entry
If you look at the "true before" photo, you’ll see I didn’t exactly start with a pretty room. This was a full back-to-brick nightmare. I was literally standing in a shell with exposed brick, no insulation, and no ceiling. I had to rebuild the entire room from the studs up just to get a blank canvas to play with. Being honest: I don’t consider myself a "pink girl," it makes me think of Barbie and im anything but, yet somehow it keeps creeping into my house! Once I committed to the magenta for the wardrobes, I decided to lean into it. I’m obsessed with stripes and leopard print, so I figured, lets add it ALL! It’s loud, it’s bold, and it feels like a high-end boutique rather than a standard bedroom. The ottoman started life as my daughter’s old KALLAX bookcase. I couldn't bear to throw it away, so I reinforced it, wrapped it in black velvet, added some gold stud bling, and topped it with a tufted leopard print seat. It’s now the centerpiece of the room and hides the things i need to add to vinted until i get a chance! This room is proof that you don't need a designer budget to get a designer look. It’s a mix of grit (rebuilding those walls!) and total glam. It’s sustainable, it’s full of my favourite prints, and even if I still claim I'm not a "pink girl," this room definitely makes a case for it.
Voting is not enabled or out of date!

Andreea-Eunice, Piroi

Photo 1
Photo 2
Photo 3
Photo 4
Photo 5
Photo 6
Photo 7
Please provide any other information that is relevant for your entry
Before&afters of our kitchen and open plan living. Pre extension and post extension
Voting is not enabled or out of date!

Aneta, Havirova

Photo 1
Photo 2
Photo 3
Photo 4
Photo 5
Photo 6
Photo 7
Photo 8
Please provide any other information that is relevant for your entry
When we first moved in, I painted everything dark. At the time, I thought those were my favourite colours, but looking back, it reflected a period of anxiety and low mood. The room felt heavy and closed in, absorbing light rather than letting it in. This transformation became about changing that, both in the space and in myself. I carried out the entire renovation, and as the room slowly changed, so did how I felt within it. What started as a design project became something more personal, a shift towards creating a home that feels lighter, calmer and more uplifting. The palette moved to soft neutrals layered with confident pops of colour, bringing energy back into the room. A bold green ceiling adds depth and a cocooning feel, drawing the eye upward and giving the space a distinctive character. To reconnect with the home’s 1930s roots, wall paneling was added for texture and structure. A large sculptural ceiling light introduces a more contemporary contrast, softening the overall look. Sustainability was central to the design. Every piece of furniture was sourced secondhand and reworked - from the Nathan coffee tables and dining set to custom storage created by dismantling and combining existing pieces. A bookcase was repurposed into shelving above the sofa and within the alcoves, ensuring the space works for everyday living. Art and textiles add warmth and personality. The statement artwork above the fireplace is a vintage Liberty scarf, while the rug anchors the room with color and softness. The renovation was fully hands-on, involving stripping wallpaper, repairing and skimming walls, sanding, and installing paneling -completely reshaping the space. What was once a dark, enclosed room is now open, layered and full of light, a space that reflects not just a change in design, but a change in how we live and feel at home.
Voting is not enabled or out of date!

Anna, King

Photo 1
Photo 2
Photo 3
Photo 4
Photo 5
Photo 6
Photo 7
Photo 8
Please provide any other information that is relevant for your entry
This before & after transformation turned what was once an unused area alongside a ground floor bedroom into a practical & much needed downstairs toilet. By reworking the layout & boarding between the two spaces, I created a completely separate room that better supports our family’s day-to-day living. I took on the project myself, learning new skills along the way, including replastering the entire space & laying a limestone floor. Once the fixtures were in place, I added MDF panelling & used oak trim offcuts to create detail & define the wallpapered upper section. Although a small space, it was a true labour of love that has made a big impact, both functionally & aesthetically. This is a transformation i’m incredibly proud of.
Voting is not enabled or out of date!

Anna, King

Photo 1
Photo 2
Photo 3
Photo 4
Photo 5
Photo 6
Photo 7
Photo 8
Please provide any other information that is relevant for your entry
Once an empty, impractical space that quickly became a dumping ground due to lack of storage. Recognising the need for a functional & inspiring area for both work & creativity, I designed & built a full wall of bespoke, built-in furniture. This incorporates a desk, a cosy reading nook & ample storage, all carefully planned & constructed using a mix of existing materials, reworked pieces & adapted IKEA units. It was a challenging DIY project that required precise measurements & a methodical approach, with everything framed out & finished in MDF & decorative trim. Once complete, I defined each area with wallpaper & wood panelling, bringing it all together with a fresh, uplifting green. Every inch of the space was thoughtfully considered & transformed, resulting in a hardworking, characterful room that feels completely bespoke & uniquely mine
Voting is not enabled or out of date!

Anna, King

Photo 1
Photo 2
Photo 3
Photo 4
Photo 5
Photo 6
Photo 7
Photo 8
Please provide any other information that is relevant for your entry
This living room transformation showcases the journey from a dated, characterless space into a warm, functional & styled room. When I first moved in, the room lacked both personality & purpose, so I began with a simple refresh before reimagining its full potential. The biggest change came from building a faux chimney breast, which introduced structure & allowed for the creation of alcoves on either side. These were fitted with built-in cupboards & shelving, adding both storage & visual interest. To bring in a rustic country feel, I incorporated reclaimed brick slips & an oak mantle to create a bespoke fireplace. Throughout the process, I developed new skills, including installing plasterboard & plastering, completing the transformation entirely myself. The result is a complete before-&-after reinvention—turning an uninspiring room into a cosy, characterful space that works beautifully for everyday living
Voting is not enabled or out of date!

Anna, King

Photo 1
Photo 2
Photo 3
Photo 4
Photo 5
Photo 6
Photo 7
Photo 8
Please provide any other information that is relevant for your entry
This bathroom transformation tells the story of turning a once distasteful & uninspiring space into a calm, characterful master ensuite. Originally lacking style & atmosphere, the room has been completely reimagined & renovated by hand to create a soothing, country-inspired retreat. I introduced rustic elements such as reclaimed shelving & a vanity unit built from scrap wood, bringing warmth & individuality into the space. A soft French grey-green palette contrasts with fresh white, while panelling adds depth & charm. Every detail was carefully considered to elevate both the look & feel of the room. The result is a before-&-after transformation that is functional & easy on the eye
Voting is not enabled or out of date!

Anna, King

Photo 1
Photo 2
Photo 3
Photo 4
Photo 5
Photo 6
Photo 7
Photo 8
Please provide any other information that is relevant for your entry
My guest bedroom transformation has turned a once dull & uninspiring space into a warm, welcoming retreat designed with comfort in mind. Originally lacking character, the room has been thoughtfully reimagined through the addition of diy panelling, painted in a soft heritage neutral to create a calm & timeless backdrop. I added ditsy wallpaper to bring charm & visual interest, while the picture ledge I added allows for an evolving display of thrifted frames, adding personality & a curated feel. I upcycled a chest of drawers that was rescued & even sprayed my bed black. Layered with soft neutrals, gentle greens & seasonal touches, the room now feels cosy, inviting & considered. This before-&-after transformation now means that my guests feel at home & never want to leave
Voting is not enabled or out of date!

Anna, Rocks

Photo 1
Photo 2
Photo 3
Photo 4
Photo 5
Photo 6
Photo 7
Photo 8
Please provide any other information that is relevant for your entry
This kitchen was a DIY transformation on a serious budget! When we viewed the house in 2024 we loved the space and light that the kitchen had and planned to put in a new kitchen, but looked at all the other jobs that needed doing we realised that it was going to be out of reach for a good few years. So I set about making the best of what we had with paint, MDF, new lights and hardware. All the kitchen units were the same, I just painted them and added new handles. I added tongue and groove panels to make the room feel less boxy, built extractor hood housing and made shelves to go in place of the old wall hung cupboards. On the glass fronted cupboards I added film to give a reeded glass effect and added some cornice. The chairs, "island" or prep table and antique glass lights were all bargain Facebook Marketplace finds. Changing the things that we could do cheaply by ourselves helped us love some of the things we disliked before but would be expensive to change, like the worktops and the floor tiles! I still have some finishing off to do in here, as I hope to get a marble worktop for the "island".
Voting is not enabled or out of date!

Ashley, Rack

Photo 1
Photo 2
Photo 3
Photo 4
Photo 5
Photo 6
Photo 7
Photo 8
Please provide any other information that is relevant for your entry
This garden transformation represents not just a dramatic visual change, but a complete lifestyle shift for our family. What was once a boggy, sloped, and unusable space with poor drainage has been entirely reimagined and rebuilt by my own hands, with help from my husband on weekends. It has been a true labour of love, saving thousands in the process while delivering a deeply personal and meaningful result. Before, the garden was tired and impractical. Worn, uneven concrete slabs, rotten fencing, and damaged grass thanks to the children and the dog meant the space was rarely used and constantly brought mess back into the house. It lacked privacy, structure, and any sense of enjoyment. I approached the redesign in carefully considered stages, focusing on how we wanted the space to function as a family. The vision was clear: to create an outdoor room that felt like a natural extension of our home. The result is a multi-functional space with defined areas to dine, relax, and play. A larger patio now accommodates outdoor dining, while a pergola and decking area capture the afternoon sun, adding both structure and shaded comfort. New fencing provides privacy and a clean backdrop, while raised planters introduce modern lines and opportunities for layered, evergreen planting. Artificial turf has transformed the garden into a low-maintenance, family friendly space, my daughter can now roll freely on the grass, and the garden is used daily without the worry of mud or mess. A thoughtfully designed lighting scheme brings the space to life after dark, ensuring it remains visually striking and welcoming throughout the seasons. This transformation has turned an overlooked, problematic garden into a beautiful, functional, and much loved outdoor living space that has genuinely changed how we live.
Voting is not enabled or out of date!

Avalana, Simpson

Photo 1
Photo 2
Photo 3
Photo 4
Photo 5
Photo 6
Photo 7
Photo 8
Please provide any other information that is relevant for your entry
When we first moved in, the kitchen was completely at odds with my style. It was very neutral, flat and lacking any sense of personality. With no budget for structural changes, I set out to completely transform the space using paint, wallpaper and creative, hands-on design solutions. The beige tiled backsplash was one of the biggest challenges. I skimmed over the tiles and applied one of my own hand-painted marble wallpapers, designed specifically for this area, instantly elevating the space. The existing cabinetry was updated with a custom-mixed paint colour, while the countertops were refinished using a gilded topcoat to introduce warmth and a subtle metallic sheen. Smaller details, such as changing the tap from chrome to gold and spray-finishing the oven, made a significant difference in shifting the overall tone. To add depth and drama, I installed a 12mm MDF ceiling drop to house a statement metallic floral mural, paired with a chandelier to create a strong focal point. I continued the metallic detailing through the window reveals to create cohesion throughout the space. A previously unused bench beneath the window was reimagined as a seating nook, featuring a bespoke scalloped, striped velvet cushion that I designed and brought to life in collaboration with a local upholsterer. The most transformative decision was removing the window above the sink and replacing it with antique copper-toned mirror, enhancing both light and atmosphere while adding a sense of richness. The finished space feels opulent, layered and inviting. A kitchen designed not just for function, but for living. It’s a complete departure from where it started, achieved without major renovation, and a true reflection of the power of colour, pattern and creativity.
Voting is not enabled or out of date!

Becky, Leavesley

Photo 1
Photo 2
Photo 3
Photo 4
Photo 5
Photo 6
Photo 7
Photo 8
Voting is not enabled or out of date!

Becky, Leavesley

Photo 1
Photo 2
Photo 3
Photo 4
Photo 5
Photo 6
Photo 7
Photo 8
Please provide any other information that is relevant for your entry
Three areas into one. Fitted the kitchen ourselves.
Voting is not enabled or out of date!

Becky, Leavesley

Photo 1
Photo 2
Voting is not enabled or out of date!

Becs, Baker

Photo 1
Photo 2
Photo 3
Photo 4
Please provide any other information that is relevant for your entry
This downstairs loo has had a number of changes since we first moved in but this is the latest – and hopefully the last?! I stuck on every single bobbin for the trim hand and this took an undercoat and five coats of Farrow & Ball Brinjal. Definitely a labour of love…
Voting is not enabled or out of date!

Becs, Baker

Photo 1
Photo 2
Photo 3
Photo 4
Photo 5
Photo 6
Photo 7
Photo 8
Please provide any other information that is relevant for your entry
Cleverly designed built-in storage, panelling and wallpaper have transformed this oddly-shaped, former dumping ground of an loft room into a tranquil, multifunctional office, guest room and chill out zone for the teenage kids. I really hope you can tell the ‘Afters’ from the ‘Befores’ ?
Voting is not enabled or out of date!

Beth, Loman

Photo 1
Photo 2
Photo 3
Photo 4
Photo 5
Photo 6
Photo 7
Photo 8
Please provide any other information that is relevant for your entry
Our living room transformation was driven by a desire to create a warm, characterful space that truly reflects how we live as a family. The original room felt dated and under utilised, lacking both personality and practical flow. By introducing a cohesive colour palette, bespoke joinery and layered textures, we re-imagined the space into a calm yet inviting retreat. Every detail was carefully considered to balance style with everyday functionality, from clever storage to durable, family-friendly finishes. The result is a timeless, lived-in space that feels both elevated and effortless, proving that thoughtful design can completely transform how a room is experienced.
Voting is not enabled or out of date!

Bethany, Tyson

Photo 1
Photo 2
Photo 3
Please provide any other information that is relevant for your entry
We transformed our entrance space from chaotic to calm - the perfect place to come home to.
Voting is not enabled or out of date!

Bradley, Dreha

Photo 1
Photo 2
Photo 3
Photo 4
Photo 5
Photo 6
Photo 7
Photo 8
Please provide any other information that is relevant for your entry
This dining nook transformation completely redefined both the look and function of the space. What was once an underutilised and unremarkable area is now a bold, character-filled focal point within the home. I introduced strong architectural elements to elevate the space, including a panelled and wallpapered ceiling with added moulding and coving, as well as custom arch detailing to frame the nook. These features created depth, interest, and a more considered, high-end feel. A key part of the transformation is the built-in style booth seating. Using two flat-back storage benches as a base, I brought the wall forward and built an arch around them to achieve a bespoke, fitted look. I then completed the upholstery myself, turning a simple setup into a standout design feature. To further enhance the visual impact, I hand-painted palm trees and stripes on the walls, adding personality and a unique design statement. I also created a custom bar station side unit, bringing both practicality and style into the finished space. Every element of this makeover was completed by myself, and the result is a dramatic before-and-after transformation that showcases how thoughtful design and hands-on creativity can completely reinvent a space. Here are some of the videos I have shared showcasing the process highlighting the before and after of the project: https://vm.tiktok.com/ZNR4Coa5r/ https://vm.tiktok.com/ZNR4XJbWp/
Voting is not enabled or out of date!

Bradley, Dreha

Photo 1
Photo 2
Photo 3
Photo 4
Photo 5
Photo 6
Photo 7
Photo 8
Please provide any other information that is relevant for your entry
This living room transformation was a deeply DIY-driven project, inspired by a desire to turn a previously bland and uninspiring space into a fresh, luxurious tropical escape. A key feature of the design is the pair of custom-built alcoves, created using arched plywood to seamlessly connect tall flat-pack units to the surrounding walls, giving the impression of a fully bespoke installation. Within each alcove, I introduced a tropical mural to create the illusion of two window seats, with the integrated storage benches styled as seating areas, adding both charm and function. Along the fireplace wall, these storage boxes not only maximise practicality but also double as comfortable seating when layered with cushions, enhancing the cosy, snug atmosphere. To finish the space, I introduced a striped rug that echoes the subtle stripe etching within the wallpaper, tying the scheme together and reinforcing the cohesive, considered design. The overall result is a high-end look achieved through thoughtful planning, creativity, and budget-conscious, hands-on craftsmanship. I love sharing my project over on my socials to encourage people that they can do it themselves too: https://vm.tiktok.com/ZNR4tm546/
Voting is not enabled or out of date!

Briony, Teasel

Photo 1
Photo 2
Photo 3
Photo 4
Photo 5
Photo 6
Photo 7
Photo 8
Please provide any other information that is relevant for your entry
This before and after entry shows our stairs and landing. Before, it was covered in coats of thick gloss paint, grey faux panneling and had a dark grey carpet. I really wanted to inject colour into this space. My main inspiration was Watergate Bay hotel in Cornwall, which is where I got the colour palette from, the idea for the shiplap wall and why I incorportated the palm wallpaper along with the ocean print. I spent ages deliberating what to do with the stairs themselves as being a U shape, I knew a custom runner would be expensive. I love stripes and had the idea to use leftover paint from another project to try it out. I love it so much, they make me so happy everytime I see them and the Etruscan Red paint really glows when the sun shines on them. The bottom of the stairs area also has a real stained glass window which we restored, and we fitted a window film in a similar style to the top one to match. We then painted the top of the stairs wall in a fun checkerboard pattern in a warming yellow to tie in with the yellow in the wallpaper at the bottom of the stairs. Just because the stairs / landing aren't a main room in your home, it doesn't mean they can't be showstopping!
Voting is not enabled or out of date!

Callieanne, Major

Photo 1
Photo 2
Photo 3
Photo 4
Voting is not enabled or out of date!

Carly, sadler

Photo 1
Photo 2
Photo 3
Photo 4
Please provide any other information that is relevant for your entry
There is a full video transformation of our garden taking it from overgrown new build top soil to a neutral haven to enjoy One of our first projects in our home @_theneutralnewbuild_x
Voting is not enabled or out of date!

Caroline, Cumiskey

Photo 1
Photo 2
Photo 3
Photo 4
Please provide any other information that is relevant for your entry
My downstairs bathroom was too bland for my liking and needed some wow factor! It certainly packs a punch now with its bright bold colour combination, beautiful panelling and dark wood effect LVT
Voting is not enabled or out of date!

Charlotte, Aguirre

Photo 1
Photo 2
Photo 3
Photo 4
Photo 5
Photo 6
Photo 7
Photo 8
Please provide any other information that is relevant for your entry
This was my first proper DIY project, and I knew from the outset that I wanted to create a lounge that felt bold, beautiful, and true to the home’s original character. Armed with nothing more than a hammer and chisel, I began by opening up the fireplace, uncovering the potential that had been hidden away. I lifted the old laminate flooring and carefully removed the original floorboards beneath to insulate properly before the painstaking task of relaying, sanding, and staining each one to bring them back to life. Taking on new skills along the way, I tiled the fireplace myself (a first for me) and then made a confident design decision to fully colour drench the room in Lick 03. It was very much a “trust the process” moment but one that paid off completely. To complete the space, I built bespoke shelving and sourced a characterful fireplace surround from Facebook Marketplace, blending craftsmanship with thoughtful reuse. The result is a truly cosy haven that works beautifully year-round. In winter, the log burner creates an irresistibly warm and intimate atmosphere, enhanced by the rich terracotta tones. In summer, those same tones feel vibrant, uplifting, and full of life. It’s a space that feels both timeless and personal the perfect balance of bold design and comfort.
Voting is not enabled or out of date!

Charlotte, Carnevale

Photo 1
Photo 2
Photo 3
Photo 4
Please provide any other information that is relevant for your entry
The first two photos are the after The 3rd was the before it was a living area before - 4th is the during
Voting is not enabled or out of date!

Charlotte, Lawrence

Photo 1
Photo 2
Photo 3
Photo 4
Photo 5
Photo 6
Photo 7
Photo 8
Please provide any other information that is relevant for your entry
We discovered when I was 30 weeks pregnant, that our bedroom wardrobe was covered in mould. So we were left with no choice but to strip it back to it's bones and start again, obviously with a clear deadline in the form of a tiny human! We DIYed our dream master bedroom with fitted wardrobes and transformed it from cold & mouldy, to warm & boujee. We didn't quite make the deadline, but baby enjoying the panelling project from the carrier!
Voting is not enabled or out of date!

Charlotte, Lawrence

Photo 1
Photo 2
Photo 3
Photo 4
Photo 5
Photo 6
Photo 7
Photo 8
Please provide any other information that is relevant for your entry
Renovating a home with two under two is beautifully chaotic, and having one calm, functional space makes all the difference. Our bathroom has become that little sanctuary in the middle of dust, noise, and constant change—a place where we could reset, keep routines steady for the kids, and carve out a moment of calm for ourselves. It’s more than just a room; it’s where busy days start and end, and having it thoughtfully designed has brought a sense of order and comfort to our everyday family life, even in the middle of renovation madness.
Voting is not enabled or out of date!

Charlotte, Lawrence

Photo 1
Photo 2
Photo 3
Photo 4
Photo 5
Photo 6
Photo 7
Photo 8
Please provide any other information that is relevant for your entry
When our renovation budget ran dry, the kitchen could have easily been left behind—but instead, we set ourselves the challenge to completely transform it for just £300, and it worked. With a lot of paint, updated handles, and some cleverly applied vinyl on the worktops, we gave the space a whole new lease of life without the cost of a full renovation. It’s proof that you don’t need a big budget to create a beautiful, functional kitchen—just a bit of creativity, determination, and a willingness to get stuck in.
Voting is not enabled or out of date!

Charlotte, OConnor

Photo 1
Photo 2
Photo 3
Photo 4
Photo 5
Photo 6
Photo 7
Photo 8
Please provide any other information that is relevant for your entry
Would love if you could take a look at my Instagram page for reels of the transformations @no.77_reno
Voting is not enabled or out of date!

Charlotte, Reddington

Photo 1
Photo 2
Photo 3
Photo 4
Photo 5
Photo 6
Photo 7
Photo 8
Please provide any other information that is relevant for your entry
The smallest rooms can really make the biggest impact. I loved creating this look in our downstairs WC. The bold colour choice has made it feel dramatic and luxurious and our guests have love the transformation. It feels like a hotel restroom.
Voting is not enabled or out of date!

Claire, Brooks

Photo 1
Photo 2
Photo 3
Photo 4
Photo 5
Photo 6
Photo 7
Photo 8
Please provide any other information that is relevant for your entry
Our garden transformation has been one of the biggest parts of our 4-year self-renovation journey. What started as a steep, unusable sloped garden has been completely reimagined into a functional and beautiful outdoor living space. We have the full before and after reveal on our Instagram page. We spent 14 months transforming the garden, including major groundwork to level and retain the space, allowing us to truly maximise its potential. Every detail has been carefully considered and completed by us, from the layout and materials to the styling and planting. The design blends modern structure with soft, calming elements – featuring porcelain paving, a bespoke outdoor kitchen, a pergola seating area, and layered lighting to create warmth and ambience. The before and after truly reflects not just a visual transformation, but the amount of work, planning and passion that has gone into creating a space we can now enjoy all year round.
Voting is not enabled or out of date!

Cliona, Hosty

Photo 1
Photo 2
Photo 3
Photo 4
Photo 5
Photo 6
Photo 7
Photo 8
Please provide any other information that is relevant for your entry
1930's home that was 2 up 2 down. We have 5 children so wanted another space for sleepover or Grandparents staying. I love scandi interiors and minimalism. We transformed a 56m2 house into a 205m2 home for 7.
Voting is not enabled or out of date!

Coral, Foster

Photo 1
Photo 2
Photo 3
Photo 4
Please provide any other information that is relevant for your entry
By adding a single-storey extension to the rear of our home, we’ve completely transformed not just how it looks from the outside, but how we live day to day. The open-plan living, kitchen, and dining space now flows straight out through two sets of bifold doors onto the patio and lawn, which makes everything feel so much more connected. It’s honestly been the best change we’ve made to the house.
Voting is not enabled or out of date!

Dan, Coyles

Photo 1
Photo 2
Photo 3
Photo 4
Voting is not enabled or out of date!

Daniel, Bland

Photo 1
Photo 2
Photo 3
Photo 4
Please provide any other information that is relevant for your entry
Reinstated plaster coving and fireplace, gold leaf ceiling panel, Bland Design faded grandeur wallpaper. Replaced rotten floor with parquet from Direct Wood Flooring.
Voting is not enabled or out of date!

Debbie, Heaven

Photo 1
Photo 2
Photo 3
Photo 4
Please provide any other information that is relevant for your entry
We have built the house over the bungalow whilst living in it ourselves , we don’t have a builder we do as much as we can , then get the trades in , it’s been a journey and we still have so much more to do .
Voting is not enabled or out of date!

Drew, Muntz

Photo 1
Photo 2
Photo 3
Photo 4
Photo 5
Photo 6
Photo 7
Photo 8
Please provide any other information that is relevant for your entry
What a wreck of a small space… Originally a staff toilet in a restaurant housed in a Regency House. After gaining permission to convert back to residential, and consulting with listed buildings, I thought the only way to handle this small, windowless space was to create an enigmatic space As you enter, all lighting is on PIR, illuminating the Italian Tortoise shell lucite panels and Vintage Maison Jansen wall lights A black ceramic WC with a 1920’s Lacquered Cabinet and black marble basin completes this dramatic little space The mirrored wall slides back to reveal boiler/water tank and the general plumbing essential for the house’s workings
Voting is not enabled or out of date!

Ellis, Duncan

Photo 1
Photo 2
Photo 3
Photo 4
Photo 5
Photo 6
Photo 7
Photo 8
Please provide any other information that is relevant for your entry
Project Sunroom! My lovely, flowery, cosy and eclectic sunroom, also known as the vestibule, or my G&T and nap room. This space forms the front entry to my home and is the first of three hallways that I transformed while pregnant to make the house feel brighter, more welcoming and full of personality. Although I liked the room when we first bought the house, it was seriously lacking the feeling of a ‘sun room’. One night at 1am, six months pregnant and unable to sleep (hello restless legs), I decided to empty the room and prepare the floor to be painted. I then hand-painted a checkerboard design to give the space a bit of attitude while still honouring the Victorian roots of the house. This had held up flawlessly since being painted due it being sealed properly which is a bonus given how much footfall this room sees! From the beginning I knew I wanted the sunroom to feel alive and full of plants. I chose a bold floral wallpaper to ground the space and introduce colour to an otherwise dark, flat wall. I added two chairs, a his and hers. One rocks, while the other is slouchy and deep enough to curl up in with a book and a G&T in the summer. Over time I layered the room with pieces to tie it all together: a thick jute rug, wooden lamps, artwork, trailing plants and vintage finds. It’s hard not to feel happy when you open the front door, but the real star of the room is the beautiful stained glass windows and door. When the sun shines, coloured light filters through the glass and scatters little rainbow streams across the room. Like many of the spaces in our home, this room carries a lot of sentiment. I worked on it while pregnant so that I could spend warm summer days here with my newborn daughter and my son beside me. It is a small room, but it sets the tone for our whole home: joyful, layered and full of life.
Voting is not enabled or out of date!

Ellis, Duncan

Photo 1
Photo 2
Photo 3
Photo 4
Photo 5
Photo 6
Photo 7
Photo 8
Please provide any other information that is relevant for your entry
My second hallway, or my inner hallway. A random long hallway nestled between the front sunroom and another inner hallway. This was a completely abandoned and discarded part of our home because it was deathly dark. I’m all for keeping original features. The panelling is STUNNING, so well crafted and completely Arts & Crafts era. But the dark stain was pretty oppressive, especially considering the hallway is sandwiched between two parts of the house that don’t get the best natural light. Because of this, it always felt dark and somehow dirty despite always being cleaned, and people literally hurried through it when they entered my house. I decided to paint the panelling. A mortal sin, I know. But who wants to enter their house and feel as though they can’t see from one corner to the next because of dark features? Not me! The hallway has been primed and painted in a really bright antique white. The floor has been hugged by an animal print runner rug. I’ve made use of unconventional pieces of furniture to act as shoe storage, an inherited pine bookcase as well as my old tallboy, which works weirdly well for shoes. The walls have quirky prints, both old and new, some more serious than others, and I’ve made use of baskets upon baskets for things like the kids’ hats and gloves, blankets and the dogs’ leads. I’m yet to choose a radiator cover and decide on a wallpaper for above the panelling but, like everything I do here, I’m waiting for the right choices to reveal themselves. Why rush? In the meantime it’s so much brighter and more welcoming. I absolutely love that it feels as though we’ve gained a whole other space in the house, one that now works hard for my family and me.
Voting is not enabled or out of date!

Emily, Barratt

Photo 1
Photo 2
Photo 3
Photo 4
Photo 5
Please provide any other information that is relevant for your entry
I have done quite a few transformations so it was really tricky to decide which to enter. I decided to enter the bathroom as it was a small unused space at the top if the house and is now a bathroom we use every day.
Voting is not enabled or out of date!

Emily, Fradgley

Photo 1
Photo 2
Photo 3
Photo 4
Photo 5
Photo 6
Photo 7
Photo 8
Please provide any other information that is relevant for your entry
Before a dining room into the kitchen now my little boys room ( now 2.5 years) During our home renovation we changed the whole house layout (which you will see later - to make more bedrooms
Voting is not enabled or out of date!

Emily, Kowalewska

Photo 1
Photo 2
Photo 3
Photo 4
Photo 5
Photo 6
Photo 7
Photo 8
Please provide any other information that is relevant for your entry
This is our faux fireplace we built in our bedroom. I say we, but I was predominantly the ideas and my husband made it come to life. I doodled him a picture of the ‘vision’ and we went from there. First he built the surround and I stained it. Next he cut plywood to fit in the surround , I then painted a black rectangle and glued different sized log slices onto it so it gave the illusion of a log store. I picked the tiles we then mounted the plywood onto the wall and My husband then tiled it. And voila with a bit of styling our fireplace came to life.
Voting is not enabled or out of date!

Emily, Kowalewska

Photo 1
Photo 2
Photo 3
Photo 4
Photo 5
Photo 6
Photo 7
Photo 8
Please provide any other information that is relevant for your entry
This is our conservatory utility. After we purchased my childhood home off my parents there was lots of work to be done. We loved the concept of our conservatory but It was not great for temperatures in the winter it was like a walk in fridge and in the summer it was like a sauna. So we had our roof replaced which made it such a more useable space. Just recently we have really made it our own. I wanted to create a moody, country cottage boot vibe in this space. We added panelling, painted the white UPVC and even turned plastic white windowsills into a ‘wood effect’ by using frenchic browning wax. We absolutely love this space now I even enjoy doing the washing in here now! We hope you love seeing the before and afters.
Voting is not enabled or out of date!

Emma, Potter

Please provide any other information that is relevant for your entry
Hello, my name is Emma Potter. I'm a marketing manager by day and an artist by night. Once a budding student with a passion for textile design, my career took a different path - it felt like my ladder was against the wrong tree. I sold my paintings in galleries in London, Surrey, Sussex and Nottingham post graduation some 30 years ago. Then I didn't pick up a paint brush for 20+years... 12 years ago I wanted to rediscover what light me up. I studied to become a coach, an NLP Practitioner and many other modalities. Then I met Karen Haller and my love of colour was rediscovered. I studied with her through the lens of brand strategist for my 9-5 career and artist for my passion - to become an artist again. Albany Cottage and the transformation of my home has transformed me. In 2025 I did my first commission, I hosted my first colour and creativity workshop, and I'm feeling more me than I've felt in as long as I can remember. That feeling is blissful. I hope you enjoy Albany Cottages journey back to colour and love. With joy and colour, Emma
Voting is not enabled or out of date!

Emma, Simonetti

Photo 1
Photo 2
Photo 3
Photo 4
Photo 5
Photo 6
Please provide any other information that is relevant for your entry
We finally bought our first home after 15 years of renting and I started a colourful home Instagram a year ago to show my content. After years of white walls I wasted no time in decorating and always have a project on the go!
Voting is not enabled or out of date!

Evelyn, Lindley

Photo 1
Photo 2
Photo 3
Photo 4
Photo 5
Photo 6
Photo 7
Photo 8
Please provide any other information that is relevant for your entry
My landlords decided we tenants needed new kitchens and the experience was horrendous, start to finish! At the end of it, I looked at my white kitchen and thought, “this won’t do!”, so I set to work with my rental-friendly design. Vinyl on the cabinets (top and bottom), vinyl on the white strip light to make it black, and wallpaper on the tiles, using Ammarah’s amazing tips! It’s much more me now! It feels warm and homely, rather than sterile and cold!
Voting is not enabled or out of date!

Fern, Hutchinson

Photo 1
Photo 2
Photo 3
Photo 4
Photo 5
Photo 6
Photo 7
Photo 8
Please provide any other information that is relevant for your entry
Our living room project was the biggest project we've done so far and has made the biggest difference to our new build home. We have taken the room from boring and cold, to character country style living that is cosy and inviting. We panelled the wall and then build a faux chimney breast which is fire/heat safe to one day put in a log burner or bioethanol fire, built in cupboards, shelving and also hidden storage within the chimney breast which we have a little push touch cupboard for in the side of the chimney breast. We were kindly gifted new sofas from DUSK and a rug from Ruggable to accompany the transformation. The mirror is from Cotswolds which we bought. We had so much building this project and it was a huge learning cover. A huge transformation!
Voting is not enabled or out of date!

Fern, Hutchinson

Photo 1
Photo 2
Photo 3
Photo 4
Photo 5
Photo 6
Please provide any other information that is relevant for your entry
Our downstairs bathroom was a basic, white small toilet when we bought our home a year ago and we have transformed it to be a luxurious, moody room. We took off the old tiles, panelled the room with trim, then larger trim to create a dado rail, built a shelf and used peel and stick wallpaper around the top of the room. We simply then styled it with a new mirror, towel rail and plants. We done all of this on a budget with the panelling and decor costing around £150 (£100 was gifted by The Range), and the wallpaper was gifted by Photowall.
Voting is not enabled or out of date!

Frederique, Etienney-Pope

Photo 1
Photo 2
Photo 3
Photo 4
Photo 5
Photo 6
Photo 7
Photo 8
Please provide any other information that is relevant for your entry
This space was originally one large room — generous but unfocused, with no clear purpose. We wanted to create two distinct rooms without losing the light that flows through the space. The solution was a full-height glass wall, built in the style of a Crittal partition. Rather than buying the real thing, we found an ironmonger who fabricated the frame to our design and fitted glass panels — the same look at a fraction of the cost. One of the biggest challenges was getting the colours right. We wanted the dining room to feel dark and moody, while the living room needed to be soft and bright — but the two had to flow together through the glass wall. Finding the right pink to complement the deep charcoal without clashing took real time and testing. The result is two rooms that feel completely different in mood and character, yet still feel like part of the same home. Light flows freely between them, but each space has its own identity. Same footprint, completely transformed.
Voting is not enabled or out of date!

Gail, Richardson

Photo 1
Photo 2
Photo 3
Photo 4
Photo 5
Photo 6
Photo 7
Photo 8
Please provide any other information that is relevant for your entry
This transformation was a long time coming! We lived with the patterned carpet for far longer than we ever expected, but we always had grand plans for this room. Why not put cloudy wallpaper on the ceiling?! The panelling took us a long time to do ourselves but now feels like it was always here. Having mist coated the room to a bright white, the first coat of the dark paint felt quite shocking - but we are so happy with how it turned out. It’s our room for special occasions, and it really does feel quite special in here.
Voting is not enabled or out of date!

Gemma, Bertolotto

Photo 1
Photo 2
Photo 3
Photo 4
Photo 5
Photo 6
Photo 7
Please provide any other information that is relevant for your entry
My client loved the outdoors. This is his reception room for his business. I took his love of the outdoors and matched it all to his brand colours. It’s a rental property so we were restricted with what we could change/add to the room. He was absolutely delighted with the result! His clients always comment how much the love the whole design. I completed every room in his building. Every room is a showstopper from the second you enter the building. I’m very proud of this multi room project.
Voting is not enabled or out of date!

Gentiana, Dukaj

Photo 1
Photo 2
Photo 3
Photo 4
Photo 5
Photo 6
Photo 7
Photo 8
Please provide any other information that is relevant for your entry
When I get this house was all with brown carpet and I didn't like so I decided to remove the carpet and putting the laminate flooring and i am proud how it looks now. The transformation created not just a new room but calming environment that supports relaxation and connection. The first floor living room and dining room were once disconnected both visually and functionally. The layout felt outdated with mismatched furniture limited natural flow and a lack of identity, these rooms which should have been the heart of the home,instead felt underused and uninspiring. The goal was to create a cohesive welcoming environment where both spaces work together seamlessly. I focused on improving flow between the living and dining areas while giving each space it's own character Careful choices in colour palette, lighting and furniture placement helped unify the rooms. The transformation has completely redefined how the space is used The dining area and living room now feel connected, functional and inviting. The rooms flow naturally into one another making the space for both everyday living and entertaining More importantly the redesign has created a warm and comfortable environment that encourages connection, turning previously unused areas into the true centre of the home.
Voting is not enabled or out of date!

George, Grantham

Photo 1
Photo 2
Photo 3
Photo 4
Photo 6
Please provide any other information that is relevant for your entry
Video of the transformation: https://vm.tiktok.com/ZNRQSryTK/
Voting is not enabled or out of date!

Georgia, Goulden-Page

Photo 1
Photo 2
Photo 3
Photo 4
Photo 5
Photo 6
Photo 7
Photo 8
Please provide any other information that is relevant for your entry
Faced with a £120k renovation quote for the downstairs of our barn conversion, we chose a different path, taking on the transformation ourselves and completing it for just £40k. What began as a cost-saving decision evolved into a full-scale redesign, which we documented and shared online, gaining attention from national newspapers. By removing two walls and constructing four new ones, we reconfigured the space to suit modern-day living, creating a seamless open-plan kitchen, living and dining area alongside a walk-in pantry, snug and bootility room. The result is a striking before-and-after transformation that combines practicality, character and a deeply personal sense of achievement. We've removed the 90's features and are restoring the original character of our Victorian Barn Conversion.
Voting is not enabled or out of date!

Georgina, Russell

Photo 1
Photo 2
Photo 3
Photo 4
Photo 5
Photo 6
Photo 7
Photo 8
Voting is not enabled or out of date!

Grace (Brook Home Project), A

Photo 1
Photo 2
Photo 3
Photo 4
Photo 5
Photo 6
Photo 7
Please provide any other information that is relevant for your entry
From a run down & the smallest room in our home. Built into my walk in wardrobe.
Voting is not enabled or out of date!

Hanna, Tosney

Photo 1
Photo 2
Photo 3
Photo 4
Photo 5
Photo 6
Photo 7
Please provide any other information that is relevant for your entry

What began as an empty plot became our family home in just six months. We laid the first block in June 2024 and moved in on Christmas Eve, building every part of the house from scratch. My husband, Harry, built it alongside two other men, while I designed and planned every room, choosing everything from the flooring and paint colours to lighting, layouts and styling. What makes the transformation so meaningful is that every corner tells part of our story. From carefully mapping out the kitchen to creating the garden beds that are now filled with seasonal flowers, we didn’t just renovate — we created a home and lifestyle that reflects us completely.

Voting is not enabled or out of date!

Hannah, Roe

Photo 1
Photo 2
Photo 3
Photo 4
Photo 5
Photo 6
Photo 7
Photo 8
Voting is not enabled or out of date!

Hazel, Moore

Photo 1
Photo 2
Photo 3
Photo 4
Photo 5
Photo 6
Photo 7
Photo 8
Please provide any other information that is relevant for your entry
This room started out as a twin room. It felt dark and the tones too dull for a north facing room. We needed space for a home office so stripped it right back and started from scratch. Using light colours to completely transform the space.
Voting is not enabled or out of date!

Helen, Somers

Photo 1
Photo 2
Photo 3
Photo 4
Photo 5
Photo 6
Photo 7
Photo 8
Please provide any other information that is relevant for your entry
We transformed a dated galley kitchen with no heating into a welcoming family space. A pleasure to both cook and entertain in
Voting is not enabled or out of date!

Helena, Hubbard

Photo 1
Photo 2
Please provide any other information that is relevant for your entry
Before & after of my own personal home project. The first photo is the very first look we had of that room before we bought our house. The after, was about 3 months into moving in. I run my own interior design company, Hubbard Interiors, and I love doing these kind of transformations for my clients! What a change it makes!
Voting is not enabled or out of date!

Ipshita, Chatterjee

Photo 1
Photo 2
Photo 3
Photo 4
Photo 5
Photo 6
Photo 7
Photo 8
Please provide any other information that is relevant for your entry
I keep styling the space differently every few weeks - it is a small space that has made a huge impact.
Voting is not enabled or out of date!

Jade, Coxon

Photo 1
Photo 2
Photo 3
Photo 4
Photo 5
Voting is not enabled or out of date!

Jade, watkins

Photo 1
Photo 2
Photo 3
Please provide any other information that is relevant for your entry
We added stone cladding to transform our 1970s hallway into a cosy modern country entrance. Our Instagram handle is @no14hectorshouse where you can see how we transformed this space x
Voting is not enabled or out of date!

Janet, Shahverdi

Photo 1
Photo 2
Photo 3
Photo 4
Photo 5
Photo 6
Photo 7
Photo 8
Please provide any other information that is relevant for your entry
This project is the renovation of the second sitting room in our Edwardian home, built in 1906. The space originally felt tired and underused, so my aim was to restore its character while creating a warm, elegant room that felt both timeless and practical. I was closely involved in much of the renovation work myself, including helping to replace the window, building the fireplace surround, and constructing the built-in cupboard. My goal was to ensure that the architectural details felt authentic to the period of the house rather than newly introduced. The fireplace was designed to become the focal point of the room, bringing depth and character, while the updated window allows natural light to enhance the space. Careful attention was given to proportion, texture and layout to create a room that feels calm, cohesive and inviting.
Voting is not enabled or out of date!

Janice, Bristow

Photo 1
Photo 2
Photo 3
Photo 4
Photo 5
Photo 6
Photo 7
Photo 8
Please provide any other information that is relevant for your entry
We’ve lived in our home for twenty nine years and have transformed the garden several times. Everything you see, including building our extension and the pergola, we’ve done ourselves. Here are just a few of those transformations.
Voting is not enabled or out of date!

Jasmine, Gurney

Photo 1
Photo 2
Photo 3
Photo 4
Photo 5
Photo 6
Photo 7
Photo 8
Please provide any other information that is relevant for your entry
My son’s playroom hadn’t been touched since we moved in, save for replastering the ceilings, but even that hadn’t been mist-coated, leaving a dark and cluttered room for his toys. I’ve since transformed it into a colourful, bright FunHaus inspired room where his imagination can run wild. Building him a two-storey playhouse, hand painting a mural on the ceiling, upcycling Ikea Trofast into stylish storage and an Aldi triclimb into Swedish wall bars, and finally building a bespoke fitted bookcase and cupboards so everything can finally have a place. It’s now impossible to get him out of there! He has both ADHD and Autism, so wanted to create a space he could be safe while self-regulating. The playhouse has an upstairs area that’s padded, and filled with cushions and toys where he can sit and read. It also has remote control lights to aid in his sensory seeking, and the wall bars let him burn off energy while keeping him safe too. It’s not 100% finished but so far, he loves it!
Voting is not enabled or out of date!

Jess, Ryan

Photo 1
Photo 2
Photo 3
Photo 4
Photo 5
Photo 6
Photo 7
Voting is not enabled or out of date!

Jess, Ryan

Photo 1
Photo 2
Photo 3
Photo 4
Photo 5
Photo 6
Voting is not enabled or out of date!

Jodie, Corrigan

Photo 1
Photo 2
Photo 3
Photo 4
Photo 5
Photo 6
Photo 7
Photo 8
Please provide any other information that is relevant for your entry
Woodland wonderland created for my 4year old animal obsessed little boy, with added Christmas touches.
Voting is not enabled or out of date!

Jodie, Cutter

Photo 1
Photo 2
Photo 3
Please provide any other information that is relevant for your entry
Our new build garden transformation
Voting is not enabled or out of date!

Julie, Dean

Photo 1
Photo 2
Photo 3
Photo 4
Photo 5
Photo 6
Photo 7
Photo 8
Please provide any other information that is relevant for your entry
This was our kitchen renovation from dark and dingy to light and airy. We completely changed the layout, lowered ceilings and replaced floor, also adding crittle doors
Voting is not enabled or out of date!

Karen, Gadd

Photo 1
Photo 2
Photo 3
Photo 4
Photo 5
Photo 6
Photo 7
Photo 8
Please provide any other information that is relevant for your entry
When we first viewed this house, the garden was completely overgrown and disconnected from the home. Large conifers dominated the space, invasive plants had taken over, and there was no clear layout or usable area. It felt dark, crowded and completely underused. Despite this, we could immediately see the potential. Our vision was to transform the garden into a structured, contemporary outdoor space that would feel calm, welcoming and practical for modern family life. Over the past two years we have completely reimagined and rebuilt the space. We removed the large conifers and cleared invasive planting to open up light and create a sense of openness. New fencing was installed to frame and define the garden, while structured borders and raised sleeper beds were designed to add depth and architectural interest. A brand-new patio now anchors the garden, creating a seamless transition from indoors to outdoors. We built a pergola and fire pit area so the space could be enjoyed long into the evenings. To keep the garden practical and low maintenance, we installed faux lawn and decorative stone features, alongside structured stone planters. Established apple and pear trees bring softness and seasonal interest, while a statement water feature adds movement and tranquillity. What was once an overgrown, unusable plot is now a bright, contemporary garden that feels calm, structured and inviting. It has become a true extension of our home — a place where we entertain, relax and spend countless evenings together as a family.
Voting is not enabled or out of date!

Karen, Gadd

Photo 1
Photo 2
Photo 3
Photo 4
Photo 5
Photo 6
Photo 7
Please provide any other information that is relevant for your entry
Before installing our fitted wardrobes, the bedroom lacked both storage and structure. Clothing and everyday items didn’t have a dedicated place, which made the space feel cluttered and less relaxing than we wanted it to be. We wanted to create a solution that was not only practical, but also enhanced the overall look and feel of the room. The introduction of fitted wardrobes completely transformed the space. Designed to maximise every inch, they provide seamless, floor-to-ceiling storage while creating a clean, streamlined look. Everything now has its place, allowing the room to feel organised, calm and uncluttered. As well as improving functionality, the wardrobes have become a key design feature within the room. Their fitted, bespoke feel adds a sense of cohesion and balance, elevating the overall aesthetic and making the space feel more considered and complete. The transformation has not only improved storage, but has completely changed how the room feels day to day. What was once a space lacking structure is now a calm, organised and stylish bedroom that feels both practical and restful.
Voting is not enabled or out of date!

Karen, Gadd

Photo 1
Photo 2
Photo 3
Photo 4
Photo 5
Photo 6
Photo 7
Photo 8
Please provide any other information that is relevant for your entry
Before the transformation, our kitchen and dining area felt disconnected and lacked both flow and functionality. The space didn’t make the most of its potential, and it wasn’t somewhere we naturally gathered as a family. We wanted to create a bright, open and sociable kitchen diner — a space that would become the heart of our home. The transformation focused on improving both layout and usability. By rethinking the space, we created a more open and cohesive design that allows for better flow between cooking, dining and everyday living. The updated layout now provides a clear, functional kitchen area alongside a welcoming dining space, making it perfect for both family life and entertaining. Every element has been carefully considered to maximise space, light and practicality. The result is a kitchen diner that feels modern, spacious and inviting. It’s now a place where we cook, eat, entertain and spend time together — a true hub of the home that works beautifully for everyday living. What was once a disconnected and underused space has been transformed into a bright, functional and sociable environment that has completely changed how we use our home.
Voting is not enabled or out of date!

Karen, Gadd

Photo 1
Photo 2
Photo 3
Photo 4
Photo 5
Photo 6
Please provide any other information that is relevant for your entry
Originally, this space was a plain, uninspiring wall that lacked both purpose and presence within the room. The television felt like an afterthought, with no real connection to the overall design, leaving the space feeling incomplete. We saw an opportunity to turn this overlooked area into something far more impactful — a feature that would define the room and bring everything together. The transformation centred around creating a bold yet refined media wall that would act as a focal point. By introducing structure and depth, the wall now feels intentional and balanced, giving the room a stronger sense of layout and design. The television is now seamlessly integrated into the space, framed in a way that feels cohesive rather than intrusive. The addition of built elements and styling has added both visual interest and a sense of sophistication. This transformation has completely changed how the room feels. What was once a blank and underutilised wall is now a statement feature that anchors the entire space, creating a more polished, considered and inviting environment.
Voting is not enabled or out of date!

Karen, Gadd

Photo 1
Photo 2
Photo 3
Photo 4
Photo 5
Photo 6
Photo 7
Photo 8
Please provide any other information that is relevant for your entry
Before the transformation, the bedroom felt dated and lacked a clear sense of style. The space didn’t feel cohesive, and it was missing the calm, inviting atmosphere we wanted from a bedroom. Our aim was to create a warm, relaxing retreat with a more considered and elevated look. The introduction of solid walnut furniture became a key part of the transformation, bringing depth, richness and a more refined feel to the space. Rather than the room feeling heavy, the walnut tones now add warmth and character, creating a strong and intentional foundation. To balance this, we introduced soft beige and cream tones throughout the room, helping to lighten the overall look and create a calm, neutral backdrop. Touches of gold were added through styling and accessories, bringing warmth and a subtle sense of luxury. Layering textures and carefully chosen details helped to create a space that feels both cosy and cohesive, while still maintaining a clean and uncluttered feel. The transformation has completely changed how the room feels. What was once a dated and unstructured space is now a warm, balanced and stylish bedroom that feels calm, inviting and thoughtfully designed. It’s become a true retreat within our home — somewhere we can unwind and switch off at the end of the day.
Voting is not enabled or out of date!

Kat, Wagstaff

Photo 1
Photo 2
Photo 3
Please provide any other information that is relevant for your entry
Please accept our entry of our little lounge into your before and after category. This space has all been done on a budget and wall panelling and painting has been done ourselves. The first image is the before when we moved in and the second shots are how it is now. Forever my favourite room in our home as so much love went into it. Thank you so much for accepting our entry ?
Voting is not enabled or out of date!

Kate, Turner

Photo 1
Photo 2
Photo 3
Photo 4
Photo 5
Photo 6
Photo 7
Photo 8
Please provide any other information that is relevant for your entry
We bought our do'er upper in Summer of 2022 whilst I was 30 weeks pregnant with our third child. When buying this house we knew that we wanted to extend to create more family living space. This dream started to become a reality in September 2024 when our extension and bathroom renovation works started. After 14 weeks including 5 weeks of living at my parents, our dream space was finally a reality. Originally we started with 25.5 sqm across our separate kitchen and dining room to 68 sqm of living space that now houses our kitchen, diner, snug, utility room and downstairs toilet. It has been life changing for our family of 5.
Voting is not enabled or out of date!

Katelynn, McCarthy

Photo 1
Photo 2
Photo 3
Photo 4
Photo 5
Please provide any other information that is relevant for your entry
Before and after transformation of our kitchen space. From small and narrow to an open plan entertaining living space?
Voting is not enabled or out of date!

Katherine, Sanders

Photo 1
Photo 2
Photo 3
Photo 4
Photo 5
Photo 6
Photo 7
Photo 8
Please provide any other information that is relevant for your entry
With a growing family, we needed to find a way to add an extra bedroom without extending. We decided to split our large bedroom into two small smaller bedrooms for our children. To create four bedrooms upstairs and one bedroom downstairs.
Voting is not enabled or out of date!

Kayleigh, McInulty

Photo 1
Photo 2
Photo 3
Photo 4
Photo 5
Photo 6
Photo 7
Photo 8
Please provide any other information that is relevant for your entry
When we bought Highbury, the fireplace in the lounge had been boarded up, and the dining room had a gas fire with a wooden surround. The surround was original, to die for, but covered in paint and caulk. My heart hurt the minute I saw it, and I knew it was once a stunning piece. The previous owner had filled in so many of the intricate details on the surround and I knew that wouldn’t do. I spent 4 days sanding, cleaning, restoring and staining the surround. I then opened the fire back up, and installed brick slips before getting a log burner installed. Then the big moment came, installing the fire surround at the heart of the home. I cried! It’s now the focal point of our room and gets a stand out moment every single season!
Voting is not enabled or out of date!

Kelly, Insley

Photo 1
Photo 2
Photo 3
Photo 4
Photo 5
Photo 6
Photo 7
Voting is not enabled or out of date!

Kelly, Robbins

Photo 1
Photo 2
Photo 3
Photo 4
Photo 5
Photo 6
Please provide any other information that is relevant for your entry
The Bootility was by far the worst area of the house. Filled with mildew, mould and was so dark. We made the speaker by knocking into a part of the house that was only accessible via outside, there was actually underneath one of the main bedrooms. It was absolutely crumbling and falling apart. But in this little higgerdypiggerdy area, we created a functional but also beautiful space for our a busy family of 6. Seem to be flooded with light from a full length window and glazed door.
Voting is not enabled or out of date!

Kelly, Robbins

Photo 1
Photo 2
Photo 3
Photo 4
Photo 5
Photo 6
Photo 7
Photo 8
Please provide any other information that is relevant for your entry
This was the before and after transformation of our 2 younger daughter’s bedroom. A very dated tired, abit brown space, untouched since the 70s. The idea was to bring pure nostalgic childhood to their space. Nothing needed to match, everything goes. Anything they loved, any theme, any colour could go into the room and just ‘fit’. Whatever ever made them happy, made the space feel even more special, and continues to as they add trinkets and treasures. This is actually my favourite room in the whole house, sometimes on hard days I go in here and just sit as the sun pours in, it’s truly such a happy space, that makes everyone smile.
Voting is not enabled or out of date!

Kelly, Robbins

Photo 1
Photo 2
Photo 3
Photo 4
Photo 5
Photo 6
Photo 7
Photo 8
Please provide any other information that is relevant for your entry
The master bedroom, this was an absolute travesty when we brought the hose, sooo much mould and age form a massive leak some years before, stained horrible ceilings and carpets. It was absolutely transformed to become my safe, calm escape. I loved the inclusion of its daring but dramatic classic art mural. This was one of the very first room as we completed. This was also the very first time I’ve ever Wallpapered, all the gear and absolutely no idea, cutting around tricky plasterered in pipes. The bath in the corner was a little added luxury, a new coving to bring back the Georgian and feel. I wanted to calm neutral space but not boring and bland, I think we absolutely nailed that.
Voting is not enabled or out of date!

Kerry, Davison

Photo 1
Photo 2
Photo 3
Photo 4
Photo 5
Photo 6
Photo 7
Photo 8
Please provide any other information that is relevant for your entry
We had this little tucked away area, at the back of the garden, behind the garage, which had started its life as a green house area, but after a couple of bad stormy winters, it ended up just being a dumping ground for garden materials. I knew I wanted this little space to be something more than a wasted area, especially since it’s the only bit of our garden which isn’t over looked, so I set about transforming it into a little hidden jungle spa. The first thing we did was make the area fully private, by adding the horizontal fencing, then we removed the stones and added paving slabs, whilst making the sloping ground more even. We also added a drain, so we could easily empty the hot tub without flooding ours or our neighbours gardens and put in an outdoor plug, so we could safely have the hot tub plugged in. The area is really narrow, being 1.9m so we had to find a hot tub which was small enough to fit in the gap. A round, inflatable 1.8m hot tub was the perfect solution. I went for one with a wood look finish and people are usually shocked that it’s actually an inflatable tub. I’ve added a mix of real and faux plants here, as it’s an area which doesn’t get much sun but I really wanted it to have that hidden oasis feel, with big dramatic green leaves cascading down around you while you bathe. This really gives a feeling of being somewhere exotic, whilst in reality, you’re in still Newcastle. I also added a little towel rail, which I made myself after seeing one very similar for sale. I had some left over bits of slats from building the fence, so I used those to build the little rail where we store the towels. The final touches to make my little corner of tropical paradise was a faux living wall, complimented by my custom ‘House of Chi’ neon light and some colourful spot lights, which you can adjust to change the mood of the garden. I like to go for green, to add to the jungle vibes. This tiny space has the biggest impact in our garden and went from wasted space to the most loved corner of our garden. It’s loved and used by not only me, but my teen daughter and her friends and even my 5 year old likes to take a dip with me in the summer.
Voting is not enabled or out of date!

Kezia, Falconer

Photo 1
Photo 2
Photo 3
Photo 4
Photo 5
Photo 6
Please provide any other information that is relevant for your entry
The renovation of the stairs and hallway area required a complex mix of renovation skills! Some solid DIY/ carpentry skills for the stairs (we did it all ourselves), bold paint choices, some preservation of the original 1920s arch and corbels, and eventually some styling. We are pleased with the statement stairs, detail of the herringbone floor, art nouveau corbels and simple sideboard. It's a mix of old meets new meets bold meets minimal - and we think it works so well. Alot of sweat and dust and coffee went into these before and after pics. And we also had to use a ladder for 2 weeks to get upstairs! The live-in-reno-life reality hit home then. But we think this selection of images shows you the hard work and love that created this hallway of character. All on a budget... All DIY.
Voting is not enabled or out of date!

Kezia, Falconer

Photo 1
Photo 2
Photo 3
Photo 4
Photo 5
Photo 6
Photo 7
Photo 8
Please provide any other information that is relevant for your entry
As you can see from the photos this bathroom renovation has been a really transformation from dated baby-blue glass tiles to soft setting-plaster coloured walls. The cool and calming after shots show off the upcycled vanity unit which we did ourselves as our first ever upcycle. We added a shower, extended the floor footprint into the hall, and repositioned the sink and toilet. So the 'after' is really a world away from the before in every way... Plumbing, design and feel. We wanted a relaxing functional face that had luxe touches over the top of natural materials and soft colours. And we think we pulled it off! Bye bye baby blue glass tiles! Hello gold finishings, soft pink tones and industrial-touched calm.
Voting is not enabled or out of date!

Kimberley, Lind

Photo 1
Photo 2
Photo 3
Photo 4
Photo 5
Photo 6
Photo 7
Photo 8
Please provide any other information that is relevant for your entry
Lindwhitehome - Instagram
Voting is not enabled or out of date!

Kimberley, Lind

Photo 1
Photo 2
Photo 3
Photo 4
Photo 5
Photo 6
Photo 7
Photo 8
Please provide any other information that is relevant for your entry
Lindwhitehome - Instagram
Voting is not enabled or out of date!

Kirstie, Waterston

Photo 1
Photo 2
Photo 3
Photo 4
Photo 5
Photo 6
Photo 7
Photo 8
Please provide any other information that is relevant for your entry
Of all our rooms, this has probably undergone the biggest transformation - and restoration - as we discovered the original Victorian panelling. It was another maternity leave project competed during naptimes, although I’m still adding to it now. This room is our dining area, it’s an awkward space because it’s more of a thoroughfare linking the kitchen extension to the hallway and rest of the house. When we moved in this room was in a sorry state. There was damp around the window, the boiler was in the fireplace, and it was quickly condemned, which was not something we had budgeted for. There was an odd pigeonhole structure under the window and we soon realised all these cupboards and structures were built to conceal various pipes. The boiler cupboards and various boxed in pipes protruded so much into the room taking up valuable floor space in an already small area. We ripped out the boiler to open up the fireplace and install a stove to make this a cosy heart of the home once again. It was a cold, pale blue room so I decided to add character by panelling below dado level and introducing colour above. But when I started peeling off the wallpaper, the plaster started crumbling with it. I realised the original lime plaster was intact underneath, complete with doodles, and I spent weeks scraping off the modern plaster. When I started pulling off the wallpaper below the dado I realised it was sitting on plasterboard. There was a little gap and I thought I could see wood behind it. I tentatively started prising it off, and found the original Victorian panelling underneath. This felt like such a win, to have discovered an original feature, hidden for decades. Unfortunately a large section was missing in the corner of the room where it had been pulled apart to install central heating at some point in the early 1980s. However, after recessing the pipes (through much trial and error!) I managed to source some timber cut in imperial measurements to match the size of the Victorian panelling, and I carefully patched it in, transforming that corner of the room. I wanted to bring light and warmth to the space, so I went for pink panelling and paired it with a bold William Morris print dating from the same era our house was built. I think the wallpaper was maybe an unconventional choice for a kitchen-dining area, but it’s completely transformed a drab thoroughfare into a more welcoming space that you want to spend time in. The space now has a purpose. Although this is a room you walk through to get to the rest of the house it has its own personality now. This is where we spent a lot of family time together; eating, crafting, baking celebrating birthdays. I always dreamt of an old farmhouse table that would be a family focal point, but being a tiny room it took years of salvage hunting to find one small enough. It was slathered in grey paint but remarkably you’d never know that now. I feel like there’s part of me in every element here - I carefully restored the panelling, but I also painted it, I did the wallpapering, the tiling, I restored the kitchen table and reinstated a ceiling rose. But I also reupholstered vintage chairs and handmade the banner above the fireplace (this is a very noisy boy household) - all these little touches were to save money, but it’s also put soul back into the house.
Voting is not enabled or out of date!

Kirsty, Clements

Photo 1
Photo 2
Photo 3
Photo 4
Photo 5
Photo 6
Photo 7
Photo 8
Voting is not enabled or out of date!

LYDIA, NELSON

Photo 1
Photo 2
Please provide any other information that is relevant for your entry
We converted our understairs cupboard into a pantry, using shelves and lighting from IKEA and some wine racks from our old kitchen.
Voting is not enabled or out of date!

Lara, Bezzina

Photo 1
Photo 2
Photo 3
Photo 4
Photo 5
Please provide any other information that is relevant for your entry
This is the first bedroom we’ve renovated in the house, we’ve managed to add lots of extra space by removing the faux lowered ceiling (specialist removal as it contained asbestos), we removed the chimney breast too and the built in cupboard either side of it. The natural light is cold so I decided to go dark and cosy with the colour scheme. I made the upholstered headboard, upcycled the bedside cabinets that a friend gave to us, added period cornicing and ceiling rose. It’s such a cosy, peaceful space to rest now.
Voting is not enabled or out of date!

Lara, Winter

Photo 1
Photo 2
Photo 3
Photo 4
Photo 5
Photo 6
Photo 7
Photo 8
Please provide any other information that is relevant for your entry
From a dark, cluttered playroom to a calm, colourful home office. We moved the kids’ playroom upstairs and I transformed this long, narrow room on a very low budget, doing everything myself. I painted the walls in Setting Plaster and the ceiling in Red Earth (Farrow & Ball), refreshed the UPVC door, and made the cabinet curtains to add texture and pattern. My 5-year-old created the artwork, Gizmo has his little food station here too (with more of my son’s art), and the centrepiece is my great-grandmother’s bureau that I brought with me from Germany.
Voting is not enabled or out of date!

Laura, Crombie

Photo 1
Photo 2
Photo 3
Photo 4
Photo 5
Please provide any other information that is relevant for your entry
I saw the potential of a wasted car port space at the front of the house. We couldn’t afford an architect so I drew up all the plans myself, briefed the builder and sorted building regs. My husband built all of the internal structure himself to my sketches, from the media wall to the rooflight opening. I want a bold colour with real contrast and that’s what we’ve created. An amazing extension for £18k.
Voting is not enabled or out of date!

Laura, Major

Photo 1
Photo 2
Photo 3
Voting is not enabled or out of date!

Laura, Timmins

Photo 1
Photo 2
Photo 3
Photo 4
Please provide any other information that is relevant for your entry
I'm almost embarrassed to upload this 'before'!! We moved to our new home and had to create a multi-purpose room. Its main purpose was to be a bedroom for my partner's children to call their own when they stay with us, then when they weren't here, it needed to also be a second living space, and a dressing room. So we opted for a custom-built fold-down Murphy bed to solve this problem. We went from a double mattress on the floor with a clothing rail, to a fold down bed with built in wardrobes on each side, with plenty of usable floor space too!
Voting is not enabled or out of date!

Lauren, Flower

Photo 1
Photo 2
Photo 3
Photo 4
Please provide any other information that is relevant for your entry
The before main bathroom and the finished main bathroom The loft extension process and the finished en-suite
Voting is not enabled or out of date!

Lauren, Thompson

Photo 1
Photo 2
Photo 3
Photo 4
Photo 5
Photo 6
Photo 7
Photo 8
Please provide any other information that is relevant for your entry
Our living room has continued to evolve, but we restored the original floorboards, removed the fireplace and tiled it ourselves before installing an antique marble surround, created built in alcove cabinets (ikea hack for £450), and have been slowly working in perfecting the furniture. It continues to adapt as we use it as a playroom for our young baby and it has undergone a huge transformation, entirely DIY
Voting is not enabled or out of date!

Leah, Hodson

Photo 1
Photo 2
Photo 3
Photo 4
Photo 5
Please provide any other information that is relevant for your entry
This was the very first DIY project I completed in our home, and 2.5 years later, I still love it just as much. I had always dreamed of a marble cloakroom, but without the budget for specialist trades or stone installation, I challenged myself to recreate that luxurious look in a more accessible way. After disappearing down a marble rabbit hole, I found an incredibly realistic Calacatta Viola inspired wallpaper and the vision came to life. Working with the room’s compact footprint, I used the wallpaper strategically: a full feature wall behind the WC, with a half wall application throughout the rest of the space. To enhance the illusion of stone tiling, I framed the wallpaper with wood moulding, creating architectural detail and a convincing tile like finish that has fooled both visitors in person and thousands online. To add further depth and texture, I created a faux limewash finish on the painted upper walls using layered, watered down paint techniques, bringing softness and movement to contrast with the dramatic veining below. I also transformed the existing vanity by adding fluted MDF panelling and repainting it, turning an uninspiring fixture into something that feels completely bespoke. What began as a budget conscious makeover became a layered, luxurious space that proves thoughtful DIY can rival high end design.
Voting is not enabled or out of date!

Lesley, Kay

Photo 1
Photo 2
Photo 3
Photo 4
Photo 5
Photo 6
Photo 7
Photo 8
Voting is not enabled or out of date!

Lesley, Kay

Photo 1
Photo 2
Photo 3
Photo 4
Photo 5
Photo 6
Photo 7
Photo 8
Voting is not enabled or out of date!

Lesley, Kay

Photo 1
Photo 2
Photo 3
Photo 4
Photo 5
Photo 6
Photo 7
Photo 8
Voting is not enabled or out of date!

Lesley, Kay

Photo 1
Photo 2
Photo 3
Photo 4
Photo 5
Photo 6
Photo 7
Photo 8
Voting is not enabled or out of date!

Lesley, Kay

Photo 1
Photo 2
Photo 3
Photo 4
Photo 5
Photo 6
Photo 7
Photo 8
Voting is not enabled or out of date!

Lesley, Kay

Photo 1
Photo 2
Photo 3
Photo 4
Photo 5
Photo 6
Photo 7
Photo 8
Voting is not enabled or out of date!

Lesley, Kay

Photo 1
Photo 2
Photo 3
Photo 4
Photo 5
Photo 6
Photo 7
Photo 8
Please provide any other information that is relevant for your entry
This room is a downstairs guest bedroom created out of the previous owners art studio. We laid a carpet as the tiled floor was full of paint then panelled the back wall and used paper by WM Morris to add warmth. I painted the dark orange beams in order to lighten the room and we bought pale lime washed oak furniture in a style suited to the barn. I reused lamps, a chair and accessories I’ve had for years and put shutters up at the window along with the blind we’d had made a few years ago to keep the light out.
Voting is not enabled or out of date!

Lesley, Kay

Photo 1
Photo 2
Photo 3
Photo 4
Photo 5
Photo 6
Photo 7
Photo 8
Please provide any other information that is relevant for your entry
My recently completed dressing room. Very small and quite awkward to furnish because of the shape of the ceiling. I didn’t want to it to feel overwhelmed with wardrobes and didn’t want to cover up the beams so we opted for three quarter height wardrobes in a neutral colour. There’s space on top for extra basket storage and inside there are two double hanging spaces and shelving for baskets and clothes. I had cable tie holes made in top of the wardrobe to hide wires and chose antique brass handles to add a bit of glamour. I did the French chic hack on all the beams and door to lighten them and painted the room in a pale colour as there is only one skylight in here for lighting. I upcycled my dressing table by doing the French chic hack on the tops and changed the knobs from white to antique gold. Even though the room is small I still have everything in here a dressing room should have.
Voting is not enabled or out of date!

Lesley, Kay

Photo 1
Photo 2
Photo 3
Photo 4
Photo 5
Photo 6
Photo 7
Photo 8
Please provide any other information that is relevant for your entry
The before pics are of the barn on our first viewing. The previous owner had very modern furniture in here. It felt quite sparse and very unloved. I had the vision of creating a garden room feel in here as it is a lovely big room with the skylight allowing the south facing sun to shine through. It’s taken me a few years to get it right but we have since had the walls papered in a beautiful claret and key paper and the lower half panelled and painted in a subtle grey green. I’ve painted the doors in this beautiful olive green which really grounds the space and dressed the room with pale oak furniture and added green accessories including plants and some faux flowers. I think the grandfather clock gives the room a little more character and the subtle lighting finishes the room perfectly
Voting is not enabled or out of date!

Lexie, Carducci

Photo 1
Photo 2
Photo 3
Photo 4
Photo 5
Photo 6
Please provide any other information that is relevant for your entry
This is our open plan kitchen / dining / living room transformation. Originally the layout of this space was separated into 3 spaces; living on the bottom and then up a couple of steps to a dining mezzanine and then a separate kitchen at the back. We wanted the space to be as open and bright as possible so we removed the wall between the kitchen and dining and put the kitchen down one wall with a built in bespoke dining table and then kept the living area where it was. Our theme for the home was 'Mediterranean villa' we basically wanted to feel like we were living abroad, so light neutral colours and sandy earthy natural textures. We used microcement by Woodys Concrete across this whole floor which although pricey is one of my favourite features, it has a slight movement which makes it look like sand, it's completely seamless so super easy to clean and with the underfloor heating it's toasty on the feet! It's such a fascinating work of art as well to see each of the 6 layers that make up microcement intricately smoothed across the floor. We chose a paint colour for the walls and ceiling called skimming stone from Farrow and Ball, that was the closest colour match to the microcement so it almost looked like we had colour drenched the whole space in microcement. Believe me, if I could have afforded to microcement the floor, walls and ceiling I would have! And changing out the white PVC windows and doors for black aluminium frames instantly made the space feel more modern and expensive. We replaced the french doors with pivot doors out to the garden which is another favourite feature of mine and something I didn't want to compromise on because they allow in maximum light and view when shut and maximum space when open.
Voting is not enabled or out of date!

Lisa, Meyers

Photo 1
Photo 2
Photo 3
Photo 4
Photo 5
Photo 6
Photo 7
Photo 8
Please provide any other information that is relevant for your entry
We decided to update our living room as it was looking a little shabby. We had to keep the sofa. We went for a completely different look. The room looks so cosy and inviting
Voting is not enabled or out of date!

Lisa, Shaver

Photo 1
Photo 2
Photo 3
Voting is not enabled or out of date!

Lisa, Weaver

Photo 1
Photo 2
Photo 3
Photo 4
Photo 5
Photo 6
Photo 7
Photo 8
Please provide any other information that is relevant for your entry
From Blank Workspace to Enchanted Botanical Library This room has undergone a dramatic transformation — from an open plan stark white workspace just off the lounge, furnished with little more than a desk and chair, into a richly layered, storybook-inspired enchanted botanical library — now a dedicated retreat for relaxation, reading and escape. My husband and I have always dreamed of having a library, so I was keen to incorporate one when we moved into our new home. Flooded with natural light and overlooking the back garden, this room immediately felt like the perfect place. While it had great potential, it lacked character, usability and practicality for a busy family of five. My vision was to transform it into an immersive reading retreat — a calming space that feels cocooning, restorative and deeply connected to nature. From the outset, the design was guided by a simple idea: an enchanted library nestled within nature, as though lifted from the pages of a storybook. The centrepiece of the design is a full-height, wall-to-wall library that now envelops the entire room. While my original vision was for bespoke joinery, the budget demanded a more creative solution. Instead, I sourced free and low-cost second-hand IKEA Kallax units to form the structural framework of the shelving — a resourceful approach that transformed pre-loved flat-pack furniture into the foundation of a fully integrated, bespoke-looking library while prioritising reuse and sustainability. To elevate the units into something that felt truly bespoke, we used MDF to extend the shelving to full ceiling height, even spanning the space above the patio doors. Wooden moulding strips were carefully applied to conceal joins and unify the structure, while the existing skirting board was repurposed along the base so the individual elements read as one continuous piece of joinery. These details transform simple components into a seamless architectural feature, finished in a serene green paint that creates a rich, cocooning backdrop for books and plants. An illustrated cloud mural across the ceiling enhances the sense of calm and openness, reinforcing the feeling of being immersed in nature. Lush trailing plants are layered throughout the shelving so that greenery winds through the books, creating the impression of a long-established botanical library where stories and nature have gently grown together. Whimsical details further reinforce the magical atmosphere. A double-seater hanging chair forms a playful focal point, gently swaying as you settle in with a book, while layered lighting creates a soft, atmospheric glow in the evenings that enhances the room’s enchanting ambience. The room’s connection to the garden was strengthened through the installation of aluminium bi-fold doors that open fully onto the garden in the warmer months, allowing the library to expand outwards and further blur the boundary between indoors and nature. Steel sliding internal doors were also installed, allowing the space to be closed off from the rest of the house when a quiet retreat is needed. Through resourceful design, DIY and thoughtful detailing, a plain and underused room has been transformed into an enchanting botanical library — an imaginative, atmospheric retreat that feels as though it belongs within the pages of a storybook and is now one of the most loved spaces in our home.
Voting is not enabled or out of date!

Lucy, Jacobs

Photo 1
Photo 2
Photo 3
Photo 4
Photo 5
Photo 6
Photo 7
Please provide any other information that is relevant for your entry
This living room began as a long, narrow new build space with white walls that lacked both character and definition. Through the introduction of colour, panelling and a bespoke built-in fireplace, I’ve completely reimagined the layout and atmosphere, creating a clear focal point that anchors the room. The design adds depth, warmth and architectural interest, while zoning the space more intentionally for both relaxing and entertaining. Layered textures, soft furnishings and ambient lighting soften the structure, resulting in a room that now feels cohesive, inviting and full of personality - a true transformation from a blank, uninspiring space into a warm and elevated heart of the home.
Voting is not enabled or out of date!

Luiza, Frediani Oxley

Photo 1
Photo 2
Photo 3
Photo 4
Please provide any other information that is relevant for your entry
After years of living with a generic, "investor-grade" bathroom, the space felt completely disconnected from our lifestyle. As a household of "non-bath people," our daily use of a poorly positioned shower caused constant splashing, eventually rotting the window frame. We decided to gut the room entirely to create a space that was both structurally sound and aesthetically intentional. Our goal was a look that felt "beautifully classic, but never boring." We anchored the room with traditional black-and-white penny tile flooring and wrapped the walls in a vibrant mint green subway tile, punctuated by sharp black borders for a graphic, sophisticated edge. By swapping the bulky bathtub for a modern black-framed shower enclosure, we didn't just solve the moisture issues; we reclaimed significant floor real estate. This layout shift was a functional game-changer, finally allowing us to move our cat’s litter tray from the living room into the bathroom. The result is a space that feels architecturally thoughtful, highly functional, and brimming with personality.
Voting is not enabled or out of date!

Marie, McLoughlin

Photo 1
Photo 2
Photo 3
Photo 4
Photo 5
Photo 6
Photo 7
Photo 8
Please provide any other information that is relevant for your entry
This is a before and after of my sitting room, everyone told me not to go dark but I love it!
Voting is not enabled or out of date!

Marie, Nolan

Photo 1
Photo 2
Photo 3
Photo 4
Photo 5
Photo 6
Photo 7
Photo 8
Please provide any other information that is relevant for your entry
Our kitchen was the very last room we renovated, and in hindsight, I’m so glad we had to wait. By the time we finally came to tackle it, we had spent years living in the house and really understood how we wanted the space to work — how we moved through it, how we cooked, how we gathered, and what mattered most to us day to day. That patience gave us clarity, and working within a tight budget pushed us to be far more creative than we might otherwise have been. The original kitchen had reached the end of its life and needed replacing, but the idea of simply buying a brand new fitted kitchen never felt right for us — financially, environmentally, or creatively. Instead, we completely reimagined the space as a freestanding kitchen built almost entirely from second-hand and salvaged pieces sourced locally. Vintage military campaign drawers became cabinetry, an antique buffet became the island, rescued sinks and reclaimed doors found new purpose, and even old science benches were transformed into worktops. Piece by piece, we created a kitchen that is not only practical and flexible, but full of craftsmanship, character and stories of its own. What started as a necessity — waiting, budgeting carefully, and making do with what we could find — ended up becoming the greatest strength of the project. We were forced to think differently, and in doing so created something far more personal, sustainable and beautiful than we ever could have planned at the beginning. It’s proof, I think, that sometimes patience, creativity and constraints can lead you somewhere much better than having everything instantly.
Voting is not enabled or out of date!

Marie, Springthorpe

Photo 1
Photo 2
Photo 3
Photo 4
Photo 5
Photo 6
Photo 7
Photo 8
Please provide any other information that is relevant for your entry
From a grey and boring new build and decoratoring like the norm. Wasn't for me and my love of pink, I transformation my pink haven. I pink up the fireplace a few years back for £5.00 of Ebay and tried it with a bit of yellow, which I thought it would look great with grey. It felt so cold. In lockdown I started playing around with more colour. It was a funny time and had sometime of my hands like many. So, I thought I'm going go for it. Most furniture was upcycled. I made the shutters and painted them pink. I seen a video how to make them. I wanted a focal point so, I made the fireplace to stand out with wooden batons. I love Miami and Beverly hills vibes, so I went with it.
Voting is not enabled or out of date!

Mariné, Lee

Photo 1
Photo 2
Photo 3
Photo 4
Photo 5
Photo 6
Photo 7
Photo 8
Please provide any other information that is relevant for your entry
We moved into this new build in 2022, where the garden was just a patch of soil. We added lawn at first, but due to the heavy clay soil it struggled every winter and the space felt unused and without purpose. In 2024 I decided to completely rethink it. I removed all the grass by hand and we shifted to a more hard landscaped approach, adding a base, a path and defining different areas to sit and enjoy the space. The design is quite modern, with clean lines and a focus on texture, but always with the intention of softening it through planting. Because of the soil, I focused on creating as many flower beds as possible to bring greenery back in. The goal was to make the garden feel like an extension of the house, somewhere to relax, dine and unwind. It’s still evolving, but it has already completely changed how we use and enjoy the space.
Voting is not enabled or out of date!

Maxine, Austin

Photo 1
Photo 2
Photo 3
Photo 4
Photo 5
Photo 6
Photo 7
Photo 8
Please provide any other information that is relevant for your entry
Transforming our chaotic garage into a cosy snug completely redefined how our family uses our home. What was once an unloved dumping ground is now a purposeful and versatile family space - perfect for playing, gaming and snuggling down to watch a movie. With the structure already in place, we focused on reimagining the interior. Building internal walls, concealing utility access points, and undertaking one of our biggest DIY projects yet - a bespoke built-in library and media wall, complete with generous toy storage for our four children. Cosy yet durable was always the vision. Deep blue colour drenching, botanical wallpaper and layered lighting has transformed the once underutilised space into the heart of our home. Finished with pre-loved furniture to create a beautiful yet practical family snug.
Voting is not enabled or out of date!

Megan, Butler

Photo 1
Photo 2
Photo 3
Photo 4
Photo 5
Photo 6
Please provide any other information that is relevant for your entry
This transformation was completed in less than a year! We are loving our sunshine kitchen SO much
Voting is not enabled or out of date!

Melanie, Farr

Photo 1
Photo 2
Photo 3
Photo 4
Photo 5
Photo 6
Photo 7
Photo 8
Please provide any other information that is relevant for your entry
We wanted to recreate our old 1960s pebble dashed bungalow into a beautiful Barn Style Home. Oak Beams & Gable ends lots of windows filling the home with natural light. Using Old farmhouse bricks (New Handmade Bricks) and using modern guttering and facials but aged to look like traditional cast iron. We wanted it to look like it has always been here. Being sympathetic to the beautiful countryside area that it is situated. We wanted to build something sustainable for our future retirement one day. A Cosy, Timeless, Light and Airy Home using natural traditional building materials but insulated with the most modern. Using solar and renewable energy to make the running of the bungalow really cost effective to run. To make a home that flows in style and colours though out that creates a very relaxing environment inside and out to really enjoy living in. My inspiration for the design came from when I was little girl passing a dilapidated derelict barn when I went to visit my grandparents. It had a big wooden gable end, no glass it’s all broken and it’s falling down, it was so magical to me then and it still is even to this day. To bring a long term dream into a reality and transform our little bungalow beyond recognition is proof that with lots of imagination and a love for a design anything is possible.
Voting is not enabled or out of date!

Melinda, Lones

Photo 1
Photo 2
Photo 3
Photo 4
Photo 5
Photo 6
Photo 7
Please provide any other information that is relevant for your entry
My kitchen transformation is the one I am the most proud of since moving into our house. It started as a tiny, mouldy room with hardly any light, but we knocked down two internal walls and added French doors to make the most of the space. We fitted the entire kitchen ourselves with the help of my dad (who had never done it before either!) and chose a dramatic quartz worktop to complete my dream kitchen.
Voting is not enabled or out of date!

Michelle, Corr

Photo 1
Photo 2
Photo 3
Photo 4
Photo 5
Photo 6
Photo 7
Please provide any other information that is relevant for your entry
This room is all painted with Benjamin Moore paint by a very skilled painter
Voting is not enabled or out of date!

Miranda, Horchler

Photo 1
Photo 2
Photo 3
Photo 4
Photo 5
Photo 6
Photo 7
Photo 8
Voting is not enabled or out of date!

Naila, Qasmi

Photo 1
Photo 2
Photo 3
Photo 4
Photo 5
Photo 6
Photo 7
Photo 8
Please provide any other information that is relevant for your entry
This is our second reception room, and one we always planned to turn into a home library and study, even before we bought the house! This transformation is centred around the built-in bookcases, which we made ourselves using a mix of plywood for the main structure and solid wood for the face frame. We deliberately stopped short of taking them all the way to the ceiling, as we wanted to keep the original proportions of the room. Fully boxing in the alcoves would have made the space feel smaller, so this felt like the right balance. One of the biggest changes was removing the original art deco fireplace. It wasn’t quite our style, and the oversized hearth took up far too much floor space. In its place, we created something more in keeping with the room using second-hand pieces. We sourced the iron insert and black granite hearth from Facebook Marketplace, and the mantel we reused from our old living room fireplace for now, until we find something more suitable. To bring my personality into the space, I added a mural to the right of the bookcases, featuring one of my favourite artworks, Almond Blossom by Van Gogh. The room is still a work in progress, but even at this stage the before and after shows a huge transformation.
Voting is not enabled or out of date!

Naomi, Hudson Reed

Photo 1
Photo 2
Photo 3
Photo 4
Photo 5
Photo 6
Photo 7
Photo 8
Please provide any other information that is relevant for your entry
"So many pictures to pick from here! We transformed a whole house from a neglected 1970s into a family home. The entire house was renovated, and we had two children in 13 months while doing it. My first child's nursery was being worked on when he was born, and it didn’t have a roof. I sit back and look at this and see how far we have come."
Voting is not enabled or out of date!

Natalie, Kelly

Photo 1
Photo 2
Photo 3
Photo 4
Photo 5
Photo 6
Photo 7
Photo 8
Please provide any other information that is relevant for your entry
We renovated our bungalow during the 2020 lockdown — while home-schooling, working from home and managing a build where everything had to be sourced online. In the middle of it all, we also faced the heartbreaking loss of my father. What began as a renovation became a symbol of resilience for our family. 2020–2021 changed our lives, but it also gave us a home filled with gratitude, memories and love.
Voting is not enabled or out of date!

Natasha, Landers

Photo 1
Photo 2
Photo 3
Photo 4
Photo 5
Photo 6
Photo 7
Please provide any other information that is relevant for your entry
Imagine moving into a house with a one year old with no central heating and dodgy electrics. Yes that was me. The kitchen had carpet and there were no drawers! So a few years in I installed a temporary kitchen (it was there for 15 years) and decided one day I'd get rid of the Artex ceiling and create a space that was warm and vibrant. That what this space is, the rubber sunshine yellow floor always adds warmth to the space even on the cloudiest day and I designed the room so it would always be flooded with light. I wanted touches of industrial feel, so I designed the copper light installation which is inspired by the London Underground map and added large tiles as a splashback that look like copper but are actual porcelain. It's where I entertain friends and on an evening you find me dancing along to a disco vinyl I have playing on the record player.
Voting is not enabled or out of date!

Nichola, McKerrow Todd

Photo 1
Photo 2
Photo 3
Photo 4
Photo 5
Photo 6
Photo 7
Photo 8
Please provide any other information that is relevant for your entry
Project Overview – Before & After What began as a relatively simple brief evolved into a much more meaningful transformation — turning an underperforming room into a warm, family-focused space designed around how the clients truly live. Before The room felt like a blank canvas, lacking the personality and energy of its owners. While the initial request was for a larger dining table, early conversations revealed a more fundamental issue: the space wasn’t working for the family day to day. Storage was limited, and the layout didn’t support either family life or entertaining. There were also practical constraints — the kitchen needed to remain, along with several existing pieces of furniture — which meant the design had to work harder within what was already there. After Rather than focusing on a single element, the design evolved into a more considered, holistic response. The layout was refined to improve flow, with carefully integrated storage to support the practical demands of a busy family space. Just as importantly, the scheme introduces a stronger sense of personality. The clients’ vibrant nature is now reflected through artwork and layered material choices, bringing warmth and character into the room. The result is a space that feels both functional and personal — one that supports everyday life while also creating a setting for connection and gathering.
Voting is not enabled or out of date!

Nichola, Mckerrow-Todd

Photo 1
Photo 2
Photo 3
Photo 4
Photo 5
Photo 6
Please provide any other information that is relevant for your entry
Master Ensuite – From Cold Space to Sanctuary Before The original ensuite felt quite stark — a very white, clinical space that didn’t have the warmth or sense of retreat you’d hope for in a master suite. It worked practically, but it wasn’t somewhere you’d choose to spend time. After The aim was to shift this into something much more calming and restorative — a space that feels like a sanctuary within the home. I moved away from the all-white palette, introducing warmer, more natural tones — grounding the room with deep, layerd green tones and more tactile materials. This helped soften the space and bring a sense of comfort that was missing before. There was also a conscious move to bring in a subtle connection to nature, through texture and materiality, using the Graham and Brown Mural on the wall so the room feels more relaxed and enveloping rather than purely functional. Now, it’s a space to slow down in — somewhere to start and end the day that feels considered, comfortable, and much more in tune with how the clients want to live.
Voting is not enabled or out of date!

Nicky, Neeve

Photo 1
Photo 2
Photo 3
Photo 5
Photo 6
Photo 7
Photo 8
Please provide any other information that is relevant for your entry
My before and afters are always on a budget as we live in affordable housing so don’t have huge budgets. I think it’s important to show that you don’t need to spend lots of money to get a huge impact
Voting is not enabled or out of date!

Nikki, Essex

Photo 1
Photo 2
Photo 3
Photo 4
Photo 5
Photo 6
Photo 7
Please provide any other information that is relevant for your entry

After moving from a flat with no garden to our forever home, we wanted to create a garden that felt just as homely as the inside (and being Greek, an olive tree was the top of my priority list!). We wanted somewhere that the kids could play, and our family could relax with a glass of wine, entertain and make fun memories together. What started as an uneven, unused garden was completely transformed. We sat and planned, did lots of DIY, lost weekends and evenings to hard work (solo parenting for me whilst my partner did a lot of the manual labour) but kept going with the vision. We introduced modern paving, seating areas, a tucked away decking area for morning coffee / evening wine, new plants and mood lighting. The landscaping created a garden that was both practical but also also inviting for our everyday life. The transformation hasn’t only changed the appearance, but how we use the garden as a family. From summer evenings to a play zone for our kids, it has now become one of our favourite parts of our home. We couldn’t be happier with the work we put into it.

Voting is not enabled or out of date!

Olivia, Munro

Photo 1
Photo 2
Photo 3
Photo 4
Photo 5
Photo 6
Please provide any other information that is relevant for your entry
We discovered the original inglenook fireplace to our 400 year old home when peeling back the layers whilst renovating the living room. It had completely been filled in with bricks. So we painstakingly restored it back to its former glory. What’s more we discovered original floor tiles in a section of the study when breaking up the floor which there were just enough to use as the floor in the inglenook! Now in pride of place!
Voting is not enabled or out of date!

Paloma, Quinn Mills

Photo 1
Photo 2
Photo 3
Photo 4
Photo 5
Photo 6
Photo 7
Photo 8
Please provide any other information that is relevant for your entry
We bought our derelict house because it was all we could afford and had to do all the work ourselves, but we felt the potential of the kitchen (somehow). It was dark and dingy, with damp and little light, but we knew it was the project for us with the south west facing garden backing on to it and the potential to flood the room with light. We didnt go for the recommended long tunnel extension but decided on two small but impactful extensions, a pitched side return 4m long and a pitched back extension only 1.5m long, all within permited development. The back wall of the house needed rebuilding so we knocked that out, added three mighty steels over the new opening to hold the new wall above and the goal post steels of the back extension. We then did the same for the side return adding in another two steels, overall there are 9 steels holding the room up. The plan was to divide the room into 3 spaces. The kitchen in the original space, the dining in the side return and the lounging in the back extension, all connected to each other for ease of use and socialising. We had a strong vision for the windows and went bold with red crittal style French doors and windows utilising the height of the side return and goal post extension at the back. We also added in a side window and 3 electric skylights to flood the room in light. We added a new floor and put down water based underfloor heating, with French Provence limestone on top of it. For the dining we made back bench seating that wraps around side wall and red window with the seating under the red windows double depth to double as a reading nook. There was an external window of the lounge that was now internal and we amended this to be an open internal window to help seperate the kitchen from the lounge. We removed the render and exposed the bricks, also changing the pitch of the opening to follow the side return pitch. The seating area at the back has a couch overlooking the garden and is bathed in light. The kitchen is inframe shaker style with a bespoke kitchen island Paloma built herself for just over £1,300. We painted the walls setting plaster, the kitchen a deeper red and kept the steels exposed. We added hanging plants and some modern folk inspired chairs and hi-chairs to finish the space off. We've yet to add artwork but love the space we have built!
Voting is not enabled or out of date!

Pia, Orr

Photo 1
Photo 2
Photo 3
Photo 4
Photo 5
Photo 6
Photo 7
Photo 8
Please provide any other information that is relevant for your entry
We gave our traditional fireplace room a modern update, while keeping its period features firmly in mind. This included removing the original 1920s fireplace and replacing it with a French-style design, complete with bespoke wooden alcoves on either side. We also restored the original parquet flooring that had been hidden under carpet for years, refreshed the walls with new paint, and added a statement wall mural to create a focal point in the space. To make the room feel more multifunctional, we added a discreet home cinema system by installing speakers within the built-in wooden alcoves, along with new bespoke curtains to enhance both the acoustics and overall look. Finally, the room was finished with new furniture, bringing everything together into a space that feels both elegant and comfortable.
Voting is not enabled or out of date!

Pixie, Lavin

Photo 1
Photo 2
Photo 3
Photo 4
Photo 5
Voting is not enabled or out of date!

Pixie, Lavin

Photo 1
Photo 2
Photo 3
Photo 4
Photo 5
Photo 6
Photo 7
Voting is not enabled or out of date!

Rebecca, Anderson

Photo 1
Photo 2
Photo 3
Photo 4
Photo 5
Photo 6
Photo 7
Photo 8
Please provide any other information that is relevant for your entry
This bar and social area is a great example of our full before and after transformation of our whole house. We renovated the back of the house and added a double height extension ourselves. My husband and his dad did the most incredible job of building our beautiful home. I then designed a 2.5 m high bar built from Ikea cabinets. We made the huge long doors ourselves and added the chicken wire and door handles that were all sprayed gold. There is a how to on my Instagram account.
Voting is not enabled or out of date!

Rebecca, James

Photo 1
Photo 2
Photo 3
Photo 4
Photo 5
Photo 6
Photo 7
Photo 8
Please provide any other information that is relevant for your entry
A complete transformation of my open plan living and dining room. Includes built in bookcase and tv unit, both Ikea hacks with everything painted in Treron by farrow and ball. It’s not a huge space but I’ve made good use of it by adding storage meaning it now works well for my children and I. A total transformation to how it was before!
Voting is not enabled or out of date!

Rebecca, James

Photo 1
Photo 2
Photo 3
Photo 4
Photo 5
Photo 6
Photo 7
Please provide any other information that is relevant for your entry
Transformation of very dated and dark kitchen to the perfect light bright family kitchen. Doesn’t compete with the big kitchens with islands etc. but the size of kitchen a lot of people have and can relate to and shows what you can create even in a small space. This was a complete rip out, require and full new kitchen and appliances. Zellige tiles and beads hardware are the perfect finishing touch!
Voting is not enabled or out of date!

Rhianna, Davis

Photo 1
Photo 2
Photo 3
Please provide any other information that is relevant for your entry
I created this high end look on a shoe string budget. To complete this project, I removed the damaged vinyl on the cabinets and painted directly over the mdf. This entire kitchen was done using just 2 tins of paint and some new handles and therefore was achieved for less than £100. Not only did I save thousands of pounds in the process, I also inspired many others to do the same with their kitchens too.
Voting is not enabled or out of date!

Rita, Millat

Photo 1
Photo 2
Photo 3
Photo 4
Photo 5
Photo 6
Photo 7
Photo 8
Please provide any other information that is relevant for your entry
This twin bedroom was challenging as it’s a narrow and long room and I didn’t want it to feel less special , so the layout, wall cladding and choice of colours and textures was key. We called it “ the adventurer room” and hoping it will make everyone feel cozy relaxed and adventurous.
Voting is not enabled or out of date!

Sabrina, Masero

Photo 1
Photo 2
Voting is not enabled or out of date!

Sal, Riley

Photo 1
Photo 2
Photo 3
Photo 4
Photo 5
Photo 6
Photo 7
Photo 8
Please provide any other information that is relevant for your entry
Small Space Transformation: A Reworked Box Room in My Home This project transformed the smallest room in my home, a compact box room that lacked storage, function, and a clear layout. The aim was to make it work properly for everyday use while still feeling personal and right for my son. The layout was key. The bed was turned horizontally to make better use of the space, which also allowed room for built in storage and a small shelf for his favourite things. It immediately made the room feel more usable and open. A bespoke bed was built from my own sketches, with drawers underneath to maximise storage in a small footprint. The sleeping area is set into a tongue and groove panelled nook, which helps define the space and gives it more structure. The headboard was sourced from a local charity shop and fitted in perfectly, then painted to tie into the scheme, giving it a simple, considered feel. To bring in character, I used a plaid wallpaper and carried tones from it through the room to keep everything cohesive. It gives a strong Ralph Lauren feel and is designed to grow with him rather than feel too childlike. Storage was a big focus. A full height wardrobe makes use of the ceiling height, providing generous storage while keeping the room feeling clear and functional. The result is a small room in my home that now works hard day to day, practical, full of character, and a space he genuinely enjoys spending time in.
Voting is not enabled or out of date!

Samantha, Crouch

Photo 1
Photo 2
Photo 3
Photo 4
Photo 6
Photo 7
Photo 8
Please provide any other information that is relevant for your entry
I am Sam of theonebespoke, introducing our home gym. We are incredibly proud of this small space, which we transformed from a storage room of doom into our very own home gym! It was created from a desire to make fitness more accessible, comfortable and part of everyday family life. After downsizing and navigating a challenging year, we wanted to create an impressive space that supported both physical and mental wellbeing, whilst complimenting the aesthetics of our home. To maximise the compact area we painted the room a tone of white, installed a large back lit bespoke mirror to give the illusion of more space and carefully selected multifunctional equipment. The bespoke epoxy resin floor perfectly blends functionality with the wow factor. What makes this small space truly special is the impact it has had on our daily lives. We used to close the door on this disorganised room of doom, now we can't wait to open it and head inside. It’s given us a common interest, brought us together as a family. It’s not just a gym – it’s a reflection of how thoughtful design can support wellbeing, connection and lifestyle.
Voting is not enabled or out of date!

Sandra, Czachur

Photo 1
Photo 2
Photo 3
Photo 4
Photo 5
Photo 6
Photo 7
Please provide any other information that is relevant for your entry
From a very basic utility room to a beautifully designed boot room, this transformation has completely redefined this space. Once purely functional, it’s now a thoughtfully organised area with clever storage for coats, shoes, and everyday essentials. Every detail has been considered to bring both style and practicality together, creating a space that not only works harder but feels calmer, tidier, and effortlessly welcoming the moment you walk in.
Voting is not enabled or out of date!

Sarah, Burke

Photo 1
Photo 2
Photo 3
Please provide any other information that is relevant for your entry
Last summer I decided to refresh our snug living space; I wanted to replace our (very!) worse for wear IKEA Kallax storage unit (bought 7 or 8 years previous for a modern apartment space we were living in at the time) with something more style appropriate for our little Yorkshire cottage. As we are renting, we are limited with what changes we can make and where we have been granted permission to drill into walls, so the first hurdle was to find something that would give us the height we needed without drilling into the walls. Secondly, I have a really sweet but reactive dog (called Iggy, he says hi!) and with a very awkwardly shaped space with a floor plan at approximately 4m x 3.5m square in this area, there is only one space where the sofa can be so that Iggy won't go nuts at passers'by out the window, which left us with just one spot for the cabinet, a niche of 118cm, and I wanted to maximise these dimensions to get the best use out of the space. Thirdly, as with all projects I do, I was on a tight budget of £100 to pull this off. There are a few things that I knew I wanted out of this project; I wanted glazed doors to bounce a little more light and reflectivity around the small space, something pre-loved that I could give a new lease of life to, and something that would give us more storage space, as well as shelves to display books and objects we love. I managed to source two separate cabinets from one of my local charity furniture shops; one cabinet (the top half) had lead lined glass doors which I instantly loved. The second was a heavily detailed 2 drawer/door base cabinet, not exactly my taste but fit the dimensions of the niche it would sit within (something that had proved quite difficult to find up til this point). Both cabinets came in well under budget and although they weren't matching, I could see them sitting quite well together. The top half was also much more shallow than the base cabinet and could sit comfortably on top of it, which gave me confidence that it would be stable, eliminating the need to attach it to the wall (as I intended to attach it to the base cabinet). Once the pieces were delivered, I got to work on the top half, cleaning and prepping the wood work to be painted. I decided to leave the top in it's original wood finish, as I'm not a fan of painted tops (as I think they mark quickly and look poor quality), and masked off the areas to leave in their natural finish; all cabinet internals for contrast, and all brass fixtures. I went with Rust-oleum Chalky Furniture Paint in Wet Harvest which has a rich honey tone and would bring some much needed warmth to the space. After a couple of coats and finished with Rust-oleum's Clear finishing wax for protection and sheen, I polished up the brass features to bring them back to life. There is a small keyhole on the front of the doors but no key came with it, and as the latch has been left on, I decided to display the cabinet with one door open to protect the latch and paint work from damage of accidentally knocking against each other when opening and closing. I turned my attention then to the base cabinet. Originally, I intended to strip the varnish right back to its original wood finish, seal it and add some nice door knobs, but as I was cleaning the cabinet I discovered that it was an Ercol! This was an awesome surprise, but meant that I needed to change approach. I didn't have the budget to professionally have the varnish stripped and I didnt have the luxury of the space or time to have a go myself (and I didn't want to be left with something of a hodge podge) so I decided to just strip back the top of the cabinet to it's original beautiful teak wood finish, oil it and seal it. The door knobs would remain to maintain the original Ercol features, and I would paint the rest of the cabinet (except the internals) in Rust-oleum Chalky Furniture Paint in Fallow; a deep earthy brown. Once waxed it has taken on a chocolaty smooth, tactile quality that I love. Down the line I intend to have the whole cabinet professionally stripped to it's original wood finish, but that's a job for a bigger budget. I love that these cabinets don't exactly match, but they both contain very similar qualities that I think makes them sit well together; the two rectangles on each of the door fronts, vertical and horizontal grooves that frame these rectangular forms, the notches in the top of the top cabinet are very similar to the notches in the side details of the base cabinet, and the soft edges of the cabinet tops, alongside the paint colour and finish choices, I think, harmonises these two pieces together. The cabinets together came to £45, plus £20 for delivery. I bought the paint and wax in the sale (total £35), bringing me in under budget (for once!). I'm so happy with the outcome, and I hope it is worthy of your consideration for this category.
Voting is not enabled or out of date!

Sarah, Twigg Doyle

Photo 1
Photo 2
Photo 3
Photo 4
Photo 5
Photo 6
Photo 7
Photo 8
Please provide any other information that is relevant for your entry
This is a client project, for which I was hired to help add colour and style on a limited budget. She bought this home for the simply stunning views. But having paid a hefty price tag for the property, it left little in the coffers to revamp the tired and dated interiors and enable her to put her own stamp on the property. The open plan kitchen/dining space has been our starting point for the project, with the inspiration for the design - to keep the feeling of light and space, introduce a warm colour and connect the inside spaces to the nature outside. To allow the spaces to seamlessly blend, whilst keeping the character. In the kitchen, we made the decision to keep the dark granite worktops as they were in good condition and created a soft neutral pink and green to complement them, with walls in Farrow & Ball Pink Ground and units in Dulux Heritage DH Drab. We removed dated looking trim details to the units, filled and repaired any broken cabinetry. We painted the top cabinets to match the walls and below cabinets in green. Dated tiles were removed and replaced with a clear splashback. The cooker hood dominated, so was replaced with a streamlined version we had boxed in, to match the units in a shaker style. Better lighting was needed so we the single bulb pendant with a 3-bulb glass and brass fitting, had recessed LED strip lighting added above and underneath the cabinets. New vinyl tile style flooring replaced the broken, stained cork flooring. The kitchen window frames were painted green to match the units, allowing the view to take centre stage. Remote control voile blinds were added to reduce the glare on very sunny days. Finally, new brass handles and sockets added a finishing touch. In the open plan dining space we painted the french doors in the same soft green of the kitchen units to really open out the vista to the garden. Panelling which was already in the living space was added and mirrored in style to the dining space wall. The very faded and marked floors were sanded back and a clear varnish added to seal them. New curtains were added on a ceiling track so the poll didn't detract from the view to the garden. A New scallop detail jute rug was sourced. The finishing touches, a scalloped ceiling pendant, gorgeous linen table cloth and runner. The overall effect is a seamless flow between each space which now feels much bigger with the colour drench. It now makes the most of the views, whilst adding character and period details in keeping with the property.
Voting is not enabled or out of date!

Scarlett, Rowley

Photo 1
Photo 2
Photo 3
Photo 4
Photo 5
Photo 6
Photo 7
Photo 8
Please provide any other information that is relevant for your entry
Once a grotty, rotten old conservatory, now our wonderful kitchen/diner! We knocked the original structure down and rebuilt it from the ground up to create our perfect space. The majority of the work was done by our two Dads (plumber and joiner dream duo!) which makes it so special. The space is ideal for cooking, dining, and hosting family and friends, and truly is the heart of our home which holds so many memories.
Voting is not enabled or out of date!

Serena, Dobson

Photo 1
Photo 2
Photo 3
Photo 4
Photo 5
Photo 6
Photo 7
Photo 8
Please provide any other information that is relevant for your entry
When we moved to Hillside House much of the garden was taken over by a hard standing tennis court. The space was enormous, and we knew it had potential to be a wonderful space to relax and play. However it needed so much work - in its overgrown state it felt stark, uninviting and disconnected from the rest of the garden. Nettles and brambles were coming through the tarmac and the chain link fence screamed prison exercise yard rather than lush garden. The transformation required significant groundwork. The original tennis court surface was fully removed, a process that involved extensive excavation of the tarmac and underlying hardcore. We looked in to turfing the area but with the quote coming back at £60,000 that simply wasn’t feasible. Instead we ordered 60 tonnes of top soil, spread and levelled it and sowed seed in the early autumn, hoping for a miracle! We were rewarded- come spring green shoots were poking through. Our lawn was emerging! We dug out a sweeping bed down one side to add structure, colour and seasonal interest, helping to integrate the area with the wider landscape. At the top end we built pergolas to create vertical interest and define spaces within the garden. Under these we laid tiles for seating (one side) and a hot tub (the other) - mirroring the symmetrical style of the the Georgian period of our house. We shifted by hand eight tonnes of gravel to set this area off, and created a box hedge border to separate the lawn from the social space. We used reclaimed bricks from a wall we dismantled internally to add an edging to the hedge. The space is now completely transformed and for us as a family, much more usable. As the sun sets over the fields at the end of the garden we can now relax and drink in the view. The children have somewhere to play and the whole area feels far more connected to the house. As we have gone along we have, out of necessity, learnt new skills and we are all the more proud of our garden as it has been transformed by us, for us.
Voting is not enabled or out of date!

Sharon, Scoffings

Photo 1
Photo 2
Photo 3
Photo 4
Photo 5
Photo 6
Photo 7
Photo 8
Please provide any other information that is relevant for your entry
Once a dark, cluttered dumping space, this loft room felt cramped and overlooked. It is now a bold, pattern drenched sanctuary full of personality. A larger Velux floods the room with light, while a full length rear window opens up views of the garden from the bed. A wall to wall, near floor to ceiling navy velour curtain creates the illusion of an even larger window. Behind the bed, a concealed false wall hides shelving and storage, seamlessly wallpapered to appear solid. The room leans into its character. Cow print wraps walls and ceiling, turning awkward angles into a statement. Cobalt blue woodwork and vanity add depth, while navy wardrobes and curtains ground the scheme. A repurposed dressing table was painted to match, fitted wardrobes maximise storage, and a sculptural chair adds a bold pop of colour. Hollywood style lighting and a neon sign bring a playful, theatrical edge. What was once wasted space is now a confident, immersive bedroom that fully embraces its individuality.
Voting is not enabled or out of date!

Shelley, Probert

Photo 1
Photo 2
Photo 3
Photo 4
Please provide any other information that is relevant for your entry
Our dining room was designed to feel homely but still be practical. We really wanted to maximise storage while also creating a space for the TV. We’re planning to upgrade to a bigger screen soon, but for now we’re loving the ambience, especially the soft lighting on the media unit in the evenings. We built it using Besta units from Ikea, panels from wall panels world and the colour is Jojo’s green by Coatpaints.
Voting is not enabled or out of date!

Shelley, Probert

Photo 1
Photo 2
Photo 3
Photo 4
Photo 5
Please provide any other information that is relevant for your entry
When we moved into our new build, the kitchen just wasn’t our style so we decided to change it. We kept the original layout but upgraded the doors and added extra cabinets, including a breakfast cupboard and butler sink and an island and it’s made such a huge difference. Plus a mirror splash back for adding light into a north facing kitchen. My husband did it all himself and I honestly couldn’t be prouder… it’s completely transformed the space and we love it so much ?
Voting is not enabled or out of date!

Silvana, Hawkes

Photo 1
Photo 2
Photo 3
Photo 4
Photo 5
Voting is not enabled or out of date!

Silvana, Hawkes

Photo 1
Photo 2
Photo 3
Photo 4
Photo 5
Voting is not enabled or out of date!

Sophie, Murphy

Photo 1
Photo 2
Photo 3
Photo 4
Photo 6
Photo 7
Please provide any other information that is relevant for your entry
We transformed every part of this space, including changing it from living room into a dining library. we added an office space, library wall, dining table and chair, log burner and stand out wallpaper. We also moved the radiator.
Voting is not enabled or out of date!

Sophie, Stotesbury

Photo 1
Photo 2
Photo 3
Photo 4
Photo 5
Photo 6
Photo 7
Photo 8
Please provide any other information that is relevant for your entry
The upstairs originally consisted of just two bedrooms, with no central landing. As part of a side extension, a new landing was introduced to transform both the layout and flow of the home. Careful structural planning allowed a previously unused void to become a bright, functional transition space, improving access and usability across the first floor. The design pairs classic wall panelling with a soft neutral palette and contrasting handrail, creating a calm and cohesive aesthetic. What was once a disconnected layout is now a well-balanced and elegant upper floor, demonstrating how thoughtful design and extension can completely redefine a home’s functionality.
Voting is not enabled or out of date!

Suzy, Broome

Photo 1
Photo 2
Photo 3
Photo 4
Photo 5
Please provide any other information that is relevant for your entry
The door was rotting on one side. So my father-in-law made us a new left hand door. I then stripped and filled the right side door. I then painted the doors in a vibrant orange and sourced vintage door knocker and brass handles/letter box. Finally I laid the front path. It has entirely transformed the feel and look of the house. It’s a statement that reflect the vibrant family that live behind the door and offers a dopamine burst of joy on your return home even on the greyest of days. I also wanted it keep the tiles sympathetic to the age and style of the property.
Voting is not enabled or out of date!

Tara, Clarke

Photo 1
Photo 2
Photo 3
Photo 4
Photo 5
Photo 6
Photo 7
Photo 8
Please provide any other information that is relevant for your entry
This space used to be a cold ugly garage with a concrete floor and exposed bricks with a utility space at the back with a small toilet which was largely unused other than for putting washing on. These spaces have been transformed to provide 2 office spaces, a separate living area, and a downstairs toilet/utility. We are now using every inch of the space with each zone providing a specific function, and is now beautifully decorated and styled.
Voting is not enabled or out of date!

Teri, Muncey

Photo 1
Photo 2
Photo 3
Photo 4
Photo 5
Photo 6
Photo 7
Photo 8
Please provide any other information that is relevant for your entry
I’ve done everything I can to transform this space in as many renter-friendly as possible, taking it from clinical, hospital bathroom to a joyful cottage style bathroom full of colour and personality. What I did… Peel and stick tile floor Peel and stick wall tiles and sealed Painted the walls and towel rail Changed the light fitting Added a bath panel made from an Ikea door A battery operated wall sconce and home made ruffle shade Upcycled the linen closet with paint and added gathered material panels Decked the place with second. Hand finds and collected items from our travels
Voting is not enabled or out of date!

Tracy, Merry

Photo 1
Photo 2
Photo 3
Photo 4
Photo 5
Photo 6
Photo 7
Photo 8
Please provide any other information that is relevant for your entry
Welcome to the Merry household- creating a country feel in a new build, blending vintage charm with modern comfort. This is our smallest room with the biggest impact
Voting is not enabled or out of date!

Tracy, Merry

Photo 1
Photo 2
Photo 3
Photo 4
Photo 5
Photo 6
Please provide any other information that is relevant for your entry
Welcome to the Merry household- creating a country feel in a new build, blending vintage charm with modern comfort
Voting is not enabled or out of date!

Vania, Silva

Photo 1
Photo 2
Photo 3
Photo 4
Photo 5
Photo 6
Photo 7
Photo 8
Please provide any other information that is relevant for your entry
First time applying to something so amazing like this after we final bought our home last year. Interior has always been a big passion of mine and being able to share it online has been so lovely. Putting the ideas in my head into reality has been amazing.
Voting is not enabled or out of date!

Vicky, Burton

Photo 1
Photo 2
Photo 3
Photo 4
Photo 5
Photo 6
Please provide any other information that is relevant for your entry
This room was always destined to be our family space. I wanted it to feel adaptable to real family life, somewhere that worked for us day to day, but still felt considered and part of the overall home. It flows seamlessly into the extension, with pocket doors leading into the snug. Originally the dining room of the house, it became that “in-between” space once we built out so we reimagined it completely. We removed the old back boiler and gas fireplace and created a gallery wall, complete with a Frame TV. The built-in units are actually secondhand pine cupboards, painted in Dulux Mellow Flow to blend effortlessly with the room. Keeping the toys on display makes the space practical and easy to tidy, while the rainbow wall and picture shelves give my girls a dedicated spot for their books.
Voting is not enabled or out of date!

Vicky, Gill

Photo 1
Photo 2
Photo 3
Photo 4
Photo 5
Photo 6
Photo 7
Please provide any other information that is relevant for your entry
My dining room before and after has turned out to be the most minimal but the best transformation in our house!
Voting is not enabled or out of date!

ben, irurzun

Photo 1
Photo 2
Photo 3
Photo 4
Photo 5
Photo 6
Photo 7
Photo 8
Please provide any other information that is relevant for your entry
Before and after of the kitchen of the department I’ve just moved into in February. Done on a tight budget using paint and faux wood effect paint, del made cabinets adding to what was existing already to save £££
Voting is not enabled or out of date!

Best DIY creation


Aimee, Scott

Photo 1
Photo 2
Photo 3
Please provide any other information that is relevant for your entry
This console table was a £30 bargain.. now it’s the statement piece of the room. Proof that a little creativity, some primer, and some furniture wax can completely transform a piece.
Voting is not enabled or out of date!

Alexandra, Wood-Tonks

Photo 1
Photo 2
Photo 3
Photo 4
Photo 5
Photo 6
Photo 7
Photo 8
Please provide any other information that is relevant for your entry
Liam created this bench seat for our dining room! Liam is not a joiner, and together we created a design and idea and brought it to life as a diy project. Liam created the frame of the bench seat, we made our own tongue and groove panels for the sides and back rest, we upholstered our own bench seat cushions, primed and spray painted the bench seat ourselves. I absolutely love this diy bench seat, and it is a beautiful addition to the room. The only thing missing is the oak top, which would not be finished in time for submission unfortunately! However, I still believe this is an amazing diy project.
Voting is not enabled or out of date!

Alice, May

Photo 1
Photo 2
Photo 3
Photo 4
Photo 5
Please provide any other information that is relevant for your entry
We crested these built in floating shelves using a previously boarded up doorway. We extended them out using timber batons, boarded and painted for a seamless effect. This is one of my favourite DIYs around the home
Voting is not enabled or out of date!

Anna, King

Photo 1
Photo 2
Photo 3
Photo 4
Photo 5
Photo 6
Photo 7
Photo 8
Please provide any other information that is relevant for your entry
This space showcases one of my most rewarding DIY creations, transforming a once spare bedroom into a hardworking home office & crafting room. Starting with a blank canvas, I designed & built a bespoke desk area, forming the heart of the room & cleverly adapted IKEA units around it to create overhead storage, drawers & a connected seating area that feels seamlessly built-in. The seating was intentionally designed so I could have my dog by my side while I work, while also serving as a place to sit, scroll, research or enjoy a quiet coffee break. Every element was carefully considered & crafted to maximise both function & flow, with added wood panelling & patterned wallpaper bringing warmth & personality to the space. This project reflects my hands-on approach to DIY, creating something completely bespoke, practical & personal from the ground up.
Voting is not enabled or out of date!

Anna, King

Photo 1
Photo 2
Photo 3
Photo 4
Photo 5
Photo 6
Photo 7
Photo 8
Please provide any other information that is relevant for your entry
This living room makeover is one of my proudest DIY creations, transforming a once dated & characterless space into a warm, functional & beautifully styled room. After initially refreshing it to make it liveable, I took time to reimagine its full potential & designed a faux chimney breast to introduce both structure & purpose. This allowed me to create alcoves on either side, where I built in cupboards & shelving to add much-needed storage & styling opportunities. To achieve a rustic country feel, I sourced reclaimed brick slips & an oak mantel to form a bespoke fireplace, bringing depth & authenticity to the space. Drawing on my existing skills in wood & stonework, I also pushed myself further by learning how to install plasterboard & plaster, completing the project entirely myself. It was a challenging but incredibly rewarding process, resulting in a space full of character that truly reflects my hands-on approach to creating a home
Voting is not enabled or out of date!

Anna, King

Photo 1
Photo 2
Photo 3
Photo 4
Photo 5
Photo 6
Photo 7
Photo 8
Please provide any other information that is relevant for your entry
This project showcases a small but impactful DIY creation, transforming an unused, cluttered area into a fully functional downstairs toilet. I reconfigured the layout to create a separate space, before taking on the entire renovation myself. I laid the limestone floor by hand, adding both durability & a timeless feel. To bring character into the space, I installed MDF panelling & incorporated oak offcuts from a previous project as a design feature, adding warmth & a sense of continuity. Every stage was carefully considered & completed with a hands-on approach, turning a forgotten corner into a practical & beautifully detailed space that I’m incredibly proud to have created
Voting is not enabled or out of date!

Anna, Rocks

Photo 1
Photo 2
Photo 3
Photo 4
Photo 5
Photo 6
Photo 7
Please provide any other information that is relevant for your entry
When we viewed the house in 2024 we decided this space was crying out to be transformed into a boot room! I started planning right away, but once I got an idea of how much something like this would cost, I realised I would have to get creative. Having done an Ikea Pax hack for wardrobes at our last house, I knew they were versatile and there was no reason why the very affordable wardrobes couldn't become the bootroom of our dreams! First, we hired a floor sander and refinished the floors as they were so scratched and damaged (as you can see in photo 5). We added a more matte finish to the floor and tried to tone down the orange tone to make the floors look a bit less like they belonged in a squash court! I painted the room, built the Pax wardrobes, built a bench between the wardrobes and added some tongue and groove panelling and cornice. Then I painted the whole thing in a gorgeous buttery yellow and added brass hardware and baskets perfect for all our shoes. It stores an unbelievable amount of sports kits, shoes and coats! And the yellow is such a lovely warm colour to come home to!
Voting is not enabled or out of date!

Ashley, Rack

Photo 1
Photo 2
Photo 3
Photo 4
Photo 5
Photo 6
Photo 7
Photo 8
Please provide any other information that is relevant for your entry
My outdoor kitchen was designed and built entirely from scratch by myself and my husband with the goal of redefining what’s possible in a small garden. I wanted to show that even compact spaces can enjoy the luxury and functionality of an outdoor kitchen, so I reimagined the footprint of my existing freestanding BBQ and transformed it into a fully integrated, multi-purpose feature. Constructed using blockwork and cement board, the structure was finished with a clean, modern one coat render and topped with a durable compact laminate worktop. The design balances aesthetics with practicality, incorporating a discreet gas bottle compartment, integrated storage cupboards, and generous preparation space. Despite its modest size, the kitchen is highly functional, featuring a two grill BBQ and a pizza oven, making it a central hub for cooking, entertaining, and family time. Every detail was carefully considered to maximise usability without compromising on style. The project has resonated strongly with my audience, consistently generating hundreds of thousands of views and significant engagement on Instagram. It demonstrates that with thoughtful design and hands on execution, even the smallest outdoor spaces can be transformed into something aspirational, functional, and truly special.
Voting is not enabled or out of date!

Becca, Jordan

Photo 1
Photo 2
Photo 3
Photo 4
Photo 5
Photo 6
Photo 7
Please provide any other information that is relevant for your entry
I made an antique mirror that usually retails for £995 for just £80 using Ikea LONSAS mirrors. I removed the plastic backing from the mirror, applied a thick layer of varnish and left it for an hour. Then I scraped it back to the copper and added another think layer of varnish. I then rubbed the copper off with a cloth and made up a bleach water spray. I sprayed this onto the mirror, dabbing it using a sea sponge to create the antique effect. Then sprayed it with copper spray for a more realistic finish. Stuck them all to a tray frame that I made using tile spacers and then hung it in our dressing room. Such an easy but super effective DIY. The reel I did for instagram also did incredibly well with 716 shares, 105k views and 1.9k saves.
Voting is not enabled or out of date!

Becky, Russell

Photo 1
Photo 2
Photo 3
Photo 4
Photo 5
Photo 6
Photo 7
Photo 8
Please provide any other information that is relevant for your entry
This bathroom transformation wasn’t just a renovation — it was proof that the biggest barrier to DIY isn’t skill, it’s belief. Six years into owning my home, the bathroom still hadn’t had a single update. Not because I didn’t want to change it, but because I couldn’t afford to pay someone else to do it. So I decided to figure it out myself — even the parts that terrified me. I stripped everything back to basics: ripped out the old vinyl flooring, removed the bath, sink and toilet, and started fresh. I taught myself to replumb the toilet and sink with YouTube as my only tutor. I installed all the wall panelling, painted every surface, and laid brand new flooring. I built a wooden frame for the bath panel, created a window ledge and sink backsplash from recycled tiles, and installed a new shower screen. A bathroom cabinet and shelf got a second life through upcycling, and a beautiful towel rail I spotted in a sale — spray painted black — ties the whole scheme together perfectly alongside the new fixtures. What makes this project my favourite isn’t the finished result (though I’m incredibly proud of it) — it’s what it represents. Two years before starting this, I’d barely picked up a drill. I didn’t grow up with DIY confidence; I had to build it from scratch, project by project. Plumbing felt completely out of reach. But necessity has a way of making you braver than you think you are. The whole bathroom cost a fraction of what a tradesperson would have quoted. I saved thousands. And more than the money, I gained the knowledge, the confidence, and the proof — to myself and anyone watching — that you don’t have to grow up knowing how to do something. You just have to decide you’re going to learn.
Voting is not enabled or out of date!

Ben, Irurzun

Photo 1
Photo 2
Photo 3
Photo 4
Photo 5
Photo 6
Photo 7
Photo 8
Please provide any other information that is relevant for your entry
Apothecary cabinet made using 12 moppe ikea small drawer Units. Framing them all in a wooden structure, staining the whole thing and turning the drawers to add handles and vintage handmade apothecary style labels. Ending with 64 usable kitchen drawers. The marble on the top came from a fireplace hearth from my previous house.
Voting is not enabled or out of date!

Beth, Marsden

Photo 1
Photo 2
Photo 3
Photo 4
Photo 5
Photo 6
Photo 7
Photo 8
Please provide any other information that is relevant for your entry
I transformed a second hand wardrobe that I sourced for free via Facebook Marketplace, into a bespoke statement piece! The full upcycle combined structural carpentry, furniture modification and decorative finishing techniques. The original piece lacked character, so I completely reimagined its form by building a curved top, introducing a softer silhouette and elevating it beyond a basic, flat front design. To enhance the overall look, I added bobbin legs and applied bobbin beading and mouldings, carefully balancing traditional detailing with a more contemporary finish. This required precise measuring, cutting and placement to ensure each element felt cohesive and intentional rather than applied. The exterior was refinished in paint to create a clean, elevated look, while the interior was fully lined with wallpaper across the back panels and ceiling, adding an unexpected, high end detail when opened. As part of the upcycle, I retained the original hardware and restored it using Rub ’n Buff, avoiding unnecessary waste while still achieving a polished finish. Sourcing the piece second hand and reworking it in this way reflects my approach to DIY, where I focus on transforming overlooked items into something that feels considered and design led. The finished wardrobe feels entirely bespoke to the space, both in its design and styling. This project showcases my ability to take a discarded piece of furniture and, through a combination of technical skill and creative vision, turn it into something that feels thoughtfully designed rather than simply updated.
Voting is not enabled or out of date!

Bradley, Dreha

Photo 1
Photo 2
Photo 3
Photo 4
Photo 5
Photo 6
Photo 7
Photo 8
Please provide any other information that is relevant for your entry
For my dining nook makeover, I fully embraced the spirit of DIY by designing and completing every aspect of the project myself. What started as a simple idea quickly evolved into a detailed, hands-on transformation where I pushed my creativity and skills to the limit. I reimagined the space from the ground up, beginning with the ceiling, installing panelling using tiles and moulding strips, followed by carefully wallpapering it to create a bold, cohesive look. I added coving to enhance the architectural feel and designed and built arch panelling to frame the nook, giving it depth and character. One of the standout features is the booth seating, which I intentionally created as an accessible DIY “hack” to inspire others. Using two flat-back storage benches as a base, I enhanced and transformed them by bringing the wall forward and building an arch around the seating, creating a bespoke, built-in look without the need for complex joinery. I then completed the upholstery myself, ensuring both comfort and a polished finish. I extended this hands-on approach into creating a custom bar station side unit, adding both function and personality to the space. To bring the design to life, I hand-painted palm trees and stripes on the walls, introducing a playful yet considered design element that makes the nook truly unique. Every stage of the process was completed independently, from structural work to fine decorative details. Alongside the physical transformation, I documented the entire journey and shared it across my social platforms, encouraging others to feel confident in tackling their own DIY projects. From planning to execution, this makeover reflects my passion, creativity, and commitment to showing that impactful design can be both personal and achievable. Here are some of the videos I have shared to encourage DIY: https://vm.tiktok.com/ZNR4Coa5r/ https://vm.tiktok.com/ZNR4XJbWp/
Voting is not enabled or out of date!

Bradley, Dreha

Photo 1
Photo 2
Photo 3
Photo 4
Photo 5
Photo 6
Photo 7
Photo 8
Please provide any other information that is relevant for your entry
This project is a true reflection of hands-on, DIY design, transforming a once bland living room into a functional and luxurious tropical-inspired retreat. The entire space was thoughtfully reimagined and built with a budget-conscious approach, focusing on creating a bespoke look through creative craftsmanship. A standout feature is the pair of custom-built alcoves, formed using arched plywood to seamlessly connect tall flat-pack units to the walls, giving the impression of fitted joinery. These alcoves not only frame the fireplace but also function as a media wall, combining style with everyday practicality. Within each alcove, I installed tropical murals to create the illusion of window seats, with integrated storage benches that double as seating when dressed with cushions, maximising both comfort and usability. Additional storage along the fireplace wall ensures the space works hard while maintaining a clean, cohesive aesthetic. To complete the design, a striped rug was introduced to echo the subtle stripe detailing within the wallpaper, tying the entire scheme together. This project demonstrates how thoughtful DIY solutions can deliver a high-end, multi-functional space without the need for a large budget. I love sharing my project over on my socials to encourage people that they can do it themselves too: https://vm.tiktok.com/ZNR4tm546/
Voting is not enabled or out of date!

Briony, Teasel

Photo 1
Photo 2
Photo 3
Photo 4
Photo 5
Photo 6
Photo 7
Photo 8
Please provide any other information that is relevant for your entry
Kitchens can be really expensive but the sometimes the cheaper options start to look scruffy in such a high traffic environement (like vinyl wrap) - so it's tough to know what to do! We really wanted to find an answer to this when it came to our kitchen worktop, which was originally a faux granite black and grey mottled effect (not to our taste and didn't suit the vision!). We considered tiling the worktop but knew this could be expensive, and we also considered purchasing the cheapest worktop we could find from IKEA and learning to fit it ourselves - at least it would be the right colour even if it was the same standard as the current worktop! Then we discovered Epodex Resin. We'd seen people use this in craft projects to make things like river tables and keyrings or floral centerpieces. You can seal pretty much anything you like in resin! After a look on the website we noticed they do sell countertop sets. Rather than choosing a pre-made one, we bought everything separately (the priming paint, the clear resin, the terazzo tile chips that I had custom made by an indepedant buisness, and the topcoat). The process consisted of sanding the existing worktops, taking away any beading or kitchen trim, removing temporarily the hob and sink, painting, arranging the chips, taping everything up so the resin would run off and spread evenly, mixing and pouring the resin and then leaving it to set before applying an anti-scratch topcoat. It took us two weekends of work and we learned a lot along the way but we're really happy with how it turned out - it always leaves people amazed which makes us feel very proud.
Voting is not enabled or out of date!

Caz, Blaxcell

Photo 1
Photo 2
Photo 3
Photo 4
Photo 5
Photo 6
Photo 7
Photo 8
Please provide any other information that is relevant for your entry
I was quoted £2.5–4k for built-in cabinetry… so I built my own for under £750. I needed storage that worked for our home office, but I didn’t want to compromise on how the space felt. The wall had a narrow depth to work with (to avoid a doorway), but I knew it still had the potential to be both practical and beautiful—somewhere to hide the mess, but also a styled, inviting display I’d love looking at every day. Starting with basic IKEA IVAR units, I transformed a wall of outdated shelving that didn’t suit the space into something that now feels bespoke. Every inch is now working harder. I cladded the units, designed and built the arches to soften the look, added trim to elevate the finish, and painted everything in a rich green to bring warmth into the room. To elevate it further, I added custom-cut MDF oak veneer tops making the whole piece feel more considered. I am really proud of this creation, as I did it all myself, and during my second and third trimester of pregnancy with my second child. No help — just a vision, and a whole heap of unwavering determination (very much powered by nesting hormones). For me, this is what DIY is all about—creating something that looks bespoke, functions beautifully, and feels personal, without the price tag.
Voting is not enabled or out of date!

Charlotte, Lawrence

Photo 1
Photo 2
Photo 3
Photo 4
Photo 5
Photo 6
Photo 7
Photo 8
Please provide any other information that is relevant for your entry
Taking on our kitchen as a DIY project became one of the most rewarding parts of our renovation. With our budget already stretched, we challenged ourselves to completely transform the space for just £300—and proved it’s possible with a bit of creativity and hard work. From painting cabinets to updating handles and refreshing the worktops with vinyl, every detail was done by us, turning a tired (very orange) kitchen into a space our family love spending time in.
Voting is not enabled or out of date!

Charlotte, Thomson

Photo 1
Photo 2
Photo 3
Photo 4
Photo 5
Photo 6
Photo 7
Photo 8
Please provide any other information that is relevant for your entry
This is my strawberry inspired lamp. I created this from my old grey, boring lamp base, that I literally woke up l one day at the end of last year and decided it very much resembled a strawberry! I primed the base first in white and then sprayed in bright red. The scalloped shaped shade, I fabric glued some bright green fringing to the bottom edge to look like the strawberry’s leaf’s. I love this lamp again now!! I’ve given it a new lease of life and it really adds a much needed pop of colour to this little corner of my lounge. I bought a strawberry cushion from Vinted and voila! I LOVE my strawberry corner
Voting is not enabled or out of date!

Charlotte, Thomson

Photo 1
Photo 2
Photo 3
Photo 4
Photo 5
Please provide any other information that is relevant for your entry
I created this doorbell chime cover using a tray and wicker placemat. Photo 5 shows what the wall in my hallway looked like before. It needed covering with something more aesthetically pleasing, and even considered painting it. But I saw this tray in the middle of Aldi and took a risk! I hot glued the placemat to the bottom of the tray and used Posca pens to create a face. I thought the placemat looked like it could be a sun and it needed a cheeky face (I’m partial to anything with a face!). Such a fun cover up for an otherwise boring space that makes me smile every time I see it! So pleased it fitted over the chime box, and luckily the extractor fan switch is still accessible - the only switch we use
Voting is not enabled or out of date!

Chloe, Lawrence

Photo 1
Photo 2
Photo 3
Photo 4
Please provide any other information that is relevant for your entry
I DIY’d this fireplace from scratch, with no experience and on a budget of course! I also posted a 7 step guide video on my TikTok (@182living) so others can give it ago theirselves! I would of loved to upload the video as part of the entry but I wasn't able too :(
Voting is not enabled or out of date!

Chloe, Lawrence

Photo 1
Photo 2
Photo 3
Photo 4
Photo 5
Photo 6
Photo 7
Photo 8
Please provide any other information that is relevant for your entry
My home is my creative outlet, I love nothing more than working on a project that is visually pleasing and brings me joy :)
Voting is not enabled or out of date!

Chloe, Shepherd

Photo 1
Photo 2
Photo 3
Photo 4
Photo 5
Photo 6
Photo 7
Photo 8
Please provide any other information that is relevant for your entry
Our en-suite might be small at 1.2 x 3m, but it’s proof you don’t need a big space to make an impact. We DIYed the entire room ourselves, even upcycling the vanity, which has become one of our favourite features. The walled shower was a key decision, helping to zone the space while giving the illusion of something much bigger. It makes the room feel far more spacious than it actually is. It’s hard to capture all the details across a few slides, but this little en-suite has turned out to be the perfect size for us.
Voting is not enabled or out of date!

Christine, Mullan

Photo 1
Photo 2
Photo 3
Photo 4
Photo 5
Photo 6
Please provide any other information that is relevant for your entry
This is our DIY secret door - we built this secret door for under £200. Originally it was the outside gable wall of the house but added a new secret door to create a secret playroom for our kids. They have their own special room- with hand drawn mural that opens during the day as an extension of the living room and then in the evening when they go to bed the door can be closed and us grown ups can have a more grown up living room space.
Voting is not enabled or out of date!

Clara, Burns

Photo 1
Photo 2
Photo 3
Photo 4
Photo 5
Photo 6
Photo 7
Photo 8
Please provide any other information that is relevant for your entry
Last summer I ripped up the whole garden by myself. I built wooden frame and did ombre concrete in sections. I also did a underground fire pitt in centre. Along with this i built a brick wall and steps with a raised patio area . I haven't finished garden as need to add stepping stones and decorative around edge and build a wood gazebo and make top of firepitt into a table. I have never built walls or concreted so even though I didn't get to finish I'm proud of what I achieved so far with a unique garden floor only I have got.
Voting is not enabled or out of date!

Courtney, Curtis-Jones

Photo 1
Photo 2
Photo 3
Photo 4
Photo 5
Photo 6
Photo 7
Photo 8
Please provide any other information that is relevant for your entry
Without a doubt, our new pantry cupboard / coffee station is definitely our best DIY project to date! What started off as an IKEA kitchen wall unit, turned into our pantry cupboard of dreams!! And it cost us less than £300 too which is a huge bonus.
Voting is not enabled or out of date!

Daniel, Bland

Photo 1
Photo 2
Photo 3
Please provide any other information that is relevant for your entry
Using a second hand landscape picture, cutting and reassembled to bend into the ceiling of my gallery wall.
Voting is not enabled or out of date!

Danielle, Pearce

Photo 1
Photo 2
Photo 3
Photo 4
Please provide any other information that is relevant for your entry
This light fitting is my favourite DIY of the house! It is quite simply a multi pendant fitting from amazon, a florists wreath ring, some artifical flowers, a touch of creative flair and some unique bulbs that are all different some say wine, some say dance, some simply give off a gorgeous glow, it perfectly compliments the floral wallpaper, the colourful dining table that I made with my brother and my nieces, and it lights the room beautifully.
Voting is not enabled or out of date!

David, Saul

Photo 1
Photo 2
Photo 3
Photo 4
Please provide any other information that is relevant for your entry
Loved creating this bespoke table for Combined Safety Solutions. The client brief was industrial chic, whilst giving a strong corporate branding. Using the custom graphic topped with custom cut toughened glass. Sturdy but reliable hair pin legs finished off the tables build. Lastly the client optioned for on-board double USB ports to power laptop & Ipad whilst working online & leading staff meetings. All while sat in a comfortable set of supplied suede chairs.
Voting is not enabled or out of date!

Ellis, Duncan

Photo 1
Photo 2
Photo 3
Photo 4
Photo 5
Photo 6
Photo 7
Photo 8
Please provide any other information that is relevant for your entry
The Bookplace: A Reimagined Fireplace Reading Nook During my maternity leave, I set out to create something truly special for my baby daughter’s bedroom, a reading corner unlike anything I had seen before. Our home is a Scottish Arts and Crafts period property, rich with original character and architectural detail. Each bedroom features its own mantelpiece except hers. Rather than accept the absence of that focal point, I decided to create one. The result is what I have affectionately named The Bookplace, a reimagined vintage fibreglass fire surround sourced from Facebook Marketplace for just £30 and transformed into an ultra feminine, functional and highly decorative bookcase. I carefully restored and repainted the surround, adding two bespoke shelves to create practical storage for her growing collection of books. The focal point is the faux antique tiled backdrop adorned with delicate fairytale inspired illustrations of castles, swans, florals and elegantly dressed women. It brings whimsy, nostalgia and storytelling magic into the space. I designed the piece to feel timeless rather than overly childish, the Goldilocks of little girls’ bedrooms. Not too young, not too grown up, but something that will evolve with her. It is a feature rooted in the heritage of our Arts and Crafts home, yet playful enough to be styled seasonally for birthdays, Christmas and beyond. Perhaps what makes it most meaningful is how it was created. Much of the work was done during the newborn haze of maternity leave, often with my daughter in a sling against my chest. This was not simply a DIY project but an act of love, intention and imagination. The Bookplace has become more than a bookcase. It is a focal point, a conversation piece and a place to gather floor cushions and blankets for bedtime stories. It blends period character with modern creativity and proves that thoughtful design does not require a large budget, only vision and heart. I am incredibly proud of this one of a kind creation, born from an idea in my mind’s eye and brought to life through creativity and care. Submitting The Bookplace feels like a small but meaningful well done to myself. It stands as a feature in her room, but also as a marker of resilience and motherhood. It serves as a quiet reminder to myself that I am capable, and that DIY gives me that empowering sense of “I can do this” when I need it most. I hope you like it as much as my little ones do!
Voting is not enabled or out of date!

Emily, Barratt

Photo 1
Photo 2
Photo 3
Photo 4
Photo 5
Photo 6
Photo 7
Photo 8
Please provide any other information that is relevant for your entry
The courtyard is my proudest DIY achievement, I pushed myself beyond what I ever have done before. I built an outdoor kitchen with timber, then concrete boards and tiled it then I made DIY concrete worktops. I built the decking I placed it on. Then I used concrete building blocks to make a seating area and planter and rendered them. I used roof battens around the walls and built a hit tub frame using left over wood that I had.
Voting is not enabled or out of date!

Emily, Fradgley

Photo 1
Photo 2
Photo 3
Photo 4
Photo 5
Photo 6
Photo 7
Photo 8
Please provide any other information that is relevant for your entry
DIY vanity table - Used a £20 marketplace find table to create the style I required. I started by removing the singular legs away from the circular top and flipped the top so I could use it upside down. I measured a leg height. And used 2 thing layers of ply wood which (me and my husband - as I needed his strength) we bent the ply around the circular part of the table - used nails and screws to hold these in place. And cut a piece of circular Mdf for the lid. - once assembled I used upholster foam / and glue to create the cushioned the effect I required covering the outside of each of the legs the front back and lid. Now came the fun part I bought a few meters of upholstery fabric to cover the foam and the table - spray glue and staple gun to keep it in place. For the Lid after upholstering, I used a £5 circular mirror purchased from B and M and a hinge to make the lid open and closed. This is why i used the original table upside down. I wanted to use the inside as a place to store my makeup and hair tings - I also lined the inside with the same fabric. I used a wooden stool i already had at home - created a foam cushion for the top to make it comfier and used foam to create a skirt effect to hide the wooden legs. so, the whole piece matched. This make came in at under £100 and now i have a unique piece that sits beautifully in my bay window.
Voting is not enabled or out of date!

Fern, Hutchinson

Photo 1
Photo 2
Photo 3
Photo 4
Photo 5
Photo 6
Photo 7
Photo 8
Please provide any other information that is relevant for your entry
This project was the biggest project we have accomplished so far and we are extremely proud. We have transformed what was once a drab, long, empty room into a cosy living room full of character for under £800! We build the faux chimney breast out of timber, MDF and fire safe cement board, built the shelving units and cupboards out of MDF and timber
Voting is not enabled or out of date!

Frederique, Etienney-Pope

Photo 1
Photo 2
Photo 3
Photo 4
Photo 5
Photo 6
Photo 7
Photo 8
Please provide any other information that is relevant for your entry
This ornate fireplace surround was transformed using nothing more than leftover paint sample pots and a fine paintbrush. Every flower, leaf and detail was hand painted by me — picking out the intricate moulding in soft pinks and greens to bring the carving to life. No specialist tools, no professional finish — just patience and a steady hand. It cost almost nothing and is one of my favourite things in the house.
Voting is not enabled or out of date!

Gentiana, Dukaj

Photo 1
Photo 2
Photo 3
Photo 4
Photo 5
Photo 6
Photo 7
Photo 8
Please provide any other information that is relevant for your entry
When I get this house was with brown carpet and I decided to remove it. It was a little bit hard This project was not just about aesthetics, but about improving daily life. The transformation has enhanced how the space is experienced, making it more practical, enjoyable, and suited to modern living. It demonstrates how thoughtful design — even on a modest budget — can completely change how a home feels and functions.
Voting is not enabled or out of date!

Hannah, Warden

Photo 1
Photo 2
Photo 3
Photo 4
Photo 5
Photo 6
Photo 7
Photo 8
Please provide any other information that is relevant for your entry
This feature in our bungalow renovation gets complemented a lot. We went from no stairs to stairs so we really wanted to make this a key feature. It took my partner and dad several days to perfect measurements and work out how best to screw the oak slats to the main oak beam.
Voting is not enabled or out of date!

Jade, Coxon

Photo 1
Photo 2
Photo 3
Voting is not enabled or out of date!

Jade, Coxon

Photo 1
Photo 2
Photo 3
Photo 4
Photo 5
Photo 6
Voting is not enabled or out of date!

Jade, Coxon

Photo 1
Photo 2
Photo 3
Photo 4
Photo 5
Photo 6
Voting is not enabled or out of date!

Jade, Coxon

Photo 1
Photo 2
Photo 3
Photo 4
Photo 5
Photo 6
Photo 7
Photo 8
Voting is not enabled or out of date!

Jasmine, Gurney

Photo 1
Photo 2
Photo 3
Photo 4
Photo 5
Photo 6
Photo 7
Please provide any other information that is relevant for your entry
I built this two- storey playhouse for my AuDHD 4 years old to both make better use of his playroom space, and give him something no other child had. From 18 lengths of CLS timber to make the frame and mdf for the internal and external walls, I designed the whole thing on some 3D modelling software, then got to work building. I wanted to ensure minimal damage if we ever take it down so it is only secured to the two walls with 18 screws and built to take the weight of several adults. The downstairs space was built with the exact measurements needed to fit my son’s play kitchen and have enough head height to last until he’s no longer interested in playing in there. The top floor has a padded floor and bookshelves, and is filled with his cushions, blanket and soft toys to give him a little sensory escape after a long stimulating day at school. I installed recessed spotlights that can change colour using a remote, to add another level of sensory stimulation, and have since added a basket of fidgets and a weighted blanket to the space. He loves going up there to wind down / regulate! He’s already asked me to put a TV in there! On the bottom level also has these spotlights as well as a striplight. All of which are plugin, with all wires running inside the framework of the structure. Built into the design is one of the ways in and out. When I first designed it, I had a ladder inside with an opening, but I worried it took up too much space or he would fall down by accident. On the left side, where there’s a grid in the bottom window, you’ll see I added a step on the wall, and the window sill, + grid and window lintel all act as steps to rock-climb his way through the large opening. These all take the weight of an adult too as he regularly makes me come up there with him. I’ve since transformed an Aldi triclimb into Swedish wall bars and placed it on the wall next to the opening so that too can be used to climb in and out safely. His favourite way to get out though.. launching himself onto the huge thick floor cushion I placed at the bottom! These hardest part of the build was the roof. Working out compound mitre angles when the roof not only slanted at 40 degrees, but also needed to join at angles for the three front sides was a real test of my GCSE maths abilities. But making a scale model really helped with this and helped me work out the cut angles and the sizes of the internal and external faces of the roof.
Voting is not enabled or out of date!

Jennie, Brown

Photo 1
Photo 2
Photo 3
Photo 4
Photo 5
Photo 6
Photo 7
Photo 8
Please provide any other information that is relevant for your entry
This project focused on transforming an underused space into a functional and considered walk-in dressing room. Working with the layout of our home, we reimagined the area by opening up the back of our existing bedroom wardrobe into the adjoining spare room, creating a seamless connection between the two spaces. This allowed us to maximise space that was previously not being fully utilised. Using IKEA PAX wardrobes, we designed a bespoke-feeling dressing room that combines both practicality and a clean, timeless aesthetic. The layout was carefully planned to ensure ample storage while maintaining a calm and organised feel. We added architrave and skirting to the top and bottom of the units and added wood trims to the wardrobe joins, so that it really has the look of built in bespoke, instead of just Ikea. Overall, this DIY transformation highlights how rethinking existing spaces can add both function and value to a home, creating something that feels both purposeful and personal.
Voting is not enabled or out of date!

Jill, Oliver

Photo 1
Photo 2
Photo 3
Photo 4
Photo 5
Please provide any other information that is relevant for your entry
I wanted to create a cost effective island for my kitchen. I used an Ikea Kallax unit that cost £30. Then built around it with 9mm thick mdf, added more mdf to create shaker style look. Made a worktop out of 25 mm thick mdf and vinyl wrapped it. Added LED strip lights for mood lighting and painted it. Added baskets for storage. I shared to my highlights how to build this, to help people who have a small budget or a small space. It has inspired so many to build their own and I have a highlight full of details to help people. This was built 3 years ago and is as good as the day I built it.
Voting is not enabled or out of date!

Karen, Gadd

Photo 1
Photo 2
Photo 3
Photo 4
Photo 5
Photo 6
Photo 7
Photo 8
Please provide any other information that is relevant for your entry
One of the most rewarding parts of transforming our garden has been the opportunity to design and build many of the features ourselves. When we first viewed the house, the garden was overgrown and dominated by large conifers and invasive planting. There was no clear layout and very little usable space. Rather than simply clearing it, we wanted to completely redesign the garden and create something structured, contemporary and practical for everyday living. Over the past two years we have gradually brought that vision to life through a number of hands-on DIY projects. We designed and built raised sleeper borders to create depth and structure, carefully shaping the layout of the garden and defining different zones within the space. We also built a pergola to create a focal point and a place to gather, along with a fire pit area that allows us to enjoy the garden well into the evenings. Decorative stone detailing and structured borders were added to give the space texture and contrast, while a new patio area connects the garden seamlessly to the house. Each element was thoughtfully planned and completed step by step, turning what was once an overgrown and unusable garden into a calm, contemporary outdoor space. Seeing something we designed and built ourselves become such an important part of our home has been incredibly rewarding. The garden is now somewhere we spend countless hours relaxing, entertaining and enjoying time together as a family.
Voting is not enabled or out of date!

Karen, Gadd

Photo 1
Photo 2
Photo 3
Photo 4
Photo 5
Photo 6
Photo 7
Photo 8
Please provide any other information that is relevant for your entry
Creating our media wall has been one of the most rewarding DIY projects in our home. We wanted to transform a plain wall into a focal point that felt both stylish and functional — something that would elevate the room while also working for everyday family life. Starting with a blank space, we designed and built the media wall ourselves, carefully planning every detail to ensure it felt balanced and cohesive. The goal was to create a clean, contemporary look while incorporating practical storage and a dedicated space for the TV. The finished design frames the television seamlessly, turning it into part of the overall aesthetic rather than a standalone feature. The structure adds depth and interest to the room, while the styling brings warmth and personality. Throughout the process, we focused on achieving a high-end look through DIY, paying attention to proportions, finishes and the overall feel of the space. The result is a feature wall that completely transforms the room, creating a focal point that is both functional and visually striking. What started as a simple idea has become one of the standout features of our home — a space we designed and built ourselves, and one that we use and enjoy every day as a family.
Voting is not enabled or out of date!

Karen, Gadd

Photo 1
Photo 2
Photo 3
Photo 4
Photo 5
Photo 6
Photo 7
Photo 8
Please provide any other information that is relevant for your entry
Our fitted wardrobes were a complete DIY transformation, created to achieve a bespoke, built-in look without the bespoke price tag. Rather than starting from scratch, we also made the decision to reuse and repurpose wood from wardrobes we already owned, giving existing materials a new life while reducing waste. The goal was to create a seamless, wall-to-wall finish that feels fully integrated into the room. We built the wardrobes up to ceiling height, added side panelling and framework to remove any gaps, and finished with detailed trims to achieve a true fitted look. Careful attention was given to proportion and symmetry, ensuring the final design feels clean, balanced, and considered. We chose a soft, neutral palette to create a calm and timeless feel, layering in warm tones and textures to add depth. Styling played an important role in the overall finish, combining practical storage with carefully chosen accessories so the space works beautifully day to day while still feeling elevated. What makes this project stand out is both the transformation and the intention behind it. By reworking existing materials and combining them with a thoughtful design approach, we were able to turn a standard, off-the-shelf starting point into a bespoke-looking feature that completely transforms the room. It’s a reflection of how creativity, sustainability, and attention to detail can come together to create something that feels truly high-end.
Voting is not enabled or out of date!

Kate, Turner

Photo 1
Photo 2
Photo 3
Please provide any other information that is relevant for your entry
We're new to the DIY journey and decided to panel our daughter's bedroom. We were looking to take it from nursery to "big girls room" and we're so proud with our first DIY project.
Voting is not enabled or out of date!

Katie, Kitson

Photo 1
Photo 2
Photo 3
Photo 4
Photo 5
Photo 6
Photo 7
Photo 8
Please provide any other information that is relevant for your entry
Despite being a complete DIY novice, I’ve always had this belief that I can do things I’ve never done before… (let’s just say I learn a lot as I go). With my media wall wardrobe, I somehow convinced myself I could create something that Google said didn’t even exist. As a long-term student of the University of YouTube, I’m not going to lie — it made me really nervous. I spent months researching, going back and forth, and overthinking every option before finally deciding that if I didn’t just try, I’d never know. Despite my original plan not even working out (all because of 2cm!), I kept going, adapted as I went, and somehow managed to pull it all together. I’d spent almost a year on and off being bed bound, so I knew this messy wall inside out. Now it’s completely transformed — I can’t see any of the chaos it once held, and I’ve used every bit of space for storage. It genuinely feels like my own little piece of luxury. Along the way, I learned more than I ever expected — hanging doors in different directions to work around coving, switching hinges to support heavier doors and wider openings, repurposing a kitchen cupboard in a way it definitely wasn’t designed for, using kitchen doors as wardrobe fronts, learning how to cut into coving with a multi-tool, and even fixing badly drilled holes so I could redrill them properly. Since sharing it, I’ve had so many conversations with people wanting to create their own media wall wardrobe — and I honestly can’t describe how happy that makes me. (I should probably say that I reused existing wardrobes elsewhere to make this too.)
Voting is not enabled or out of date!

Kayleigh, McInulty

Photo 1
Photo 2
Photo 3
Photo 4
Photo 5
Photo 6
Photo 7
Photo 8
Please provide any other information that is relevant for your entry
What about a DIY creation in the form of an en-suite, created from scratch? Highbury had to bathroom upstairs so it was time to install one. We ripped out the old built in cupboard in the guest room, and framed out the space we intended to steal from this room, to be the en-suite off the master. We then cut a hole from the master through to this new space, before installing plumbing, electrics, installation, and plasterboard. We installed the en-suite in its new space and decided to go one DIY step further and create a hidden door! The secret door was made from a mirror and drawer brackets. Why not?! Who says DIY can’t have a little bit of childish magic!
Voting is not enabled or out of date!

Kayleigh, McInulty

Photo 1
Photo 2
Photo 3
Photo 4
Photo 5
Photo 6
Photo 7
Photo 8
Please provide any other information that is relevant for your entry
On a normal Saturday morning browse around my local antique shop, I found these drawers and FELL IN LOVE. I just knew they were going to be my bathroom vanity. I brought them home and removed the bottom drawer, before sanding, whitewashing and staining them. I then made an MDF mould to pour a white concrete mixture into it, which I painstakingly let dry for 60 days! While that was drying, I made a bottom for the vanity (where the third drawer was removed). The concrete top was then finally ready, so the 2 remaining drawers were amended to allow for the water pipes, before installing the top. Tap and basin installed, and we were good to go! A totally unique and homemade vanity.
Voting is not enabled or out of date!

Kelly, Insley

Photo 1
Photo 2
Photo 3
Photo 4
Photo 5
Photo 6
Photo 7
Photo 8
Please provide any other information that is relevant for your entry
‘The fire place of dreams’
Voting is not enabled or out of date!

Kelly, Robbins

Photo 1
Photo 2
Photo 3
Photo 4
Photo 5
Photo 6
Photo 7
Photo 8
Please provide any other information that is relevant for your entry
Bootility transformation Storage Bench area is a complete diy make by myself and husband. The other unit is a dot upcycle love made of two separate thrifted (free) units, with a deed panelling and shelve to look built in <3
Voting is not enabled or out of date!

Kerry, Davison

Photo 1
Photo 2
Photo 3
Photo 4
Photo 5
Photo 6
Photo 7
Photo 8
Please provide any other information that is relevant for your entry
This simple DIY project turned an overlooked corner of my garden into one of our most used spaces, all for just £3. I had a narrow area beside the fence that felt completely wasted, so I designed a pull down table that could attach directly to it. To create the tabletop, we repurposed an old pallet my dad had saved in the garage. After dismantling it, we carefully reassembled the planks to form a sturdy, characterful surface. At a local car boot sale, we found two hinges for £3, which we restored and spray painted black before fixing them to the fence and tabletop. Chains and bolts were added for extra support, while also allowing the table to fold neatly away when not in use. To enhance both privacy and the overall aesthetic, we closed the fence boards, treated all the wood with protective oil, and styled the space with cane backed chairs and an abundance of plants. Despite its minimal cost, this project has had a big impact. Throughout the summer, it becomes a go to spot for morning coffee, relaxed breakfasts, and a practical serving area when hosting barbecues with friends. It’s a small, thoughtful solution that proves even the simplest ideas can completely transform how a space is used and enjoyed.
Voting is not enabled or out of date!

Lara, Winter

Photo 1
Photo 2
Photo 3
Photo 4
Photo 5
Photo 6
Photo 7
Photo 8
Please provide any other information that is relevant for your entry
I built a banquette seat around an existing radiator in our dining room. I did all of the work completely by myself, using IKEA cabinets and parts of our 12 year old sofa to keep the costs as minimal as possible. Wire mesh integrated in three of the cabinets allows for the air from the radiator to circulate. This DIY has completely transformed how we use the space - It has quickly become the hub of our home.
Voting is not enabled or out of date!

Lauren, Thompson

Photo 1
Photo 2
Photo 3
Photo 4
Photo 5
Photo 6
Photo 7
Photo 8
Please provide any other information that is relevant for your entry
I upcycles these old pine cabinets myself, painstakingly sanding back the varnish, priming and painting, then finishing off with some diy curtains and new knobs. They’re now our pantry cupboards and make me smile every day!
Voting is not enabled or out of date!

Leah, Hodson

Photo 1
Photo 2
Photo 3
Photo 4
Photo 5
Please provide any other information that is relevant for your entry
When we moved in, we inherited these IKEA Pax wardrobes - practical, spacious, and exactly what we needed for storage, but aesthetically far from my style. Rather than replace them, I transformed them with leftover primer and paint, giving the wardrobes an entirely new lease of life. To elevate them further, I added thick MDF moulding, carefully cut by hand and applied with adhesive. Choosing a deeper profile was key - the scale of the wardrobes needed detailing substantial enough to feel bespoke, rather than unmistakably flat-pack. I also repositioned the handles lower down, aligning them with the moulding to create a more intentional, custom-built look. Two years on, the moulding is still firmly in place, and what began as a simple DIY has become one of the most impactful transformations in our home - proof that thoughtful design can completely reimagine even the most ordinary pieces.
Voting is not enabled or out of date!

Leanne, Teather

Photo 1
Photo 2
Photo 3
Photo 4
Photo 5
Please provide any other information that is relevant for your entry
We decided to create this corner bench to our kitchen diner area. It’s great for storage and seating family at meal times. We are really pleased with how it turned out
Voting is not enabled or out of date!

Leigh, Palmer

Photo 1
Photo 2
Photo 3
Photo 4
Photo 5
Photo 6
Photo 7
Please provide any other information that is relevant for your entry
I have converted former Victorian pub intro my home, with minimal use of trade support. Top to bottom conversion
Voting is not enabled or out of date!

Louise, Horton

Photo 1
Photo 2
Photo 3
Photo 4
Please provide any other information that is relevant for your entry
What was once an antique farmhouse table, is now a beautiful kitchen island and the heart of our kitchen! For this project, we extended the legs of the table (by using old chair legs and adding internal steel rods!l), added a marble effect top, stained the whole piece and added a brass rail for tea towels. Inspired by DeVOL, but with a budget price tag!
Voting is not enabled or out of date!

Maxine, Austin

Photo 1
Photo 2
Photo 3
Photo 4
Photo 5
Photo 6
Photo 7
Photo 8
Please provide any other information that is relevant for your entry
Every inch of this space has been DIY’ed, combining multiple projects into one room design that supports busy family life. As our entryway, the area needs to work hard! We created bespoke built-in storage using flat-pack units, building a frame around them before cladding with MDF and finishing with skirting and coving to blend everything together. Additional DIY elements include full-height wall panelling, a bench seat built from a kitchen cupboard and a skirting board hack to enhance the sense of height. To unify the space, I colour-drenched all woodwork in a single green tone, added wallpaper to the ceiling to complement the floor, and made a bench cushion. Our DIY efforts have resulted in a layered, functional space that feels completely bespoke - and one that I’m incredibly proud to have created!
Voting is not enabled or out of date!

Naila, Qasmi

Photo 1
Photo 2
Photo 3
Photo 4
Photo 5
Photo 6
Photo 7
Photo 8
Please provide any other information that is relevant for your entry
These are our master bedroom wardrobes, and probably my favourite DIY to date. We inherited the built-in wardrobes from the previous owners (last picture) and lived with them for a while. Once we realised just how much storage they gave us, it didn’t make sense to rip them out, especially as they were solid wood and the internal layout worked well enough for us. So instead I decided to upgrade how they looked externally, as they were quite dated. I wanted full-height doors and a more minimal feel to the bedroom in general, so came up with the idea of making them almost ‘invisible’, so they’d look like a part of the wall rather than obvious wardrobes. We started by sourcing large sheets of plywood from a local timber yard and cut them down ourselves to create new full-height doors. We then removed the original doors and face frame, and added coving along the top and skirting along the bottom to match the rest of the room. We fitted the new doors with concealed soft-close hinges to create a seamless look. We finished by continuing the wall panelling straight across the wardrobes so they blend in completely, and colour drenched the whole room in a deep olive green. We did consider push catches to avoid handles, but the panelling itself is sturdy enough to grip, so it actually works as a built-in solution without needing anything extra. The result is wardrobes that almost disappear into what looks like a fourth wall. It’s made the room feel calmer and surprisingly more spacious, without losing any of that all important storage that made us keep them in the first place.
Voting is not enabled or out of date!

Nicky, Neeve

Photo 1
Photo 2
Photo 3
Photo 4
Photo 5
Photo 6
Please provide any other information that is relevant for your entry
My DIY cooker hood transformation I made myself using mdf, timber frames and architrave. I also tiled the splashback myself too with gold trim and wallpapered the wall behind. My bathroom I tiled for the first time, wallpapered, painted, laid flooring, upcycled a mirror, made shelving from an old scaffolding board, second hand wall sconces from Vinted, spray painted the flush and door handle and made a faux roman blind myself. For the Autumnal porch, I made the milk stool from recycled wood and handmade the wreath too.
Voting is not enabled or out of date!

Olivia, Munro

Photo 1
Photo 2
Photo 3
Photo 4
Photo 5
Photo 6
Photo 7
Photo 8
Please provide any other information that is relevant for your entry
We turned an open horse shelter into a home gym and yoga studio, doing all the work ourselves to give ourselves somewhere chaos free from the renovation of our 400 year old home. Somewhere tranquil and a project that was somewhat different to work on. Using modern materials it was so much easier than the traditional ones we need to use in the house. I did a faux limewash hack using two farrow and ball colours and used osmo oil to treat the wooden floor we laid which was the cheapest flooring we could create! We got the bifold doors at a discounted pr rate but otherwise bought all the materials ourselves, we probably went overboard insulating but it’s been worthwhile as as we didn’t install heating and it’s been useable all winter! All in about £5000 including the custom made bifolds and we now have a beautiful clean space to escape to!
Voting is not enabled or out of date!

Orima, Kamalu

Photo 1
Photo 2
Photo 3
Please provide any other information that is relevant for your entry
Having a eye for things that are far beyond our budget means that sometimes one must resort to creating one's own dream furniture pieces, such as this DIY footstool that I made from scratch. Taking inspiration from fellow Insta DIYers, I purchased materials from B&Q (MDF), Dunelm (Foam and wadding), John Lewis (fabric) and Amazon Home (studs, furniture legs) created this lovely piece of furniture. I made a few mistakes along the way but overall, I am so pleased with how this footstool came out! It forms the perfect space for gaming, resting tired feet, and in the case of our toddler, jumping on repeatedly! Here is a video showing the process of building this DIY footstool: https://www.instagram.com/reels/DLZ4cusi...
Voting is not enabled or out of date!

Peter, Irvine

Photo 1
Photo 2
Photo 3
Photo 4
Photo 5
Please provide any other information that is relevant for your entry
Finca style Kitchen Before & After. Made from pallet wood, Ikea Metod base cabinets, a stone garden trough planter turned kitchen sink, tiled countertop, cedar wood shelves, tumbled travertine flooring, real stone wall feature, window reconfiguration EVERYTHING done by myself & partner Damian.
Voting is not enabled or out of date!

Rachel, Campbell

Photo 1
Photo 2
Photo 3
Photo 4
Photo 5
Please provide any other information that is relevant for your entry
Budget Ceiling Beam Transformation: High-Impact DIY Feature ⸻ ? Project Overview This project focused on creating a statement ceiling beam feature in a new-build home without the high cost typically associated with solid wood beams. After being quoted approximately £450 for a pre-made beam, I set out to recreate the look using a budget-friendly DIY approach, achieving a similar visual impact for a fraction of the cost. ⸻ ? Design Intent The goal was to introduce warmth, character and architectural interest into a modern new-build space that lacked original features. The beam was designed to: • Add depth and visual structure to the room • Create a focal point • Bring in natural, rustic texture • Elevate the overall aesthetic without a full renovation ⸻ ?️ What I Did • Designed and built a faux ceiling beam using affordable materials • Measured and cut the beam structure to fit the space • Created custom brackets to support the installation • Installed the beam securely to ensure both safety and durability • Finished the beam to replicate the look of real wood The full process was completed as a DIY project and documented step-by-step. ⸻ ? Key Challenges • Achieving a realistic wood finish on a budget • Ensuring the beam was safely and securely installed • Designing custom brackets after initially misjudging sizing • Balancing aesthetics with structural practicality ⸻ ? Budget Impact • Estimated cost of pre-made beam: ~£450 • DIY cost: ~£60 This project demonstrates how high-impact design features can be achieved at a significantly lower cost through creative problem solving. ⸻ ? Sustainability / Thoughtful Choices • Reduced material waste by building to exact measurements • Avoided purchasing a full solid wood beam • Focused on a “create rather than replace” approach ⸻ ? Result The finished beam adds instant character and warmth to the space, transforming a plain ceiling into a standout design feature. It proves that impactful interior details don’t require large budgets just creativity and a willingness to experiment.
Voting is not enabled or out of date!

Rachel, Edmonds

Photo 1
Photo 2
Photo 3
Photo 4
Photo 5
Photo 6
Photo 7
Photo 8
Please provide any other information that is relevant for your entry
I took the smallest bedroom in the house (just under 7ft square) and transformed it to make it feel larger and become more functional with zoned areas for sleeping, working and relaxing. I designed and made everything myself including the desk, wardrobe, bed round hanging mirror and ladder using plywood and handrail fixings. The idea was to move the bed higher up the wall creating usable space underneath so that my teenage son had more usable floor space. I had a Manhattan Loft vibe in my head for the styling with an industrial feel which I think I achieved. I particularly loved designing the ladder so that each step was easier to use. You'll notice the first step is on the left though which gives away that my son is not only left handed but left footed too!
Voting is not enabled or out of date!

Rebecca, Anderson

Photo 1
Photo 2
Photo 3
Photo 4
Photo 5
Photo 6
Photo 7
Photo 8
Please provide any other information that is relevant for your entry
Inspired by the incredibly opulent feather lights and needing a grand looking trophy piece for a large 3m high open plan living room, I made this myself. Sprayed a branch gold. Fashioned a stand in a basket. Added florists from to the two “branches”. Added fluffy pampas and the dried honestly underneath for the “fruit”. Strung 3 oversized Edison bulbs underneath the palms and tan the cords for then down the back of the trunk. I chose commercial grade bulbs and wire/plugs so that there was absolutely no heat at all radiating from them. The result is a giant 2.5m high show stopping lamp that I am supremely proud of.
Voting is not enabled or out of date!

Rebecca, James

Photo 1
Photo 2
Photo 3
Photo 4
Photo 5
Photo 6
Photo 7
Photo 8
Please provide any other information that is relevant for your entry
I transformed the freestanding wardrobes that the previous owner left into beautiful built in wardrobes by building a base to allow for skirting, boxing them in, adding panelling, coving and new handles, and painting the same colour as the walls. I love how they turned out!
Voting is not enabled or out of date!

Sabrina, Masero

Photo 1
Photo 2
Photo 3
Photo 4
Photo 5
Photo 6
Please provide any other information that is relevant for your entry
I collaborated with a company with the pergola and the climbing frame, my partner did absolutely everything in this garden from scratch.
Voting is not enabled or out of date!

Sal, Riley

Photo 1
Photo 2
Photo 3
Photo 4
Photo 5
Photo 6
Photo 7
Please provide any other information that is relevant for your entry
This was a simple DIY door hack I did in my home that completely changed the feel of the entryway. The original door felt flat and lacked character, so I added moulding to create a more panelled look. It’s a straightforward change, but it made a huge difference, adding depth and making the space feel more considered. While the space was updated more broadly, it was the door detail that made the biggest visual impact. I also reupholstered a vintage stool within the space, rebuilding the base to bring it back into use. This DIY door hack is a project my audience still asks about, with many recreating it in their own homes, and it continues to get a high number of saves and shares on Instagram. For me, it shows how small, thoughtful changes can elevate a space and bring in a more timeless feel without overcomplicating things.
Voting is not enabled or out of date!

Sarah, Burke

Photo 1
Photo 2
Photo 3
Photo 4
Photo 5
Photo 6
Photo 7
Photo 8
Please provide any other information that is relevant for your entry
Last summer I decided to refresh our snug living space; I wanted to replace our (very!) worse for wear IKEA Kallax storage unit (bought 7 or 8 years previous for a modern apartment space we were living in at the time) with something more style appropriate for our little Yorkshire cottage. As we are renting, we are limited with what changes we can make and where we have been granted permission to drill into walls, so the first hurdle was to find something that would give us the height we needed without drilling into the walls. Secondly, I have a really sweet but reactive dog (called Iggy, he says hi!) and with a very awkwardly shaped space with a floor plan at approximately 4m x 3.5m square in this area, there is only one space where the sofa can be so that Iggy won't go nuts at passers'by out the window, which left us with just one spot for the cabinet, a niche of 118cm, and I wanted to maximise these dimensions to get the best use out of the space. Thirdly, as with all projects I do, I was on a tight budget of £100 to pull this off. There are a few things that I knew I wanted out of this project; I wanted glazed doors to bounce a little more light and reflectivity around the small space, something pre-loved that I could give a new lease of life to, and something that would give us more storage space, as well as shelves to display books and objects we love. I managed to source two separate cabinets from one of my local charity furniture shops; one cabinet (the top half) had lead lined glass doors which I instantly loved. The second was a heavily detailed 2 drawer/door base cabinet, not exactly my taste but fit the dimensions of the niche it would sit within (something that had proved quite difficult to find up til this point). Both cabinets came in well under budget and although they weren't matching, I could see them sitting quite well together. The top half was also much more shallow than the base cabinet and could sit comfortably on top of it, which gave me confidence that it would be stable, eliminating the need to attach it to the wall (as I intended to attach it to the base cabinet). Once the pieces were delivered, I got to work on the top half, cleaning and prepping the wood work to be painted. I decided to leave the top in it's original wood finish, as I'm not a fan of painted tops (as I think they mark quickly and look poor quality), and masked off the areas to leave in their natural finish; all cabinet internals for contrast, and all brass fixtures. I went with Rust-oleum Chalky Furniture Paint in Wet Harvest which has a rich honey tone and would bring some much needed warmth to the space. After a couple of coats and finished with Rust-oleum's Clear finishing wax for protection and sheen, I polished up the brass features to bring them back to life. There is a small keyhole on the front of the doors but no key came with it, and as the latch has been left on, I decided to display the cabinet with one door open to protect the latch and paint work from damage of accidentally knocking against each other when opening and closing. I turned my attention then to the base cabinet. Originally, I intended to strip the varnish right back to its original wood finish, seal it and add some nice door knobs, but as I was cleaning the cabinet I discovered that it was an Ercol! This was an awesome surprise, but meant that I needed to change approach. I didn't have the budget to professionally have the varnish stripped and I didnt have the luxury of the space or time to have a go myself (and I didn't want to be left with something of a hodge podge) so I decided to just strip back the top of the cabinet to it's original beautiful teak wood finish, oil it and seal it. The door knobs would remain to maintain the original Ercol features, and I would paint the rest of the cabinet (except the internals) in Rust-oleum Chalky Furniture Paint in Fallow; a deep earthy brown. Once waxed it has taken on a chocolaty smooth, tactile quality that I love. Down the line I intend to have the whole cabinet professionally stripped to it's original wood finish, but that's a job for a bigger budget. I love that these cabinets don't exactly match, but they both contain very similar qualities that I think makes them sit well together; the two rectangles on each of the door fronts, vertical and horizontal grooves that frame these rectangular forms, the notches in the top of the top cabinet are very similar to the notches in the side details of the base cabinet, and the soft edges of the cabinet tops, alongside the paint colour and finish choices, I think, harmonises these two pieces together. The cabinets together came to £45, plus £20 for delivery. I bought the paint and wax in the sale (total £35), bringing me in right on budget (for once!). I'm so happy with the outcome, and I hope it is worthy of your consideration for this category.
Voting is not enabled or out of date!

Scarlett, Mack

Photo 1
Photo 2
Photo 3
Photo 4
Photo 5
Photo 6
Photo 7
Photo 8
Please provide any other information that is relevant for your entry
This area REALLY needed storage so I built in 2 large wardrobes and chest of drawers and clad them in pine dowels. Then I used the ceiling wallpaper to create a worktop on top of the units.
Voting is not enabled or out of date!

Shelley, Probert

Photo 1
Photo 2
Photo 3
Photo 4
Photo 5
Photo 6
Photo 7
Please provide any other information that is relevant for your entry
We remodelled our kitchen on a budget and wanted a way to hide the extractor fan without losing access to it. So my husband built a custom frame around it, making sure we could still reach the buttons, then we finished it using MDF, upsidedown skirting board mouldings and painted it to match the space. Such a simple, affordable hack but it’s made such a difference, we love how seamless it looks now.
Voting is not enabled or out of date!

Sue, Fox

Photo 1
Photo 2
Photo 3
Photo 4
Photo 5
Photo 6
Photo 7
Photo 8
Please provide any other information that is relevant for your entry
This is my son’s room, it is a slightly awkward L-shaped room. The alcove is just wide enough for a bed so lent itself to a cabin bed. We used Ikea drawers and cupboard units for the base, then cut the curves from ply. Room painted in a delicate blue with navy accents and darker tonal wood work. The alcove was gilded and stencilled with a free form chinoiserie style stencil. The desk area was hidden with folding doors which were also gilded and stencilled. It is a lovely calm restful room, which makes the most of a difficult shape.
Voting is not enabled or out of date!

Suzy, Broome

Photo 1
Photo 2
Photo 3
Photo 4
Photo 5
Photo 6
Photo 7
Please provide any other information that is relevant for your entry
I decided to test my tiling and flooring skills by cleaning, laying and sanding 30 square metres of reclaimed parquet flooring by myself in our previous home. I was told by various people (mostly men) that I would not be able to do it. So I took a week off of work and did it. Every tile was laid and cut by me. Then I sanded and varnished it myself. The tiles came from an old chapel in Sheffield and were £250. The entire project cost us around £400 to complete. We then went on to extend our kitchen/diner. I then laid a new tiles floor in the new dining space and created a step between the two spaces that meant the two areas worked in harmony together. Overall I laid the entire ground floor flooring by myself and seriously upskilled in terms of my use of power tools and flooring and tiling. Never let anyone tell you you can’t do something!
Voting is not enabled or out of date!

Vicky, Gill

Photo 1
Photo 2
Photo 3
Photo 4
Photo 5
Photo 6
Photo 7
Photo 8
Please provide any other information that is relevant for your entry
Our DIY alcove cabinets was our first ever project in the house and went viral on social media. Doing these gave us the confidence to try more projects and now it’s a loved hobby!
Voting is not enabled or out of date!

Victoria, Caroline

Photo 1
Photo 2
Photo 3
Photo 4
Photo 5
Photo 6
Photo 7
Photo 8
Please provide any other information that is relevant for your entry
I loved this diy project a room I use to dread entering now I go in there just to look at it again and again. a full micro cement powered room.
Voting is not enabled or out of date!

Claire, Douglas

Photo 1
Photo 2
Photo 3
Photo 4
Photo 5
Photo 6
Photo 7
Please provide any other information that is relevant for your entry
I saw huge potential in the window area of our boring 60s box of a front room and found a way to create an expensive-looking hack using flatpack CD towers to frame the window with bespoke-looking built-ins on a tiny budget, doing all the work myself, a real labour of love! I measured everything up and sourced super sturdy, flatpack CD towers which i used as the main structure for the shelving. I built a timber frame to seat them on to lift them up off the floor, important as the extra height allows for skirting to be added to the base which instantly elevates a built-in project. I had to cut the overhead units down to fit into the space and used strong metal brackets to ensure they were properly attached to the wall. It was really important to create the bespoke, custom joinery look so i built the units in with strip moulding, filled all the shelf holes and attached coving to the top. I then primed and painted everything. I made a DIY window seat cushion with MDF, upholstery foam and wadding and covered in beautiful, embroidered fabric, which has ended up being the cats’ favourite spot in the house. To soften it all, I added Roman-style blinds using a couple of metres of gorgeous, patterned fabric, which brought in a bit of texture and warmth. Finally, I popped in some rechargeable, remote-controlled LED lights in a few of the shelves to highlight styling pieces and give more of a luxe look and this really finished it off.
Voting is not enabled or out of date!

Sophie, Murphy

Photo 1
Photo 2
Photo 3
Photo 4
Please provide any other information that is relevant for your entry
this project was a project to keep my husband busy during my cancer treatment. We used three billy bookcases for this before/after. Offcuts of old mdf we had lying around and paint we already had. The vision was to compliment the Georgian room after we discovered it was originally a dining room. It’s quite a large space so we wanted it to become cosier and a place to retreat to.
Voting is not enabled or out of date!
Best Entertaining Space

Where you entertain or enjoy entertainment.

Andrea, Grace

Photo 1
Photo 2
Photo 3
Photo 4
Photo 5
Photo 6
Photo 7
Photo 8
Please provide any other information that is relevant for your entry
An entertaining open plan space to meet everyone’s needs In a living and entertaining space. Open plan living room, toy area, dining, bar and kitchen
Voting is not enabled or out of date!

Anouska, Lancaster

Photo 1
Photo 2
Photo 3
Photo 4
Photo 5
Photo 6
Photo 7
Photo 8
Please provide any other information that is relevant for your entry
When we bought Penally House, the basement was a cold and damp storage space without power, light or heating. We created our Bar/Cinema by adding partitions to the open space, and then panelling the entire room with wood panelling. I wanted to create a 'Secret Cinema' so the door is concealed within a panelled wall in the hallway, without a door handle. The door is held closed by magnets as I didn't want any joins. I wanted to create a 'Gentleman's Club' from a bygone era as a nod to the heritage of the house, which was built in 1836. In those days, the men would have leave the ladies after dinner to smoke in a formal, grand room in the house - a billiard room or a bar. The dark red walls and mood lighting created with wall lights add to the drama and intimacy of the space. I created the paint colour as part of my paint range/collaboration with Victory Colours. This paint is called 'Secret Cinema' after the room. The ceiling is spray painted gold in a special effect that looks very old, like smokers have used the 'club' for years. I also created this paint and called it 'Treasure Chest' as the house was originally built an downed by a smuggler. All the paints in the basement are created by me for 'The Cornwall Collection' with Victory Colours. These rooms were showcased on Series 2 of Renovation Nation on Channel 4. All the walls are made of wood and cover the original stone walls, some of which were damaged and filled with cement. There are fluted columns and scrolls to add to the regency feel of the room. The floor is original flagstones from 1836. The room was designed around the antique cinema chairs which I bought on ebay. They came out a theatre in London - they still have the original seat numbers on them. We reinstated a fireplace, bought on ebay from the period of the house. Originally this room would have been were the servants cooked the food for the owners of the house, so there was a working fireplace/flume which has been blocked. There was also a bread oven from 1836 which we kept and can be accessed by opening a secret door in the panelling. We use this room for entertaining - parties, after dinner drinks, cinema nights and it is adored by all - young and old.
Voting is not enabled or out of date!

Chelsea, Shakespeare

Photo 1
Photo 2
Photo 3
Photo 4
Photo 5
Photo 6
Photo 7
Please provide any other information that is relevant for your entry
We moved in 4 weeks ago, Christmas day is already arranged to be hosted in here
Voting is not enabled or out of date!

Chloe, White

Photo 1
Photo 2
Photo 3
Photo 4
Photo 5
Please provide any other information that is relevant for your entry
I designed this as an entertaining space inspired by the calm, easy feeling of clouds. I wanted it to feel relaxed and welcoming, so guests can settle in and feel comfortable straight away. I kept the palette soft and the textures gentle to create a laid-back atmosphere, while still making sure the layout works well for hosting. The aim was to create a space that feels open, sociable, and easy to enjoy, where people can gather, unwind, and spend time together.
Voting is not enabled or out of date!

Coral, Foster

Photo 1
Photo 2
Photo 3
Photo 4
Photo 5
Please provide any other information that is relevant for your entry
Turning what was once multiple separate rooms into this open plan living kitchen diner has honestly made the best space for entertaining. We love how it all flows, but still feels really cosy at the same time. Being able to cook and host at once was always a must for us, and this space does exactly that.
Voting is not enabled or out of date!

Dan, Coyles

Photo 1
Photo 2
Photo 3
Photo 4
Photo 5
Voting is not enabled or out of date!

Daniel, Bland

Photo 1
Photo 2
Photo 3
Please provide any other information that is relevant for your entry
Luxury dining room , Bland Design metallic wallpaper, gilded ceiling, sumptuous colours and grand styling.
Voting is not enabled or out of date!

Donna

Photo 1
Photo 2
Photo 3
Photo 4
Please provide any other information that is relevant for your entry
In a tiny cottage, space is very limited, so by opening up the kitchen diner, we can entertain perfectly.
Voting is not enabled or out of date!

Emily, Barratt

Photo 1
Photo 2
Photo 3
Photo 4
Photo 5
Photo 6
Photo 7
Photo 8
Please provide any other information that is relevant for your entry
I turned a run down basement into a bar for £700. We now host various parties down here, it’s great for Halloween parties etc. I have added a photo of what it was like before I turned it into something that could be used to entertain.
Voting is not enabled or out of date!

Emma, Simonetti

Photo 1
Photo 2
Voting is not enabled or out of date!

Evelyn, Lindley

Photo 1
Photo 2
Photo 3
Photo 4
Photo 5
Photo 6
Please provide any other information that is relevant for your entry
The kitchen in my old house was such a great size for entertaining. We held birthdays, Christmases, baby showers and wakes in this kitchen. It was just the perfect party spot.
Voting is not enabled or out of date!

Frederique, Etienney-Pope

Photo 1
Photo 2
Photo 3
Photo 4
Photo 5
Photo 6
Please provide any other information that is relevant for your entry
Our garden is small, but we wanted it to work as hard as the rest of the house — so we built an outdoor cocktail bar and cinema. Inspired by travels to Morocco and Mexico, the bar has arched curves, bold yellow and blue paintwork, and is built from reclaimed wood and an old Victorian door. Corrugated steel, warm timber and colourful details give it that sun-soaked, relaxed energy we wanted to bring home from our travels. It’s a proper entertaining space — drinks lined up behind the bar, a disco ball, art on the walls, and an outdoor cinema for evenings under the sky. A hammock and a palm tree complete the picture.
Voting is not enabled or out of date!

Georgia, Goulden-Page

Photo 1
Photo 2
Photo 3
Photo 4
Photo 5
Photo 6
Photo 7
Please provide any other information that is relevant for your entry
We transformed our barn conversion's floorplan last March with the goal of creating a spacious, open-plan entertaining area at the heart of our home. By removing two walls and constructing four new ones, we reimagined the layout to maximise both flow and natural light. Central to the design are three striking arched windows, now fully visible as you enter thanks to opening up the space between the kitchen and sitting room and widening a single doorway into a generous double doorway. The result is a bright, versatile environment that can be easily adapted, perfect for hosting and bringing together our large family for memorable gatherings but with the ability to carefully place furniture to create zoned areas.
Voting is not enabled or out of date!

Helen, Somers

Photo 1
Photo 2
Photo 3
Photo 4
Photo 5
Photo 6
Please provide any other information that is relevant for your entry
I have created a drama filled room perfect for entertaining guests. A dark ceiling punctuated with a statement light fitting teamed with a bold wallpaper makes it a wonderful space to socialise. I also love lazy afternoons in the sofa reading and listening to records
Voting is not enabled or out of date!

Hollie, Hedley

Photo 1
Photo 2
Photo 3
Photo 4
Photo 5
Photo 6
Voting is not enabled or out of date!

Jess, Ryan

Photo 1
Photo 2
Photo 3
Photo 4
Photo 5
Voting is not enabled or out of date!

Karen, Gadd

Photo 1
Photo 2
Photo 3
Photo 4
Photo 5
Photo 6
Photo 7
Photo 8
Please provide any other information that is relevant for your entry
When we first viewed this house, the garden was overgrown and completely disconnected from the home. Large conifers blocked the light, invasive plants had taken over, and the space felt closed in and unusable. We immediately saw the potential to create something very different — a welcoming outdoor space where friends and family could gather and where we could truly enjoy spending time together. Over the past two years we have completely transformed the garden with entertaining in mind. After removing the conifers and clearing the overgrowth, we redesigned the space to feel open, structured and connected to the house. A new patio now creates a natural entertaining area that flows seamlessly from indoors to outdoors. The pergola provides a beautiful focal point and a place to gather, while the fire pit allows us to extend evenings outside long after the sun goes down. We introduced faux lawn and decorative stone to keep the space low-maintenance so it can be enjoyed rather than constantly maintained. Raised sleeper beds, structured borders and stone planters add depth and character, while apple and pear trees bring softness and seasonal interest. A statement water feature adds a calm, relaxing atmosphere, making the garden feel like a retreat as well as a social space. Today, the garden has become the heart of our home for entertaining. From relaxed summer evenings around the fire pit to family gatherings and outdoor meals under the pergola, it’s a space that brings people together and creates lasting memories.
Voting is not enabled or out of date!

Kate, Turner

Photo 1
Photo 2
Photo 3
Photo 4
Photo 5
Photo 6
Photo 7
Photo 8
Please provide any other information that is relevant for your entry
Pre 2024 this space was a pipe dream - we've always loved entertaining family and friends, but when we moved into this house we had to scale back until our extension works were completed. In 2025 we were able to start hosting again, and this space is the perfect space to do it. In November 2025 we hosted 60 family and friends for our joint 40th party and it was so nice to do this in the home we've created and not in an external venue.
Voting is not enabled or out of date!

Katherine, Sanders

Photo 1
Photo 2
Photo 3
Photo 4
Photo 5
Please provide any other information that is relevant for your entry
We moved our kitchen to the back of the house and extended to create a large kitchen living dining space with bifold doors that open onto a raised patio, perfect for hosting family.
Voting is not enabled or out of date!

Kelly, Harmer

Photo 1
Photo 2
Photo 3
Photo 4
Photo 5
Photo 6
Photo 7
Photo 8
Please provide any other information that is relevant for your entry
A large open plan space that we love entertaining in! Move the dining table and create a dance floor, fill the island with food, host karaoke & games nights or Christmas. It’s so versatile and we adore it.
Voting is not enabled or out of date!

Kerry, Davison

Photo 1
Photo 2
Photo 3
Photo 4
Photo 5
Photo 6
Photo 7
Photo 8
Please provide any other information that is relevant for your entry
The dining room is the heart of our home, every social gathering starts here. Layered with warm wood, soft neutrals and lots of greenery, I’ve created a space that feels cosy but still styled. The slatted feature wall, statement lighting and long dining table set the tone, but I love switching it up with different tablescapes depending on the occasion… from fresh, light spring settings to full, cosy autumnal and Christmas looks. It flows straight out into the garden, so everything spills outside when we host. Between the outdoor cinema, hot tub and dining area, it’s become an extension of the room and with the colourful lighting, dining and seating areas, it’s perfect for entertaining. Over the last four years this space has seen it all… summer BBQs and pulled pork on the smoker, Christmas buffets, Sunday dinners, outdoor halloween movie nights, last minute plans for home cooked pizza that turn into late nights with friends. We’ve even hosted a full mini rave and hot tub party for my daughter’s 13th. Its not always perfect, it’s not always tidy, but always full of life, which is exactly how I think a home should feel.
Voting is not enabled or out of date!

Laura, Hall

Photo 1
Photo 2
Photo 3
Photo 4
Photo 5
Photo 6
Please provide any other information that is relevant for your entry
My dining room is the ultimate entertaining space, we created it especially with entertaining in mind. I wanted somewhere that everyone could gather around the table together. After My father died and we sold our family home we didn't really have that kind of space anymore, so it felt really special to be able to create it. As well as being able to gather around the table, we can also move the table to one side to create a dancefloor. Aside from parties and special meals it also hosts a. multitude of other things, such as games nights and my little boy's play dates :) A real multi use space!
Voting is not enabled or out of date!

Laura, Major

Photo 1
Photo 2
Photo 3
Photo 4
Please provide any other information that is relevant for your entry
This is our kitchen dining living area which is such an amazing entering space with bifolds onto the garden!
Voting is not enabled or out of date!

Leah, Govier

Photo 1
Photo 2
Photo 3
Photo 4
Photo 5
Photo 6
Please provide any other information that is relevant for your entry
When we moved into our house this area wasn’t quite how we wanted it to be to create the perfect space for entertaining. We decided to extend the kitchen island, add some built in units as part of a dining zone, and then created a coffee station to tie together the two areas. We used black vinyl wrap to bring the colour scheme together. This space is perfect for a coffee catch up, a dinner party or a few drinks and it now flows so nicely together and leads to both outside and the lounge for further entertaining if necessary!
Voting is not enabled or out of date!

Lesley, Kay

Photo 1
Photo 2
Photo 3
Photo 4
Photo 5
Photo 6
Photo 7
Photo 8
Please provide any other information that is relevant for your entry
This is our open plan family room, dining room/kitchen. A large open plan room yet each space is easily defined by furniture placement. The south facing family room has patio doors which bring in lots of light during the day but in the evening turns into an ambient cosy space where we can chill out on the large comfy sofa. The dining area looks straight onto the kitchen area so guests can either sit at the table or the island whilst the chef is cooking. The whole space is a very sociable area and quite often our guests have said they never want to leave as it’s such a lovely comforting welcoming home.
Voting is not enabled or out of date!

Lexie, Carducci

Photo 1
Photo 2
Photo 3
Please provide any other information that is relevant for your entry
The entertaining space was really the main focus for our renovation. Before this home I only ever lived in places I had bought as an investment so I basically lived there throughout the renovation process and then either sold it on or rented it out. So I’m used to living on building sites and never getting to enjoy the finished product, so entertaining was never happening at mine haha! So now that we have a home that is for us to live in we wanted to create an entertaining space to host our guests, we felt we had a lot of making up for hosting duties! We wanted the living, dining and kitchen to be as open as possible so removed walls and pillars between the spaces. And we put in the largest kitchen island as we could that fitted the space, we actually reconfigured the kitchen a few times until we found the most social layout. So now we have the hob in the island so I can chat to guests at the bar area whilst cooking. We then had the dining table built into the island at a lower level so it creates that seamless flow of the space. The table seats 6 but we keep it as a 4 unless we have guests and then we bring down 2 additional seats that are used upstairs. I think my favourite feature in this space has to be the Kaelo wine cooler which is built into the kitchen table and keeps a bottle cool so you don’t have to keep running back and forth to the fridge! 
Voting is not enabled or out of date!

Lisa, Weaver

Photo 1
Photo 2
Photo 3
Photo 4
Photo 5
Photo 6
Photo 7
Photo 8
Please provide any other information that is relevant for your entry
Outdoor Living: A Multi-Zone Entertaining Space A large-scale, multi-zone entertaining space designed as a seamless extension of our home, this garden is built around experience—hosting everything from large, multi-generational gatherings to relaxed get-togethers, with spaces for outdoor dining, lounging, socialising, children’s play and relaxing with friends in the hot tub and sauna. The design is anchored around a generous central patio, framed by two distinct pergolas that create connected yet clearly defined zones. Constructed from robust timber posts and polycarbonate roofing, the structures feel like permanent architectural extensions rather than outdoor shelters. The roofing maximises natural light while helping to keep it cool in warmer weather and retain heat in colder months —allowing the space to be used across all seasons. One pergola forms the social hub, with an outdoor kitchen, BBQ and pizza oven, alongside a covered dining and lounge area, including a 12-seater dining table. The second pergola introduces a more playful, experience-led element, with a sauna, hot tub and 2 person ice bath—bringing a fun, social dimension to entertaining, particularly in colder months. The central patio connects the two zones and features a separate 12-seater dining table, allowing for flexible hosting—perfect for dividing adults and children or accommodating larger gatherings across both areas. A full-width raised flower bed runs along the patio, filled with colourful planting and integrated bench seating, creating additional space for relaxed, informal gathering. Planting and styling play an important role in softening the scheme. Potted plants and layered greenery are used throughout the pergola areas to break up the structure, while vintage stone sculptures and aged planters contrast with newer elements, creating a balanced mix of old and new. Lighting enhances the atmosphere after dark, with festoon lighting across both pergolas, a chandelier light feature in the lounge area, and candlelight creating a warm, inviting setting in the evenings. The enclosed, private layout makes it ideal for entertaining families. While adults gather across the patio and pergolas, children can enjoy the adjoining lawned garden—complete with trampoline, zip wire, swings, slides, treehouse and playhouse—allowing the whole space to work together without compromise. Scale and flow were key to the design. The layout allows for easy movement and large numbers without feeling crowded, while the proximity of each zone keeps everything connected and sociable. I designed and project-managed the entire space from start to finish, taking a hands-on approach throughout. I worked alongside a carpenter to bring my pergola, outdoor kitchen and storage designs to life, as well as building the flat pack sauna. I built the dining table and bench seating myself, and managed all the trade coordination. Sustainability was an important part of the project. I repurposed materials wherever possible, including transforming our old indoor sofa for outdoor use, reusing an old office worktop in the kitchen area, and sourcing second-hand furniture. We also installed solar panels on the house to help offset the energy demands of the sauna and hot tub. Large-format aluminium bifold doors connect the open-plan kitchen, dining and lounge area directly to the patio, allowing the indoor and outdoor spaces to function as one during warmer months. Results The space now operates as a dynamic, year-round entertaining environment, regularly hosting large gatherings and multiple parties for adults, children and families. Its flexibility supports both large-scale events and smaller group use, with features such as the hot tub and sauna ensuring the space remains active and sociable even in winter. This project redefines outdoor entertaining—transforming a garden into a fully integrated, all-season extension of the home, where scale, atmosphere and connection come together effortlessly.
Voting is not enabled or out of date!

Marie, Nolan

Photo 1
Photo 2
Photo 3
Photo 4
Photo 5
Photo 6
Please provide any other information that is relevant for your entry
We’ve always tried to be really respectful of the original character of our house, keeping as many of its period features and original layout as possible. But one change we did make was opening up the wall between the kitchen and dining room, which completely transformed how we use the space. We also replaced a window with French doors out onto the courtyard, which brought in so much more light and created a lovely flow between inside and out. It’s now the perfect space for entertaining — relaxed, welcoming, and somewhere we genuinely love gathering with friends and family. It was actually the last room we renovated, and in a lot of ways, I think it’s the room that best reflects my style. By the time we got here, I’d grown in confidence with my design choices, and it feels like the space where everything finally came together.
Voting is not enabled or out of date!

Miranda, Horchler

Photo 1
Photo 2
Photo 3
Photo 4
Photo 5
Photo 6
Photo 7
Photo 8
Voting is not enabled or out of date!

Naomi, Hudson Reed

Photo 1
Photo 2
Photo 3
Photo 4
Photo 5
Photo 6
Photo 7
Photo 8
Please provide any other information that is relevant for your entry
"This space comprises a dining room with bifolds onto the decking, a living area, and a kitchen with bifolds to the decking. It was designed to encompass modern living while still having small zones to feel cozy. The kitchen was a falling-down conservatory, and when I saw this space, I knew a kitchen with an island would pull it all together."
Voting is not enabled or out of date!

Nick, Grant

Photo 1
Photo 2
Photo 3
Photo 4
Photo 5
Photo 6
Photo 7
Please provide any other information that is relevant for your entry
This is our Tiki Bar that I built in the garden. I made the whole thing myself including the structure. It's mostly made from recycled materials. We love hosting parties here and making Tiki cocktails.
Voting is not enabled or out of date!

Pixie, Lavin

Photo 1
Photo 2
Photo 3
Photo 4
Photo 5
Photo 6
Voting is not enabled or out of date!

Rachel, Edmonds

Photo 1
Photo 2
Photo 3
Photo 4
Photo 5
Photo 6
Photo 7
Voting is not enabled or out of date!

Samantha, Crouch

Photo 1
Photo 2
Photo 3
Photo 4
Photo 5
Photo 6
Photo 7
Photo 8
Please provide any other information that is relevant for your entry
I’m incredibly proud of the entertaining space we’ve created at the back of our semi-detached home. It’s transformed how we use and enjoy our space as a family. Designed as a seamless extension of our home, the garden combines relaxation and socialising in one cohesive setting. At its heart is a covered pergola seating area, allowing us to enjoy the space across the seasons. The furniture, fire, soft furnishings and lighting create a warm, inviting atmosphere that works for both everyday living and hosting. A key feature of this space is its connection to our outbuilding, which we’ve transformed into a multifunctional home cinema and gym. Providing the perfect transition from outdoor dining to indoor entertainment. The design carefully balances practicality with aesthetics. Well considered materials, lighting and defined zones ensure the space is functional yet stylish. For example; the bespoke gym resin floor, which is one of a kind, provides a unique artistic focal point but is incredibly durable, making it perfect as a gym floor. From summer gatherings, cosy evenings by the fire, family movie nights and workouts. It has become a central part of how we spend time together. This space reflects our approach to home — creating somewhere that not only looks beautiful, but is truly lived in, enjoyed and shared.
Voting is not enabled or out of date!

Sophie, Stotesbury

Photo 1
Photo 2
Photo 3
Photo 4
Photo 5
Photo 6
Photo 7
Please provide any other information that is relevant for your entry
This open-plan kitchen, dining, and living space was designed with entertaining at its core—balancing functionality with a warm, inviting aesthetic. A large central island anchors the room, creating a natural social hub for cooking, dining, and gathering. Expansive glazing and a statement rooflight flood the space with natural light, enhancing the sense of openness and connection to the garden. A soft, cohesive palette—featuring warm wood flooring, muted cabinetry, and brushed brass accents—adds depth and sophistication. Zoned yet seamless, the layout flows effortlessly from kitchen to relaxed seating area, allowing the space to adapt from everyday living to hosting with ease. Thoughtful lighting, bespoke detailing, and layered textures create a welcoming atmosphere that is both practical and elevated. The result is a versatile, light-filled space that brings people together—perfectly suited to modern entertaining.
Voting is not enabled or out of date!

Stacey, Hawkes

Photo 1
Photo 2
Photo 3
Photo 4
Photo 5
Photo 6
Photo 7
Photo 8
Please provide any other information that is relevant for your entry
Our garden bar is the perfect entertainment space! Situated at the bottom of our garden, it is known as 'The Well Inn', affectionately named as such after finding a Victorian well in the garden during building works! The room is 4m x 6m and boasts 3m long bifold doors to let loads of light into the room. Its colour drenched in Dulux Peacock Blue, with blue and pink accents throughout. We have a professional sized dart board, with a DIY pallet wood wall behind it (which we made from old pallets) and a full size refurbished pool table which has been professionally recovered in a bright pink cloth to add a bit of fun to the space! There's is also a functional bar area which has been painted to match the walls and has a feaure wallpaper in a gold floral pattern and 3 bright pink bar stools. A faux living wall is situated behind a mustard yellow sofa bed (practicality for guests as well as functional for watching TV/sport in the 65 inch TV). We also have a custom neon sign upon the living wall. Lighting has been considered throughout, with 4 wall lights - 3 above the mirrors and one above the dart board. There is also pendant lighting above the bar area. It is a well used and well loved entertainment space!
Voting is not enabled or out of date!

Susie, Thompson

Photo 1
Photo 2
Photo 3
Photo 4
Photo 5
Photo 6
Photo 7
Photo 8
Please provide any other information that is relevant for your entry
When we moved into our home a couple of years ago, we immediately knew we wanted to create a true entertainment space within the kitchen. With a big family and 17 years spent living in Bermuda, it was important to us to bring a sense of light, openness, and a vaulted ceiling reminiscent of the way we had lived abroad. Entertaining is at the heart of how we use our home, so we commissioned a bespoke dining table designed specifically for the space. It comfortably seats ten, but we made it extra wide to allow serving dishes to run along the centre, while still accommodating additional guests at either end when needed. At its fullest, we’ve even hosted sixteen around it on Christmas Day. We also wanted a dedicated area for drinks, so we transformed an awkward junction between the old and new parts of the house into a functional and characterful bar. It now features a wine cooler, beer fridge, generous glass storage, and playful signage—turning what was once an unused space into a focal point for gathering and entertaining.
Voting is not enabled or out of date!

Suzy, Broome

Photo 1
Photo 2
Photo 3
Photo 4
Photo 5
Photo 6
Photo 7
Please provide any other information that is relevant for your entry
When we moved in this room was entirely grey with a large radiator taking up most of the back wall. Because of the ceiling height I knew that I wanted to create a family gallery dining space. We removed the radiator and fitted a green upright into the space to save on wall space and maximise seating potential. We have four children and entertain/host lots so ensuring enough seating was key to the success of the room. I wanted this space to be a collected joyful story of us as a family. Somewhere that houses our own artwork, artwork from artists we love and respect and points of colour, interest and joy. It’s a beautiful space to sit, eat, drink and relax in and is entirely ‘us’ in a space.
Voting is not enabled or out of date!

Traci, Johnson

Photo 1
Photo 2
Photo 3
Photo 4
Photo 5
Photo 6
Photo 7
Photo 8
Please provide any other information that is relevant for your entry
A true family room for entertaining friends, family, kids and even pets! From a deep leather couch with an ottoman to put up your feet to a game table for puzzles or crafts, there is a place for everyone to be together, even if working on different things!
Voting is not enabled or out of date!

Sophie, Murphy

Photo 1
Photo 2
Photo 3
Photo 4
Photo 5
Please provide any other information that is relevant for your entry
i’d like to say our home is for entertaining as we have built a bar on three levels. However. the kitchen is the heart of the home and we’ve also built an espresso martini/ coffee bar into the original scullery hearth. Fitted the kitchen ourselves and made it feel as comfortable as possible by adding in breakfast stools and dried hops, wreaths and everything in between!
Voting is not enabled or out of date!
Best First Impressions

The outside of your home showcasing it's 'kerb appeal.'

Anouska, Lancaster

Photo 1
Photo 2
Photo 3
Photo 4
Photo 5
Photo 6
Photo 7
Photo 8
Please provide any other information that is relevant for your entry
Penally House was built in 1836. The house was in a terrible state when we bought it and the driveway and garden were totally overgrown. The island on the front drive was used as tipping ground by the last owners. The driveway was mud which we gravelled. We reinstated the gates and railings as the metal had been taken for the war in the 1940's. We lovingly restored the house and garden over 4 years 2021-2025. We reinstated the original orangery as the last piece of the restoration jigsaw puzzle last year. The orangery is by Vale Garden Houses.
Voting is not enabled or out of date!

Coral, Foster

Photo 1
Photo 2
Photo 3
Photo 4
Photo 5
Please provide any other information that is relevant for your entry
Our home definitely has the kerb appeal now. Removing the unused front garden and replacing it with tarmac, block paved edging and sleeper beds has made the entrance feel so much sleeker. The sleeper beds tie in perfectly with the cladding under the porch and the wooden posts, which just brings it all together.
Voting is not enabled or out of date!

Daniel, Bland

Photo 1
Photo 2
Photo 3
Please provide any other information that is relevant for your entry
My first outdoor mural! Transformed my friends house with Sandtex paints
Voting is not enabled or out of date!

Emily, Giblin

Photo 1
Photo 2
Photo 3
Photo 4
Photo 5
Photo 6
Please provide any other information that is relevant for your entry
Best First Impressions The front of my Victorian terrace home. With its hand painted door, well maintained garden & whimsical touches, it adds that kerb appeal whilst also being practical. Full of flowers & bursting with life.
Voting is not enabled or out of date!

Evelyn, Lindley

Photo 1
Photo 2
Photo 3
Photo 4
Please provide any other information that is relevant for your entry
As I put in the "best hallway" category - this entrance always got a great reaction from people at the door. Most people loved it, but some thought it was crazy pink... they weren't wrong! I've always said that it doesn't matter whether the first reaction you get in a hallway is good or bad - so long as you get a reaction!
Voting is not enabled or out of date!

Hanna, Tosney

Photo 1
Photo 2
Photo 3
Photo 4
Photo 5
Photo 6
Photo 7
Photo 8
Please provide any other information that is relevant for your entry

Our home was designed to feel timeless from the moment you arrive. Built in the Yorkshire countryside, we wanted it to feel as though it had always belonged there, using natural stone, soft landscaping and traditional details. Because we built from scratch, every first impression was considered — from the front elevation and stonework to the planting that softens the entrance and changes beautifully through the seasons.

Voting is not enabled or out of date!

Jade, Coxon

Photo 1
Photo 2
Photo 3
Voting is not enabled or out of date!

Jess, Biggs

Photo 1
Photo 3
Photo 4
Photo 5
Photo 6
Photo 7
Photo 8
Please provide any other information that is relevant for your entry
We’ve been slowly renovating and styling our Victorian cottage, focusing on creating calm, cosy spaces that work for family life. I love mixing natural textures, soft colours and thoughtful details to make each room feel warm and inviting
Voting is not enabled or out of date!

Jodie, Kemp

Photo 1
Photo 2
Photo 3
Photo 4
Photo 5
Photo 6
Photo 7
Photo 8
Please provide any other information that is relevant for your entry
This is the moment the house introduces itself. Before you’ve seen a single room… you already know what you’re dealing with. Colour. Pattern. Personality. Confidence. No soft entry. No easing you in. Most homes use the hallway to play it safe. Neutral walls. White ceilings. A quiet “welcome.” This does the opposite. The black and white stripes create instant structure and contrast. The bold yellow door pulls you forward. The layered patterns and colour combinations build energy from the second you step inside. And then there’s the ceiling. Not white. Not ignored. Fully part of the design, making the entire space feel immersive rather than transitional. Because this isn’t just an entrance. It’s a statement of intent. It tells you immediately: ? this home isn’t afraid of colour ? this home isn’t trying to blend in ? this home is designed to be felt, not just seen It sets the expectation for everything that follows. And that’s the point. A first impression should say something. This one says everything.
Voting is not enabled or out of date!

Lexie, Carducci

Photo 1
Photo 2
Photo 3
Photo 4
Please provide any other information that is relevant for your entry
The first thing I wanted people to say when they walk in to my house is ‘wow that’s so cool!’ And we definitely made that happen with our entrance! As soon as you come through the front door you’re greeted on the left by a crittall glass wall through to the garage (sorry, show room! My boyfriend always tells me it’s a showroom not a garage haha!) In the garage, sorry, showroom, sits our one and only piece of art in our home, our classic car. We deliberately put nothing else but the car in the space and we matched the tiled floor to the same colour as our microcement in the hallway to make it look seamless, we originally planned to have microcement in the garage too but with the oils and weight of the car we were eventually persuaded not to! And if you’re wondering where all the garage items are, we created a room behind the garage, sorry, showroom, which is actually used as the garage for storing tools and bikes etc. We used LED lights above the car to highlight it behind the crittall glass wall and shine down onto the car like a work of art. Other showstopping features as you walk through the front door are the microcement itself making the space feel exotic, the whole staircase is covered in microcement too so it’s one seamless floor. We’ve had LEDs plastered into the wall up the stairs which are on a motion sensor which adds a nice touch and creates a welcoming vibe. And instead of having a traditional bannister we had a bespoke metal balustrade created that runs all the way up to the 2nd floor. 
Voting is not enabled or out of date!

Marie, Nolan

Photo 1
Photo 2
Photo 3
Photo 4
Photo 5
Photo 6
Photo 7
Please provide any other information that is relevant for your entry
Our house is on the canal path of Marple famous lock flight and Aqueduct. We had no idea how to drive to it the first time we went to see it so we parked and walked to it along the canal path. It was absolutely love at first sight. It appears around a bend and I could immediately picture our life here, kayaking in the canal on the other side of the garden wall, sitting in the evening sun and chatting to the people out for a walk. Before we even viewed the interior, I knew this was our house. I knew we could make the inside fit our vision no matter the condition but the gorgeous position of the house and it's part in the history of the area was something that was totally unique.
Voting is not enabled or out of date!

Naomi, Hudson reed

Photo 1
Photo 2
Photo 3
Photo 4
Photo 5
Photo 6
Photo 7
Photo 8
Please provide any other information that is relevant for your entry
From a dilapidated 70s build to a complete modern renovation This was all about living together as a family and utilising the space. Bringing the outdoor in and ensuring the design was cohesive from the outside when living in this space
Voting is not enabled or out of date!

Natasha, Landers

Photo 1
Photo 2
Photo 3
Please provide any other information that is relevant for your entry
I wanted the front of my home to reflect the inside; colourful, bold and eclectic.
Voting is not enabled or out of date!

Nicky, Neeve

Photo 1
Photo 2
Photo 3
Photo 4
Photo 5
Photo 6
Photo 7
Photo 8
Voting is not enabled or out of date!

Serena, Dobson

Photo 1
Photo 2
Photo 3
Photo 4
Photo 5
Photo 6
Photo 7
Photo 8
Please provide any other information that is relevant for your entry
Our front door is as old as our house, which was built circa 1800. As with much of this house, it was in a sorry state when we bought the property in 2023. Decades of thick gloss paint which was chipping and peeling away, grimy looking stone steps and an ugly set of locks and bolts. For a long time we couldn’t even use the door as we didn’t get a key for this entrance originally. Whilst we changed the locks early on to rectify this, we had become so accustomed to using the kitchen door we still didn’t use it. Even the postman used the side door. No lights outside meant after dark it had a creepy air that made it the best house in the village for Halloween… but beyond that it had very little kerb appeal. Hearing a passer by ask whether the house was abandoned one day made us determined to do something about it. We wanted a front entrance less Nightmare on Elm Street and more Home Sweet Home. Something that gave a little glimpse of the colourful transformation happening inside. We set about stripping decades of thick white gloss from the door and thick black gloss from the surround. The fanlight started to pop. We stripped and sanded. Filled and sanded again. Primed. And sanded again (prep is king, apparently!!). The detailing that had been lost under layers of paint was once again taking centre stage. Colour was the exciting part. Painting a front door is not something you can do on the sly in a tiny village. People were invested and I don’t think we disappointed. So many compliments came our way as we toiled through weekends and evenings. We chose a bright happy yellow offset with a gorgeous blue - we wanted to move as far away as possible from the dark and neglected vibes we’d inherited. We wanted blue sky and sunshine! A number was added in the fanlight, house name on slate plaques placed on either side of the door. This old girl was getting her identity back and shouting it loud! We added lighting and a swallow door knocker (in homage to the swallows that return to our barn every summer - swooping about the blue skies in the sunshine). The best part? The original door pull that was nearly overlooked and chucked in the skip. On a whim I tried the slow cooker hack. The thick black gloss paint that had long disguised its beauty fell away to reveal an intricate design in metalwork that was further transformed by some rub ‘n’ buff. A beautiful piece now proudly back where it belongs - front and centre of our sunny yellow front door. The final piece of the jigsaw? The old stone steps. Given a spruce up with some masonry paint and a stencil to suggest fancy tiles. A few planters, a nice doormat and now we have a front entrance that gives the right first impressions - one that offers an hint of what’s to come inside and invites you to come in, rather than giving you cause to scurry by!
Voting is not enabled or out of date!

Stacey, Dyer

Photo 1
Photo 2
Photo 3
Please provide any other information that is relevant for your entry
We have worked so hard on repairing the roof and external material of the house. There were minimal plants around the house and we have gradually added them all back in to give a layered colourful appearance. We also had a stained glass door bespoke made incorporating our favourite colours as a family.
Voting is not enabled or out of date!

Suzy, Broome

Photo 1
Photo 2
Photo 3
Photo 4
Photo 5
Photo 6
Photo 7
Photo 8
Please provide any other information that is relevant for your entry
When we moved in the front of the house was a big pull for us. It looked beautiful with traditional featured and a double front door (grey! - I’ve included some images of it before I transformed it). The door was rotting so my father-in-law made us a new left hand side door for it. I then stripped the other side. I sourced an antique door knocker and brass handles and knew that I wanted the front door to be a bold vibrant pop of colour. A clue to the colour that’s behind the front door in our home and the colourful family that live within it. It has to be orange! I then set about finding some tiles that would compliment the orange burst of energy but be in keeping with the period of the property. I then laid the path myself over the course of a weekend. I’m a skilled tiler and have tiled throughout all of our homes, floors, walls, etc but this was my first experience of tiling outside. As I was laying them passers by were stopping to say how beautiful it looked. We still get kind remarks about the front of our house. The children feel it’s just an extension of our characters and personalities on the outside of the house and it brings me joy whenever I return home.
Voting is not enabled or out of date!
Best Furniture Retailer

This category is sponsored by 

Alexander Ellis

Photo 1
Photo 2
Photo 3
Photo 4
Photo 5
Please provide any other information that is relevant for your entry
Alexander Ellis is the largest independent family run retailer in the region with an unmatched choice of furniture and home accessories
Voting is not enabled or out of date!

Aosom

Retailer website
Photo 1
Photo 2
Photo 3
Photo 4
Photo 5
Please provide any other information that is relevant for your entry

At Aosom (pronounced awesome), we believe home is more than just four walls - it is where life happens and memories are made. With HOMCOM, we bring warmth and style to the spaces you live in every day. Outsunny takes that feeling outdoors, turning gardens into natural extensions of the home you love. And PawHut ensures your pets feel right at home too. Beautifully designed, thoughtfully priced, and built around you: that is Aosom.

Voting is not enabled or out of date!

Arca Living Ltd

Photo 1
Photo 2
Photo 3
Photo 4
Photo 5
Please provide any other information that is relevant for your entry
We think beautiful homes should be accessible to everyone. That’s why we’re committed to bringing our customers modern furniture at affordable prices, providing rattan sets, sofas, dining tables and more that are big on style, and even bigger on comfort.
Voting is not enabled or out of date!

Arthauss

Retailer website
Photo 1
Photo 2
Photo 3
Photo 4
Photo 5
Please provide any other information that is relevant for your entry

Arthauss Furniture is a fast-growing UK-based online furniture retailer, known for combining contemporary European design with exceptional value and customer service. Since launching in 2013, the company has built a strong reputation for offering stylish, high-quality furniture that enhances modern living spaces, while maintaining a seamless online shopping experience

Voting is not enabled or out of date!

Barker & Stonehouse

Photo 1
Photo 2
Photo 3
Photo 4
Photo 5
Please provide any other information that is relevant for your entry

This year, Barker and Stonehouse are celebrating 80 years of helping customers create homes they love. Over eight decades, the family‑run furniture retailer has become known for quality craftsmanship, unique design and exceptional customer service. This milestone anniversary is a celebration of a rich heritage and a long‑standing dedication to stylish furniture and inspiring interiors.

Voting is not enabled or out of date!

Bed Kingdom

Photo 1
Photo 2
Photo 3
Photo 4
Photo 5
Please provide any other information that is relevant for your entry

We create practical, stylish furniture designed for real homes and everyday living. From space-saving solutions to imaginative children’s beds, our collections are built to bring comfort, functionality, and personality into every room. We combine thoughtful design with accessible pricing, making it easier for customers to create spaces that inspire. With our customers at the heart of everything we do, we are committed to delivering exceptional choice, seamless convenience, and dependable quality

Voting is not enabled or out of date!

Bensons for Beds

Photo 1
Photo 2
Photo 3
Photo 4
Photo 5
Please provide any other information that is relevant for your entry
At Bensons, everything we do starts with sleep. Our purpose is to help customers find the sleep solution to fit their needs, space and budget. Through a combination of expert advice, a wide product range, and trusted brands, we enable customers to shop with confidence both in store and online. Customer Centric Innovation and Product Development A key differentiator for Bensons is our end-to-end control of product development on our owned brands. At our Kitemark accredited factory in Cambridgeshire, we invest in innovation, allowing us to respond directly to our customers evolving sleep needs. In 2025/26, we completed a full relaunch of all three-core owned brand mattress ranges, delivering high quality products manufactured in our own factory: • Simply by Bensons – Relaunched in 2025, this range comprises five handcrafted, affordable mattresses offering superior materials at an accessible price point. Since relaunch, revenue is up 46% versus the previous range. • Slumberland Orthopaedic Support – Launched in summer 2025, this is Bensons first dedicated range designed to address back pain. Research conducted in 2024 identified that over three million people in the UK are affected by back pain, and it’s one of the top five causes of sleep disruption. Recognising a gap in the market, we developed range of three new mattress products featuring the exclusive Apex Max Pro spring system, which adapts to individual body movement for responsive, firmer support. Recyclable Eco Air foam enhances comfort, while regulating temperature and moisture. • Staples & Co: Artisan Pure Collection – With heritage dating back to 1895, Staples & Co was re designed in 2025/26 following extensive customer insight. The result was the Artisan Pure Collection: five handcrafted mattresses combining premium natural fibres with industry leading sustainability credentials. Most fibres are GOTS certified, with the unique inclusion of Wools of New Zealand, sourced from a fully traceable, environmentally responsible collective of over 2,200 farmers. These fibres are handcrafted in our factory, creating an exceptional range which includes Artisan Splendour, Decadence, Opulence, Indulgence and Utopia. Divans, Headboards and Bedroom Furniture Our manufacturing expertise extends beyond mattresses to divan bases and headboards, reflecting Bensons’ long heritage as specialist bed makers. Our divans are designed with functionality in mind, offering multiple storage solutions to suit modern homes where space is at a premium. Complementing this, our headboards range from timeless buttoned designs to hotel height and floor standing statement pieces. Recognising the importance of style choice, we use trend analysis and market insight to offer a curated selection of colours and fabrics. New fabric introductions include faux leather, tactile bouclé in three modern colourways, and a refined high shine fibre woven with muted yarns, ensuring broad appeal across customer tastes. Partnering with Trusted and Premium Brands Over half of the Bensons range features trusted third party brands including Hypnos, Sealy, Jay Be, iGel, Simba, ELLE Home and Ideal Home. We’d like to shine a light on two stand out furniture partnerships. ELLE Home In 2024, we partnered with ELLE Home to create an exclusive bedroom furniture collaboration. Bringing together ELLE Home’s authority in luxury interior design and Bensons’ functional expertise, the collection comprised three elegant ottoman bedframes: Emmeline, Rosalind and Josephine. Each frame is paired with coordinating bedside tables. The launch was supported by dedicated website landing pages, in store zoned displays ,and bespoke POS, delivering a seamless brand experience. The collection gained further momentum when featured in ELLE Decoration magazine in March 2025, expanding reach to a highly engaged, design led audience. Ideal Home Our partnership with Ideal Home was launched in 2025 to great success. Leaning into Ideal Home’s expertise as a brand that has guided consumer home decisions for over 100 years, the collection was developed as a practical, design led furniture range. The range balances form, function and accessibility, offering both minimalist frames and upholstered statement designs built to high standards of durability and support. The Darlton bedframe has been the standout performer of the Ideal Home range, accounting for 11% of bedframe category sales, with beige as the top colourway. Week on week, Darlton continues to rank as the number one bedframe both online and in store, with particularly strong store performance where the range delivers 23% of sales mix. Sustainable Luxury and Category Leadership Within mattresses, our long standing partnership with Hypnos continues to drive innovation. Building on the success of the Luxurious Earth collection, in 2025 we began collaborating with Hypnos to develop and bring to life ‘Inspired by Nature’, - our most luxurious and sustainable collection to date. Launched in April 2026, the exclusive to Bensons range includes five mattresses and toppers endorsed by the Eden Project. The mattresses are handcrafted at Hypnos’s Buckinghamshire factory with top of the range natural and traceable materials. This includes RWS British wool, fruit fibres and natural latex. All of which is combined with exclusive ReActivePro pocket springs for superior support and comfort. As a registered educational charity, the Eden Project benefits directly via a donation from the sale of every mattress in the collection. One month from launch and the sales performance has been highly encouraging. Award Winning Products and Accreditations Bensons’ commitment to quality and consumer confidence is reinforced through consumer recognition, awards and accreditations. These include: • 13 mattress products endorsed by the Good Housekeeping Institute • 5 eve mattresses awarded Which? Best Buy • 15 mattress products accredited by Gen M with the M Tick. These mattress products were proven to have cooling properties that help address night sweats — one of the 48 signs of menopause. Standout examples include the bestselling iGel Nanotech range with graphene technology, and the Slumberland Air range featuring advanced cool touch fabric technology. Our People Finally, all of our success is underpinned by almost 2,000 dedicated colleagues who are passionate about sleep and the customer experience. As a Great Place to Work Certified employer, this recognition reflects our commitment to be an inclusive, positive workplace that supports wellbeing, engagement and job satisfaction. All of which enables our people to deliver outstanding products and service, every day.
Voting is not enabled or out of date!

Blinds2go

Retailer website
Photo 1
Photo 2
Photo 3
Photo 4
Photo 5
Please provide any other information that is relevant for your entry

We've been creating beautiful views since March 2000. That’s when our original founders set up the first place you could buy blinds online in the UK, from a small flat in Nottingham. From those early days, we’ve now sold over 14 million blinds. By our calculation, that’s at least one window on every street. And counting. Since then, we’ve helped you enjoy 26 years of golden sunrises and cosy sleep-ins. From picking free samples to finding simpler ways to install with our no drill blinds, we’re here to help you find the right solution for your home. And now the sun never goes down on our blinds. Today, we have the experience to know what really matters to you.

Voting is not enabled or out of date!

BoConcept

Voting is not enabled or out of date!

CPD LUXE REALMS

Retailer website
Photo 1
Photo 2
Photo 3
Photo 4
Photo 5
Please provide any other information that is relevant for your entry
Our selected showcase pieces have been carefully chosen to represent the breadth of the Luxe Realms collection across key lifestyle categories, including outdoor living, bedroom furniture, dining, accent seating, and home accessories. This mix has been designed to appeal to a wide customer base by combining statement design, everyday practicality, and current interior trends. The featured products include the Capri Collection Outdoor Large Corner and Coffee Table Set, Torisse Armchair Chenille Berry, Highgrove Ottoman Bed – Grey (King), Oakridge Mongolian Lamb Fur Cushion – Teal (Small), and Malika Dining Table in White Oak and Black. Together, these pieces highlight the Luxe Realms brand aesthetic of contemporary comfort, refined finishes, and versatile styling for modern homes. We believe this selection delivers strong visual impact for editorial and promotional presentation, while reflecting the categories and designs most likely to drive customer engagement.
Voting is not enabled or out of date!

DUSK

Retailer website
Photo 1
Photo 2
Photo 3
Photo 4
Photo 5
Please provide any other information that is relevant for your entry

At DUSK.COM, we’re committed to creating luxury homeware that’s affordable for all, without ever compromising on quality. We believe everyone deserves to create a beautiful home at a fabulous price, whether they’re after a new bed or sofa, or simply some crisp bedding and cosy throws for a seasonal refresh. Our aim is to turn people's dream homes into a reality, with thoughtful designs, timeless style, and prices that just make sense

Voting is not enabled or out of date!

Darlings of Chelsea

Photo 1
Photo 2
Photo 3
Photo 4
Photo 5
Please provide any other information that is relevant for your entry
Darlings of Chelsea is the home of quality, handcrafted sofas, corner sofas, sofa beds & more. At Darlings, we pride ourselves on the superior quality and depth of our product range, which extends beyond luxury sofas to exceptional beds and mattresses . When you buy a sofa from Darlings of Chelsea, you are buying from one of the most respected, trusted names in the business, where customer service is paramount, and quality is at the epicenter of what we do. We pride ourselves on using British craftmanship to make our products by hand, using traditional techniques and the finest materials, to guarantee you’re buying a fabric or leather sofa that will stand the test of time. Both of our ranges of fabric sofas and leather sofas include sofa beds and corner sofas, giving you the flexibility to find a sofa that will suit your space. And whether you are interested in a traditional leather sofa or want to go for something a little more contemporary, we’re confident you’ll find what you’ve been looking for here at Darlings. It's not just the depth of our range that makes us stand out – it’s the comfort of our sofas that really makes the difference. Comfort and luxury blend seamlessly with style to provide you with a sofa that fits perfectly into your home, whether you choose an armchair, loveseat, corner sofa, or sofa bed. If you would like to try out any of our fabric or leather sofas before you buy, simply visit one of our fantastic showrooms where you can see them in person.
Voting is not enabled or out of date!

Dream Home Store

Photo 1
Photo 2
Please provide any other information that is relevant for your entry
Dream Home Store is your go-to UK destination for stylish, affordable home and garden furniture. From beds and wardrobes to dining sets and garden essentials, we offer a carefully curated range of quality products designed to transform any space. With competitive prices, free delivery available on selected orders, and a wide selection to suit every style and budget, we make furnishing your home easy and enjoyable. Whether you're refreshing a single room or starting from scratch, we've got everything you need, delivered straight to your home.
Voting is not enabled or out of date!

Furl

Retailer website
Please provide any other information that is relevant for your entry

Furl makes space-making furniture for people who want calm in a chaotic world. Our sofa beds, storage beds and storage sofas are designed to do more with less — turning small homes into sanctuaries and giving every room the freedom to be more than one thing. Beautiful to look at, quietly clever in how they work, and built to last: when it's chaos out there, it's calm in here.

Voting is not enabled or out of date!

Furniture Direct Online

Photo 1
Photo 2
Photo 3
Photo 4
Photo 5
Please provide any other information that is relevant for your entry

We are Furniture Direct Online, and our mission has always remained the same - to bring you incredible quality furniture at the most affordable prices, backed by the absolute best customer experience. It is a promise that has earned the trust of thousands of homes across the UK and one we are proud to stand by every day. As one of the UK’s most influential social media furniture brands, we specialize in stylish, affordable sofas and furniture that never compromise on quality, design, or comfort. Every piece is carefully chosen to suit modern living, helping you create a space that looks good and feels good. From statement sofas to practical sofa beds, or smart electric recliners, we believe great furniture should be accessible to everyone.

Voting is not enabled or out of date!

Furniture Edit

Photo 1
Photo 2
Photo 3
Photo 4
Photo 5
Please provide any other information that is relevant for your entry

At Furniture Edit, we’re changing the way people shop for furniture. No fake sales. No inflated RRPs. No endless discount codes designed to create pressure. Just beautifully designed furniture at the best possible price every single day. We believe your home should reflect your personality, your lifestyle, and the way you live. That’s why we’ve built a carefully curated collection of stylish, high quality furniture and home accessories that combine functionality, comfort, and individuality across every budget. Founded by an industry expert with years of experience in the traditional furniture sector, Furniture Edit was created to challenge an outdated industry built around pushy sales tactics and confusing pricing. Our vision was simple: create a better, more transparent shopping experience where customers can shop confidently, knowing they’re already getting exceptional value from the start. As a family owned, online only business, we keep things lean and customer focused, allowing us to offer market leading prices without compromising on quality or service. With our Best Price Guarantee, you can trust that you’re getting outstanding value on every order. We work with some of the UK’s leading manufacturers to bring you furniture chosen for its craftsmanship, quality, and timeless appeal. Every piece is hand selected by our trend led team to help you create a home that feels effortlessly stylish and built to last. Most importantly, we believe great service still matters. When you contact Furniture Edit, you’ll speak to real people, not bots. Whether it’s through live chat, phone, or email, our dedicated customer care team is here from purchase to delivery and beyond. Furniture Edit is furniture retail done properly: honest pricing, carefully curated design, and customer service that puts people first.

https://www.furnitureedit.com/pages/about-us

Voting is not enabled or out of date!

Furniture Village

Photo 1
Photo 2
Photo 3
Photo 4
Photo 5
Please provide any other information that is relevant for your entry
We are the largest family-owned furniture retailer in the UK with 1364 employees, 59 stores and 16 fulfilment centres. Founded by our Executive Chairman, Peter Harrison, in 1989, we’ve been helping people love the place they call home ever since. Whether you’re looking to furnish your first home or forever home, we offer a wide range of high-quality furniture at great-value prices that you won’t find anywhere else.
Voting is not enabled or out of date!

Furniturebox

Photo 1
Photo 2
Photo 3
Photo 4
Photo 5
Please provide any other information that is relevant for your entry
At Furniturebox, we believe stylish, on-trend furniture should be affordable, easy to assemble, and at your door the next day. For us it’s more than just a sofa, table, or chair. It’s where memories are created. We’re here to make your home feel like home. It all started in 2015, with two seventeen-year-olds, Monty and Dan, who had a dream and lots of determination. We’ve grown since then, but our mission has never changed: to make it easy for anyone to create a home they love, whatever their budget. From our family to yours, here’s to the moments, the memories, and the feeling of truly being at home. Proud to be rated 4.9/5 on Trustpilot.
Voting is not enabled or out of date!

Garden Furniture Centre

Photo 1
Photo 2
Photo 3
Photo 4
Photo 5
Please provide any other information that is relevant for your entry

At The Garden Furniture Centre, we help customers transform their gardens into beautiful, usable living spaces. Our collections bring together premium materials such as handcrafted teak, all weather rattan, and contemporary pergolas, designed for comfort, durability, and effortless outdoor living. As a family run UK business, we combine expert advice with a personal approach, inspiring customers to create outdoor spaces they can enjoy every day

Voting is not enabled or out of date!

Grace & Grey

Photo 1
Photo 2
Photo 3
Photo 4
Photo 5
Please provide any other information that is relevant for your entry

Grace & Grey is an independent interiors and lifestyle brand based in Poulton-le-Fylde, Lancashire, founded by award-winning interior designer Lindsey Goth. With over 16 years of experience in interior design, Grace & Grey was created to offer customers a carefully curated collection of homeware, furniture, lighting and décor that helps make creating a stylish, cohesive home feel effortless. Our approach combines practical design knowledge with a warm, welcoming shopping experience, both online and in-store. We focus on timeless, design-led pieces that feel considered rather than trend-driven, helping customers create homes that feel calm, characterful and personal to them. Alongside our retail offering, we also provide interior design services, giving customers guidance and confidence in pulling spaces together — something that sits at the heart of the Grace & Grey brand.

Voting is not enabled or out of date!

Graham and Green

Photo 1
Photo 2
Photo 3
Photo 4
Photo 5
Please provide any other information that is relevant for your entry

Founded in 1974, Graham and Green are a British independent, family-owned homeware brand renowned for its eclectic mix of furniture, lighting and home accessories. With a passion for artisanal craftsmanship and unique design, the brand continues to inspire homes with thoughtfully curated collections season after season.

Voting is not enabled or out of date!

Haskins Furniture

Photo 1
Photo 2
Photo 3
Photo 4
Voting is not enabled or out of date!

House of Isabella

Photo 1
Photo 2
Photo 3
Photo 4
Photo 5
Please provide any other information that is relevant for your entry
We are delighted to submit our entry for Best Furniture Retailer at the U-Furnish Home Awards on behalf of House of Isabella. At House of Isabella, we pride ourselves on delivering far more than furniture — we deliver a seamless, premium experience from initial enquiry through to delivery at our customers’ doors. What sets us apart: Exceptional Customer Service We provide round-the-clock customer support, ensuring our clients feel supported at every stage of their journey. From pre-purchase advice to post-delivery care, our team is committed to responsiveness, professionalism, and genuine care. International Reach with Boutique Attention We operate across both the UK and Australia and ship Europe-wide, allowing us to serve a broad and diverse customer base while maintaining a personalised, high-touch service approach. Premium European Partnerships We collaborate with leading European brands, offering curated collections that balance exclusivity, quality, and timeless design. End-to-End Experience We believe ordering furniture should feel effortless. Our processes are structured, transparent, and customer-focused — ensuring smooth ordering, clear communication, and reliable delivery. Service as a Standard, Not an Afterthought Our reputation has been built on trust, consistency, and exceeding expectations. We understand that purchasing furniture is an investment, and we treat every order with the care and attention it deserves. House of Isabella is not just a retailer — we are a brand built on service excellence, international growth, and a commitment to delivering beautiful interiors with professionalism and integrity. Thank you for considering our entry.
Voting is not enabled or out of date!

Hug Rug

Retailer website
Photo 1
Photo 2
Photo 3
Photo 4
Photo 5
Please provide any other information that is relevant for your entry

Hug Rug - the original washable rug, made for thoughtful living. Designed and manufactured in the UK, Hug Rugs are crafted sustainably from recycled materials, and designed to trap dirt, dust and moisture making them perfect for busy households and everyday living. From first home to forever home, Hug Rug’s collections of eco-conscious rugs and doormats have something for everyone, thoughtfully designed to complement every style of interior

Voting is not enabled or out of date!

IKEA

Retailer website
Voting is not enabled or out of date!

Laura James

Photo 1
Photo 2
Photo 3
Photo 4
Photo 5
Please provide any other information that is relevant for your entry

At Laura James we understand that it's important to create a home that's a sanctuary to retreat to, a warm and welcoming place that we want to spend time in. That's why our home and garden furniture is designed to be both functional and aesthetically pleasing. Our customers are at heart of every collection and we work hard to create pieces with longevity and timeless style. We pride ourselves on crafting furniture in high quality materials and fabrics, whether it's a natural acacia wood garden dining set or the luxurious velvet upholstery of an ottoman bed. Our furniture and accessory ranges continue to grow to provide pieces that are stylish, affordable and most importantly designed for everyday modern living.

Voting is not enabled or out of date!

Leandesk

Retailer website
Voting is not enabled or out of date!

Leekes

Retailer website
Photo 1
Photo 2
Photo 3
Photo 4
Photo 5
Please provide any other information that is relevant for your entry
Founded in 1897, Leekes has grown from a small family-run ironmongery into one of the UK’s leading independent furniture retailers, with over a century of experience in home furnishings. From its earliest days serving communities in South Wales, the business expanded alongside customer demand, moving into larger premises and developing dedicated furniture departments that now define its offering. Furniture is central to the Leekes proposition. Customers can explore extensive collections across living, dining, and bedroom furniture, including sofas, cabinetry, beds, mattresses, and home office solutions. The business combines trusted heritage brands such as G Plan, Ercol, and Stressless with its own in-house collections, offering contemporary and classic styles built for longevity and everyday living. Large-format showrooms are carefully designed to inspire customers by showcasing complete room settings. Expert teams provide tailored advice to help customers create homes that reflect their lifestyles. Strategic acquisitions, such as Park Furnishers in Bristol, have strengthened Leekes’ reputation as a destination for high-quality furniture retail. Today, more than 60,000 customers visit Leekes stores each week. The business remains firmly rooted in its family values and heritage, offering everything for the home with a clear focus on furniture as the cornerstone of its success.
Voting is not enabled or out of date!

Lights4fun

Photo 1
Photo 2
Photo 3
Photo 4
Photo 5
Please provide any other information that is relevant for your entry

Founded in 2003, Lights4fun is the UK’s leading decorative lighting brand, known for its beautifully designed, high-quality lighting solutions that help customers create magical moments indoors and out. From signature TruGlow® LED candles to fairy lights, wreaths and garlands, Lights4fun lights the way for stylish, seasonal living. Their wide variety of product offerings makes Lights4fun the ultimate go-to for every space and every event, big or small. From outdoor festoon lights and lanterns and exclusive light-up reindeer families to indoor sparkle, give your home a magical glow, all year round.

Voting is not enabled or out of date!

Mamas & Papas

Photo 1
Photo 2
Photo 3
Photo 4
Please provide any other information that is relevant for your entry

Mamas & Papas nursery furniture ranges are designed to make creating your dream nursery simple and stress‑free, supporting your family from newborn through to toddler and beyond. Whether your style leans towards modern minimalism, Scandinavian simplicity, classic traditional design or an eclectic mix‑and‑match look, our collections offer quality, longevity and exceptional value.

Voting is not enabled or out of date!

OKA

Retailer website
Photo 1
Photo 2
Photo 3
Photo 4
Please provide any other information that is relevant for your entry

OKA is a leading British interiors brand, creating furniture and homeware that makes time with friends and family more memorable. Simply put, it’s a love affair with living well. OKA prioritises beauty, comfort, and style, selecting pieces for their integrity, not because they fit a prescribed look. The magic of OKA is in the mix: unique pieces designed in England and sourced from around the globe, rich textures and patterns, and timeless furniture profiles. OKA is an omni- channel direct-to-consumer business, operating oka.com as well as 14 stores across the UK including two outlets

Voting is not enabled or out of date!

Rackhams

Retailer website
Photo 1
Photo 2
Photo 3
Photo 4
Photo 5
Please provide any other information that is relevant for your entry
In our first year of trading, Rackhams has quickly established itself as a trusted destination for quality furniture and home furnishings. Through our curated marketplace model, we have generated over £1.8 million in sales across home and garden furniture and accessories, demonstrating strong demand from customers seeking both quality and value. Our range spans everyday essentials through to bespoke, custom made pieces, allowing customers to furnish their homes with products that suit a wide variety of styles, spaces and budgets. One of the key strengths of Rackhams is the breadth and flexibility of our offering. Customers can shop practical furniture for daily living alongside unique, made to order items created by specialist partners. This has allowed us to serve a wide audience, from customers looking for reliable, affordable pieces through to those seeking something more distinctive. Earlier this year we even facilitated the sale of a bespoke dining table to Deji, highlighting the appeal of our platform for customers looking for high quality, custom furniture. Customer experience is central to our approach. Despite being a new entrant to the furniture retail market, Rackhams has achieved an excellent 4.7 rating on Trustpilot, reflecting consistently positive feedback around product quality, value for money and customer support. Our marketplace model allows us to work closely with trusted brand partners while remaining a constant point of contact for customers throughout the buying journey, helping ensure orders are fulfilled smoothly and any issues are resolved quickly. As a modern digital department store, Rackhams is focused on combining strong pricing with carefully selected products that meet high quality standards. Our early success in the home and garden furniture category reflects this commitment. Having built strong momentum in our first year, we are continuing to expand our furniture offering and partner network, with the ambition of becoming one of the UK’s most trusted destinations for stylish, well made furniture at competitive prices.
Voting is not enabled or out of date!

Sofa.com

Retailer website
Photo 1
Photo 2
Photo 3
Photo 4
Photo 5
Please provide any other information that is relevant for your entry
20 year anniversary
Voting is not enabled or out of date!

Still & Bloom

Photo 1
Photo 2
Photo 3
Photo 4
Photo 5
Please provide any other information that is relevant for your entry

A family business through and through, Still and Bloom brings timeless design to the furniture market, using unique and sustainable materials. A world away from “fast furniture,” each piece is handcrafted in their Hampshire workshop and built to last. Founder Nick Fishers explains: “We’ve grown carefully, building a skilled team of friendly and dedicated individuals, our Still and Bloom extended family. You get out what you put in, and with such a talented and attentive team, we’re able to create beautifully crafted, unique pieces, each made with love, thoughtfulness, and care

Voting is not enabled or out of date!

Suns Lifestyle

Retailer website
Photo 1
Photo 2
Photo 3
Photo 4
Photo 5
Please provide any other information that is relevant for your entry

Suns Lifestyle is an independent, family-run British outdoor living company specialising in premium pergolas, outdoor kitchens, and contemporary garden furniture designed for year-round use. Their Essex showroom, set within the grounds of the Heron Country Club in Essex, offers more than 7,000 square feet of outdoor inspiration where visitors can explore the latest collections, get expert advice, and bring their own luxury outdoor space to life

Voting is not enabled or out of date!

Swift Direct Blinds

Photo 1
Photo 2
Photo 3
Photo 4
Photo 5
Please provide any other information that is relevant for your entry

At Swift Direct Blinds, we’ve been helping homeowners transform their spaces for over 50 years. Our blinds, shutters and curtains are hand crafted to your exact specifications for a perfect fit. With simple measuring guides, step-by-step installation videos and next day delivery on hundreds of options, upgrading your windows has never been easier.

Voting is not enabled or out of date!

Tesco

Retailer website
Photo 1
Photo 2
Photo 3
Photo 4
Photo 5
Please provide any other information that is relevant for your entry

Tesco Marketplace is an online platform launched by Tesco, the UK's largest supermarket chain, to expand its digital retail offerings with thousands of additional products from approved third‑party sellers. While Tesco is widely known for groceries, Tesco Marketplace brings together a much broader selection, offering everything from home and lifestyle items to everyday essentials. Customers can also collect Clubcard points on every Tesco Marketplace purchase, which can be used on groceries, fuel, days out, dining, travel and much more, with wide range of Clubcard Reward Partners. Tesco Marketplace features a diverse range of home products to elevate your living spaces. Their furniture selection includes practical yet stylish items like coffee tables, dining tables, dining chairs, tv cabinets, and bedside tables. For home accessories, customers can find decorative cushions, vases, and wall art to add personality to any room. The lighting range spans pendant lights, table lamps, and floor lamps to create the perfect ambiance. Additionally, Tesco Marketplace offers an extensive collection of bedding, including duvet covers, sheets, and luxurious throws, allowing customers to refresh their homes with comfort and style. Whether updating a room, preparing for a new season or finding everyday essentials, Tesco Marketplace makes it easy to discover new products across multiple categories — because Every Little Helps.

Voting is not enabled or out of date!

The Conran Shop

Retailer website
Photo 1
Photo 2
Photo 3
Photo 4
Photo 5
Please provide any other information that is relevant for your entry

Founded in 1973 by designer and tastemaker Sir Terence Conran, The Conran Shop specialises in contemporary furniture, lighting, and home accessories, bringing charm, function, and enduring design to a global audience. With a focus on craftsmanship and materiality, our original collections are developed in-house by our London based design team, TCS Studio, or created in collaboration with leading designers and makers worldwide. Sir Terence’s vision, for accessible, well-designed products, continues to shape everything we do.

Voting is not enabled or out of date!

Tinker & Tallulah

Photo 1
Photo 2
Photo 3
Photo 4
Photo 5
Please provide any other information that is relevant for your entry
Tinker & Tallulah is a founder-led British lighting studio, established in 2021 by husband-and-wife team Rach and Liam Millband. Based in Nottinghamshire, England, the business was born from a desire to create decorative lighting that felt both distinctive and enduring - pieces that bring character, warmth and a sense of occasion into everyday spaces. In a market largely shaped by mass production and trend-led design, Tinker & Tallulah offers a more considered alternative. Rather than following seasonal cycles or volume driven retail models, the studio focuses on small-batch, handmade production that results in lighting that feels personal, expressive and made to last. This approach runs across all of Tinker & Tallulah’s collections. Drawing on our original design inspiration of the Art Deco movement and combining this with a contemporary point of view, each piece explores colour, texture and form with confidence - from pleated silks and tailored stripes to bold velvets and signature fringed finishes. The result is lighting that feels layered and distinctive, designed not just to sit within a space, but to define it. Each lampshade is designed and handmade to order in the Nottinghamshire studio using traditional artisan techniques. This slower, more intentional process allows for a level of detail and craftsmanship that is rarely found in large-scale retail, where speed and uniformity often take precedence. Materials are carefully selected for both their aesthetic and performance, chosen for the way they hold structure, diffuse light and develop character over time. Proudly independent, Tinker & Tallulah remains a true family business, with Rach and Liam working alongside their small team to ensure that every piece is handled with care from start to finish, ensuring a consistency of quality and a connection to the maker that is often lost in modern retail. The brand is achieving impressive growth and now supplies both direct-to-consumer and trade clients, including interior designers and hospitality spaces, with its work featured in high-end venues internationally, as well as in editorial publications, television and private homes. At its core, Tinker & Tallulah represents a different way of thinking about retail. Rather than offering lighting as a functional, off-the-shelf product, it creates pieces that are designed to be kept, noticed and enjoyed over time - lighting that brings depth, atmosphere and individuality to a space. In doing so, Tinker & Tallulah is helping to redefine what customers expect from interiors retail: moving away from the convenient and disposable, and towards something more meaningful, considered and enduring.
Voting is not enabled or out of date!

Wayfair

Retailer website
Photo 1
Photo 2
Photo 3
Photo 4
Photo 5
Please provide any other information that is relevant for your entry

Wayfair is the destination for all things home: helping everyone, anywhere create their feeling of home. From expert customer service, to the development of tools that make the shopping process easier, to carrying one of the widest and deepest selections of items for every space, style, and budget, Wayfair gives everyone the power to create spaces that are just right for them.

Voting is not enabled or out of date!

Willow & Hall

Photo 1
Photo 2
Photo 3
Photo 4
Photo 5
Please provide any other information that is relevant for your entry

Willow & Hall are sofa bed specialists, having delivered over 35,000 handmade luxury sofa beds. They also craft quality sofas, armchairs, and beds using the finest materials, with a choice of 150+ fabrics and multiple seat fillings. By operating exclusively online, they deliver artisan quality at competitive prices with nationwide delivery and flexible returns. Their commitment to craftsmanship and customer service creates beautiful, functional furniture for modern homes.

Voting is not enabled or out of date!
Best Garden

Your outdoor living space.

Alexandra, Wood-Tonks

Photo 1
Photo 2
Photo 3
Photo 4
Photo 5
Photo 6
Photo 7
Photo 8
Please provide any other information that is relevant for your entry
This is our patio garden transformation! Although not a typical garden, i do believe that this transformation is beautiful. We removed the old concrete floor, rerouted the drainage, and layed some Yorkshire stone flags (which we were under the carpet in our house, we took them up and decided to reuse them in the patio area). Once they were layed, Liam cleaned them up. We also created a small flower planter using railway sleepers and planted wisteria, hydrangeas, sweet peas and Veronicas. I also created a small memory flower plot for my cat which passed away. It’s a lovely reminder every day when I come home. We also added festoon lighting, for the perfect ambiance in the spring and summer evenings.
Voting is not enabled or out of date!

Alia, Razzaq

Photo 1
Photo 2
Photo 3
Photo 4
Photo 5
Photo 6
Photo 7
Photo 8
Please provide any other information that is relevant for your entry
We’re so excited to share our outdoor living space and outdoor kitchen a self-built retreat that has become an extension of our home. Designed with a modern aesthetic, the space is divided into areas that reflect how we live and gather. It’s where we unwind, cook and share meals, and create meaningful moments with family and friends. We have had many lovely evenings out here in the summer. At the heart of the garden is our pergola, a feature we customised ourselves to serve as both a focal point and an inviting place to relax. As evening falls, the space transforms - soft lighting creates a warm, almost magical atmosphere. Every plant has been chosen with care, combining textures and gentle tones to create a garden that feels bright and airy with a modern feel. Our garden isn’t just about how it looks - it’s where we switch off and leave the busy city behind. It gives us joy, and we hope it inspires others to carve out their own little escape.
Voting is not enabled or out of date!

Alicia, Murphy

Photo 1
Photo 2
Photo 3
Photo 4
Please provide any other information that is relevant for your entry
We live in a terraced house, and so our outdoor space is limited to a yard. I wanted to make the most of it based on our needs - we wanted somewhere we could sit outside on a sunny day or enjoy our dinner al-fresco. Using bright colours and clever, multi-functional furniture (we made the benches ourselves to fit the space perfectly and incorporate storage), we've created our little 'yarden' that we've enjoyed for many a summer!
Voting is not enabled or out of date!

Andrea, Grace

Photo 1
Photo 2
Photo 3
Voting is not enabled or out of date!

Angela, Lee

Photo 1
Photo 2
Photo 3
Photo 4
Photo 5
Photo 6
Photo 7
Photo 8
Please provide any other information that is relevant for your entry
My Instagram account is @myhome_lee_home where you can see my full garden . I have created zones for dinning, kitchen, lounging & a garden pergola room with a fireplace & I even have a greenhouse tucked away in the corner . I have a small garden so I have made use of every corner & have diy’d every inch myself .
Voting is not enabled or out of date!

Ashley, Rack

Photo 1
Photo 2
Photo 3
Photo 4
Photo 5
Photo 6
Photo 7
Photo 8
Please provide any other information that is relevant for your entry
My garden is designed as a true extension of my home, an outdoor living space that mirrors the interior in both style and atmosphere. I carefully selected complementary materials, tones, and finishes to ensure a seamless flow from inside to out, creating a cohesive and considered design throughout. This space is entirely self-designed and built from scratch. Every porcelain tile has been laid by my own hand, alongside the installation of artificial turf, the construction of a bespoke pergola, and a fully functional outdoor kitchen. I regularly share the diy tutorials of this space with my followers and always amasses hundreds of thousand views. Despite its compact footprint of just 9m x 8m, the garden has been thoughtfully planned to feel open and spacious. Structural planting and carefully positioned trees draw the eye upward, adding height, depth, and a strong architectural presence. The layout incorporates two distinct yet generous seating areas, maximising the south-facing aspect. One space is dedicated to outdoor dining, while the other is designed for relaxed evening lounging and drinks. A compact outdoor kitchen—complete with BBQ and pizza oven—sits at the heart of the space, reflecting how we live and prioritising time spent together as a family. Lighting has been carefully integrated throughout to enhance mood and ambience, allowing the garden to transition effortlessly from day to night. The result is a highly functional yet beautifully styled outdoor space that proves thoughtful design can transform even a small garden into something impactful, inviting, and truly liveable.
Voting is not enabled or out of date!

Beccy, Horwood

Photo 1
Photo 2
Photo 3
Photo 4
Photo 5
Photo 6
Photo 7
Photo 8
Voting is not enabled or out of date!

Becs, Baker

Photo 1
Photo 2
Photo 3
Photo 4
Photo 5
Photo 6
Photo 7
Photo 8
Please provide any other information that is relevant for your entry
I won the living wall in an insta giveaway!
Voting is not enabled or out of date!

Catherine, Kenna-Dawe

Photo 1
Photo 2
Photo 3
Photo 4
Photo 5
Photo 6
Photo 7
Photo 8
Please provide any other information that is relevant for your entry
Walled garden grade 11 listed Elegant and aesthetic Flower and plant inspiration
Voting is not enabled or out of date!

Claire, Brooks

Photo 1
Photo 2
Photo 3
Photo 4
Photo 5
Photo 6
Photo 7
Photo 8
Please provide any other information that is relevant for your entry
We always wanted our garden to be an extension of our home – a place to relax, entertain and unwind. As part of our ongoing 4-year self-renovation, we dedicated the last 14 months to creating a space that feels both luxurious and liveable. The design centres around a modern bespoke outdoor kitchen, pergola dining area and a cohesive planting to create a calm and elevated feel. We focused heavily on lighting to completely transform the atmosphere in the evenings, using warm layered lighting to make the space feel inviting and cosy. Every element has been thoughtfully chosen to balance practicality with aesthetics, resulting in a garden that is not only visually impactful but also functional for everyday living. This space represents our vision of bringing indoor comfort outdoors, and creating a garden that can be enjoyed in every season.
Voting is not enabled or out of date!

Dan, Coyles

Photo 1
Photo 2
Photo 3
Photo 4
Voting is not enabled or out of date!

Donna

Photo 1
Photo 2
Photo 3
Photo 4
Photo 5
Photo 6
Photo 7
Photo 8
Voting is not enabled or out of date!

Emily, Barratt

Photo 1
Photo 2
Photo 3
Photo 4
Photo 5
Photo 6
Photo 7
Photo 8
Please provide any other information that is relevant for your entry
We treat this area as an extension of our kitchen and dining room in the summer. We love to sit and eat and entertain out here.
Voting is not enabled or out of date!

Frederique, Etienney-Pope

Photo 1
Photo 2
Photo 3
Photo 4
Photo 5
Photo 6
Photo 7
Photo 8
Please provide any other information that is relevant for your entry
Our garden is small but we refused to let that limit it. The goal was to create an outdoor space that felt like an extension of our home — colourful, characterful and made for living in. Inspired by travels to Morocco and Mexico, the space has a relaxed, sun-soaked energy. A custom built cocktail bar with arched curves, bold yellow and blue paintwork and reclaimed materials sits at the heart of it. A palm tree, a hammock and an outdoor cinema do the rest. It’s a small space, big personality for the whole family!
Voting is not enabled or out of date!

Helen, McLean

Photo 1
Photo 2
Photo 3
Photo 4
Photo 5
Photo 6
Photo 7
Photo 8
Voting is not enabled or out of date!

Holly, Scott

Photo 1
Photo 2
Photo 3
Photo 4
Photo 5
Photo 6
Photo 7
Photo 8
Please provide any other information that is relevant for your entry
This project reimagines a standard new-build garden as a structured, design-led outdoor room that balances architectural clarity with softness and seasonal movement. The layout is intentionally zoned. A central lawn creates visual breathing space and flexibility, while deep, layered borders wrap the perimeter to establish depth and immersion. The dark fencing was used strategically as a backdrop, allowing planting to feel more dramatic and giving colour greater impact throughout the seasons. Material contrast defines the experience of the space. Porcelain paving anchors the main seating terrace, establishing a clean architectural base. This is offset by gravel pathways with stepping stones that introduce texture and rhythm, guiding movement through the garden while supporting drainage and practicality. The outdoor lounge area is designed as a true living space. The fire table creates a focal point and extends usability into cooler evenings, while the sculptural hanging chair introduces form and a sense of retreat. The trampoline is deliberately integrated within its own gravelled zone, softened with planting so family life feels cohesive rather than visually disruptive. Lighting plays a crucial role in the overall concept. Festoon lighting adds warmth and sociability, while subtle uplighting highlights trees and borders, allowing the garden to transition seamlessly from daytime openness to evening intimacy. This garden interprets “outdoor living” through structure, layering and purposeful design. It is both composed and relaxed — a considered extension of the home that supports entertaining, play and restoration in equal measure.
Voting is not enabled or out of date!

Imogen, Thomas

Photo 1
Photo 2
Photo 3
Photo 4
Photo 5
Photo 6
Please provide any other information that is relevant for your entry
We love being outdoors living in the Peak District. Our farm animal neighbours really make this feel like home. Being a south facing garden, we truly see the best of the weather in all seasons.
Voting is not enabled or out of date!

Jade, Coxon

Photo 1
Photo 2
Photo 3
Photo 4
Photo 5
Voting is not enabled or out of date!

Janice, Bristow

Photo 1
Photo 2
Photo 3
Photo 4
Photo 5
Photo 6
Photo 7
Photo 8
Please provide any other information that is relevant for your entry
Our garden story began when my husband built our beautiful pergola. I was so proud of it that I started an Instagram account just to share it! Over the last 5 years the rest of the garden has gently evolved, with every project done entirely by us. We’re already dreaming up exciting plans for this summer’s garden too.
Voting is not enabled or out of date!

Jodie, Cutter

Photo 1
Photo 2
Photo 3
Photo 4
Photo 5
Photo 6
Voting is not enabled or out of date!

Karen, Gadd

Photo 1
Photo 2
Photo 3
Photo 4
Photo 5
Photo 6
Photo 7
Photo 8
Please provide any other information that is relevant for your entry
When we first viewed this house, the garden was overgrown and disconnected from the home, dominated by large conifers and invasive planting. Most people would have seen a huge job. We saw possibility. Our vision was to create a structured, contemporary garden that felt calm and intentional — but also practical for modern family life. Over the past two years, we have completely transformed the space. We removed mature conifers to open up light and create breathing space. We installed new fencing to frame the garden and give it definition. Structured borders and raised sleeper beds were introduced to add depth and architectural interest. A new patio now anchors the space, creating a seamless transition from indoors to out. The pergola and fire pit extend its use into the evenings, while the water feature adds movement and tranquillity. We chose faux lawn and decorative stone detailing to keep maintenance low without compromising on style. Established apple and pear trees bring seasonal beauty and a sense of permanence. The result is a layered, contemporary garden that feels calm and cohesive — yet completely liveable. It’s where we entertain, unwind and spend long evenings together. It has genuinely become an extension of our home.
Voting is not enabled or out of date!

Kate, Turner

Photo 1
Photo 2
Photo 3
Photo 4
Please provide any other information that is relevant for your entry
We chose this house mainly for the garden. We wanted a large outdoor space that wouldn’t feel too overlooked and would still have plenty of room even after adding an extension. This one ticked every box and gave us the chance to create the play area I’d always dreamed of for our children. The previous owners were botanists, so the garden truly comes alive in spring and summer!
Voting is not enabled or out of date!

Kerry, Davison

Photo 1
Photo 2
Photo 3
Photo 4
Photo 5
Photo 6
Photo 7
Photo 8
Please provide any other information that is relevant for your entry
Our garden began as a typical new build blank canvas, little more than a mud filled space for the first year. Rather than rushing into a design, I spent time observing how the sun moved across the garden, allowing this to shape every decision that followed. The result is a space thoughtfully designed around light and shade, with dedicated areas for relaxing, entertaining, and unwinding throughout the day. This has been a true family project. Built entirely by hand, the transformation brought together my dad, mam, husband, myself, and even my two daughters. Together, we laid the patio, constructed the pergola, created a pull-down table, and built out the planting areas. Wherever possible, we used reclaimed materials, repurposing what we already had or sourcing items from local free sites, ensuring the garden was not only cost effective but sustainable. We introduced a secluded hot tub area, tucked behind the garage where unused storage space once sat. This zone has been transformed into a spa like retreat, complete with colourful LED lighting, water features, and layers of tropical planting to create a sense of escape and privacy. Across the garden, we installed five outdoor power points to support lighting, entertainment, and hosting. Creativity and practicality runs throughout the space. I created a cinema screen using a pull down blackout blind from IKEA, mounted to the wall for outdoor movie nights. The planting scheme focuses on varying heights and textures, using tropical plants and grasses to create lush, immersive pockets of greenery. A disco ball hanging from the pergola adds a playful touch which always sparks conversation with neighbours or delivery drivers. This is a garden designed to be lived in. It’s used year round for hosting garden parties, spa days, and even outdoor sound baths in the sunshine. Dining outdoors is a huge part of how we enjoy the space, and we are currently in the midst of designing and developing an outdoor kitchen area down the side of the house, to house our barbecue and smoker, allowing us to further embrace alfresco living. What started as an empty plot has become a vibrant, multi functional garden that reflects our creativity and love of being outdoors.
Voting is not enabled or out of date!

LYDIA, NELSON

Photo 1
Photo 2
Photo 3
Photo 4
Photo 5
Photo 6
Voting is not enabled or out of date!

Laura, Timmins

Photo 1
Photo 2
Photo 3
Photo 4
Photo 5
Photo 6
Photo 7
Please provide any other information that is relevant for your entry
When I moved into my new build in March 2025 it came with a very random large piece of ground next to it, that had a couple of small plants in. As I was grieving and as the sunshine was so amazing in April last year, I threw myself into gardening to try and transform it - all by myself. By the end of summer I'd turned it into a haven for pollenators, and it was such a success that I even had neighbours coming to visit and see just the garden! I did all the work myself - I prepped the ground, planted every plant, I grew some from seed, I built the arch and bench, and at the end of the season I harvested all the seeds which are now growing for my summer garden 2026!
Voting is not enabled or out of date!

Lexie, Carducci

Photo 1
Photo 2
Photo 3
Photo 4
Please provide any other information that is relevant for your entry
Our garden isn’t the biggest and we’re also not very green fingered so it was so important to create a useable space that didn’t require too much maintenance. Our main uses for our outside space was to enjoy the sun, bbq and feast with friends. We worked alongside Aubrey at Garden Designs for all to bring this space to life, sticking with the neutral Mediterranean villa vibe we used non slip Minoli tiles that were as close to the colour of our microcement internally. We then built in planters and a bbq area using block bricks covered in an off white render. The bbq design actually has a mini steel in it to hold it up so it sits above the storage underneath. We didn’t want a generic fence, we wanted to go for something eye catching but that wasn’t too OTT for the local neighbourhood, although the fence still caused many issues in the area haha! We used a red cedar wood in a bar code design, so we ordered different lengths and widths of wood and put them together in a random pattern, they were then varnished. In terms of greenery in the garden we filled the planters with mostly evergreens, we opted for a Māori Queen (because my boyfriend is from New Zealand) and a Torbay dazzler (as I grew up in Torbay), we padded the planters out with lavender for the bees and to add some colour. We also put a wisteria the end closest to the house, hoping in time it will wrap its way along the fence. Finally we had a baby olive tree that we had potted at our old apartment but it looked like it was not having a great time, we planted him in a single planter and now he’s thriving! 
Voting is not enabled or out of date!

Lisa, Meyers

Photo 1
Photo 2
Photo 3
Photo 4
Photo 5
Photo 6
Photo 7
Please provide any other information that is relevant for your entry
My husband did all of the garden himself. I was away in Spain and thought we were having just decking replaced. Instead he built a garden perfect for events, family time, chill time, with an outdoor bar area, kitchen/bbq, and a separate chill corner. He also made all of the coping stones and planters.
Voting is not enabled or out of date!

Marie, Springthorpe

Photo 1
Photo 2
Photo 3
Photo 4
Photo 5
Photo 6
Photo 7
Photo 8
Please provide any other information that is relevant for your entry
It was all made with pallets and a old wardrobe and managed to get some tin for the roof. The slabs were free from the FB marketplace. I also picked up a oil drum which cost my £10.00 and put a table top on it using wood left over. Got bits and bobs to fill the from the bar from charity shops. We wasn't going on holiday in lockdown and was going to go Jamaica for my husbands 50th birthday.so I brought Jamaica to our garden.
Voting is not enabled or out of date!

Mariné, Lee

Photo 1
Photo 2
Photo 3
Photo 4
Photo 5
Photo 6
Photo 7
Photo 8
Please provide any other information that is relevant for your entry
As a new build, the garden started as a simple patch of bare soil. We initially added lawn, but with the heavy clay soil it struggled every winter and never really became a space we used. It became clear the garden needed more purpose, so we removed the grass and moved towards a more hard landscaped approach, introducing gravel and creating generous planted areas to bring greenery back in. The design is quite modern, with clean lines and corten steel edging defining the layout. Over time, the planting will soften these edges, creating a balance between structure and something more natural. I designed the space as an extension of the home, with three seating areas for dining, relaxing and unwinding. Since making these changes, we’ve naturally started spending much more time outside. It’s still evolving, with a focus now on adding height through trees and planting, but it already feels far more personal, usable and full of life.
Voting is not enabled or out of date!

Nichola, Ruben

Photo 1
Photo 2
Photo 3
Photo 4
Photo 5
Photo 6
Photo 7
Photo 8
Please provide any other information that is relevant for your entry
Having acquired a green lawn with a concrete path up the middle , we proceeded to build three natural slate patios ( diy ) and several bespoke raised beds . Growing flowers from seed gives me the most joy and also the new kitchen garden with its peas , beans , spuds and herbs right outside the door . I love recycling and last year we recycled afresh water plastic tank from my son’s loft . We sunk it in the garden and have frogs this year ! Bespoke base for a smart black greenhouse of mono floral tiles , I use it constantly to grow cut flowers .
Voting is not enabled or out of date!

Rebecca, Anderson

Photo 1
Photo 2
Photo 3
Photo 4
Photo 5
Photo 6
Photo 7
Photo 8
Please provide any other information that is relevant for your entry
The garden is small but mighty. With zero budget I stripped the old plastic rattan garden furniture that was broken and frayed and we rebuilt the furniture to what you see in the pictures. It meant we had oversized and comfortable furniture to sit and enjoy our “outdoor Living-room“ We bought a cheap projector from Amazon and used t he white roller blinds inside the French doors to project movies onto it as the screen! We socialise loads in the garden even in the winter. As a family we love spending time in the hot tub and watch movies and spending time together outside. I also made the pallet bar that hung on big gold hooks on the wall and it can be moved around the garden to wherever we need it. I absolutely love it!! We did our garden completely ourselves from an absolute building site. We had DIY renovated our house and built a big extension and the garden was the last huge bit of DIY to do.
Voting is not enabled or out of date!

Serena, Dobson

Photo 1
Photo 2
Photo 3
Photo 4
Photo 5
Photo 6
Photo 7
Photo 8
Please provide any other information that is relevant for your entry
Our garden has been the focus of much of the work we have undertaken over the last 12 months. What was once a neglected, overgrown space dominated by a disused hard-standing tennis court has been transformed into a layered and multi zoned garden that we can now enjoy as a family - an escape from the renovation chaos inside. This project sought not only to reclaim lost ground, but to transform it into a series of distinct yet cohesive outdoor spaces - balancing open, social areas with quieter, more intimate corners. We know that the farming family that once lived here adored the garden. Glimpses of former glory were visible through the brambles and nettles we inherited. We’ve heard tales of parties playing tennis, of Mother’s love for her rose garden. Mature trees and shrubs are in abundance, as are the spring bulbs that still poke through. All she needed was a hand out of the weeds. We have worked tirelessly to transform the dilapidated tennis court - taking up the tarmac and removing the chain link fence, seeding a lawn, digging borders, building pergolas and laying a tiled seating area. This part of the garden - unused for the first two years of our time at Hillside House - is now a delight. Watched over by the huge horse chestnut tree at the far end, the children can play to their hearts content whilst we sit and soak up the sunset and views over the Trent Valley (that on a clear day stretch as far as Derbyshire apparently!). Directly in front of the house is a cosier garden - established shrubs and trees make this a haven for birds. It feels calm and enclosed. We’ve started work on a secret garden with a hammock - a winding gravel path will soon be lined with foxgloves and as you sway in the breeze you can just see the house through the greenery. Immediately in front of the house is Mother’s rose garden. We’ve pruned and weeded and added a lavender border. The roses have space to breathe again and are rewarding us with beautiful blooms. We hope we’ve done her proud. A seating area nestled by the house is sheltered by the old stone - it’s a real sun trap under a gorgeous, fragrant jasmine. Soft lighting on both levels mean that we can enjoy the garden in to the evening. We’ve added a fire pit by the pergolas and a wood burner by the rose garden. It’s truly a garden for all seasons. At its heart, this garden is a continuation of a story that began long before us. Having fallen into neglect, our role has been to nurture it back to life with sensitivity and respect. It will never truly be finished - nor should it be - but as it evolves, we hope we are doing justice to those who loved it before, while creating new moments for those who experience it now.
Voting is not enabled or out of date!

Joanna, Fletcher

Photo 1
Photo 2
Photo 3
Photo 4
Photo 5
Photo 6
Photo 7
Photo 8
Please provide any other information that is relevant for your entry
When we built our home, the garden was nothing more than a pile of rubble. It certainly didn’t transform overnight, but over the past few years we’ve poured weekends and every spare moment into shaping it into our dream sanctuary. We’ve always been drawn to corten, incorporating it through planters and even redirecting the stream that runs through our land to form a striking corten waterfall. With little formal knowledge but a clear vision, we’ve embraced planting and landscaping along the way. Grasses and alliums now bring a soft palette of whites and greens, beautifully contrasting with the dark tones of the house and the warm, weathered steel.
Voting is not enabled or out of date!

Pandora, Maxton

Photo 1
Photo 2
Photo 3
Photo 4
Photo 5
Photo 6
Photo 7
Photo 8
Please provide any other information that is relevant for your entry

I make use of every corner of our garden, whether it’s beneath a tree, under the pergola, or anywhere else — no space goes unused. Building our pergola was one of the best decisions we ever made for the garden, and we enjoy sitting out there from March through to October. Fairy lights are also a fantastic addition to any garden: affordable, simple, and incredibly effective at creating atmosphere

Voting is not enabled or out of date!
Best Hallway

This category is sponsored by 

Abbie, Downey

Photo 1
Photo 2
Photo 3
Photo 4
Photo 5
Photo 6
Please provide any other information that is relevant for your entry
This hallway, from my previous home, sparked my love for maximalism. What began as a blank, muted corridor was reinvented as a layered, personality-driven entrance, incorporating original features into the design to create a seamless, character-filled space. Bold, contrasting patterns, vibrant colours, and striking design details create a statement first impression, making the hallway visually engaging and full of personality. This space proves that even a ‘forgotten’ area can become an inspiring introduction to a home, showcasing creativity, style, and thoughtful design from the moment you step inside.
Voting is not enabled or out of date!

Alexandra, Wood-Tonks

Photo 1
Photo 2
Photo 3
Photo 4
Photo 5
Photo 6
Photo 7
Photo 8
Please provide any other information that is relevant for your entry
This hallway is one of my favourite spaces, and my favourite transformation in our home renovation (photo 5 is a before picture of the stairs / hallway). We added panelling, new architraves, a loft hatch, tall skirting boards, new carpets, new spindles and bannister, we had the original handrail down the stairs repaired and reinstalled. I really wanted a colour contrast and so we picked a darker panelling paired it with a creamy beige. We also got all new traditional Victorian style oak doors with black beehive door knobs to complete the transformation.
Voting is not enabled or out of date!

Alicia, Murphy

Photo 1
Photo 2
Photo 3
Photo 4
Please provide any other information that is relevant for your entry
We live in a small, terraced house and so we're limited on space. I'm a huge fan of colour, pattern and print but I'm always conscious of having a smaller space and not wanting to overpower a room. When designing our hallway, I figured that I wanted to create a show-stopping entrance - plus, the hallway isn't a room you spend lots of time in (instead you just pass through), so why not have fun and go all out? We definitely couldn't do this colour scheme or wallpaper in another room (like our living room or bedroom), but for the hallway I think it works perfectly.
Voting is not enabled or out of date!

Becky, Leavesley

Photo 1
Photo 2
Voting is not enabled or out of date!

Beth, Loman

Photo 1
Photo 2
Photo 3
Photo 4
Photo 5
Photo 6
Please provide any other information that is relevant for your entry
Our hallway transformation embodies thoughtful design, functionality and timeless style. Previously a dark, unfinished space, we re-imagined it into a welcoming entrance that is cohesive with our home’s character. Every element from the bespoke stair runner and chevron‑patterned flooring was selected to enhance light, flow and everyday use. The introduction of soft textures, subtle colour contrasts and practical storage brings both character and purpose to a high‑traffic area. This makeover reflects our style and ensures the hallway has that welcoming first impression, that I wanted to create.
Voting is not enabled or out of date!

Callieanne, Major

Photo 1
Photo 2
Voting is not enabled or out of date!

Candice, Guy

Photo 1
Photo 2
Photo 3
Photo 4
Photo 5
Photo 6
Photo 7
Photo 8
Please provide any other information that is relevant for your entry
This project was about elevating a bland entrance into a considered and appealing space to walk into. I wanted to keep the walls light and neutral so used my favourite limewash paint as the foundation, which brought in subtle texture.   I originally envisioned full wall panelling but having a full‑length mirror at the narrow entrance was essential for opening up the space - and I couldn’t have both. The solution was a to install a low panel detail that mimics an elevated skirting board to add architectural interest. This small intervention immediately brought structure to the space while maintaining a sense of flow.   By painting the stairs and banister in contrasting tones, it created a strong visual base for the striking jute stair runner. Its stripe pattern adds more movement and the runner on the floor beside it, ties the neutral palette together, echoing the same warm, earthy shades whilst also adding some contrasting pattern.   The main wall on the staircase is very tall and in order to inject some personality into it, I decided to add a gallery wall with a mixture of prints and canvases - almost every piece was created by me, allowing the space to feel completely personal. The marble console table is another focal point – a real sculptural and elegant piece that brings in an additional, natural material that’s not just more wood.   One of the more creative design solutions was disguising the ugly doorbell chime, positioned on the wall. I painted a deep, box canvas to hang over it, which disguises it perfectly and allows me to bring in a darker, earthy tone to contrast against the lighter walls.
Voting is not enabled or out of date!

Cliona, Hosty

Photo 1
Photo 2
Photo 3
Photo 4
Photo 5
Photo 6
Photo 7
Photo 8
Please provide any other information that is relevant for your entry
We have a large family so storage was very important to us when designing the extension. We have a 4m x3m hall wardrobe. We didn't have a huge budget for our stairs so we got basic stairs and oak handrails and covered the stairs with the same floor that's in the whole house.
Voting is not enabled or out of date!

Dan, Coyles

Photo 1
Photo 2
Photo 3
Photo 4
Photo 5
Voting is not enabled or out of date!

Danielle, Pearce

Photo 1
Photo 2
Photo 3
Photo 4
Photo 5
Photo 6
Photo 7
Photo 8
Please provide any other information that is relevant for your entry
This hallway was a real tough one to decide it's direction when i first moved in, its larger than an average hallway but smaller than a functional room, its a corridor between the front door, the kitchen and the living room, the downstairs wc is located off this room and it took months of deliberating before we decided to simply make it a place of joy, you can sit and play backgammon while waiting for the loo lol, grab a book and get some peace and quiet if all the reception rooms are full or simply hang up your coat and move on. Pablo the peacock is the main focal point and a lot of locals look at him through the front window and he's village famous haha
Voting is not enabled or out of date!

Drew, Muntz

Photo 1
Photo 2
Photo 3
Photo 4
Photo 5
Photo 6
Photo 7
Photo 8
Please provide any other information that is relevant for your entry
My Regency Hallway was a restaurant when acquired, so total strip out was necessary. Being in Cornwall, meant the Lobby had to function almost as a wet room, so Verde Marble tiling was installed to Dado height, and a large back lit Antique Biedermeier Wardrobe was altered to house coats/shoes and a leather upholstered bench sits between the two pillared cabinets. The lobby is finished with gilded Thibault Woven Seagrass above Dado height, and a lacquered natural plaster ceiling. The flooring is bespoke mosaic in Greek Pattern taking reference from the original Greek Key Ironwork Gate to the house Greek Key Dado was then installed throughout the Hallway on lacquered natural plaster walls and underfloor heated marble chequerboard from Starel Stone The Plafonier Lights were originally hanging in a Bank, and illuminated the ceiling champagne silvered wallpaper from Phillip Jeffries. To continue the “Grand Tour” vibe, a 19th Century statue of Hercules was craned into the back hallway as a “surprise” and lit by a single museum spot The Georgian staircase is uplit within the curved return casting spindle shadows up to the upper landing A large wall mirror reflects the entrance to the Dining room, throwing light into the inner hallway The Half landing is installed with antique pilasters rescued from a Chateau, flanking a mirror topped with a broken pediment, housing a half urn, back lit when one mounts the staircase
Voting is not enabled or out of date!

Ellie, Baines

Photo 1
Photo 2
Photo 3
Photo 4
Photo 5
Please provide any other information that is relevant for your entry
This hallway was transformed from a plain pass-through into a space with real presence. I added wall panelling for depth and character, then painted the doors and banisters black to create strong contrast and definition. The monochrome palette keeps it cohesive, while the statement frames add personality without overwhelming the space. It’s proof that even a hallway can set the tone for an entire home.
Voting is not enabled or out of date!

Ellie, Watson

Photo 1
Photo 2
Photo 3
Photo 4
Photo 5
Photo 6
Photo 7
Photo 8
Please provide any other information that is relevant for your entry
We put panelling in a few years ago and it transformed this area. A fairly spacious size and lots to accessorise!!! Love stepping into the house
Voting is not enabled or out of date!

Emily, Barratt

Photo 1
Photo 2
Photo 3
Photo 4
Photo 5
Photo 6
Photo 7
Photo 8
Please provide any other information that is relevant for your entry
I have a main entrance hallway and a top floor hallway. Both are quite different as they served different purposes when the house was built back in 1830. The top floor one was more cosy and the main entrance was built to be grand.
Voting is not enabled or out of date!

Emily, Fradgley

Photo 1
Photo 2
Photo 3
Photo 4
Please provide any other information that is relevant for your entry
pink ceiling hallway. one of my favorite rooms i created - along with a little DIY wall hanging made form wallpaper
Voting is not enabled or out of date!

Emily, Murray

Photo 1
Photo 2
Photo 3
Photo 4
Photo 5
Photo 6
Photo 7
Photo 8
Please provide any other information that is relevant for your entry
My hallway is pretty yet practical and features my very own pink paint, Pink House Pink, on the wardrobes and doors. We are an active, sporty family, so the wardrobes not only store armfuls of sports kit, they are ‘vaultable’, allowing parents and kids to climb up, chill out above the mayhem, and look through the internal steel window to the trapeze in the next room! The floor tiles evoke pretty cherry blossoms and the pink and blue handblown lights are reminiscent of sugary sweets. But the space avoids looking too saccharine as it’s offset by the charcoal bannister and black steel window frame. It’s the heart of our home!
Voting is not enabled or out of date!

Emma, Robins

Photo 1
Photo 2
Photo 3
Photo 4
Photo 5
Photo 6
Photo 7
Please provide any other information that is relevant for your entry
A hallway should be a grand entrance - the first impression. A sense of space and not just a pass through. With my painted piano, the art print, the globe pendant and the patterned tiles - it’s like you know a bit about me before you get through!
Voting is not enabled or out of date!

Estelle Bilson, 70s House Manchester

Photo 1
Photo 2
Photo 3
Photo 4
Photo 5
Photo 6
Photo 7
Photo 8
Please provide any other information that is relevant for your entry
Our hallway was dark, unloved and in need of some care and attention, we ripped out the under stair storage to open up the space, we replastered it, stripped all the wood and original coving and ripped up the floor. We teamed a neutral colour with a bright colour pop on the ceiling and clashing deep red accents. Our budget didn't stretch to a bespoke unit to cover the unsightly electric meter, so I found a vintage cupboard and ripped it apart to make a one of a kind hall storage for only £50 We finished this with a sympathetic period flooring in muted colours to really bring the scheme together and used key pieces from my vintage collection to style it.
Voting is not enabled or out of date!

Evelyn, Lindley

Photo 1
Photo 2
Photo 3
Photo 4
Photo 5
Photo 6
Photo 7
Photo 8
Please provide any other information that is relevant for your entry
I miss this hall! It was vibrant, eye-catching and fun; and every time I opened the door to somebody, it would get a "wow!". This was one of the rooms in my old house - and I really miss all the progress I was making within these walls.
Voting is not enabled or out of date!

Fern, Hutchinson

Photo 1
Photo 2
Photo 3
Photo 4
Photo 5
Photo 6
Photo 7
Photo 8
Please provide any other information that is relevant for your entry
Our goal for this project was to turn out small new build hallway, into a boot room style hallway full of warmth and character, and that's exactly what we done. The project cost less than £150 in total for the whole project and our hallway has now been completely transformed from drab and boring, to cosy and characterful. It's now a practical space for shoes and coats and more inviting for guests.
Voting is not enabled or out of date!

Frederique, Etienney-Pope

Photo 1
Photo 2
Photo 3
Photo 4
Photo 5
Photo 6
Photo 7
Photo 8
Please provide any other information that is relevant for your entry
Hallways are too often an afterthought — a space you pass through without a second thought. I wanted mine to feel like the opposite. A celebration. Somewhere that stops you in your tracks and makes you pause for a moment. Deep blue walls, gold trimmings and stair banister, a red star stair runner, a disco ball throwing light across every surface, and art at every turn. It sets the tone for the whole house. The gold is also the connecting thread that runs through every single room in the house. Each room has its own colour and personality, but gold ties them all back to the hallway and to each other. It was a deliberate decision — a way of making a bold, eclectic home feel cohesive. I love hallways, they are such an opportunity — your first impression, your daily moment of joy. Mine reminds me of that every single time I walk through the door.
Voting is not enabled or out of date!

Hanna, Tosney

Photo 1
Photo 2
Photo 3
Photo 4
Photo 5
Photo 6
Please provide any other information that is relevant for your entry

The hallway was designed to make an impact while holding meaning. At its centre is a hand-built stone wall, created during the build and designed to bring warmth and texture into the home from the first step inside. Built into the wall is a plaque alongside my husband’s first building hammer — the very tool used when the house began. It’s a small detail, but one that makes the space deeply personal and reminds us every day of how this home came to life.

Voting is not enabled or out of date!

Helen, Somers

Photo 1
Photo 2
Photo 3
Photo 4
Photo 5
Photo 6
Photo 7
Photo 8
Please provide any other information that is relevant for your entry
Our hallway is narrow with very little natural light. We installed refurbished cinema seats which are practical and stylish. New tiled flooring to complement the original in the vestibule and then reinstated stained glass in the internal doors. An Edwardian sideboard provides storage and a statement light fitting completes the look. I didn’t want my hallway to be a space you merely dump your coats and shoes then walk through. This hallway reflects my personality and style.
Voting is not enabled or out of date!

Hollie, Hedley

Photo 1
Photo 2
Photo 3
Photo 4
Photo 5
Photo 6
Photo 7
Voting is not enabled or out of date!

Imogen, Thomas

Photo 1
Photo 2
Photo 3
Photo 4
Photo 5
Please provide any other information that is relevant for your entry
Our hallway has slowly become my favourite space in our home. It’s warm, welcoming, and great use of space. Adding an accent chair, console table, panelling and a useful space to store shoes but also the perfect styling space.
Voting is not enabled or out of date!

Jennie, Brown

Photo 1
Photo 2
Photo 3
Photo 4
Photo 5
Photo 6
Photo 7
Photo 8
Please provide any other information that is relevant for your entry
I transformed our hallway , by turning a previously dark and uninviting space into a light, welcoming entrance that sets the tone for the rest of the home. I introduced light oak colored parquet flooring to immediately lift the space, paired with a stair runner and rods to add both texture and a sense of structure. The staircase is finished with a curated gallery wall, creating visual interest and a personal focal point as you move through the space. To add character and depth, I incorporated wall mouldings, elevating what was once a plain hallway into something more considered and timeles. A large console table provides both function and styling opportunity, allowing the space to feel layered and lived-in rather than purely transitional. I also wanted the hallway to feel practical and welcoming for guests, which led to the addition of an umbrella basket and a slipper basket, a small but thoughtful detail that reflects how the space is used in real life.
Voting is not enabled or out of date!

Jess, Ryan

Photo 1
Photo 2
Photo 3
Voting is not enabled or out of date!

Jodie, Corrigan

Photo 1
Photo 2
Photo 3
Photo 4
Photo 5
Photo 6
Photo 7
Photo 8
Please provide any other information that is relevant for your entry
Modern organic hallway that feels inviting, brings warmth & instantly my favourite home transformation.
Voting is not enabled or out of date!

Jodie, Kemp

Photo 1
Photo 2
Photo 3
Photo 4
Photo 5
Photo 6
Photo 7
Photo 8
Please provide any other information that is relevant for your entry
This hallway sets the tone before you’ve even taken your coat off. Most entrances are designed to fade into the background. Neutral walls. White ceilings. Nothing that lingers. This does the opposite. From the moment you walk in, you’re met with colour, pattern, and personality. And it doesn’t apologise for it. The maximalist floral wallpaper isn’t a feature. It’s the foundation. It wraps the space in energy and immediately signals that this home isn’t playing it safe. And then there’s the ceiling. Not white. Not forgotten. Fully considered as part of the design, pulling the entire space together and making the hallway feel immersive rather than transitional. Because that’s the shift. This isn’t a space you pass through. It’s a space you experience. It connects every room in the house, acting as a multicoloured thread that ties everything together. Each space beyond it has its own identity, but this is where the story starts. And that’s intentional. It proves that the areas we usually overlook… are actually the biggest opportunity to make an impact.
Voting is not enabled or out of date!

Katelynn, McCarthy

Photo 1
Photo 2
Photo 3
Photo 4
Photo 5
Please provide any other information that is relevant for your entry
Hallway fully renovated in our London flat❤️
Voting is not enabled or out of date!

Katherine, Sanders

Photo 1
Photo 2
Photo 3
Please provide any other information that is relevant for your entry
When we moved in, this was wasted space. We’ve had it under stairs storage for coats and shoes painted the banisters and recently added herringbone carpet to the stairs.
Voting is not enabled or out of date!

Kimberley-Jade, Agate

Photo 1
Photo 2
Photo 3
Photo 4
Photo 5
Photo 6
Photo 7
Photo 8
Please provide any other information that is relevant for your entry
A colourful mix of traditional and contemporary in this Edwardian hallway.
Voting is not enabled or out of date!

Lara, Bezzina

Photo 1
Photo 2
Photo 3
Photo 4
Photo 5
Please provide any other information that is relevant for your entry
We fell in love with the house when we first opened this door (although it was a different door that was super hard to open and the hall looked very different then). We knew it had so much potential and I wanted it to be bold, warm, welcoming and set the tone for the rest of the house. We laid the marble, diamond pattern floor ourselves over many days / weeks and could t be happier with it. It makes me very happy to come home and gives the best warm welcome now.
Voting is not enabled or out of date!

Laura, Timmins

Photo 1
Photo 2
Photo 3
Photo 4
Photo 5
Photo 6
Please provide any other information that is relevant for your entry
I have a very narrow, useless hallway that was a plain white box when I moved in last year, and as we had no space and no storage, I had to work extra hard to make the space as welcoming and as functional as possible. I turned a Billy Bookcase from IKEA into a radiator cover with vented doors and shelves above for keys, post etc, bought a bench with hidden shoe storage to keep the floor clear, and bought what was meant to be a drawer unit with hidden laundry baskets, but turned it into a unit with hidden bin and recycling units in (because we can't fit a bin in our kitchen either!)
Voting is not enabled or out of date!

Leah, Hodson

Photo 1
Photo 2
Photo 3
Photo 4
Photo 5
Photo 6
Please provide any other information that is relevant for your entry
This is my favourite space in the house to reinvent. After installing the panelling myself last spring, my husband had one request — that I leave some colour in the room. That became the starting point for one of my favourite creative outlets: a hand-painted seasonal mural that evolves throughout the year. Whenever inspiration strikes (which is often), I transform the panelled wall with a new design - from delicate spring florals to playful Halloween pumpkins, and even a checkerboard Christmas wrapping paper–inspired mural. Each iteration brings a fresh mood and sense of occasion to the hallway, making the space feel ever changing, joyful, and full of personality. What makes it even more satisfying is that every transformation has been created entirely from leftover paint samples I already had at home - proving that impactful design doesn’t require a budget, just imagination. Sometimes, all it takes is a brush, a blank wall, and a little creativity.
Voting is not enabled or out of date!

Leanne, Teather

Photo 1
Photo 2
Photo 3
Photo 4
Please provide any other information that is relevant for your entry
This can be quite a dark space which is why I’ve kept it light and airy in my colour choices
Voting is not enabled or out of date!

Lesley, Kay

Photo 1
Photo 2
Photo 3
Photo 4
Photo 5
Photo 6
Photo 7
Please provide any other information that is relevant for your entry
A warm welcome to my home ? green is one of my favourite colours and evokes all the look and feel of nature. When we bought our barn conversion I envisaged the hallway would have the feel and look of a garden room as it’s such a big square space. The light comes in from a large skylight and a small window in the door. It’s taken a few years to get to this point and the room has been many colours in that time but since having the wallpaper and panelling done it’s really helped us build upon that. I have recently painted the doors in an olive green which really grounds the room and along with the pale oak furniture, soft furnishings and accessories with lots of greenery, the room finally feels finished ?
Voting is not enabled or out of date!

Lexie, Carducci

Photo 1
Photo 2
Photo 3
Photo 4
Please provide any other information that is relevant for your entry
We had a Pinterest vision for our entrance hallway which I’m so pleased we managed to bring to real life! We had seen a Pinterest of a car in a garage that could be seen through a window and we loved it, although we didn’t quite know how we could create it in our hallway. The way our house sits is that the entrance on the ground floor actually feels like a basement because the garden is off the first floor on the opposite side. So the ground floor has very little light from the small light well in the back room and bathroom. So we wanted to create as much light as possible, so we knocked down a wall between the hall and garage to create an opening where we put the crittall window looking into the garage. We also removed the bannister for the stairs and replaced it with a black metal balustrade. For storage we build a control room under the stairs for the WiFi, heating, electrics, Sonos system etc and a pull out shoe storage too. The floor is all microcement which also gives the wow factor as you enter our home as it’s quite a unique feature and a conversation starter. We finished off the hallway with a large arched mirror and an oversized concrete style pot with oversized sticks. And to stick with the oversized theme we have the biggest diffuser I could possible find! 
Voting is not enabled or out of date!

Lou, Crane

Photo 1
Photo 2
Photo 3
Photo 4
Photo 5
Photo 6
Photo 7
Photo 8
Please provide any other information that is relevant for your entry
A year in the making and proof that a hall, stairs and landing can be a destination and not just somewhere you pass through. I restored the original bannister and stairs and then used bright pinks and a mural with a frame made from moulding painted gold
Voting is not enabled or out of date!

Malik, Ibheis

Photo 1
Photo 2
Photo 3
Photo 4
Photo 5
Photo 6
Photo 7
Photo 8
Please provide any other information that is relevant for your entry
At the start of last year, I began to see my home’s white walls as a blank canvas for something more surreal. With too many ideas to pin down, I collaborated with interior designer Ms Pink, who helped distil my vision into a clear starting point: the hallway. We chose to treat it as the conceptual anchor for the entire flat—a space that would set the tone for everything that follows. In response to the hallway’s unusual, winding shape, I leaned into distortion and theatricality. Gold leaf was applied to the skirting, door frames and ceiling to maximise light and create a reflective, almost immersive surface. This allowed for the introduction of bold electric blue striping (Electric Blue by YesColours), amplifying contrast and enhancing the sense of movement through the space. The result is a hallway that feels deliberately disorienting—somewhere between a funhouse and a stage set. As a performer and visual artist, I’m drawn to environments that feel slightly unreal, and this became an opportunity to build one within my own home. The project was completed by hand as a personal art piece, and now acts as the visual and conceptual foundation for the rest of the interior.
Voting is not enabled or out of date!

Megan, Woodford

Photo 1
Photo 2
Photo 3
Photo 4
Photo 5
Photo 6
Voting is not enabled or out of date!

Michelle, Corr

Photo 1
Photo 2
Photo 3
Photo 4
Photo 5
Photo 6
Photo 7
Photo 8
Please provide any other information that is relevant for your entry
The walls in the hallway downstairs and upstairs is the same colour of paint which is painted on the walls half and half but has 2 different textures. You can see the high shine on the bottom half
Voting is not enabled or out of date!

Miranda, Horchler

Photo 2
Photo 3
Photo 4
Photo 5
Photo 6
Photo 7
Photo 8
Voting is not enabled or out of date!

Miranda, Horchler

Photo 1
Photo 2
Photo 3
Photo 4
Photo 5
Photo 6
Photo 7
Photo 8
Voting is not enabled or out of date!

Molly, Spencer

Photo 1
Photo 2
Photo 3
Photo 4
Photo 5
Photo 6
Please provide any other information that is relevant for your entry
Hallways often get a bit neglected, a dumping ground for coats and boots, a forgotten space with a lack of character. These are all things we wanted to avoid when we started this space. We literally had to take this hallway back to the bare bones, floor boards up, joists reinforced, walls stripped of wallpaper, all before we could even begin with adding personality! We DIYed everything, from installing new sub-floor, new tiles, completely redecorating and of course fitting that statement tiger runner. It's now bold, ambitious and unforgettable. Let's face it, who doesn't want to be greeted by a wild cat as they enter the house!
Voting is not enabled or out of date!

Naomi, Hudson Reed

Photo 1
Photo 2
Photo 3
Photo 4
Photo 5
Photo 6
Please provide any other information that is relevant for your entry
The transformation of this hallways by using Panneling and a stair. runner has been outstanding Main top and using building merchants such as b & q to save money is definitely the way forward along with the colour match of farrow and ball dupes they do
Voting is not enabled or out of date!

Natalie, Wong

Photo 1
Photo 2
Photo 3
Photo 4
Photo 5
Photo 6
Photo 7
Photo 8
Please provide any other information that is relevant for your entry
My apartment hallway, used daily but wasn’t always noticed until I gave it some life with some squiggles and colour. Now every time anyone walks in they’re welcome by a calming sky and sea of squiggles. The mix of cooler green tones I find really welcoming, mixed with the large mirror, this hallway is now utilised as the place where everyone will take photos before they go out. It’s the location for outfit pictures, pretty aesthetics or just a pleasing room to walk through. People often say a hallway isn’t a room, but I certainly feel like mine is and love every moment I’m walking through or taking a second to look at the gorgeous walls around me which I do quite often!
Voting is not enabled or out of date!

Nicky, Neeve

Photo 1
Photo 2
Photo 3
Photo 4
Photo 5
Photo 6
Photo 7
Voting is not enabled or out of date!

Nicola, Gordge

Photo 1
Photo 2
Photo 3
Photo 4
Photo 5
Photo 6
Photo 7
Photo 8
Please provide any other information that is relevant for your entry
A once-overlooked hallway transformed into a bold, joyful and highly functional entrance that sets the tone for our entire home. Our 1950s home has a slightly unusual layout, with the front door positioned beneath the staircase, creating a narrow and often overlooked transitional space. To bring character and cohesion, I started by painting the original wooden front door a deep green, chosen to complement the existing stained glass and highlight its detail. This became the anchor for the scheme. The addition of a black glazed door leading into the kitchen encouraged me to be braver with colour throughout the hallway. I introduced a bold yellow colour block, which initially felt like a risk in such a compact space, but it has completely transformed the area into something uplifting and full of personality. Through the process, I refined the detailing — originally painting the skirting in the same yellow, before realising that keeping it crisp white created a much stronger contrast against the herringbone flooring and helped ground the space. Storage was a key consideration. Although I was concerned that enclosing the under-stairs area might make the hallway feel smaller, it ultimately allowed us to create much-needed, functional storage and gave the space a more resolved, finished feel. The cabinetry was kept white to blend seamlessly into the walls, ensuring the hallway still feels light and open despite its proportions. A more recent addition is a mural on the wall formed beside the built-in cabinetry, which has brought an extra layer of personality and a real sense of delight to the space. The result is a hallway that balances practicality with personality — transforming what could have been a purely functional corridor into a welcoming, characterful introduction to our home.
Voting is not enabled or out of date!

Pixie, Lavin

Photo 1
Photo 2
Photo 3
Photo 4
Photo 5
Photo 6
Voting is not enabled or out of date!

Rachel, Edmonds

Photo 1
Photo 2
Photo 3
Photo 4
Photo 5
Voting is not enabled or out of date!

Sabrina, Masero

Photo 1
Photo 2
Photo 3
Photo 4
Photo 5
Please provide any other information that is relevant for your entry
I collaborated with a few companies for the wallapaper, the paneling, traditional radiator and pendant lights.
Voting is not enabled or out of date!

Salma, Chatto

Photo 1
Photo 2
Photo 3
Photo 4
Photo 5
Photo 6
Photo 7
Photo 8
Please provide any other information that is relevant for your entry
Welcome to my floral maximalist hallway ✨ My own little slice of feminine heaven — designed to feel like a warm hug the moment you walk in. It’s filled with everything that makes me happy, from colour and pattern to meaningful details. And yes… that’s a hand-painted floral mural tucked into the under-the-stairs nook ? The first thing to greet you is my eclectic gallery wall, each piece chosen with intention — full of memories, meaning, and little moments I never want to forget ? The under-the-stairs nook is a clever budget DIY, built using separate flat-pack units, MDF, and paint — finished off with a comfy bench cushion for the perfect cosy spot ✨
Voting is not enabled or out of date!

Scarlett, Mack

Photo 1
Photo 2
Photo 3
Voting is not enabled or out of date!

Shanice, Kinnersley

Photo 1
Photo 2
Photo 3
Photo 4
Please provide any other information that is relevant for your entry
When we moved in to our 250-year-old home, the hallway was fine: grey and neutral but not the most welcoming or inspiring of hallways. We decided we wanted to bring back some old charm and make an imposing statement as soon as you entered our home, and we did that with Victorian patterned floor tiles, wall panelling, new glazed doors, and a collection of art I collected from antique and charity shops. We DIYed everything ourselves, so what we initially thought would take 6 weeks was actually a project that took 6 months! But it was 100% worth it.
Voting is not enabled or out of date!

Sharon, Scoffings

Photo 1
Photo 2
Photo 3
Photo 4
Photo 5
Photo 6
Photo 7
Photo 8
Please provide any other information that is relevant for your entry
Most stairways are ignored. Mine isn’t. It is a vibrant welcome. This space blends heritage and attitude, Indian inspired colour and pattern pushed into something sharper and more modern. Mandala style risers create rhythm and movement with every step, grounded by the original black banister. Saturated orange walls and a paisley ceiling energise the hallway, wrapping it in warmth and visual impact. The Indian essence continues in fringed pendant lampshades, adding softness and movement overhead. A gallery wall runs through it, every image chosen with intent, telling the story of the people who live here. It is personal, not decorative. Designed as a true connection point, it links every room in the house rather than simply passing between them. Function keeps pace. Motion sensor lighting guides the way. Checkered storage holds the everyday clutter, practical but with edge. A mannequin lamp adds an unexpected focal point, bold, playful and impossible to ignore. This is not just a walkway. It is energy, identity and presence, turning the overlooked into something unforgettable.
Voting is not enabled or out of date!

Shelley, Probert

Photo 1
Photo 2
Photo 3
Photo 4
Please provide any other information that is relevant for your entry
Our hallway was pretty bland when we first moved in, so we decided to give it a full refresh We added hard flooring, Karndean-Lime Washed Ash, installed glass panelled doors, and created wall panelling to add some character. For the colour, we chose Moor end by Graham & Brown on the panelling, which adds the perfect amount of warmth and contrast The stair running and stair rods also makes it feel elegant. Such a simple transformation but it’s made such a big difference it finally feels like us.
Voting is not enabled or out of date!

Stephanie, Wilson

Photo 1
Photo 2
Photo 3
Photo 4
Photo 5
Please provide any other information that is relevant for your entry
Mill view cottages hallway
Voting is not enabled or out of date!

Suzanne, Harwood

Photo 1
Photo 2
Photo 3
Photo 4
Photo 5
Photo 6
Please provide any other information that is relevant for your entry
My hallway is an invitation into a home defined by colour—an expression of my travels and the stories I’ve collected along the way. It’s filled with vibrant memorabilia from around the world, each piece holding a memory. This is my first home, shaped and inspired by my passion for interiors, travel, and colour therapy.
Voting is not enabled or out of date!
Best Home

This category is sponsored by 

Alana, Miller

Photo 1
Photo 2
Photo 3
Photo 4
Photo 5
Photo 6
Photo 7
Photo 8
Please provide any other information that is relevant for your entry
I have always dreamed of owning a period home, so when we finally found this one, we were undeterred by what we discovered on moving in. The seventies had not been kind, and almost every trace of original character had been stripped away. We set to work gradually, taking the house back to a shell and slowly, carefully renovating room by room over the past six years. Cornicing, ceiling roses and bespoke joinery have been reinstated throughout, and all the fireplaces have been opened up, I decided on a moody, atmospheric aesthetic to celebrate the deep, rich colours that feel true to the Edwardian period with just a small amount of whimsey thrown in. I used secondhand finds and vintage pieces to furnish the house as with all renovations we were on a very tight budget. Using savings and some of the equity from my previous property to fund the project. Six years in, it's still very much a work in progress, growing and evolving alongside our family but that's exactly how we like it. We're enjoying every step of the journey!
Voting is not enabled or out of date!

Amy, Neill

Photo 1
Photo 2
Photo 3
Photo 4
Photo 5
Photo 6
Photo 7
Photo 8
Please provide any other information that is relevant for your entry
I live alone in a little cottage by the woods with my dog and cat. I’m an antiques dealer so I collect art, vintage, all things nature and I’ve tried to bring all of the above into my home to curate a little safe, warm, whimsy filled space for myself and my little dog & cat.
Voting is not enabled or out of date!

Anna, King

Photo 1
Photo 2
Photo 3
Photo 4
Photo 5
Photo 6
Photo 7
Photo 8
Please provide any other information that is relevant for your entry
My home is a true reflection of my personality, lifestyle & aspirations-layered, creative & ever evolving. I have created a home that feels both lived in & loved, where every room tells a story through a mix of thoughtful design, personal pieces & hands-on renovation. From transforming spaces into functional, beautiful rooms to incorporating reclaimed materials & bespoke details, i’ve shaped a home that balances practicality with character. I’m drawn to a calm, neutral base layered with texture, warmth & seasonal touches, allowing each space to feel fresh yet cohesive throughout the year. More than anything, my home reflects how I live day to day - hands-on, family-focused & always creating while remaining a place that feels calm, welcoming & uniquely mine.
Voting is not enabled or out of date!

Anouska, Lancaster

Photo 1
Photo 2
Photo 3
Photo 4
Photo 5
Photo 6
Photo 7
Photo 8
Please provide any other information that is relevant for your entry
We bought Penally House in 2021. It was a wreck and needed gutting and fully renovating. The garden was overgrown and the house had been left to wrack and ruin. The house was built in 1836 and was originally built/owned by a smuggler. There are rumours of a secret tunnel to the sea, where contraband was smuggled in to avoid taxes. The house has been lovingly restored by us over the last 5 years. The final piece of the jigsaw was the reinstating of the timber framed orangery which crumbed over 8 years ago. The renovation was documented on Channel 4's Renovation Nation. I wish I could upload more photos!
Voting is not enabled or out of date!

Becca, Jordan

Photo 1
Photo 2
Photo 3
Photo 4
Photo 5
Photo 6
Photo 7
Photo 8
Please provide any other information that is relevant for your entry
Since moving into our new build home 5 years ago, we've transformed it from a standard white box house into a timeless, elegant home that shows my love for a neutral colour palette full of texture. We've DIY'd most of what we've done to the house, adding panelling to the hallway, building a media wall in the living room, blocking up the box room and knocking through from our room to create a walk in wardrobe, added an island to the kitchen and build an office in the garden. I'm used to designing luxury high end residential homes for my clients as an interior designer, and wanted to apply that same luxury to our home yet on a budget. We still have so much we want to do, but feel like our home is a long way from the standard Taylor Wimpey home we bought.
Voting is not enabled or out of date!

Beccy, Horwood

Photo 1
Photo 2
Photo 3
Photo 4
Photo 5
Photo 6
Photo 7
Photo 8
Voting is not enabled or out of date!

Becs, Baker

Photo 1
Photo 2
Photo 3
Photo 4
Photo 5
Photo 6
Photo 7
Photo 8
Voting is not enabled or out of date!

Bethany, Rose

Photo 1
Photo 2
Photo 3
Photo 4
Photo 5
Photo 6
Photo 7
Photo 8
Please provide any other information that is relevant for your entry
Instagram and TikTok @hemlockhome_
Voting is not enabled or out of date!

Bethany, Tyson

Photo 1
Photo 2
Photo 3
Photo 4
Photo 5
Photo 6
Photo 7
Photo 8
Please provide any other information that is relevant for your entry
We bought our 1930s house in 2021 and we have completely transformed it - one DIY project at a time. My home style is calm and cosy. A neutral and timeless foundation with pops of colour, personality and seasonal styling. It’s my happy place and a place to pause and just be.
Voting is not enabled or out of date!

Callieanne, Major

Photo 1
Photo 2
Photo 3
Photo 4
Photo 5
Photo 6
Photo 7
Photo 8
Please provide any other information that is relevant for your entry
A mix of patterns and textures to create a cosy, sensory home.
Voting is not enabled or out of date!

Candice, Guy

Photo 1
Photo 2
Photo 3
Photo 4
Photo 5
Photo 6
Photo 7
Photo 8
Please provide any other information that is relevant for your entry
Moving into a new‑build property means starting with a very blank canvas, and whilst all of the spaces in the house were functional when we first moved in, they were also completely lifeless as well as boxy and flat. My approach to designing this home was to embrace that blankness as an opportunity to use texture, layering and crafted DIYs to add personality into every space and make it feel homely.   Light, neutral coloured wall paints or limewash runs throughout most of my home, creating a soft backdrop. The limewash and faux limewash effects that I have used, add depth and texture to the original, static walls. In rooms where I wanted additional structure, I introduced panelling - each design chosen to suit the scale and mood of the space - or sometimes even the furniture. The low panel/high skirting runs throughout the ground floor and was a feature that instantly elevated the proportions.   Since I tend to opt for a neutral and earthy palette, texture is essential. I like to layer different materials – fabrics, wood, natural stone etc. to create warmth, tactility and make the spaces feel inviting and considered. I mix DIY‑upgraded furniture with Marketplace finds as well as a few carefully chosen statement pieces.   Art is a defining part of the home’s identity. I like to paint my own large‑scale canvas pieces, tailoring each one to the space. These artworks bring individuality and scale, acting as key focal points in the rooms.   More than anything, I like to try to create a sense of flow in my home. Whilst each room has its own personality, the palette, textures and designs are all in some way connected. The result is a home for us that feels calm, cohesive and personal.
Voting is not enabled or out of date!

Charlene, Bonnici

Photo 1
Photo 2
Photo 3
Photo 4
Photo 5
Photo 6
Photo 7
Photo 8
Please provide any other information that is relevant for your entry
I’ve transformed my council flat into a home that feels warm, comforting and full of love, all while staying within a budget. Every corner has been thoughtfully put together with layers, colour and little details that make it feel personal and lived in. I want to show that you don’t need a perfect home or lots of money to create a space that feels special. My hope is to inspire others to embrace where they are, take pride in their home and fill it with warmth in a way that feels true to them.
Voting is not enabled or out of date!

Daniel, Bland

Photo 1
Photo 2
Photo 3
Photo 4
Photo 5
Photo 6
Photo 7
Voting is not enabled or out of date!

Donna

Photo 1
Photo 2
Photo 3
Photo 4
Photo 5
Photo 6
Photo 7
Photo 8
Please provide any other information that is relevant for your entry
In a 300yr old cottage, nestled in rural Yorkshire, we’ve demonstrated that small houses can be just as beautifully detailed as larger ones. Thirteen years of renovation in the bag and we’re flying the flag for little homes!
Voting is not enabled or out of date!

Emily, Barratt

Photo 1
Photo 2
Photo 3
Photo 4
Photo 5
Photo 6
Photo 7
Photo 8
Please provide any other information that is relevant for your entry
I have so far spent 2.5 years DIY-ing this Victorian beauty back to life. I have kept all of the original features and tried to embrace them with each room that I have renovated. Budget was tight so I opted for a traditional Victorian kitchen with free standing units. The decor of the house is quite grand on the first and second floor as it would have been when it was built in 1830. The top floor is where the servants would have lived with exposed beams etc so I have a different coat feel on that floor and have upcycled the beams in each room up there to give the flow on that floor.
Voting is not enabled or out of date!

Emily, Giblin

Photo 1
Photo 2
Photo 3
Photo 4
Photo 5
Photo 6
Photo 7
Photo 8
Please provide any other information that is relevant for your entry
Introducing my cottage which is my colourful safe space, full of everything I love. It’s my ideal home as it reflects my personality & is the place I am at peace.
Voting is not enabled or out of date!

Emily, Kowalewska

Photo 1
Photo 2
Photo 3
Photo 4
Photo 5
Photo 6
Photo 7
Photo 8
Please provide any other information that is relevant for your entry
This is our multi functional home office. The space is a loft conversion that has many different functions. Think home office/toy storage/guest bedroom. We knew that this room had to be multifunctional but it’s such an odd shaped room we had to be clever with our placement of furniture and inventive with our design. I am quite a thrifter and as I like to stretch my money as far as it will possibly go I picked up an old set of draws from Facebook marketplace for free. Sanded them down and re varnished them. I have my grandmas old side board that was in my garage for years, my husband’s nans old bedding box that we upcycled by putting panelling on it and made the top cushioned so it became a window seat. We also have my grandads vintage suitcase he used when he was in the RAF. I picked up a vintage writing bureau which is perfect for working from home as we can literally close a draw and you wouldn’t know it was a desk. We have a clever day bed from Ikea that pulls out into a double bed which is perfect for guests. I colour drenched this room as I still wanted it to be inviting and warm and somewhere you’d like to stay or work. Teaming the neutral walls with vintage pieces and dark textures to give it interest.
Voting is not enabled or out of date!

Emma, Simonetti

Photo 1
Photo 2
Photo 3
Photo 4
Photo 5
Photo 6
Photo 7
Please provide any other information that is relevant for your entry
We finally bought our first home after 15 years of renting and I started a colourful home Instagram a year ago to show my content. After years of white walls I wasted no time in decorating and always have a project on the go!
Voting is not enabled or out of date!

Evelyn, Lindley

Photo 1
Photo 2
Photo 3
Photo 4
Photo 5
Photo 6
Photo 7
Photo 8
Please provide any other information that is relevant for your entry
I couldn't get every room into this category, but hopefully, with my other entries, you can see the rest of it!
Voting is not enabled or out of date!

Frederique, Etienney-Pope

Photo 1
Photo 2
Photo 3
Photo 4
Photo 5
Photo 6
Photo 7
Photo 8
Please provide any other information that is relevant for your entry
When we bought this house it was magnolia from top to bottom and tired beyond its years. We changed that completely — restoring period features to bring back its original character, and making sure there is not a single white wall left. We are a chaotic family of five who live loudly — art, music, travel and entertaining are at the centre of how we live, and the house had to match. Every room is colour-drenched, from deep moody darks to softer warmer tones. No two rooms are the same, but gold runs through every one as the connecting thread — tying together spaces that each have their own personality. Almost everything is secondhand, vintage or upcycled. We choose things that bring emotion and mean something to us. This isn’t a show home. It’s a home that reflects exactly who we are.
Voting is not enabled or out of date!

George, Grantham

Photo 1
Photo 2
Photo 3
Photo 4
Photo 5
Photo 6
Photo 7
Photo 8
Please provide any other information that is relevant for your entry
First time buyer in the North East, bringing colour, prints and texture to what used to be a white shell of a home. Over a quarter of a million views within our first few months of moving. Video / TikTok is more my forte: https://vm.tiktok.com/ZNRQBgrY7/ https://vm.tiktok.com/ZNRQB9DkL/ https://vm.tiktok.com/ZNRQBPM6d/
Voting is not enabled or out of date!

Hanna, Tosney

Photo 1
Photo 2
Photo 3
Photo 4
Photo 5
Photo 6
Photo 7
Photo 8
Please provide any other information that is relevant for your entry

We built our home from scratch as a true partnership — my husband, Harry, bringing the structure to life, and me designing and planning each room from the inside out. From the layout and materials to styling and planting, every detail was chosen by us. The result is a home that feels deeply personal — shaped by months of hard work, creativity and a shared vision to create somewhere timeless, welcoming and uniquely ours.

Voting is not enabled or out of date!

Hannah, Roe

Photo 1
Photo 2
Photo 3
Photo 4
Photo 5
Photo 6
Photo 7
Voting is not enabled or out of date!

Heather, Nash

Photo 1
Photo 2
Photo 3
Photo 4
Photo 5
Photo 6
Photo 7
Voting is not enabled or out of date!

Helen, McLean

Photo 1
Photo 2
Photo 3
Photo 4
Photo 5
Photo 6
Photo 7
Photo 8
Voting is not enabled or out of date!

Hollie, Hedley

Photo 1
Photo 2
Photo 3
Photo 4
Photo 5
Photo 6
Photo 7
Photo 8
Voting is not enabled or out of date!

Holly, Scott

Photo 1
Photo 2
Photo 3
Photo 4
Photo 5
Photo 6
Photo 7
Photo 8
Please provide any other information that is relevant for your entry
This home was designed as a cohesive expression of personality, lifestyle and confident colour use. Originally a blank new-build, the intention was to transform it into a layered, characterful home that feels both elevated and entirely liveable. Each room has its own identity, yet the palette and detailing create visual flow throughout. Colour plays a defining role. From the deep blue living room with warm brass accents to the playful contrast in the family spaces and the calm tonal layering within the bedrooms, every scheme was chosen to evoke a specific mood while remaining connected to the overall narrative of the home. Materiality and texture add depth. Velvet upholstery, metallic finishes, tailored window treatments and considered lighting introduce quiet luxury without sacrificing comfort. Feature wallpaper moments and bespoke styling details ensure personality is present in every space, including transitional areas such as the cloakroom and hallway. Functionality was central to the design. Spaces are zoned for modern family life, balancing entertaining, relaxation, work and play. Storage is integrated to reduce visual clutter, layouts maximise natural light, and furniture selections support both durability and comfort. This home interprets “Ideal Home” as more than aesthetic impact. It demonstrates how thoughtful design can elevate a standard property into a space that feels curated, confident and deeply personal, while working seamlessly for everyday living.
Voting is not enabled or out of date!

Jade, Fish

Photo 1
Photo 2
Photo 3
Photo 4
Photo 5
Photo 6
Photo 7
Photo 8
Please provide any other information that is relevant for your entry
I feel like I have created the Home that best reflects me my surroundings and my personality. I love muted and earthy colours which best reflects the countryside lifestyle that I live in. It’s calming natural and can be cozy and best represents each season. As a family we have nothing more than to go and get stuck into nature and we’re very lucky enough to have it on our doorstep having lived in Somerset my whole life. I have also tried to accessorise with antique pieces as well as lots of different textures such as wood fabric which again represent the natural environment that we live in as well as giving a nod to the country House aesthetics that I am so drawn to. Homely and inviting, fresh but cozy I love my Home and all it has to offer
Voting is not enabled or out of date!

Jade, watkins

Photo 1
Photo 2
Photo 3
Photo 4
Photo 5
Photo 6
Photo 7
Photo 8
Please provide any other information that is relevant for your entry
Hi, we designed and renovated our entire home ourselves. You can view more images and our journey to creating this space through our Instagram handle @no14hectorshouse. Thank you so much x
Voting is not enabled or out of date!

Jennie, Brown

Photo 1
Photo 2
Photo 3
Photo 4
Photo 5
Photo 6
Photo 7
Photo 8
Please provide any other information that is relevant for your entry
My aim was to create a home that works for our whole family, a space that feels calm, welcoming and timeless, but also somewhere we genuinely enjoy spending time in every day. I wanted it to be a house you feel happy walking into at the end of the day. At the heart of the home is a large open-plan kitchen and dining space, designed to bring everyone together. Bifold doors open directly onto the garden, creating a seamless connection between indoors and out, especially in the warmer months. As part of a wider renovation, we added a spacious utility room, which allowed us to repurpose the original space into a walk-in pantry, improving both functionality and flow. The former garage has also been completely transformed into a multi-use area, now home to a gym, games room with a pool table, and a separate office, all connected to the house via a wraparound extension and opening out with bifold doors. Throughout the home, I’ve focused on creating a timeless, neutral aesthetic that feels cohesive and calming, while still being practical for family life. The garden has been designed as an extension of the home, with distinct zones for different moments , including a sunken hot tub area, an outdoor kitchen, a relaxed seating space, and a spot to enjoy a morning coffee in the sun. Overall, this is a home that has been carefully considered to balance style, comfort and functionality. A space that evolves with us, but always feels like somewhere we want to be.
Voting is not enabled or out of date!

Joanna, Fletcher

Photo 1
Photo 2
Photo 3
Photo 4
Photo 5
Photo 6
Photo 7
Photo 8
Please provide any other information that is relevant for your entry
We saw the potential in our home the moment we found it. A 1950s architect-designed house with strong bones and character—but one that hadn’t yet evolved for modern living. We fell in love instantly, but we also knew we wanted to transform it. Our vision was to blend its mid-century roots with the clean lines of contemporary design, inspired by Dutch black houses and Scandinavian simplicity. Five years on, and while there are still elements to finish, what we’ve created already feels like a dream realised. We began our project just five weeks before the pandemic hit. Suddenly, we had no choice but to dig deep—literally and emotionally—to keep things moving. As complete self-build novices, it was a daunting place to start. I had never even touched a power tool. Yet within two years, I found myself cladding the house myself. That transformation, in many ways, mirrors the journey of the house itself. It hasn’t been easy. There’s been blood, sweat, tears—and plenty of tantrums—but giving up was never an option. We knew we could never afford to buy the kind of home we truly wanted, so we made the decision to build it ourselves. Design has always been at the heart of what we do. I have a real passion for interior spaces, and every single inch of this home has been thoughtfully designed by me. It’s something I’m incredibly proud of. Along the way, I’ve made mistakes—but I’ve learned so much more because of them. Our home is built around how we live as a family. I love open-plan spaces where I can stay connected—able to see my children playing while I’m getting on with everyday life. We’ve incorporated materials we love, like corten steel, which flows throughout the design—from oversized doors to garden planters—bringing warmth and continuity. We’re also lucky to have an incredible view, so maximising that became essential. Large windows were a must, framing the landscape and flooding the space with light—even if they do come with the downside of endless cleaning! Above all, this project has taught me that great design doesn’t have to come with a huge price tag. It’s about creativity, vision, and thinking outside the box. This isn’t just a house we built—it’s a home we created, step by step, learning as we went, and never losing sight of the dream.
Voting is not enabled or out of date!

Karen, Gadd

Photo 1
Photo 2
Photo 3
Photo 4
Photo 5
Photo 6
Photo 7
Photo 8
Please provide any other information that is relevant for your entry
Our home is a reflection of how we live — thoughtfully designed, constantly evolving, and centred around creating spaces that feel both beautiful and practical for everyday family life. When we first moved in, much of the house lacked structure and cohesion. Over time, we have carefully transformed each space, focusing on creating a home that feels calm, welcoming and connected throughout. A consistent design approach runs through the home, combining soft neutral tones with deeper contrasts and subtle pops of colour. We’ve focused on layering textures, balancing materials and introducing carefully chosen details to create spaces that feel warm, inviting and cohesive. Each room has been designed with purpose. From a calm and restful bedroom, to a vibrant and expressive children’s space, and a living room that blends comfort with a more refined, contemporary feel — every area reflects both style and functionality. Our garden has also been completely transformed into a structured, contemporary outdoor space that acts as a true extension of our home, allowing us to enjoy and use it throughout the year. We’ve approached every project with a focus on practicality as well as design, ensuring our home works for real life while still feeling considered and visually appealing. Ultimately, our home is not just about how it looks, but how it feels to live in. It’s a space that brings comfort, connection and a sense of calm — a home that has been created with care, creativity and intention in every detail.
Voting is not enabled or out of date!

Katherine, Sanders

Photo 1
Photo 2
Photo 3
Photo 4
Photo 5
Photo 6
Photo 7
Photo 8
Please provide any other information that is relevant for your entry
I have spent the last 10 years renovating in DIY my home to make a home that’s functional yet beautiful.
Voting is not enabled or out of date!

Kelly, Robbins

Photo 1
Photo 2
Photo 3
Photo 4
Photo 5
Photo 6
Photo 7
Photo 8
Please provide any other information that is relevant for your entry
Our George and Home coming together, a busy family of 6, renovating and tackling everything life has to throw ?? very nearly complete our home, just before our second year anniversary of living here. Having moved from suburban city to the English countryside for a simpler way of life. Creating beautiful the curated spaces with our girls future in mind.
Voting is not enabled or out of date!

Kerry, Davison

Photo 1
Photo 2
Photo 3
Photo 4
Photo 5
Photo 6
Photo 7
Photo 8
Please provide any other information that is relevant for your entry
Our home started as what many people would call a “typical” new build… a blank, white box with very little character. But over the past three years, I’ve made it my mission to completely change that narrative. Through my account, I love challenging the idea that new build homes have to feel boring or plain. With the right mix of texture, colour and lighting, I truly believe you can create a space that feels just as warm, layered and full of personality as any period home. Every single corner of this house has been transformed on a budget, with all of the DIY and decorating done by me and my dad. It’s been a slow, thoughtful process, adding pieces over time and really considering how each room is used and should feel, not just how it should look. Each space in our home has its own identity. The rooms reflect either the personality of the person who uses them, or the purpose they serve. Our living room, for example, is designed as a place to completely unwind. We’ve used soft neutrals, warm lighting and calming textures to create a cosy, cocoon like feel… the kind of space you sink into at the end of the day and instantly relax. For me, this home is proof that it’s not about where you start, it’s about what you create. A new build doesn’t have to stay a blank canvas, it can become something deeply personal, full of character, and entirely your own. We’ve also been incredibly proud to see our home featured in a number of interior magazines, and selected by Miller Homes for use across several of their advertising campaigns. It’s been such a full-circle moment to have a space we’ve created ourselves recognised and shared on that level.
Voting is not enabled or out of date!

Lara, Winter

Photo 1
Photo 2
Photo 3
Photo 4
Photo 5
Photo 6
Photo 7
Photo 8
Please provide any other information that is relevant for your entry
I live with my husband and our two sons in a modern cottage in Wiltshire, which I’ve slowly made our own over the past eight years. It started as a very beige, minimal space and I’ve loved bringing it to life with colour, texture and personal touches. The overall feel is what I’d call “calm colour” — warm, inviting colours that feel cohesive without being overwhelming. I focus on creating a practical, lived-in home with a natural flow, plenty of clever storage and minimal clutter.
Voting is not enabled or out of date!

Laura, Hall

Photo 1
Photo 2
Photo 3
Photo 4
Photo 5
Photo 6
Photo 7
Photo 8
Please provide any other information that is relevant for your entry
I adore my home and i've spent the last 10 years turning it from a very run down house into a happy, welcoming and joy filled family home. I believe a home should be lived in and comfortable, not instagram perfect, but with good design, lots of colours and collections of things that make you feel safe and happy, bring back happy memories and facilitate making new ones, and if that is what makes the 'best home' then I think mine fits the bill.
Voting is not enabled or out of date!

Laura, Timmins

Photo 1
Photo 2
Photo 3
Photo 4
Photo 5
Photo 6
Photo 7
Please provide any other information that is relevant for your entry
My home is definitely not the biggest or the most opulent, and there's always stuff that needs finishing - but it has become my true safe space over the last 12 months. It brings me joy in every room which I drastically needed, and I get compliments on it from everyone who visits. Designing and creating all of the interiors in my home finally pushed me to pursue my dream of being an interior designer for people like me - those without the biggest homes and without the most money, but who want to create their Happy Place.
Voting is not enabled or out of date!

Lauren, Flower

Photo 1
Photo 2
Photo 3
Photo 4
Photo 5
Photo 6
Photo 7
Photo 8
Please provide any other information that is relevant for your entry
Our 1930’s colourful home
Voting is not enabled or out of date!

Lesley, Kay

Photo 1
Photo 2
Photo 3
Photo 4
Photo 5
Photo 6
Photo 7
Photo 8
Please provide any other information that is relevant for your entry
Our barn dates back to 1890 and was one of four converted in 2019 from the old milking parlour on the farm land belonging to the Cholmondeley estate. Although it looks small from outside, people are shocked when they come inside and find it is over 2,000 square feet in size. We have upgraded the barn since moving in 3 years ago and worked really hard to make it out perfect home. We have decorated throughout, replaced carpets, built storage, replaced lighting, added kitchen units and redesigned the garden. The barn has everything for modern day living. We don’t have any gas being so rural but have an air source heat pump which provides all the electricity for the house and works the underfloor heating throughout downstairs. The barn has excellent insulation so much so we have never had the heating on upstairs. All the windows are triple glazed and we have the most up to date sewerage system. The barn is very energy efficient thus our energy bills are minimal. We have a drive large enough to take take at least 6 cars, a double garage with loft space above ripe for conversion into a study or spare guest room and a beautiful south west facing garden from which we get the most amazing sunsets over the Bickerton hills. The best thing is we have a beautiful modern country home with stunning farmland views and with the perfect amount of character. This is our forever home.
Voting is not enabled or out of date!

Lexie, Carducci

Photo 1
Photo 2
Photo 3
Photo 4
Photo 5
Photo 6
Photo 7
Photo 8
Please provide any other information that is relevant for your entry
I’m entering our home for this category to show what can be done with a space to make it feel like yours. We spend so much time in our homes and they should be our safe spaces, so although people often speak about ‘adding value to your home’ or ‘what decor choices put people off buying a home’ there seems to be less emphasis on creating a home for YOU! If you’re not planning to sell a home and it’s a long term plan then I think the rule book should be thrown out and we should embrace and create a space that brings us joy. My boyfriend and I wanted to create a home that didn’t feel like we were living in London, don’t get me wrong I adore London and its architecture but we bought a 1970s townhouse which let’s face it isn’t that cute so we felt we could really put our own stamp internally. The inspiration was Mediterranean villa! So lots of neutral tones using texture for depth. Microcement floors with colour drenched rooms to match and open spaces. Microcement was expensive but I am so pleased we went with it, it’s such a showstopper and the movement in it looks like sand. We put in pivot doors out to the garden which was another unique feature I’d only seen in a handful of homes, when shut they give the most amount of light in unlike with French doors or bi folds where the glass is in sections. We also wanted to create a spa like zen environment through the use of neutral light colours to peaceful, calm space to return home to and relax rather than being over stimulated by bright colours and lots going on. So getting home really feels like a re set. My theory was if I created a space I didn’t want to leave, I’d spend more time at home and therefore spend less money out haha! 
Voting is not enabled or out of date!

Lorah-Kate, Allen

Photo 1
Photo 2
Photo 3
Photo 4
Photo 5
Photo 6
Photo 7
Photo 8
Voting is not enabled or out of date!

Louise, Horton

Photo 1
Photo 2
Photo 3
Photo 4
Photo 5
Photo 6
Photo 7
Photo 8
Please provide any other information that is relevant for your entry
We have lovingly restored our Victorian home from top to bottom with our own bare hands! Our main focus was to enhance the character and charm of the property, whilst creating a bright and spacious living area for our family. The open plan layout lends itself beautifully to hosting and we've enjoyed many gatherings and celebrations in our home with friends and family. The bedrooms are cosy and peaceful spaces and we built an extension onto the back of the house with double doors opening out onto the garden area. Everything in our home was done on a very tight budget, with vintage finds, freebies, Facebook marketplace gems, auction bargains, DIY projects, repurposing, salvaged materials and even skip dive finds! The only new item of furniture in our home was our bed (which was a moving-in gift!) I hope you love our little home as much as we do, and that you can feel the love (and hard work!) that we've put into every inch of it.
Voting is not enabled or out of date!

Marie, Nolan

Photo 1
Photo 2
Photo 3
Photo 4
Photo 5
Photo 6
Photo 7
Photo 8
Please provide any other information that is relevant for your entry
When we moved here six years ago, it was absolutely the right decision for us but that didn’t mean it was easy. My husband is local, but I wasn’t, and moving in the middle of COVID made settling in and feeling part of a community much harder than I’d imagined. Renovating this house became my outlet, something hopeful to pour my energy into, a welcome escape from worry and uncertainty. What started as a renovation became something much bigger for me. It was a way of expressing who I am and of showing my love for my husband and my commitment to our life together by creating a home for us that enabled the kind of life we wanted. I am not an influencer and I don't have a following but sharing some of the house progress online gave me a sense of community that I was really missing. Just as importantly, we’ve always felt a real responsibility to preserve what came before us — both in the history of this house and in the objects we choose to bring into it. Wherever possible, we’ve restored, reused, repaired and repurposed, giving old pieces a new life rather than buying new. When we have invested in something new, it’s been with longevity in mind. We tried choosing quality pieces that are made to last rather than things designed to be replaced. For us, sustainability isn’t a trend or a design choice; it’s woven into how we live. It’s about protecting craftsmanship, reducing our footprint, and recognising the value in things that already exist. I’ve always dreamt about a home that felt a bit magical and full of wonder. I have loved descriptions of old houses full of secrets like in the Chronicles of Narnia or a Hayao Miyazaki film. I don't think I have achieved that sense of wonderment yet, it will probably take a lifetime, but I feel so much pleasure in the journey. I want a home filled with objects that have been made, repaired, loved and collected over time. That idea has shaped everything here. I’ve restored furniture, learned new DIY skills, upholstered pieces, rescued old materials, and filled our home with things with history, character and care behind them. For me, being surrounded by things that have been thoughtfully made creates a sense of calm and sanctuary that I dreamed about long before I owned a home of my own. Six years on, the renovation is almost complete, and what makes me proudest isn’t just how the house looks, it’s what it represents. It helped me put down roots, find my creativity, and feel part of a community.
Voting is not enabled or out of date!

Mariné, Lee

Photo 1
Photo 2
Photo 3
Photo 4
Photo 5
Photo 6
Photo 7
Photo 8
Please provide any other information that is relevant for your entry
From the moment you step in, you can tell creative people live here. My home has become a reflection of how I want to live day to day, surrounded by colour, nature and spaces that feel personal and full of life. At the heart of my design approach is a strong connection to biophilic design, bringing the outdoors in and creating spaces that feel calm, grounded and connected to nature. I’ve created an environment that feels layered and evolving rather than perfect, where each room has its own character but still connects through a shared palette. Plants play a big role throughout the house, helping bring movement and softness into the spaces. I’m drawn to colour and texture, often starting with a key piece like artwork or wallpaper and building the room around it. I like mixing finishes as well, combining limewash and painted walls to add depth, and using pattern to bring interest and personality. Being hands on is also important to me, and many of the changes in my home have come from DIY projects. From tiling to garden design, I enjoy the process of shaping a space and making it my own. More than anything, I wanted to create a home that feels warm, expressive and lived in, where creativity is part of everyday life and every space invites you to slow down and enjoy it.
Voting is not enabled or out of date!

Maxine, Austin

Photo 1
Photo 2
Photo 3
Photo 4
Photo 5
Photo 6
Photo 7
Photo 8
Please provide any other information that is relevant for your entry
Our home has been transformed not only room by room, but alongside my own journey in discovering what home truly means to our family. Early in our renovation, I played it safe - choosing whites and greys as a blank canvas while I found my style. But as life evolved, and particularly through raising four young children, I realised our home and garden needed to become so much more; it needed to feel warm, practical, personal and deeply lived in. Over time, I have slowly reimagined our spaces to reflect both our family’s lifestyle and my growing confidence in colour, pattern and timeless design. What began as cautious choices has evolved into a layered, characterful home filled with rich palettes, nature-inspired tones, bespoke DIY projects and durable family-friendly functionality. From dramatic colour-drenched spaces and handcrafted joinery to calming children’s rooms, purposeful utility areas and thoughtfully styled shared spaces, every corner has been designed not just to look beautiful, but to work hard for modern family life. Balancing creativity with practicality, our home is now becoming a true reflection of who we are - embracing personality over perfection, second-hand finds alongside bespoke craftspersonship, and creating a cohesive home that supports the joyful chaos of family life while feeling timeless, functional and unmistakably ours.
Voting is not enabled or out of date!

Mia, Felce

Photo 1
Photo 2
Photo 3
Photo 4
Photo 5
Photo 6
Photo 7
Photo 8
Please provide any other information that is relevant for your entry
We've been renovating our home for the past three years and I've really enjoyed exploring and evolving my personal style. I love experimenting with colour and pattern, sourcing second hand finds and mixing them with the new built in furniture I have designed, and my husband has built. We do a lot of the work ourselves and I'm really proud of how far we've come. There's still a lot of work to do and I can't wait to design our next rooms.
Voting is not enabled or out of date!

Miranda, Horchler

Photo 1
Photo 2
Photo 3
Photo 4
Photo 5
Photo 6
Photo 7
Photo 8
Voting is not enabled or out of date!

Naomi, Hudson reed

Photo 1
Photo 2
Photo 3
Photo 4
Photo 5
Photo 6
Photo 7
Photo 8
Please provide any other information that is relevant for your entry
I have worked so hard on styling a functional family home and I feel after several weeks we found it. Wood from tiles to make the floor as durable but more family friendly. Endurance paint! Plus panelling a great way to style a home without spending a fortune on furniture and paintings to add a feature. My biggest success was my magazine feature which featured lots of local companies in Devon. Looking forward to the next project.
Voting is not enabled or out of date!

Natalie, Wong

Photo 1
Photo 2
Photo 3
Photo 4
Photo 5
Photo 6
Photo 7
Photo 8
Please provide any other information that is relevant for your entry
My home is truly crafted to my personality, one of a kind and slightly squiggly! I love that my home feels unique, not because I want it to but just because I decorate through feeling and what looks pleasing to me. Growing up with a shared bedroom and full interiors, when I purchased my home I knew I wanted to inject colour, but in an artistic, tasteful way. The decor is eclectic but I try to explain my interior style as whimsy, bold but calming. Each piece of furniture, homeware an hand painted squiggle added to my home adds character, but I do like to mix parts of my culture into my interiors with the addition of red, a colour symbolising luck in Chinese culture. I like to mix 60s curved furniture with maximalist modern decor such as vases, quirky lamps and colourful bedding/cushion covers. Although my style is unique and not to everyone’s taste, it isn’t crafted for trends, it’s simply what makes me feel like home and allows me and my inner child to be creative!
Voting is not enabled or out of date!

Natasha, Landers

Photo 1
Photo 2
Photo 3
Photo 4
Photo 5
Photo 6
Photo 7
Photo 8
Please provide any other information that is relevant for your entry
My house is a real labour of love. Having taken over 20 years for me to fully develop the space into a place I can truly call home. My home is known for its bright colours, mid-century furniture and art.
Voting is not enabled or out of date!

Nicole, Roberts

Photo 1
Photo 2
Photo 3
Photo 4
Photo 5
Photo 6
Photo 7
Photo 8
Please provide any other information that is relevant for your entry
My home is still very much still a Reno project. I made it my mission to make my kids rooms lovely for them. These photos show the areas of my home that I am proud of and have styled myself.
Voting is not enabled or out of date!

Rachel, Edmonds

Photo 1
Photo 2
Photo 3
Photo 4
Photo 5
Photo 6
Photo 7
Photo 8
Voting is not enabled or out of date!

Rebecca, Anderson

Photo 1
Photo 2
Photo 3
Photo 4
Photo 5
Photo 6
Photo 7
Photo 8
Please provide any other information that is relevant for your entry
I am incredibly proud of our home. We bought a Victorian cottage and renovated it ourselves to nearly double the size. The only trades we needed for the ENTIRE project was an electrician to sign off the electrics that my husband had run and a plasterer. Absolutely EVERYTHING else my husband, his dad and I did ourselves. From digging the founds, plumbing 4 bathrooms, heating and electrics, windows, the roof, brick work, fitting the kitchen and appliances and all of the interior decor. We have many beautiful rooms in our home but there isn’t enough space to show you them all! I have an interior account on Instagram that you’ll see the rooms in our self build home.
Voting is not enabled or out of date!

Sal, Riley

Photo 1
Photo 2
Photo 3
Photo 4
Photo 5
Photo 6
Photo 7
Photo 8
Please provide any other information that is relevant for your entry
My home has evolved into a space that reflects how we actually live, calm, functional, and timeless, while still feeling personal and lived in. Each room has been designed with everyday life in mind, not just how it looks. The living room is the heart of the home, layered with texture and collected pieces that make it feel warm and relaxed, but still practical for family life. The entryway sets the tone as soon as you walk in, with simple design changes that made a big difference to how the space feels and functions day to day. In my son’s and daughter’s rooms, I’ve focused on creating spaces that feel fun and personal for them, but also practical and adaptable as they grow. They’re designed to work hard while still feeling considered and calm. My bedroom is kept simple and restful, with deep tones and layered textures to create a quiet space to switch off from everything else. Overall, my home is about balance, it works for modern family living, but still reflects my love of timeless interiors and thoughtful, layered design. It’s not about perfection or trend led styling, but about creating a home that genuinely works for how we live every day. There are still areas in my home I want to work on, but I prefer to take things slowly rather than rushing it. I like the idea of it all coming together over time, one space at a time.
Voting is not enabled or out of date!

Salma, Chatto

Photo 1
Photo 2
Photo 3
Photo 4
Photo 5
Photo 6
Photo 7
Photo 8
Please provide any other information that is relevant for your entry
Welcome to my colourful maximalist home — a space bursting with florals, sparkle, vintage treasures, and layers of pink in every shade. Inspired by whimsical cottagecore charm, every corner is designed to feel magical, personal, and full of joy. I don’t follow trends — I create a home that reflects me and my family, filled with meaning, comfort, and creativity. From budget-friendly finds to clever DIY touches, this is a home built with heart ✨
Voting is not enabled or out of date!

Scarlett, Mack

Photo 1
Photo 2
Photo 3
Photo 4
Photo 5
Photo 6
Photo 7
Photo 8
Please provide any other information that is relevant for your entry
Our home is a small brick cottage, built in 1800s and renovated by me! I’ve loved every minute of doing it and have learned a lot.
Voting is not enabled or out of date!

Scarlett, Rowley

Photo 1
Photo 2
Photo 3
Photo 4
Photo 5
Photo 6
Photo 7
Photo 8
Please provide any other information that is relevant for your entry
A bit of a long shot for me entering this, as I’d never usually consider our little bungalow the “best home”, but I thought it was worth a try! Our 3-bedroom semi-detached bungalow is mine and my husband’s first home together. We spent 18 months renovating it, taking every room back to bare brick, doing a full rewire, adding extensions, and building new walls to completely transform the layout. It’s now our perfect little sanctuary. I love mixing old and new pieces, with a focus on neutral, earthy tones. I hope you love our home as much as we do!
Voting is not enabled or out of date!

Sophie, Murphy

Photo 1
Photo 2
Photo 3
Photo 4
Photo 5
Photo 6
Photo 7
Photo 8
Please provide any other information that is relevant for your entry
We have completed a three year renovation of our georgian home completely by ourselves. We’ve changed it from an orange shell and we’ve added in period features, restored original features and complimented our home with modern traditional furnishings. No room has been left untouched. We have done all of this on a budget and therefore i’ve used ikea hacks, reused items (the old worktop became the window seats) and done as much as possible to save on cost.
Voting is not enabled or out of date!

Stacey, Dyer

Photo 1
Photo 2
Photo 3
Photo 4
Photo 5
Photo 6
Please provide any other information that is relevant for your entry
Our home has been a total renovation project. It was virtually derelict when we purchased and we beat off a property developer who wanted to purchase and build on the garden. We have filled it with love, colour and pattern over the last three years with lots of fun still to create.
Voting is not enabled or out of date!

Tamzin, McGillen

Photo 1
Photo 2
Photo 3
Photo 4
Photo 5
Photo 6
Photo 7
Photo 8
Please provide any other information that is relevant for your entry
We have created a colourful and cosy family home, full of print and patterns that reflects the people who live here. I don't shy away from intentional clutter and I think this gives our home a relaxed, lived in feel, it feels like a happy house, and this is often what people say who visit.
Voting is not enabled or out of date!

Tracy, Merry

Photo 1
Photo 2
Photo 3
Photo 4
Photo 5
Photo 6
Photo 7
Photo 8
Please provide any other information that is relevant for your entry
Welcome to the Merry home - creating a country feel in a new build, blending vintage charm with a modern twist.
Voting is not enabled or out of date!

Vicky, Burton

Photo 1
Photo 2
Photo 3
Photo 4
Photo 5
Photo 6
Photo 7
Please provide any other information that is relevant for your entry
My home is colourful, creative, and always evolving. It’s inspired by vintage style but full of personality, with lots of DIY touches that make it feel truly ours. It’s not about perfection, it’s about creating a space that works for real life, for my family, and for all the chaos that comes with it. It’s definitely not finished (and if I’m honest, it probably never will be… is anyone’s ever truly done?). There are always little projects on the go, ideas in my head, and corners still waiting for some love and I actually think that’s part of what makes it special. More than anything, I’ve created a home that feels exciting and encourages creativity, especially for my girls. I want it to be a space where they can play, imagine, make, and just be themselves.
Voting is not enabled or out of date!

Victoria, Goddard

Photo 1
Photo 2
Photo 3
Photo 4
Voting is not enabled or out of date!
Best Home Office

This category is sponsored by 

Aimee, Scott

Photo 1
Photo 2
Photo 3
Photo 4
Photo 5
Photo 6
Please provide any other information that is relevant for your entry
A space that took 4 days of prep including sanding everything smooth, filling every flaw, layering primer, and multiple coats of paint. The before and after transformation speaks for itself.
Voting is not enabled or out of date!

Anna, King

Photo 1
Photo 2
Photo 3
Photo 4
Photo 5
Photo 6
Photo 7
Photo 8
Please provide any other information that is relevant for your entry
Once a spare bedroom, this space has been transformed into a hardworking home office & crafting room. What was once a blank canvas is now designed with purpose, offering plenty of storage to neatly tuck away essentials for projects big & small. A bespoke desk area sits at the heart of the room, with cleverly adapted IKEA units built around it to create overhead storage, drawers & a connected seating area that feels seamlessly built-in. The seating was thoughtfully designed so I can have my dog by my side while I work, but it also doubles as the perfect spot for scrolling, researching or taking a quiet coffee break. Warm wood panelling & patterned wallpaper add depth & character, creating a calm & inviting space that supports both my creativity & productivity.
Voting is not enabled or out of date!

Anna, Rocks

Photo 1
Photo 2
Photo 3
Photo 4
Photo 5
Photo 6
Photo 7
Please provide any other information that is relevant for your entry
I loved creating this cosy office where ideas can be realised! I used a velvety burgundy paint to create a rich look with a cuckooing feel. I made a giant pinboard to help me visualise my ideas, plans and goals and also as a place to play around with patterns to see what works together. For the desk, I repurposed an old table top and used a vintage leather captains chair. The space is now relaxing and calm but without being boring or uninspiring! I have included a couple of before photos so you can see what it was like when we moved in - very yellow!
Voting is not enabled or out of date!

Avalana, Simpson

Photo 1
Photo 2
Photo 3
Photo 4
Photo 5
Photo 6
Photo 7
Photo 8
Please provide any other information that is relevant for your entry
My home office is one of the most important rooms in my home. I wanted to create a space that would support my creativity and feel both inspiring and immersive. The starting point was a significant challenge. The space was originally an old plastic lean-to attached to the bare brick of the house, with no insulation, poor flooring and no real functionality as a year-round workspace. The transformation involved fully upgrading the structure. Installing new flooring, insulation and roofing had to be tackled first, while carefully planning the layout to maximise both usability and storage. I designed a custom shelving unit to fit seamlessly within the angled ceiling, making use of every inch of the space. Aesthetically, the design was inspired by my travels to Marrakech, particularly the Jardin Majorelle gardens. This influence is reflected in the layered botanical wallpaper, arched shelving details and a hand-painted ceiling mural, where foliage trails overhead alongside birds inspired by those I see along the canal near my home. (I adore seeing the Kingfishers and Goldfinches when I am [out walking the dogs!) Additional details, such as black-painted window frames and french doors, and a bespoke faux tile wallpaper, bring cohesion and depth to the scheme. The result is a vibrant, expressive workspace that feels like a garden sanctuary year-round. A space designed to energise creativity, support my work as an artist and provide a truly immersive environment to for me to create within.
Voting is not enabled or out of date!

Bethany, Tyson

Photo 1
Photo 2
Photo 3
Please provide any other information that is relevant for your entry
My hideaway desk from LA REDOUTE is the perfect home office - practical, space saving and absolutely beautiful.
Voting is not enabled or out of date!

Daniel, Bland

Photo 1
Photo 2
Photo 3
Please provide any other information that is relevant for your entry
Orac coving, tonester paint- storms in Paris. Gloss paint finish on anaglypta to show patterns.
Voting is not enabled or out of date!

Evelyn, Lindley

Photo 1
Photo 2
Photo 3
Photo 4
Photo 5
Photo 6
Photo 7
Photo 8
Please provide any other information that is relevant for your entry
I LOVED my home office / studio! I'd spend most of my time there, working away in order to grow. Huge things were coming that I didn't know were on. the horizon, however, and not too further into the distance, I would be leaving this project of love and creativity to move into a much, much smaller home, by myself. I love my little flat and have made the most of it, the same way I did with this beautiful house. But, so much of my energy went into this home and I loved every inch of it!
Voting is not enabled or out of date!

Grace (Brook Home Project), A

Photo 1
Photo 2
Photo 3
Photo 4
Please provide any other information that is relevant for your entry
Monochrome style office
Voting is not enabled or out of date!

Hazel, Moore

Photo 1
Photo 2
Photo 3
Photo 4
Photo 5
Please provide any other information that is relevant for your entry
I mainly work from home so wanted to create a space that makes me smile every time I walk into the room. Something that truly speaks to my style. I was going for elegance and opulent. After all, this is the room I spend most of my time so needed to be right. It was also an opportunity to combine it with a glam station to get the most from the space.
Voting is not enabled or out of date!

Holly, Scott

Photo 1
Photo 2
Photo 3
Photo 4
Please provide any other information that is relevant for your entry
This room was designed as a flexible, design-led space that supports both productivity and rest. The foundation of the scheme is a soft sage tone chosen for its calming qualities. During the day, it reduces visual noise and supports clarity and focus. In the evening, the same palette creates a peaceful atmosphere conducive to relaxation and sleep when the room transitions into a guest space. A beautifully detailed desk anchors the working zone. It has been intentionally selected to function equally as a dressing table, allowing the room to serve dual purposes without compromise. Its generous surface supports creative work and planning, while integrated drawers maintain order and minimise distraction. Opposite, a velvet sofa bed provides comfortable everyday seating and pulls out into a full double bed when required. This ensures the room adapts seamlessly from productive workspace to welcoming spare room, without altering the visual integrity of the design. Layered lighting, balanced proportions and thoughtful storage ensure the space never feels overworked. Instead, it remains calm, organised and adaptable. This project interprets “Productivity at Home” through intelligent multifunctionality and considered colour psychology. It demonstrates how a carefully designed environment can enhance focus by day and offer restorative calm by night, proving that performance and comfort can coexist within one beautifully resolved space.
Voting is not enabled or out of date!

Imogen, Stead

Photo 1
Photo 2
Photo 3
Photo 4
Photo 5
Photo 6
Photo 7
Please provide any other information that is relevant for your entry

Photo 7 is the before of the room, which has been transformed by Jolly Kitchens.

Voting is not enabled or out of date!

Jade, Watkins

Photo 1
Photo 2
Photo 3
Photo 4
Please provide any other information that is relevant for your entry
We designed and built our home office. You can see our journey to creating to this space via our Instagram handle @no14hectorshouse thank you so much x
Voting is not enabled or out of date!

Leah, Govier

Photo 1
Photo 2
Photo 3
Photo 4
Photo 5
Please provide any other information that is relevant for your entry
My home office needed to be a reflection of my favourites so I chose a gorgeous green and pink combo, leopard print and gold accents and some patterned wallpaper! I love being in the space- it’s fun, yet feels calm to work in. I knew I wanted built in units but the quote we had was extortionate so we used some basic kitchen units, painted these and then salvaged some unwanted scaffold boards to create the desk area and to bring it all together. The shelves are styled with a combination of musical items I’ve collected over the years and ornaments that hold sentimental value - it’s not just pretty and practical, it’s a room full of meaning. As a serial decorator, this is the one space I haven’t yet felt the need to change ??
Voting is not enabled or out of date!

Leekim, Stewart

Photo 1
Photo 2
Photo 3
Photo 4
Photo 5
Please provide any other information that is relevant for your entry
I created a cosy office on a low budget by reimagining old furniture and using paint as my canvas — adding colour blocking, soft circles, and artistic details to bring personality into every corner.
Voting is not enabled or out of date!

Lexie, Carducci

Photo 1
Photo 2
Please provide any other information that is relevant for your entry
We put our home office in the smallest room. It was either that or the guest room but the guest room was much larger. So what we ended up doing was knocking down the wall between the guest room and the office and put in a telescopic pocket door between the rooms, that way when we don’t have guests we can keep it open and use the office as a bigger brighter space but when we do have guests we simply pull the door closed. It’s a great multifunctional space. The joinery is all bespoke and build for the space. It matches the Havana oak of the kitchen which runs throughout the home. The cupboards hide away paperwork and stationary and the printer etc whilst the shelving can display ornaments and trinkets. We’ve used LEDs under the desk and shelves so that the spotlights don’t need to be overwhelming in the dark and it’s a more relaxed working environment. We chose a darker paint colour for the walls, it’s blue green by farrow and ball and it still sits in the natural earthy tone. 
Voting is not enabled or out of date!

Marie, Nolan

Photo 1
Photo 2
Photo 3
Photo 4
Photo 5
Photo 6
Please provide any other information that is relevant for your entry
My home office is much more than just a place to work, it’s my sanctuary. I waited six years to create this room, collecting pieces I loved along the way and carefully holding onto them until I could finally bring the space together. The deep plummy red walls, paired with a soft pink ceiling, create a wonderfully warm and cocooning atmosphere that somehow feels both calming and energising, the perfect balance for a workspace. Surrounded by rich fabrics, dark wood, vibrant plants and pieces I’ve lovingly restored, it’s a room filled with things that genuinely make me happy. By day, it’s where I work in quite an analytical role, so having a space that feels peaceful, inspiring and beautifully personal makes such a difference, especially on the more stressful days. Being surrounded by colour, craftsmanship and greenery creates a sense of calm that helps me focus, think clearly and feel productive. Outside of work, the room becomes my creative space, where I make lampshades and spend time designing and making. I love that it supports both sides of me, the practical and the creative, while always feeling like a room that restores me the moment I walk through the door.
Voting is not enabled or out of date!

Marie, Springthorpe

Photo 1
Photo 2
Photo 3
Photo 4
Photo 5
Please provide any other information that is relevant for your entry
Pink Cowgirl Home Office Makeover on £250 Budget My cowgirl pink home office is finally finished. Pink, disco balls and full of cowgirl hats and cowhide prints. ?????? The full cost of the room was around £250.00. The furniture was all brought on the Facebook Marketplace and upcycled. The flooring is sticking back vinyl and covered it with a large cowhide rug from Temu. I won the wallpaper from Lust home and I had some paint leftover from other rooms which is from Rust-Oleum and its called Dusky pink. The neon's were all from Shein which they do personally one's too. The chair was from Wowcher.
Voting is not enabled or out of date!

Maxine, Austin

Photo 1
Photo 2
Photo 3
Photo 4
Photo 5
Photo 6
Photo 7
Photo 8
Please provide any other information that is relevant for your entry
This garden office pod may be small in size, but it’s designed to work hard! Measuring just 1 x 2.5 metres internally, it provides a quiet, functional workspace nestled within a garden alcove. Every detail was considered to ensure the structure feels fully integrated from every angle — from the natural timber cladding and green roof, to the interior finishes and surrounding planting. I loved maximising every inch of this compact space - colour drenching for illusion of more room, installing vertical panelling to draw the eye upwards, and a DIY built-in desk to prove that even the smallest space can be pretty and practical.
Voting is not enabled or out of date!

Michelle, Corr

Photo 1
Photo 2
Photo 3
Photo 4
Photo 5
Photo 6
Photo 7
Photo 8
Please provide any other information that is relevant for your entry
This room was completely blank and we created a home office. All the walls and ceilings are hand painted using Benjamin Moore
Voting is not enabled or out of date!

Nick, Grant

Photo 1
Photo 2
Photo 3
Photo 4
Please provide any other information that is relevant for your entry
We have a Midcentury house and I wanted my office to fit right in. I made the monitor housings, motel sign and arcade machine myself. It's a colourful inspiring place to work.
Voting is not enabled or out of date!

Nikola, Harvey

Photo 1
Voting is not enabled or out of date!

Olivia, Munro

Photo 1
Photo 2
Photo 3
Please provide any other information that is relevant for your entry
I created this horse themed study to help my sanctuary, the place I can get my head down and work and filled it with antiques and furniture I’ve loved and has many stories to tell!
Voting is not enabled or out of date!

Sandra, Czachur

Photo 1
Photo 2
Photo 3
Photo 4
Photo 5
Please provide any other information that is relevant for your entry
Our home office was designed to be both productive and beautifully homely. With everything in its place, clever storage keeps clutter at bay while soft textures and thoughtful details create a warm, inviting atmosphere. It’s a space where organisation meets comfort, making it easy to focus, feel inspired, and truly enjoy spending time here.
Voting is not enabled or out of date!

Tamzin, McGillen

Photo 1
Photo 2
Photo 3
Photo 4
Photo 5
Photo 6
Photo 7
Please provide any other information that is relevant for your entry
We have used our converted garage to create a his & hers office space. We have divided the room with colour and pattern, a tonal 'double drench' for his side, and a floral maximalist look for her side. Matching desks tie the two spaces together.
Voting is not enabled or out of date!

Victoria, Caroline

Photo 1
Photo 2
Photo 3
Photo 4
Photo 5
Photo 6
Photo 7
Photo 8
Please provide any other information that is relevant for your entry
I built this office myself to hide the electric boxes and make a useful functional area in what is normally an unused space.
Voting is not enabled or out of date!
Best Interior Content Creator

This category is sponsored by 

Aimee, Blakey

Link to social media account
Photo 1
Photo 2
Photo 3
Photo 4
Photo 5
Photo 6
Photo 7
Photo 8
Please provide any other information that is relevant for your entry
I feel like a bit of an imposter even trying to enter this category but I’ve just hit my year 2 mark on Instagram and I just love the community that we have here (and I’m a massive Cox and Cox fan - my kitchen stools from there were my first reno purchase, before we even had a kitchen ?). My account is a mix of renovation, country life and lifestyle with a bit of content creator tips on the way - after losing my job and being made redundant I had no budget to renovate my home. So I started using Instagram as a tool to help with reno costs and managed to pay for almost the entire reno in 12 months from when I started monetising around 3000 followers. Now I like to try and pay it forward (no gatekeeping here!!) to help as many reno girlies as possible to do the same. There’s a massive potential for earnings on social and room for us all ❤️
Voting is not enabled or out of date!

Aimee, Scott

Link to social media account
Photo 1
Photo 2
Photo 3
Photo 4
Photo 5
Photo 6
Photo 7
Please provide any other information that is relevant for your entry
As a first-time buyer renovating on a budget, I’ve poured creativity, authenticity, and heart into building my cosy, earthy-toned home. Starting my account just under six months ago, I’ve shared every step of my journey from sourcing affordable pieces to creating warm and inviting spaces that reflect personality without overspending. My content resonates with fellow budget-conscious homeowners and design enthusiasts, offering inspiration, practical tips, and real-life honesty about the challenges and joys of making a house a home. This recognition would celebrate not just my creativity, but the growing community I’ve nurtured around thoughtful, attainable home design. Everyone deserves to live in a home they love.
Voting is not enabled or out of date!

Alana, Miller

Link to social media account
Photo 1
Photo 2
Photo 3
Photo 4
Photo 5
Photo 6
Photo 7
Please provide any other information that is relevant for your entry
As a qualified interior designer specialising in older homes, creating content around design, wellbeing and intentional living feels like a natural extension of the work I love. What started as casually sharing our own renovation journey on social media quickly took on a life of its own, growing far beyond anything we'd anticipated and becoming another passion alongside my interior design business. The content I create is rooted in a cosy, comfort-led aesthetic, styling and renovation inspiration drawn from our own dark, moody Edwardian home, woven together with a deeper conversation around wellbeing and living with intention. There's a sprinkling of fashion and beauty my other loces! It's an honest, considered space online that reflects how we actually live, vintage finds, luxury vs affordable interiors and hard-won design knowledge. What I love most about content creation is the community it builds. Sharing the process, the imperfections and the inspiration with people who genuinely connect with it has been one of the most unexpected and rewarding parts of this whole journey.
Voting is not enabled or out of date!

Amanda, Burnside

Link to social media account
Photo 1
Photo 2
Photo 3
Photo 4
Photo 5
Photo 6
Photo 7
Photo 8
Please provide any other information that is relevant for your entry
I started my Instagram several years ago to document our renovations. Since we have moved to Scotland in 2024 we have been documenting our life renovating an old cottage on a Croft situated on the side of a sea loch on the West Coast of Scotland and adding to our family with animals and the day-to-day challenges and joy that brings. Our Instagram shows us renovating our cottage dating from the 1800’s in a modern country style that withstands animals and weather.
Voting is not enabled or out of date!

Amy, Neill

Link to social media account
Photo 1
Photo 2
Photo 3
Please provide any other information that is relevant for your entry
So lucky to have so much lovely engagement & loyal support from absolutely lovely individuals. Such a blessing ❤️ Have just re-appeared on the BBC for an episode of antiques road trip and starred in a large YouTube video https://youtu.be/Me8iykh7omQ?si=HDzki3sR...
Voting is not enabled or out of date!

Aneta, Havirova

Link to social media account
Photo 1
Photo 2
Photo 3
Photo 4
Photo 5
Photo 6
Photo 7
Photo 8
Please provide any other information that is relevant for your entry
I’m a mum of two boys who started my DIY journey after being inspired by other women on social media. Seeing what they were capable of gave me the confidence to try things myself, even when I had no experience. I began by documenting small projects at home, and over time I’ve become more confident and more ambitious with what I take on. What started as simple decorating has grown into full room transformations, furniture upcycling, and hands-on DIY. My content focuses on making interiors feel achievable. I share realistic projects, often done on a budget, using secondhand pieces that I restore or adapt to suit our home. From painting furniture and walls to reworking entire spaces, I aim to show that you don’t need a big budget to create something personal and considered. A big part of what I share is practical guidance and tips on how to paint almost anything, how to approach DIY projects step by step, and how to see potential in items that might otherwise be overlooked. More than anything, I want my content to encourage others to just start. I know how intimidating it can feel in the beginning, and if my work shows even one person that they’re capable of doing it too, then that’s the most rewarding part.
Voting is not enabled or out of date!

Anna, King

Link to social media account
Photo 1
Photo 2
Photo 3
Photo 4
Photo 5
Photo 6
Photo 7
Photo 8
Please provide any other information that is relevant for your entry
I started my home & garden account, @makinghomematter, over 10 years ago as a space to share creative, affordable & inspiring interiors, always with a focus on how a space comes together visually. My aim has always been to show that beautiful, styled homes are achievable at any budget or skill level, encouraging women to simply give things a go through projects both big & small. I share real-time transformations, combining practical renovation with considered styling to create spaces that feel cohesive, inviting & lived in. A big part of my content is seasonal styling, layering simple, thoughtful details that reflect the time of year & elevate a room’s atmosphere without a full redesign. I love shopping my own home to restyle spaces, as well as repurposing & creating pieces from scratch using scrap wood & overlooked materials to add unique character. From laying stone floors to building bespoke features, i’m hands-on in every part of the process, always in pursuit of creating spaces that feel both beautiful & personal. Ultimately, everything I share reflects my belief in creating a home that feels uniquely yours & ‘making’ home matter along the way.
Voting is not enabled or out of date!

Anna, Rocks

Link to social media account
Photo 1
Photo 2
Photo 3
Photo 4
Photo 5
Photo 6
Photo 7
Photo 8
Please provide any other information that is relevant for your entry
I started my Instagram account back in 2019 and used it as a place to document our first renovation (a 1930's semi) and it blossomed into a really great place to chat with fellow interior and renovation obsessed people! Although we planned to stay in that house for the long run, about a week after we finished it we didn't know what to do with ourselves and a For Sale sign appeared a few days later. We started again at square 1 with our current house, an Edwardian Semi detached which was unfortunately stuck in the early 2000s! So I set about making it feel like home for us, on a seriously small budget and always making the best of what we have (special mention to our 25 year old kitchen which is still going strong!. My account has grown very slowly (currently at 35,000), but I aim to share useful tips for creating a home you love without blowing the budget and hopefully inspire people to give things a go. Almost everything in our home we have done ourselves, from sanding floors to Ikea hack boot rooms and media walls, to making my own blinds and cushions. My account is all about working with what you have, and that nothing around the house is really that hard!
Voting is not enabled or out of date!

Ashley, Rack

Link to social media account
Photo 1
Photo 2
Photo 3
Photo 4
Photo 5
Photo 6
Photo 7
Photo 8
Please provide any other information that is relevant for your entry
As the creator behind @east_shore_home, I pride myself on delivering content that balances aspirational interiors with genuine, practical value. My platform is not only a space to showcase beautifully styled rooms, but a place where design is broken down, shared, and made accessible. What sets my content apart is its versatility. I seamlessly move between high end styling and hands on education, whether I’m curating refined seasonal décor, designing cohesive indoor/outdoor spaces, or guiding my audience through smart, achievable home improvements. Every project is grounded in real experience, as I design and execute much of the work myself, offering an honest and informed perspective that resonates deeply with my audience. My style aligns with a more elevated aesthetic, favouring timeless materials, considered palettes, and a calm, cohesive flow throughout the home. At the same time, I am passionate about demystifying design, showing that thoughtful interiors are not just aspirational, but attainable with the right approach. Through engaging, high-performing content, I’ve built a loyal and growing community who trust my eye, value my advice, and are inspired to transform their own spaces. My goal is always to empower others, proving that with creativity, knowledge, and intention, a beautiful home is within reach.
Voting is not enabled or out of date!

Becca, Jordan

Link to social media account
Photo 1
Photo 2
Please provide any other information that is relevant for your entry
Over the last year I've grown my Instagram account from 4k followers to 31k followers, helping people with design tips on how to create a luxury, timeless home on a budget. My account showcases both my work as a luxury interior designer, as well as my own home design and life as a working mum. Whilst I amend my strategy and series on a month by month basis, I post about interior design tips, what I'd purchase from high street stores, mini design tutorials, budget DIYs, interior inspiration, DITLs, styling tips, luxury interior design projects and aim to both inspire and educate followers on how to create a home that doesn't just look good, but can actually be lived in. I'm lucky to gain most of my high end residential projects through posting on Instagram, and have now also started to work with brands on collaborations to further expand my followers knowledge on the interiors industry.
Voting is not enabled or out of date!

Becky, Webb

Link to social media account
Photo 1
Photo 2
Photo 3
Photo 4
Photo 5
Photo 6
Voting is not enabled or out of date!

Ben, Irurzun

Link to social media account
Photo 1
Photo 2
Photo 3
Photo 4
Photo 5
Photo 6
Photo 7
Photo 8
Please provide any other information that is relevant for your entry
Instagram account for @bygoneben again. Ben, semi finalist from the contest interior design masters at the bbc. This is his second account as the previous one was lost after heavy hacking when he was at 30k. Ben has been rebuilding ever since and specially now that he’s purchased a new flat after his breakup last July. Interiors and personal content galore to enjoy.
Voting is not enabled or out of date!

Beth, Marsden

Link to social media account
Photo 1
Photo 2
Photo 3
Photo 4
Photo 5
Photo 6
Photo 7
Please provide any other information that is relevant for your entry
I create practical, design led content that helps everyday homeowners feel more confident transforming their spaces. Drawing on my background in architectural design, I break down interiors and DIY projects into approachable, achievable steps, from quick design tips to full room transformations. My content focuses on solving real problems, whether that’s creating privacy in overlooked gardens, making better design choices, or tackling home projects without overwhelm. By combining inspiration with clear, actionable advice, I aim to empower my audience to make meaningful changes to their own homes. I have included screenshots of selected posts to demonstrate not only the visual outcome of my work, but the level of engagement and value they provide to my audience. Metrics such as saves, shares and comments highlight how my content resonates, educates and encourages action, showing that it goes beyond inspiration to deliver practical, usable guidance.
Voting is not enabled or out of date!

Bethany, Rose

Link to social media account
Photo 1
Photo 2
Photo 3
Photo 4
Photo 5
Photo 6
Photo 7
Photo 8
Please provide any other information that is relevant for your entry
Instagram and TikTok @hemlockhome_
Voting is not enabled or out of date!

Bethany, Tyson

Link to social media account
Photo 1
Photo 2
Photo 3
Photo 4
Photo 5
Photo 6
Please provide any other information that is relevant for your entry
My home is my happy place. I genuinely LOVE staying in. I share cosy, homebody content, romanticising every day moments such as bubble baths and coffee in the morning. I’ve also shared our realistic (slow!) process of renovating our 1930s home ourselves.
Voting is not enabled or out of date!

Bradley, Dreha

Link to social media account
Please provide any other information that is relevant for your entry
My journey as an interior content creator began during Covid, when I started documenting a bedroom makeover on my social media. What began as a personal project quickly gained traction, leading to my first feature with an interior design magazine Dwell. Since then, I’ve continued to share home transformations, creative DIY hacks, and accessible ways to achieve high-end looks for less. My content focuses on proving that great design doesn’t require a big budget, for example, I created a cocktail table using £8 B&M vases inspired by a luxury piece, which was later featured in Ideal Home. Alongside this, I’ve received coverage from local press, further highlighting my work. I’m truly passionate about inspiring others to take on their own DIY projects and love encouraging my audience to feel confident in transforming their spaces.
Voting is not enabled or out of date!

Callieanne, Major

Link to social media account
Photo 1
Photo 2
Photo 3
Photo 4
Photo 5
Voting is not enabled or out of date!

Candice, Guy

Link to social media account
Photo 1
Photo 2
Photo 3
Photo 4
Photo 5
Photo 6
Photo 7
Photo 8
Please provide any other information that is relevant for your entry
My feed is a blend of creativity, neutral aesthetics, and practical designs to demonstrate that despite often being a bit soul-less, new builds can definitely have character. Transforming a new build house into a space that feels personal, and lived‑in is at the heart of everything I create. My content focuses on neutral, calming interiors brought to life through texture, layering and styling. I love trying to demonstrate that the blank canvas of a new build can become a warm, inviting home with the right details and a little imagination - even when you don’t use a lot of colour. I’m passionate about making interior design feel accessible - particularly on a budget. From DIY projects to canvas artwork using leftover tester pots and ‘ugly vase to lovely vase’ transformations, I share creative ideas that help people elevate their homes without overspending. My partner is always telling me I have too many ideas, so sharing these on my Instagram is the perfect outlet for me.
Voting is not enabled or out of date!

Carly, Sadler

Link to social media account
Photo 1
Photo 2
Photo 3
Photo 4
Photo 5
Photo 6
Photo 7
Please provide any other information that is relevant for your entry
I love creating content! I started my journey in 2024 when we first moved in documenting turning our new build into a home I’ve beensharing cost corners transformations & all things life in general ever since ? I have a growing number of loyal followers & I’ve also recently been attending brand events including 2 with Dusk and my most recent at the savoy London celebrating must have ideas 10 millionth customer! I have worked with brands on collaborations and I have gained some big name followers along the way. It’s the best hobby I could have ever wished for and all of the opportunities I have and the ones I haven’t even dreamt of yet
Voting is not enabled or out of date!

Charlene, Bonnici

Link to social media account
Photo 1
Photo 2
Photo 3
Photo 4
Photo 5
Photo 6
Photo 7
Photo 8
Please provide any other information that is relevant for your entry
I create interior content from my council home to show that comfort, beauty and pride aren’t defined by postcode or budget. For me, it’s about making the most of what you have and creating a space that feels warm, personal and safe. There can be stigma around council homes, and I want to challenge that by showing that a home can be soft, styled and inspiring regardless of cost. Through my content, I hope to encourage people to take pride in where they live, whether they rent or own, and to remind them that small, thoughtful touches can completely transform a space.
Voting is not enabled or out of date!

Charlotte, Thomson

Link to social media account
Photo 1
Photo 2
Photo 3
Photo 4
Photo 5
Photo 6
Photo 7
Photo 8
Please provide any other information that is relevant for your entry
I'm Charlotte (aka Charl), and 1 have just started sharing my hone on instagram. I’ve recently left my day job as a registered nurse to pursue my passion of interiors. I LOVE colour and bold, simple patterns. Earthy tones with pops of colour are right up my street. I’m also partial to an upcycle project, turning something old into something new is incredibly rewarding and I truly believe sustainability is super important. I live in Somerset with my husband, 2 young kids and our little westie Phoebe. I try and show a mixture of staged photos and real life, as well as finished and mid project videos.
Voting is not enabled or out of date!

Claire, Champion

Link to social media account
Photo 1
Photo 2
Photo 3
Photo 4
Photo 5
Photo 6
Photo 7
Photo 8
Please provide any other information that is relevant for your entry
I create content for people who don’t need it to be loud to find it valuable. In a fast-moving, algorithm-driven world, it’s easy to feel pressure to create more, post more, and compete for attention. I’ve chosen a different path—one that prioritises slower, more intentional content over noise. Less, but better. I stay firmly in my lane. My focus is home and garden, where I share a mix of upcycling projects, DIY tutorials, second-hand finds and high street styling—centred around creating spaces with calm, characterful colour—always with an emphasis on designing thoughtfully without overspending. Creating “luxe for less” is a constant thread. I transform everyday items using simple materials, share accessible DIYs, and show that good design is as much about creativity as it is about cost. There’s no filler, no gimmicks, and no creating for the sake of it. I only share when I feel there’s something worth showing—whether that’s a finished space, a thrifted find, or a project others can genuinely recreate. Transparency is central to my work. I don’t gatekeep; I share sources, processes and ideas openly, because I believe good design should feel accessible, not exclusive. My style won’t be for everyone—and that’s the point. I create for those who value calm, character and creativity over trends. A quieter approach—but one that proves you don’t need to chase attention to create something worth paying attention to.
Voting is not enabled or out of date!

Daniel, Bland

Link to social media account
Photo 1
Photo 2
Please provide any other information that is relevant for your entry
Over 1.5 million followers across platforms, regularly reaching millions with eye catching interiors and artwork.
Voting is not enabled or out of date!

Donna

Link to social media account
Photo 1
Photo 2
Photo 3
Photo 4
Photo 5
Photo 6
Photo 7
Photo 8
Please provide any other information that is relevant for your entry
Creating interiors and garden content really helps my wellbeing. Losing myself in a pretty tablescape, a diy hack or even a garden project, anything creative, brings me such a sense of balance. It’s not just the aesthetics, it’s the act of creating something for me…. The instagram homes community is a wonderful thing to be a part of too, and so uplifting. Knowing that you’re sharing ideas with others is such a nice feeling of fulfilment too. I love it!
Voting is not enabled or out of date!

Emily, Barratt

Link to social media account
Photo 1
Photo 2
Photo 3
Photo 4
Photo 5
Photo 6
Photo 7
Photo 8
Please provide any other information that is relevant for your entry
My page is all about interiors and DIY on a budget whilst transforming rooms. I share every aspect of me making over a room whilst I bring a Victorian home back to life. My followers enjoy watching the progress of a room on my stories and the end results on my page on both instagram and facebook. I also share how to DIY aspects of a home and where I get things from to complete the room. I try to keep it real whilst also sharing my background and my story of how I came to own the house I have.
Voting is not enabled or out of date!

Emma, Simonetti

Link to social media account
Photo 1
Photo 2
Photo 3
Please provide any other information that is relevant for your entry
We finally bought our first home after 15 years of renting and I started a colourful home Instagram a year ago to show my content. After years of white walls I wasted no time in decorating and always have a project on the go!
Voting is not enabled or out of date!

Fern, Hutchinson

Link to social media account
Photo 1
Photo 2
Photo 3
Photo 4
Photo 5
Photo 6
Photo 7
Photo 8
Please provide any other information that is relevant for your entry
My instagram account is very much focused on home interiors, affordable styling, DIY hacks and home dupes, as well as some posts focusing on domestic violence as I am trying to spread awareness on this and help others after going through over 10 years of this myself. Interiors helped me cope when being abused, and this is where my love for interiors began! All the stats you see in the screenshots above are organic and not from boosted posts or paid ads, and I have been told by my followers that they love my content and it brings them joy, along with a bit of reality, making everyone feel that little bit more normal, and not just "perfect, pretty aesthetics". My home is also being featured in Home Style Magazine this month (March) for their April edition.
Voting is not enabled or out of date!

Ffion, Baker

Link to social media account
Photo 1
Photo 2
Photo 3
Photo 4
Please provide any other information that is relevant for your entry
We live in a gorgeous Georgian grade ll listed home which we have restored from a crumbling wreck to a modern, family home.
Voting is not enabled or out of date!

George, Grantham

Link to social media account
Photo 1
Photo 2
Photo 3
Photo 4
Photo 5
Photo 6
Voting is not enabled or out of date!

Heather, Nash

Link to social media account
Photo 1
Photo 2
Photo 3
Photo 4
Photo 5
Voting is not enabled or out of date!

Helen, McLean

Link to social media account
Photo 1
Photo 2
Photo 3
Photo 4
Photo 5
Photo 6
Photo 7
Photo 8
Voting is not enabled or out of date!

Holly, Scott

Link to social media account
Photo 1
Photo 2
Photo 3
Photo 4
Photo 5
Photo 6
Photo 7
Photo 8
Please provide any other information that is relevant for your entry
Through my content, I aim to give homeowners clarity, confidence and practical direction. I share a mix of completed client projects, before and after transformations, styling detail and short educational tips that help my audience make better design decisions. My approach is rooted in colour confidence, thoughtful layout and layered lighting, with a focus on creating homes that feel cohesive and personal rather than trend-led. Alongside curated imagery, I regularly share practical guidance across Instagram, including short videos and saveable posts that simplify complex design decisions. Topics range from how to repeat colour intentionally, to how to anchor a seating area, to how lighting transforms a room from day to evening. I also bring my online community into real-life design experiences through workshops and in-person design days, helping them translate inspiration into confident action. My goal is not only to showcase beautiful interiors, but to equip my audience with the understanding to create their own. The images submitted reflect both the aesthetic “look” associated with my brand and the educational support that underpins it. Together, they demonstrate how I use content to inspire, guide and empower homeowners to create considered, liveable spaces.
Voting is not enabled or out of date!

Jade, Fish

Link to social media account
Photo 1
Photo 2
Photo 3
Photo 4
Photo 5
Photo 6
Photo 7
Photo 8
Please provide any other information that is relevant for your entry
I’ve had a really successful and beneficial year this year in UGC and content creation on Instagram and I’ve loved every minute of learning new skills and being able to put my creative flare to good use. I have developed a lot as a person and also a content creator trying to build storytelling into the content that I produce to either get the best out of a product for a brand or two make the viewing experience as enjoyable as possible. My love and passion for content creation has really taken shape this year after investing in a camera which has allowed me to really experiment with the shots that I’m taking the editing of different sections of videos and the smoothness of the content I am creating. I am really passionate about making whimsical and beautiful looking content. In the last year I’ve been really fortunate enough to work with large brands such as the Cotswold company on numerous occasions for their UGC content and it has taught me an awful lot about storytelling as part of the content I am making and I’ve loved every minute of it.
Voting is not enabled or out of date!

Jade, watkins

Link to social media account
Photo 1
Photo 2
Photo 3
Photo 4
Photo 5
Photo 6
Photo 7
Photo 8
Please provide any other information that is relevant for your entry
Sharing everything home interiors including decor styling and DIY tips and tricks x
Voting is not enabled or out of date!

Jenna, Best

Link to social media account
Photo 1
Photo 2
Photo 3
Photo 4
Photo 5
Photo 6
Photo 7
Please provide any other information that is relevant for your entry
This account has transformed my life. Starting a Reno diary has evolved into becoming a location home, creating content for the most amazing brands and opening up international opportunities within interiors, not to mention the amazing people I have met along the way. I would love to be considered, having been a cox and cox customer for many years it would be a dream come true.
Voting is not enabled or out of date!

Jennie, Brown

Link to social media account
Photo 1
Photo 2
Photo 3
Photo 4
Photo 5
Photo 6
Photo 7
Photo 8
Please provide any other information that is relevant for your entry
I create timeless, neutral home and interiors content, with a focus on achieving a high-end look in a realistic and accessible way. A key part of my content is my kitchen, when I designed and planned myself using Diy Kitchens. This space has featured in several viral reels, resonating with a wide audience by showing how thoughtful design choices can deliver a luxury aesthetic without the high cost. I share not just the finished result, but the process and choices behind it, helping others feel confident in making similar decisions in their own homes. Since Christmas, I have grown my platform organically from 5,000 to just under 25,000 followers, driven by consistent and relatable content that encourages saves, shares and conversation. My audience is highly engaged, particularly with design inspiration they can realistically implement and content that sometimes has a hint of humor that is highly relatable. My style is rooted in timeless, neutral interiors that prioritises longevity over trends. I aim to create content that feels both aspirational and achievable, helping my audience build homes that are considered, cohesive and personal. Ultimately, my goal is to make elevated design more accessible, proving that beautiful spaces can be created with careful planning, creativity and a clear vision rather than an unlimited budget.
Voting is not enabled or out of date!

Jodie, Cutter

Link to social media account
Photo 1
Photo 2
Photo 3
Photo 4
Photo 5
Photo 6
Photo 7
Photo 8
Voting is not enabled or out of date!

Karen, Gadd

Link to social media account
Photo 1
Photo 2
Photo 3
Photo 4
Photo 5
Photo 6
Photo 7
Photo 8
Please provide any other information that is relevant for your entry
Through my platform, I share our home as it truly is — lived in, evolving and full of real-life moments. My content focuses on creating a warm, welcoming home while showing that beautiful spaces can also be practical for everyday family life. My style blends contemporary structure with comfort, focusing on thoughtful styling, calming interiors and spaces that feel both functional and inviting. I love showing how small changes — from styling details to larger home transformations — can make a space feel completely different. Over the past few years I’ve documented the ongoing transformation of our home, from redesigning our garden into a contemporary outdoor sanctuary to styling interiors that feel calm, cohesive and liveable. My aim is always to create relatable content that helps people imagine ideas in their own homes. Rather than staged perfection, I share real spaces, real projects and honest progress — allowing my audience to follow along as our home evolves. Through reels, styling posts and home inspiration, I hope to encourage others to create homes that reflect their lives, their families and the way they want to live. For me, home is not just about how a space looks, but how it feels — and sharing that journey is what inspires my content.
Voting is not enabled or out of date!

Kate, Turner

Link to social media account
Photo 1
Photo 2
Photo 3
Photo 4
Photo 5
Please provide any other information that is relevant for your entry
I love creating content for my home instagram account, and for any of the lovely brands I have had the pleasure of working with.
Voting is not enabled or out of date!

Katelynn, McCarthy

Link to social media account
Photo 1
Photo 2
Photo 3
Photo 4
Photo 5
Photo 6
Photo 7
Photo 8
Please provide any other information that is relevant for your entry
My homepage has documented my completed London flat renovation! I love sharing new purchases and changes I make to my home. Started my page about 2 months ago and delighted to have some great engagement on TikTok?
Voting is not enabled or out of date!

Katherine, Sanders

Link to social media account
Photo 1
Photo 2
Photo 3
Photo 4
Photo 5
Photo 6
Photo 7
Photo 8
Please provide any other information that is relevant for your entry
I’ve been building a Community online for many years now and create content for my social media pages but also for lots of lovely brands. I absolutely love what I do and I’ve recently ventured into creating digital work books to help others build their own communities online.
Voting is not enabled or out of date!

Katie, Kitson

Link to social media account
Photo 1
Photo 2
Photo 3
Photo 4
Photo 5
Photo 6
Please provide any other information that is relevant for your entry
This is a bit of a strange one because I don’t really fit the typical Instagram mould. My page isn’t full of perfectly styled photos or flawless before and afters. It’s real life. If something takes me weeks, I show the weeks. If it goes wrong, I show all of it. And on the rare occasion it goes right, I share that too. I didn’t grow up learning DIY — I’m figuring it out as I go. I’ll spend far too long researching every possible way to do something, overthinking it, and then half the time I end up making it up as I go along anyway because I’ve found what feels like a quicker (and hopefully right) way to do it. I basically see myself as the guinea pig. I try things so others don’t have to waste time on ideas that don’t actually work. I take all the best bits, the lessons learned (the hard way), and share them in a way I wish I’d known before I started. It’s also very much a collaborative space. I’ve got people learning alongside me, but also people who really know their stuff and share tips along the way — which I’m always so grateful for. It’s not just me teaching, it’s all of us helping each other. It’s not about perfection — it’s about helping people feel confident enough to give it a go themselves.
Voting is not enabled or out of date!

Kelly, Robbins

Link to social media account
Photo 1
Photo 2
Photo 3
Photo 4
Photo 5
Photo 6
Photo 7
Photo 8
Please provide any other information that is relevant for your entry
Our George and Home coming together, a busy family of 6, renovating and tackling everything life has to throw ?? very nearly complete our home, just before our second year anniversary of living here. Trying to curate beautiful spaces, with meaningful items, many of which thrifted, to create a beautiful home for our girls to grow up in.
Voting is not enabled or out of date!

Kerry, Davison

Link to social media account
Photo 1
Photo 2
Photo 3
Photo 4
Photo 5
Photo 6
Photo 7
Photo 8
Please provide any other information that is relevant for your entry
What started as a blank new build canvas has become a home full of character, creativity and purpose. Over the past three years, I’ve documented the journey of transforming our space using budget friendly and accessible ideas, reclaimed materials, and a lot of hands on DIY alongside my dad. From building furniture and garden features to layering textures, colour and lighting throughout the home, every project has been about proving that you don’t need a huge budget to create something beautiful and personal. My content focuses on more than just the finished look. I share the process, the problem solving, and the real, lived in moments that make a house feel like home. Whether it’s a cosy bedroom designed to feel like a soft, calming retreat, a pull down table built from a £3 find, or a garden created for hosting, relaxing and enjoying family life in the sunshine, each space is designed with intention and personality. I’m passionate about being real and relatable, sharing not only the highlights but the ups, the downs, and the everyday chaos of life at home with four chihuahuas, a teenager, and a 5 year old. It’s super important to me that people see the full picture, not just the polished end result. I love challenging the idea that new builds are plain or without character, and showing how thoughtful design can completely transform a space. Everything I create is rooted in accessibility, creativity, and making interiors feel achievable for real life. For me, it’s not just about styling a home, it’s about telling the story behind it and the people (and pups) who live in it.
Voting is not enabled or out of date!

Lara, Winter

Link to social media account
Photo 1
Photo 2
Photo 3
Photo 4
Photo 5
Photo 6
Photo 7
Photo 8
Please provide any other information that is relevant for your entry
I share our modern cottage as it really is — a family home that’s slowly come together through budget-friendly ideas and lots of DIY. It’s about creating spaces that feel calm, comfortable and genuinely lived in, rather than perfect. I like to bring my audience along in the process as much as the finished spaces, sharing the small changes and everyday moments that make a home feel better. I hope it gives people a sense that they can take their time, enjoy it as they go, and create something that feels like their own.
Voting is not enabled or out of date!

Laura, Hall

Link to social media account
Photo 1
Photo 2
Photo 3
Photo 4
Photo 5
Photo 6
Photo 7
Photo 8
Please provide any other information that is relevant for your entry
I love sharing my interiors content through my instagram, tiktok and facebook channels. I love creating fun, relatable and inspiring content, from showcasing projects, diys, tutorials and partnering with amazing brands to showcase their products. I love connecting with my audience and inspiring people to be braver with colour in their homes. I get the biggest satisfaction when someone tells me how I've given them the push they need to take on a project, or that I have in some way brightened their day! In a world where social media can be toxic, I seek to be a little ray of sunshine bringing positivity and brightness to my little corner of the internet!
Voting is not enabled or out of date!

Lauren, Flower

Link to social media account